
'Conditional Split' Step - Create Conditional Pathways
Published: Updated:
The “Conditional Split” step in ClickFunnels workflows is a versatile tool that enables you to create dynamic pathways based on specific conditions or attributes of your contacts. This functionality is essential for personalizing the user journey, allowing you to send different messages or trigger different actions depending on whether certain conditions are met. In this article, you’ll learn how to configure and use the “Conditional Split” step to enhance your workflows.
Requirements
Section titled “Requirements”-
An active ClickFunnels account
-
A workflow created in your workspace
Adding the “Conditional Split” Step to Your Workflow
Section titled “Adding the “Conditional Split” Step to Your Workflow”-
Navigate to the Automations app and select Workflows.
-
Open an existing workflow or create a new one.
-
Click on the Plus Icon (+) in your workflow editor.
-
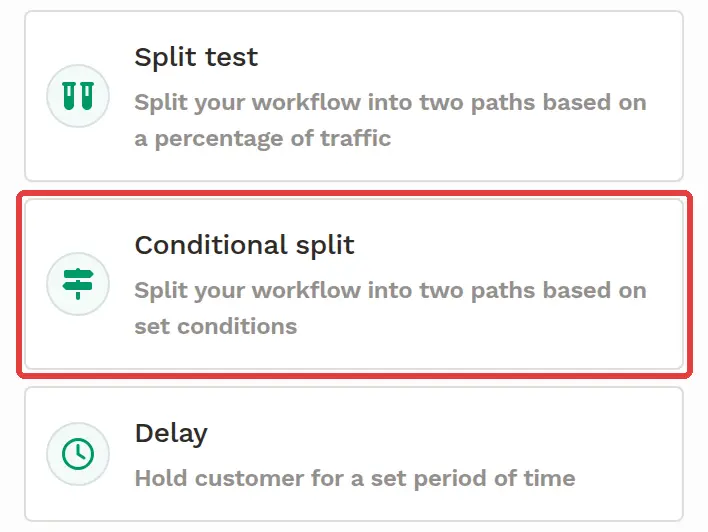
Select the Conditional split step under the Workflow category. The step is added to your workflow right away, with a Yes path on the left and a No path on the right.
Configuring the “Conditional Split” Step
Section titled “Configuring the “Conditional Split” Step”Once you’ve added the “Conditional Split” step to your workflow, you can configure it to segment your contacts based on specific conditions:
-
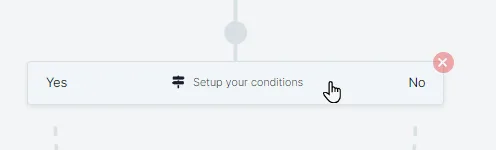
Click the “Conditional Split” step (it shows Setup your conditions until you configure it) to open its settings window, titled Conditional Split Path.
-
In the Name field, give your “Conditional Split” step a descriptive name that reflects the condition you are setting. This helps in easily identifying the split path within your workflow.
-
Set Up the Filter:
-
Under Send customer down the “Yes” path if they match the following filter(s), click Filter to add your first condition, then set the conditions that must be met for contacts to proceed down the “Yes” path. For example, you can segment contacts based on attributes like whether they’ve purchased a product, enrolled in a course, have a specific tag, etc.
-
Click and to add another condition to a group; all conditions in a group must be true for the contact to proceed. Click or to add another group of conditions, so the contact proceeds if they meet any one of these groups. This setup provides flexibility in targeting contacts based on different combinations of attributes.
-
If you use the Contact Tags condition and the tag you need doesn’t exist yet, type its name in the search box and choose Create tag “[tag name]”. The new tag is created and selected when you click Apply.
-
-
Once you’ve set up the conditions, click the Submit button to save your settings and return to the workflow editor.
Conditional Split - Yes and No Path
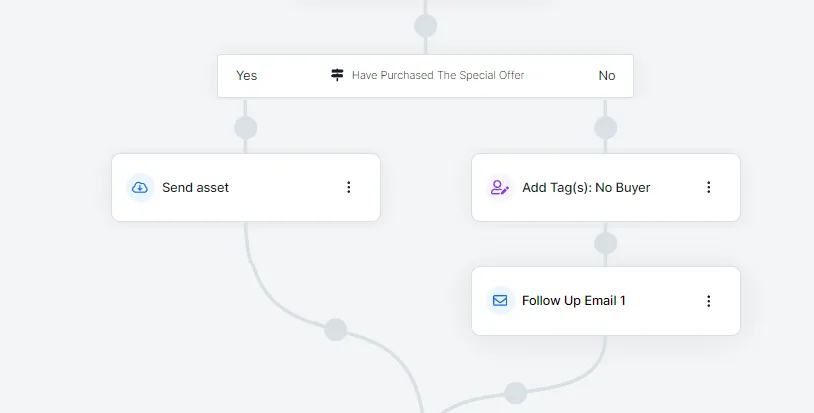
Section titled “Conditional Split - Yes and No Path”After configuring your filters, the Conditional Split step will create two distinct pathways: Yes and No.
-
Yes Path: This path is followed by contacts who meet the conditions you’ve specified. You can add subsequent steps here, such as sending a lead magnet, enrolling the contact in a course, delivering a digital asset, or applying a specific tag. For example, if a contact has purchased a particular product, you might want to send them an upsell offer email or grant access to premium content.
-
No Path: Contacts who do not meet the specified conditions will follow the No Path. Here, you can add steps to re-engage or further nurture these contacts. For instance, you might send a follow-up email, add a “No Buyer” tag, or start a re-engagement campaign to encourage these contacts to take the desired action in the future.
When the two paths finish, they join back together, and contacts from both paths continue with the steps that come after the split. If you add the split between existing steps, the steps that were below it move below the split, after the point where the paths rejoin. To stop contacts on one path from continuing, add an End step at the end of that path.
How to Safely Remove The Conditional Split Paths
Section titled “How to Safely Remove The Conditional Split Paths”Removing a Conditional Split from your workflow in ClickFunnels is a simple process, but it’s important to proceed with caution, as this action is irreversible. Here’s how you can safely remove the Conditional Split:
-
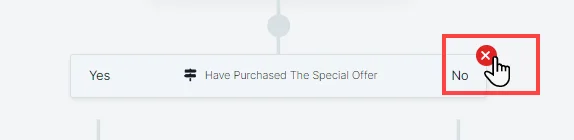
In your workflow, hover over the Conditional Split step that you wish to remove. A red cross icon will appear next to the path.
-
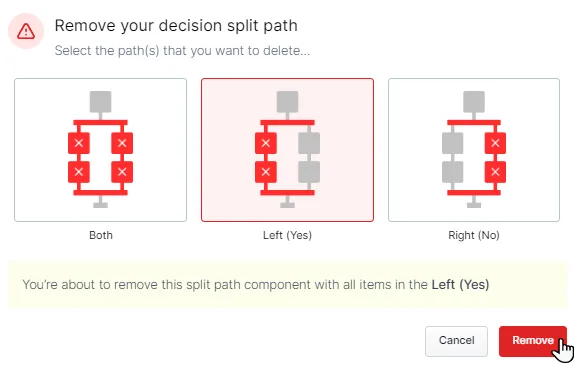
Click on the red cross icon. If neither path has any steps yet, the Conditional Split step is removed right away. Otherwise, a Remove your decision split path prompt will appear, offering you three options:
-
Select the Path to Remove:
-
Left (Yes): Choosing this option will remove the Conditional Split step and all steps within the Yes path. The steps in the No path will remain in the workflow without any conditions applied.
-
Right (No): Choosing this option will remove the Conditional Split step and all steps within the No path. The steps in the Yes path will remain in the workflow without any conditions applied.
-
Both: This option will remove the Conditional Split step along with all the steps within both the Yes and No paths.
-
-
After selecting the path(s) you want to remove, click the Remove button to confirm your choice. Once a path is deleted, both the steps within that path and the Conditional Split step itself will be permanently removed from your workflow.
Active Use Cases of the “Conditional Split” Step
Section titled “Active Use Cases of the “Conditional Split” Step”The “Conditional Split” step is highly versatile and can be applied in various scenarios to optimize your workflows. Here are some common situations where this step proves invaluable:
-
Segmenting Based on Product Purchases:
- Use the Conditional Split step to differentiate customers who have purchased a specific product from those who haven’t. For example, you can send additional resources or exclusive offers to customers who have already made a purchase, while those who haven’t can receive targeted promotional messages.
-
Tailoring Communication by Contact Tags:
- If you tag contacts based on their behavior or engagement level, you can create paths that send different messages to contacts with specific tags. For instance, contacts tagged as “VIP” might receive special discounts, while others might receive standard offers.
-
Managing Course Enrollments:
- For educational platforms, split paths can be used to segment students based on their course enrollments. Those who are enrolled in a specific course can receive relevant updates or additional materials, while others can be encouraged to enroll in new courses.
-
Handling Subscription Status:
- You can split contacts based on their subscription status. For example, if a contact has an active subscription, they might receive updates about new features or content, while those without a subscription can be sent re-engagement or subscription renewal campaigns.
-
Engaging Contacts Based on Last Activity:
- Use the split path to engage contacts differently based on their last activity date. For instance, highly active users might receive advanced tips or exclusive content, while less active users could be sent re-engagement emails to bring them back.
-
Custom Field Conditions:
- If you use custom fields to capture specific information about your contacts, you can create pathways based on these fields. For example, you might have a custom field for “Interest Level,” and based on this, you could send targeted content that aligns with their interests.
-
Opt-In Source Differentiation:
- Segment contacts based on how they opted into your funnel. For instance, those who opted in through a specific landing page might receive content related to that page’s offer, while others could be directed to a different path.
-
Branching on Countdown Event Registrations:
- Use the Registered for Countdown Event condition (under Contact Activity) to check whether a contact is already registered for a countdown event — either a specific one, or any one of several with the is one of clause. A common pattern is to place the “Register for Countdown Event” step on the No path, so contacts who are not registered yet get registered while everyone else continues untouched.
-
Handling Product Variants:
- If your products have multiple variants, you can create different paths for customers based on the specific variant they purchased. This allows you to deliver highly targeted post-purchase communication matching their product choice.
Difference Between “Conditional Split” Step and “Conditional Goal” Step
Section titled “Difference Between “Conditional Split” Step and “Conditional Goal” Step”Understanding the distinction between the “Conditional Split” step and the “Conditional Goal” step is crucial for effectively managing your ClickFunnels workflows. While both steps allow you to create conditional logic within your workflows, they serve different purposes and are used in different contexts.
“Conditional Split” Step
Section titled ““Conditional Split” Step”The “Conditional Split” step creates two distinct pathways within your workflow based on specific conditions. This step evaluates the specified criteria as soon as the workflow reaches it and directs the contact down one of two paths: “Yes” or “No.” The “Yes” path is followed if the contact meets the conditions, while the “No” path is taken if the conditions are not met. This immediate evaluation and segmentation allow you to tailor the journey of your contacts based on their attributes or actions, ensuring a more personalized experience.
Example Use Case: For instance, if you’re running a campaign where you want to send a lead magnet only to contacts who have purchased a specific product, you can use the “Conditional Split” step. Contacts who meet the purchase condition will receive the lead magnet, while those who do not will be directed down a different path, such as receiving a promotional offer instead.
“Conditional Goal” Step
Section titled ““Conditional Goal” Step”The “Conditional Goal” step does not pause the workflow or split it into paths; it focuses on achieving specific goals. Unlike the “Conditional Split” step, the “Conditional Goal” step allows contacts to skip over any steps before it if the goal condition is met. Once the contact meets the goal conditions, they are moved forward along their path, bypassing any intermediate steps that were yet to be completed. For details, see “Conditional Goal” Step.
Example Use Case: The “Conditional Goal” step is particularly effective in scenarios like abandoned cart automation. If a contact begins a purchase process but doesn’t complete it, you might set up a workflow to send reminder emails. However, if the contact returns to complete the purchase before the workflow finishes sending all the reminders, the “Conditional Goal” step would recognize the purchase event and skip the remaining reminders, moving the contact directly to the next relevant step, such as sending a thank-you email or offering a related product.