Launching a new product is an exciting opportunity, but it can also be challenging without the right strategy. A product launch funnel helps businesses build excitement, engage potential customers, and drive sales. It guides people through a series of steps, preparing them to buy before the offer is made. This article covers how the product launch funnel works and how to set it up for a successful launch.
Requirements
An active ClickFunnels account
How Product Launch Funnels Work
A product launch funnel introduces a product through a step-by-step process that builds interest before the offer is made. Instead of driving people straight to a sales page, it delivers valuable content over several days, keeping potential customers engaged and ready to buy.
This approach works well because people rarely purchase something the first time they see it. They need time to understand its value, see how it fits their needs, and trust the person or brand behind it. A launch funnel does this by guiding them through free training, insights, or educational content before the product is officially available.
For example, a business launching an online fitness program might offer a free mini-course on effective workout routines. Over a few days, participants receive short lessons that help them see results. By the time the full program is introduced, they already understand its value and are more likely to sign up.
This approach doesn’t just increase sales, it creates a better experience for potential customers. Instead of being sold to right away, they get something useful first, making them more confident in their decision when the offer comes.
Understanding the Product Launch Funnel Structure
A product launch funnel follows a structured process to guide potential customers from first learning about a product to making a purchase. Each step plays a role in building interest, providing value, and making the final offer feel like the natural next step.
Opt-in Page: This is where visitors sign up to join the launch. It typically includes a short description of what they’ll receive, a form to collect their email, and a call-to-action. The goal is to get people on the email list so they can receive updates and pre-launch content.
Thank You Page: After signing up, users are taken to a thank you page confirming their registration. This page may include event details, a welcome message, or instructions on what to do next, such as checking their email for updates.
Launch Pages: These pages deliver the core pre-launch content, often in the form of videos, lessons, or live training sessions. Each piece of content is released over several days to educate, engage, and build excitement for the upcoming offer.
Order Page: Once the launch sequence is complete, the order page introduces the product and allows customers to purchase. It includes pricing details, purchase options, and a checkout form.
Confirmation Page: After completing a purchase, customers land on the confirmation page. This page reassures them that their order was successful and provides access to the product, instructions on how to get started, or next steps.
Creating a Product Launch Funnel
A product launch funnel can be built quickly using ClickFunnels' pre-designed templates. Instead of starting from scratch, you can choose a template that matches your needs, customize it with your content, and launch your funnel in just a few steps.
In ClickFunnels, go to the Funnels section from the left navigation menu.
Click the Create Funnel button.
Browse the available funnel types and select a product launch funnel.
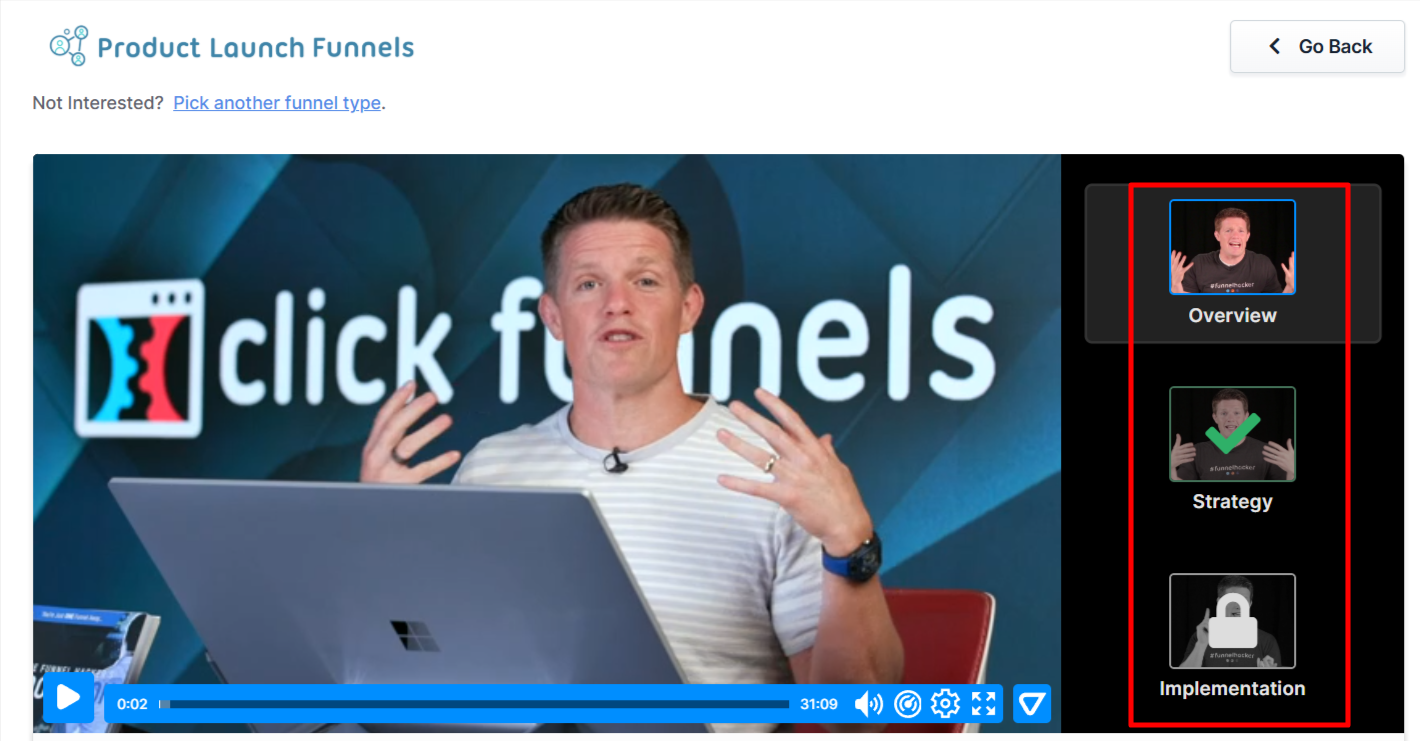
Each funnel type includes a training section with:
Overview: Understanding how a product launch funnel funnel works.
Strategy: Learning how to structure your funnel and offer for maximum impact.
Implementation: A step-by-step guide to customizing your funnel.
If you prefer a completely custom setup, click Start from Scratch to build your funnel manually. Refer to the How to Create a New Funnel article for instructions.
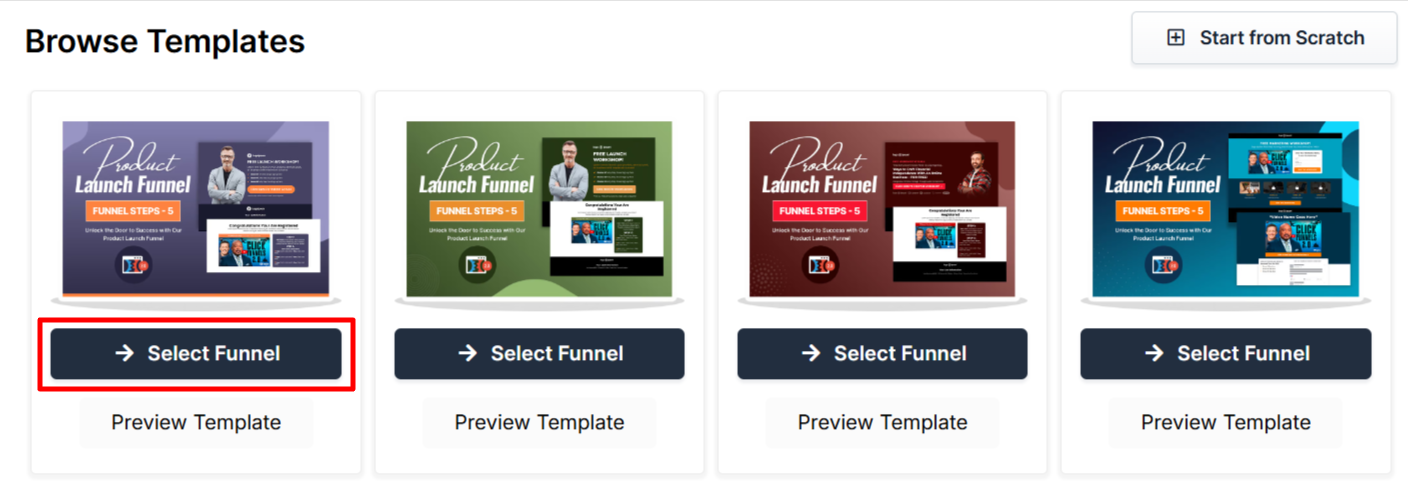
Scroll through the available templates and click Select Funnel under the one that best fits your business.
Wait for the funnel to install, then:
Click Close to exit the installation window.
Or click Customize Now to start editing your pages, build your workflows, and adjust your call-to-action.
Once the template is loaded into your workspace, you can begin customizing it to fit your product, audience, and sales message.
Editing Product Launch Funnel Pages
Once your funnel is installed, you can start customizing it by clicking Customize Now on the installation screen or by navigating to the Funnels section in your dashboard. From there, select your funnel to access the funnel workflow editor.
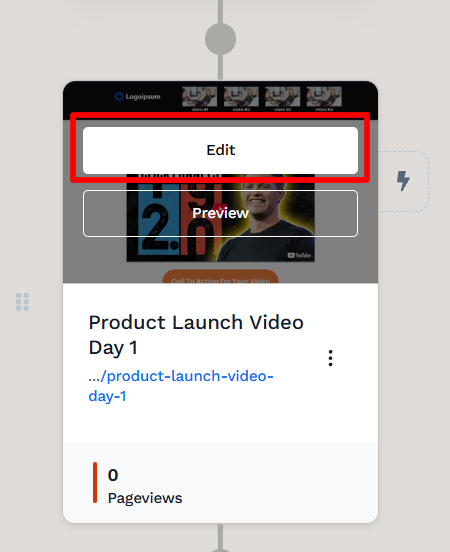
Open the Funnel Workflow Editor by clicking on the funnel. Find the page you want to edit, hover over it, and click Edit.
Each page is built using sections, columns, rows, and elements. Key areas to customize include:
Opt-in Form: Collect names and emails on the registration page.
Headline & Sales Copy: Clearly communicate what the launch is about and why users should stay engaged.
Video Element: Upload or embed your pre-launch training videos to educate and build excitement.
Countdown Timer: Create urgency by showing when the next training or product launch will be available.
Call-to-Action Button: Ensure your button stands out and directs users to the next step in the funnel.
Testimonials or Social Proof: Build credibility by including success stories or early feedback.
To learn more about editing elements in ClickFunnels, refer to the Getting Started with the ClickFunnels Page Editor article.
Click Save at the top right to keep your changes.
Use the Preview option to check how your funnel looks before publishing. Remember to view your funnel on mobile devices to ensure it looks great on all screens. For detailed instructions, check our article on Mobile Optimization Techniques.
NOTE
Most templates include one launch page by default. If your launch spans multiple days, you can clone this page to match the number of training sessions before the final offer.
In the Funnel Workflow Editor, click the ⋮ icon next to the page.
Select Clone Page and update the content for each day.
Automating Communication with Workflows
Workflows help keep potential customers engaged throughout the launch without the need for manual messaging. They can send reminders, segment contacts, and deliver content at the right time.
With workflows, you can:
Send email reminders when new training videos are available.
Tag contacts based on how they interact with the launch.
Deliver PDFs, guides, or bonus content automatically.
To create a workflow:
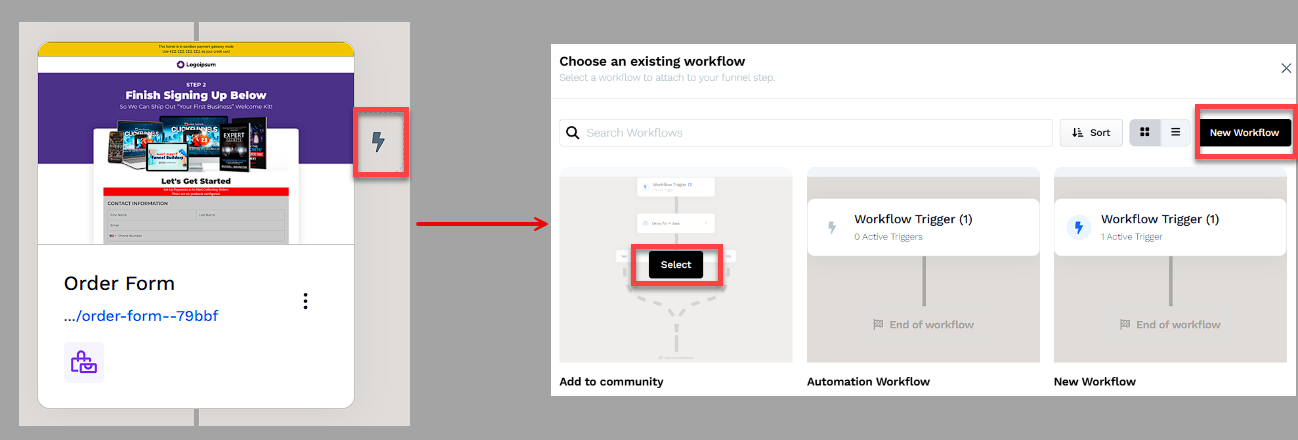
Locate the funnel step where you want to trigger the workflow.
Click the Lightning Bolt icon next to the step to add a new or existing workflow.
Select an existing workflow from the list or create a new one.
Click + (Plus) icon to add actions such as Send an Email, Send an Asset, or Tag Contact.
(Optional) Add a Delay to space out follow-up actions over time.
Click Save & Turn On to activate the workflow.
To learn more about workflows, refer to the Getting Started with Workflows.
Adding Products to The Order Form Page
Once potential customers reach the order form page, they need to see clear product details to complete their purchase. Adding products correctly ensures the right offer is displayed and checkout settings are configured properly.
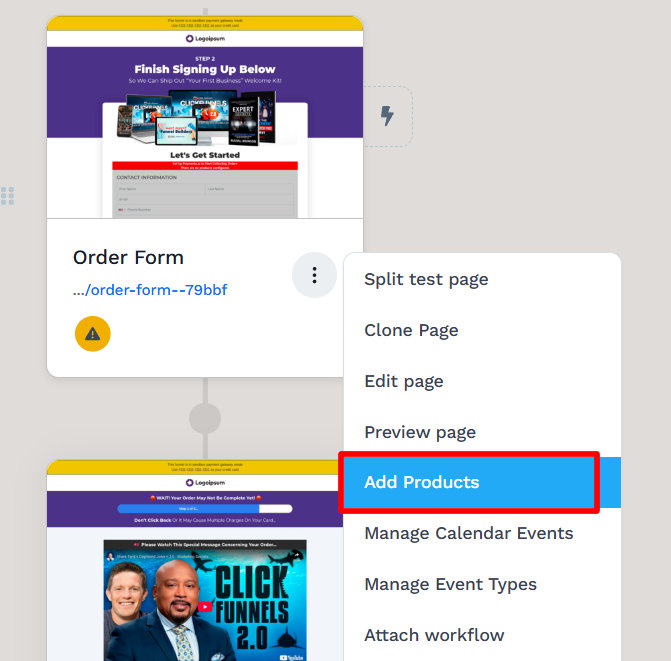
Scroll to the Order Form Page in the Funnel Workflow Editor.
Click the three-dot (⋮) icon next to the page and select Add Products.
Click + Add Product, then choose an existing product or create a new one. Learn more about How to Create and Manage Products.
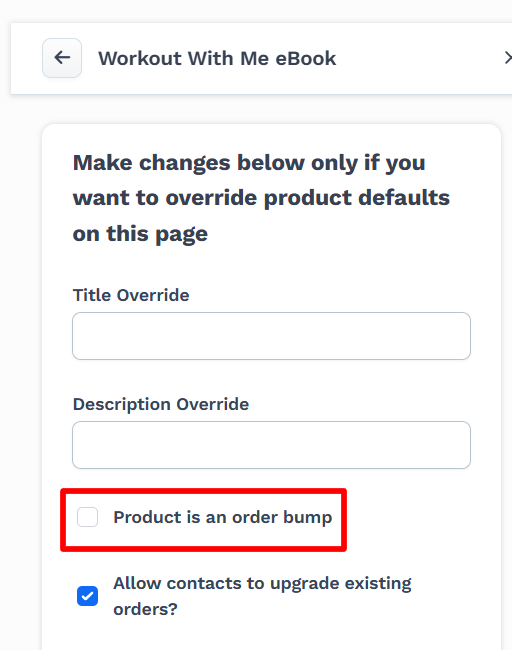
Once added, click the Gear (⚙) icon to adjust product settings, such as the title or description.
To add an Order Bump, enable the Product is an Order Bump checkbox or drag the product into the bump section.
Adjust the Checkout Settings based on how products should be selected:
Single Product allows one product per order.
Multiple Products with Quantity lets customers choose multiple items with set limits.
Multiple Products with Checkbox allows selection of multiple products with no quantity restriction.
Click Update to save changes.
Click Save, then use the Preview option to test the checkout process and ensure the order form works correctly.
For more details on configuing the order form page, refer to How to Add a Checkout (Order Form) Page in a Funnel.
Testing and Publishing Your Funnel
Before making your funnel live, it’s important to test its functionality to ensure everything works as expected.
Test the Funnel
Verify that all pages are connected in the correct order.
Check buttons, forms, and links to confirm they function properly.
Test the funnel on different devices and browsers for a smooth experience.
To run a full checkout test, follow the steps in How to Test Funnel Checkout in Test / Sandbox Mode.
Enable Live Mode
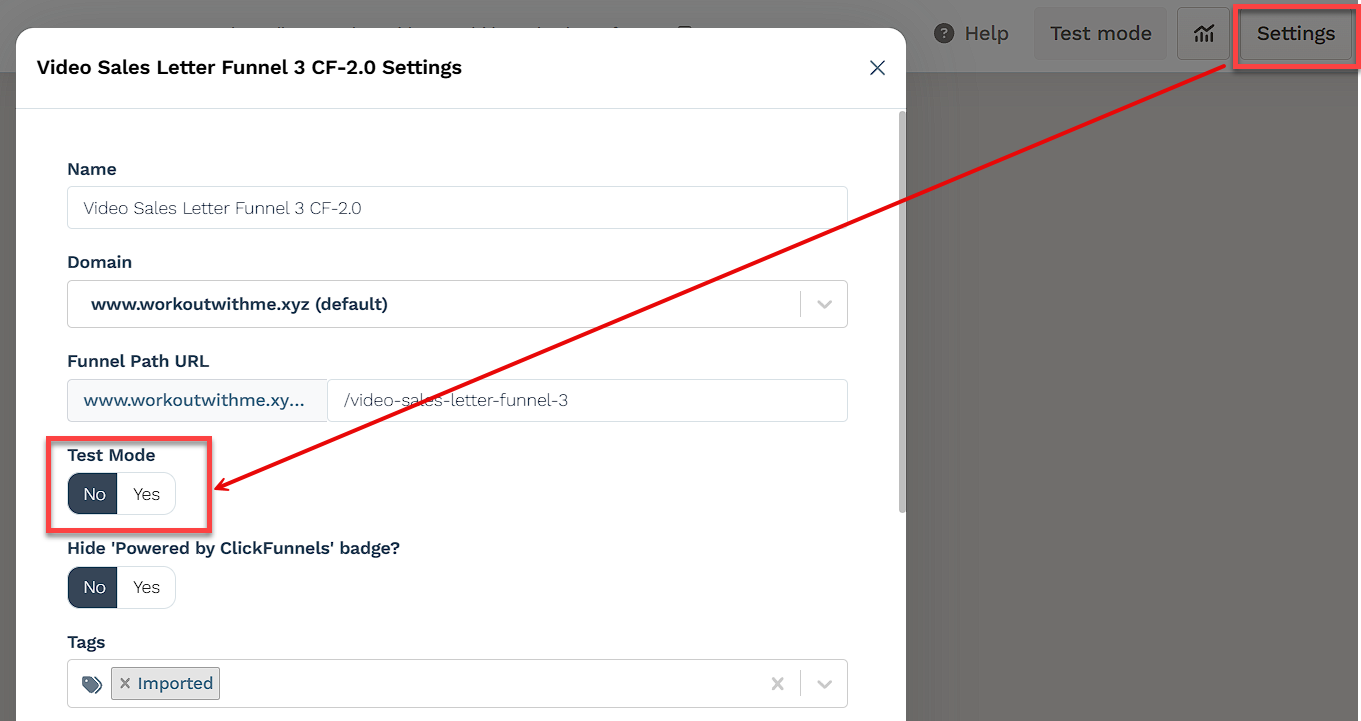
Click the Settings button at the top-right corner of the funnel workflow editor to open the funnel’s settings.
Set the funnel to Live Mode to make it accessible to customers.
Copy and Share Your Funnel URL
Hover over the URL at the top of the funnel workflow page and click to copy.
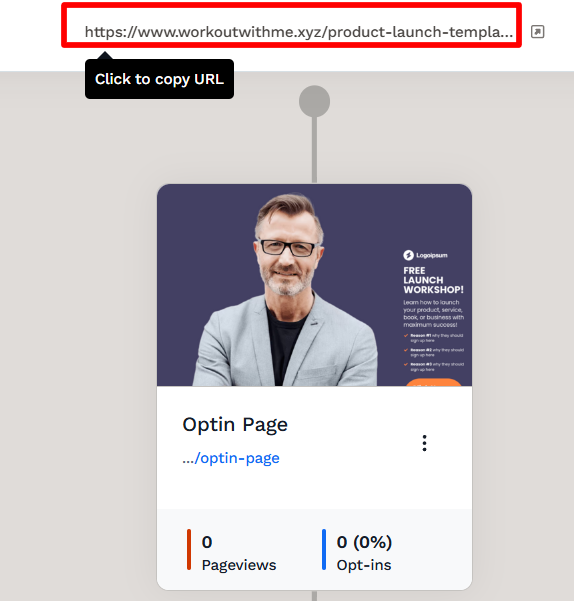
Share the link via your website, social media, or email campaigns.
Learn more about publishing and sharing your funnel in this article.