Hosting a virtual summit is a powerful way to grow your audience and build authority—but assembling all the right funnel pages can be time-consuming. ClickFunnels helps simplify the process by offering a pre-built Summit Funnel template with the included essential pages. You can create your funnel and customize content to match your event with just a few clicks. In this article, you'll learn what pages are included in the Summit Funnel template, their purpose, and how to get started quickly.
Requirements
An active ClickFunnels account
Products created for the summit
A payment processor (e.g., Payments AI, Stripe) connected to the workspace
What is a Summit Funnel
A Summit Funnel is a sequence of pages designed to host an online summit—usually featuring expert speakers or multiple sessions over one or more days. It's a strategic way to offer valuable content, grow your email list, and create upsell opportunities.
Example: Health Coach Hosting a Wellness Summit
Imagine you're a health coach planning a "3-Day Wellness Summit." You invite guest speakers to talk about fitness, nutrition, and mental well-being. Visitors first land on your Optin Page to register. Once they sign up, they’re offered an All Access Pass (Order Page) to get lifetime access to all summit recordings and exclusive bonuses. After purchase or registration, they reach the Thank You Page with access instructions. Finally, they visit the Summit Page(s), where all the session videos are available.
Summit Funnel Structure
A traditional Summit Funnel includes a series of core pages that work together to guide your visitors through registration, offer upgrades, and deliver your summit content.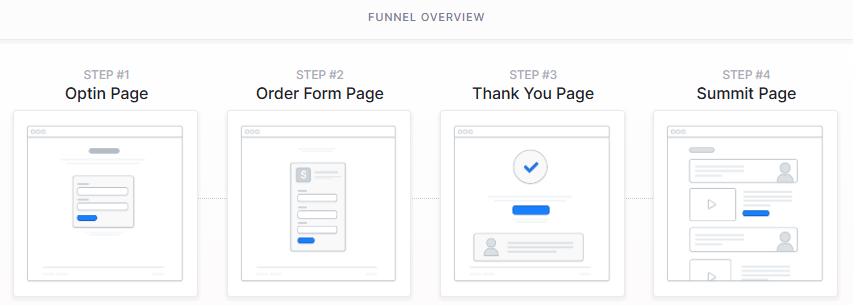
Funnel Overview:
Optin Page: This is the first page your visitors see. It captures their name and email address so they can register for your summit.
Order Form Page (All Access Pass): After registration, visitors are directed to an order page where they can purchase an All Access Pass—offering lifetime access to content, bonuses, or exclusive materials.
Thank You Page: After registering (or purchasing), visitors land on a Thank You Page. This page confirms their registration and provides key instructions or next steps.
Summit Page(s): This is where your actual summit content is hosted. These page(s) are typically accessed through scheduled email links—such as Day 1, Day 2, Day 3 content links—delivered over the course of the event. Each link is time-sensitive and access may expire after each day to encourage real-time participation and upsell conversions.
Note:
The structure of your Summit Funnel can vary depending on your business goals and summit strategy. For example, you may choose to add an Upsell Page after the Order Form Page to promote a second offer. Additionally, if you're hosting a multi-day summit, you can clone the Summit Page for each day and deliver access links via a drip email sequence. This allows you to manage time-sensitive content while encouraging real-time participation or All Access Pass upgrades.
Creating a Summit Funnel in ClickFunnels
Follow these steps to quickly create your Summit Funnel using one of the available templates:
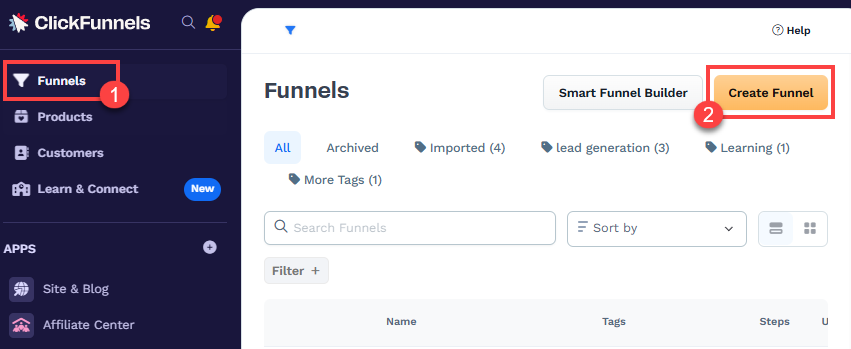
In your ClickFunnels workspace, Navigate to the Funnels menu.
In the top right corner, click the Create Funnel button.
On the Lead Funnels section, click Select under the Summit Funnel card.
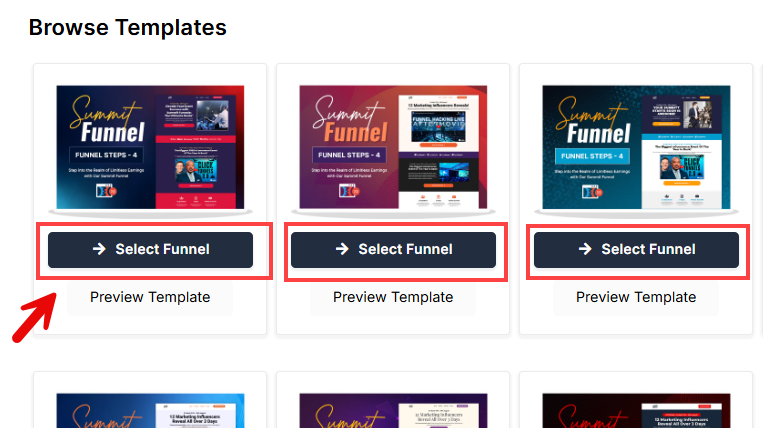
Scroll through available Summit Funnel templates.
Click Preview Template to view the layout or Select Funnel to create the funnel in your workspace. The imported funnel includes the opt-in page, order form page, thank you page and summit page.
Once your funnel is created, update each page by editing the text, images, videos, and connecting products where needed.
Adding Products to the Order Page
Once your Summit Funnel is created, it’s important to connect your product to the Order Page—commonly used to sell the All Access Pass.
This step allows you to collect payments and deliver access to your premium offer. Without linking a product, your order form will not function, and users won’t be able to complete a purchase.
The All Access Pass traditionally includes:
Lifetime access to summit recordings
Exclusive speaker bonuses
VIP session replays or private workshops
By attaching a product to the order page, you enable payment processing, track sales analytics, and ensure that buyers receive the right access or offer immediately after checkout.
Navigate to the Summit Funnel.
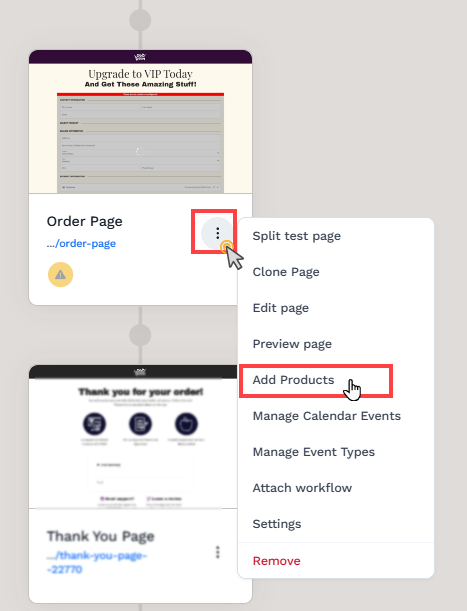
Locate the Order Page in your funnel.
Click the Three-Dot Menu (⋮) beside the page.
Select Add Products.
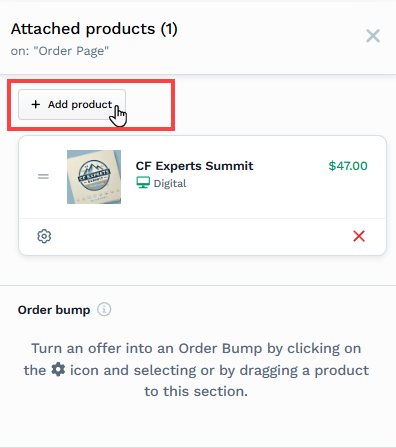
Click + Add Product to open the product selection window.
Hover over the desired product and click Select Product, or use the Add Product button at the top right to create a new product.
To add more products, click the Add Product button again to open the product selection window.
Helpful Resources:
Sending Automated Emails Using a Workflow
To ensure your attendees receive summit content on time and stay engaged throughout the event, it's essential to send automated emails using a Workflow in ClickFunnels.
Common Email Types:
Welcome Email: Immediately after registration, send a confirmation email with event details.
Day-by-Day Access Emails: For multi-day summits, schedule daily emails with links to that day's Summit Page.
Reminder Emails: Send reminders before each day's content goes live to boost attendance.
All Access Pass Upsell Emails: Encourage attendees to upgrade by highlighting exclusive benefits.
Post-Summit Follow-Up: After the event, continue the conversation with bonus offers, replay access, or product promotions.
Attaching Workflows to a Funnel Step
Once your email workflow is ready, you can connect it to your Summit Funnel so that contacts automatically enter the sequence based on their activity.
To attach a workflow:
Open your Summit Funnel and select the funnel step where you want the automation to begin (e.g., Optin Page or Order Form Page).
Next to the funnel step, click on the Lightning Bolt (
⚡ ) icon to add a new or existing workflow. This will open a dialog where you can select the appropriate workflow from the list. The workflow editor will open and a new trigger will be automatically created in the workflow.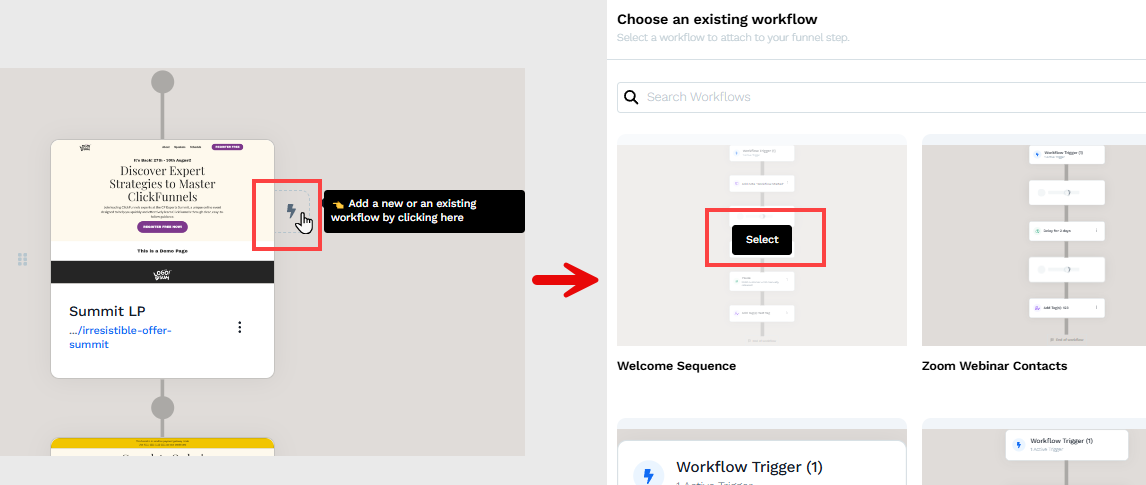
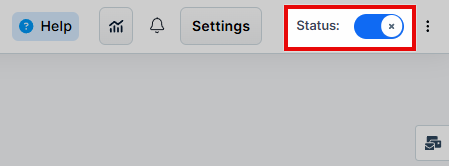
The final step is to activate the workflow so it can respond to contacts who meet the trigger criteria.
In the top right corner of the workflow navigation, find the Status option.
Toggle the status option. The workflow status will change from disabled to active.
Helpful Resources:
Delivering All Access Pass After Purchase
If you are offering lifetime access to summit recordings or bonus content through an All Access Pass, it is important to clearly define how this content will be delivered to your customers after purchase.
One of the most efficient and professional delivery methods in ClickFunnels is to use a Course. Courses allow you to organize content into modules and lessons, making it easier for attendees to navigate the material.
To give you a general overview of how this works:
You create a course in the Courses app to your workspace.
Inside the course, you can create Modules and add Lessons with videos, downloadable content, or other resources.
In your product settings, you set up product fulfillment to automatically grant access to the course when the All Access Pass is purchased. Alternatively, you can create a workflow and use the trigger "Order - Successful Purchase" to grant course access automatically. This provides an additional way to manage fulfillment and access control based on user actions.
This allows your customers to instantly access summit content in a structured and professional environment, without any manual steps required.
Helpful Resources:
Summary
To successfully set up and manage a Summit Funnel in ClickFunnels, here’s what you need to do:
Import a pre-built Summit Funnel template to get started with the essential funnel structure.
Create a product for the All Access Pass and attach it to the Order Form Page to enable payment and fulfillment.
Customize each funnel page to reflect your summit’s messaging, branding, and content.
Set up workflows to automate email communication and ensure attendees receive timely access and reminders.
Build a course in ClickFunnels to host your summit content and bonus materials for All Access Pass customers.
Deliver course access either through product fulfillment or by using workflow triggers based on purchase actions.
This setup helps you deliver your summit content efficiently while creating a seamless experience for your attendees.
Funnel Builder Support Options
For additional support building your funnel, explore the Funnel Builder Coaching & Certification Program. The program offers step-by-step training and live coaching for members who want to build with guidance.
To hire a certified funnel builder, visit the Funnel Builder Directory to connect with a verified expert.