Automating your funnel steps can help you nurture leads, engage contacts, and streamline your follow-up process—without lifting a finger. ClickFunnels makes it easy to trigger Automation Workflows (formerly Follow-Up Funnels) directly from specific funnel steps, allowing you to deliver personalized emails, apply tags, send internal notifications, and more. In this article, you’ll learn how Funnel Automation works and how to connect Workflows to your funnel steps.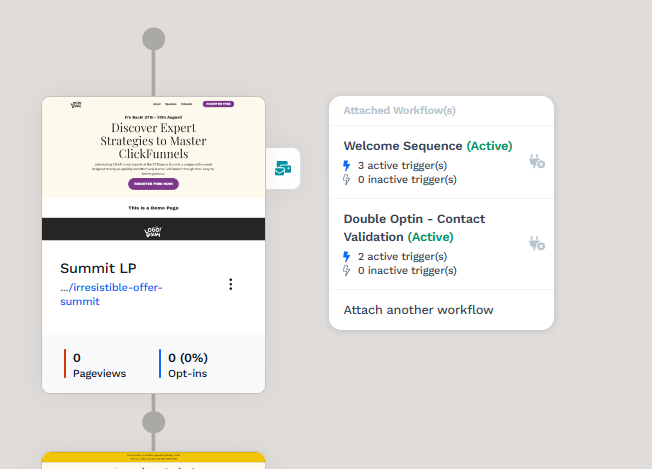
Requirements
An active ClickFunnels account
A Funnel created in your workspace
The Automations app added to your workspace
What is Funnel Automation
Funnel automation allows you to automatically perform marketing actions—such as sending email sequences or tagging contacts—based on your users’ behavior in your funnel. It reduces manual tasks and ensures your leads receive timely communication throughout their journey.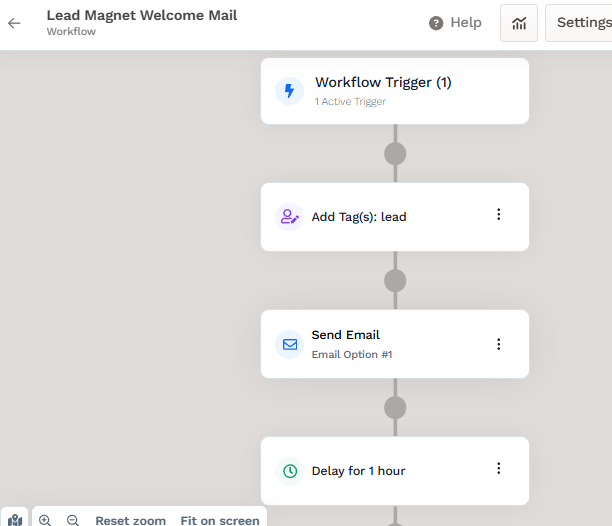
Example:
If someone opts in on your lead capture page, you can automatically trigger a workflow that sends a welcome email, applies a tag, and notifies your team—all without needing to do it manually.
ClickFunnels uses Workflows to power automation inside your funnels. In ClickFunnels Classic, workflows were previously known as Follow-Up Funnels. With workflows, you can create a sequence of actions that run when a contact reaches a funnel step.
Typical automation tasks include:
Sending a series of emails (email sequences)
Tagging contacts based on their actions
Delivering digital assets
Enrolling in a course
Sending contacts to 3rd-party apps (e.g., Mailchimp, Aweber, Active Campaign, Hubspot, etc.)
Sending internal notifications
Creating an Automation Workflow
You must create a workflow before connecting automation to a funnel step. A workflow is a series of steps that automatically run when a contact enters the workflow. You can customize these steps using actions, delays, conditions, and more.
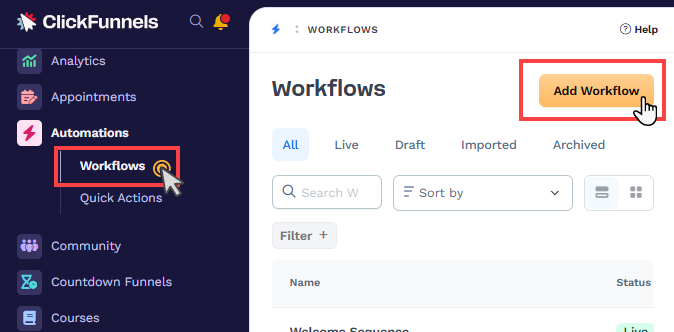
From your ClickFunnels dashboard, click on the Automations app in the left-hand menu and select Workflows.
Click Add Workflow to create a new workflow.
Give your workflow a clear and descriptive name.
Select Run Type: Here, you’ll choose how often a contact can trigger this workflow.
Multiple runs per contact (back to back): This allows a contact to re-enter the workflow if they meet the trigger condition again (e.g., someone abandons their cart multiple times).
Multiple runs per contact (simultaneous): This triggers multiple actions within the workflow simultaneously for a single contact upon meeting the trigger condition (e.g., sending an email simultaneously when someone subscribes).
Only one run per contact: This ensures a contact only goes through the workflow once, even if they meet the trigger condition multiple times (e.g., a welcome email series).
Click the Create Workflow button.
You’ll then be directed to the workflow builder interface, where you can add triggers and actions to create your automated sequence.
Helpful Resources:
Triggering the Automation Workflow from Funnel Steps
Once your workflow is ready, you can connect it to your funnel step to run automatically when a visitor reaches that funnel step.
From your workspace navigation, click the Funnels menu and access the funnel with which you wish to link the workflow.
Choose the specific Funnel Step (e.g., Opt-In page, Order page) where you want the workflow to be triggered.
Next to the funnel step, click the Lightning Bolt (
⚡ ) icon to add a new or existing workflow. This will open a dialog where you can select the appropriate workflow from the list.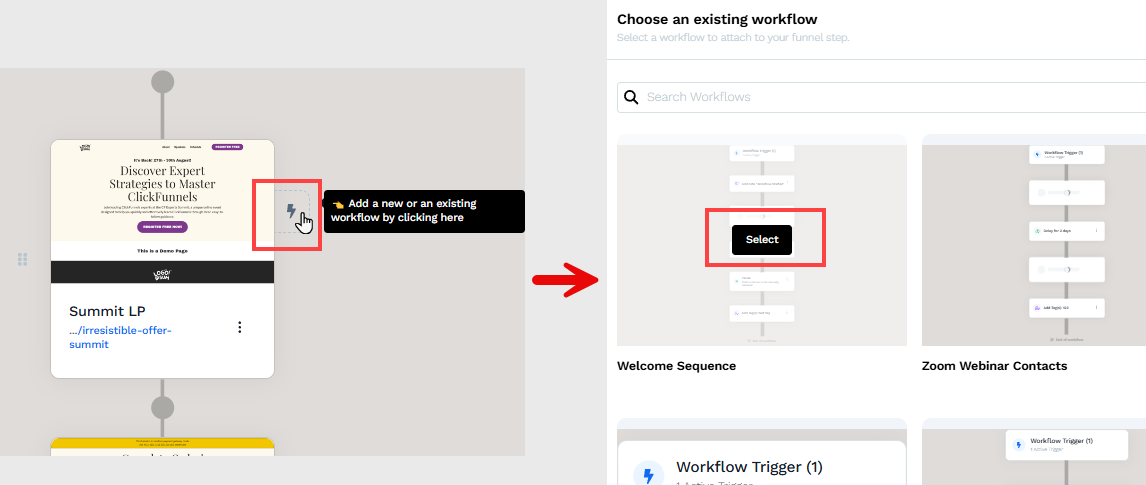
In the open prompt, select one or multiple Events triggering the workflow. For instance, if you wish to initiate the workflow when an individual submits an opt-in form or visits the funnel step, you may select
Opt-In&Pageviewas the trigger events.
Next, the workflow editor will open, and the trigger(s) will be automatically added to the workflow.
Triggering Multiple Workflows
ClickFunnels significantly simplifies the process of triggering multiple workflows from the same funnel steps for various events. For example, on an order page, you can initiate one workflow for submitting an opt-in form and another workflow for completing the purchase. To add multiple workflows, please follow the steps outlined below:
Navigate to the Funnel Step, where you want to attach multiple workflows.
Click the Automation icon.
Click Attach Another Workflow.
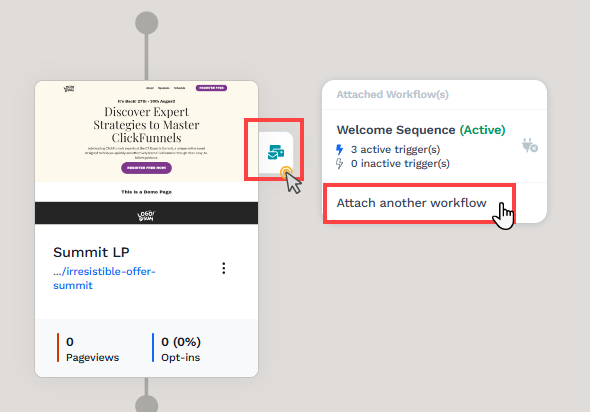
This will open a dialog where you can select the appropriate workflow from the list.
In the open prompt, select one or multiple Events triggering the workflow.
Once selected, another workflow will be added to the funnel step.
Removing a Workflow from the Funnel Step
Navigate to the Funnel Step, where you want to attach multiple workflows.
Click the Automation icon.
Click the adjacent Disconnected Plug Icon to disconnect the workflow from the funnel step.
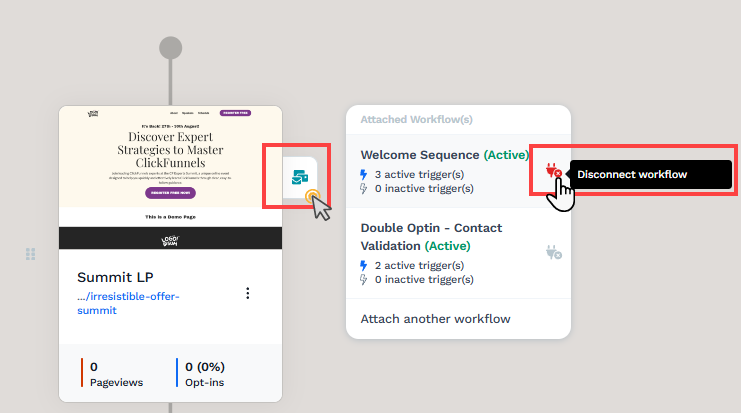
The selected workflow will be detached from the funnel step. Additionally, the trigger will be removed from the workflow.