Broadcast messages let you share important announcements, updates, and reminders with your audience. You can create and manage these messages in the Email App. This article will help you navigate the various management options available. By familiarizing yourself with these options, you can ensure your email marketing campaigns are well-managed and effective.
Requirements
An active ClickFunnels account
Access The Broadcasts Dashboard
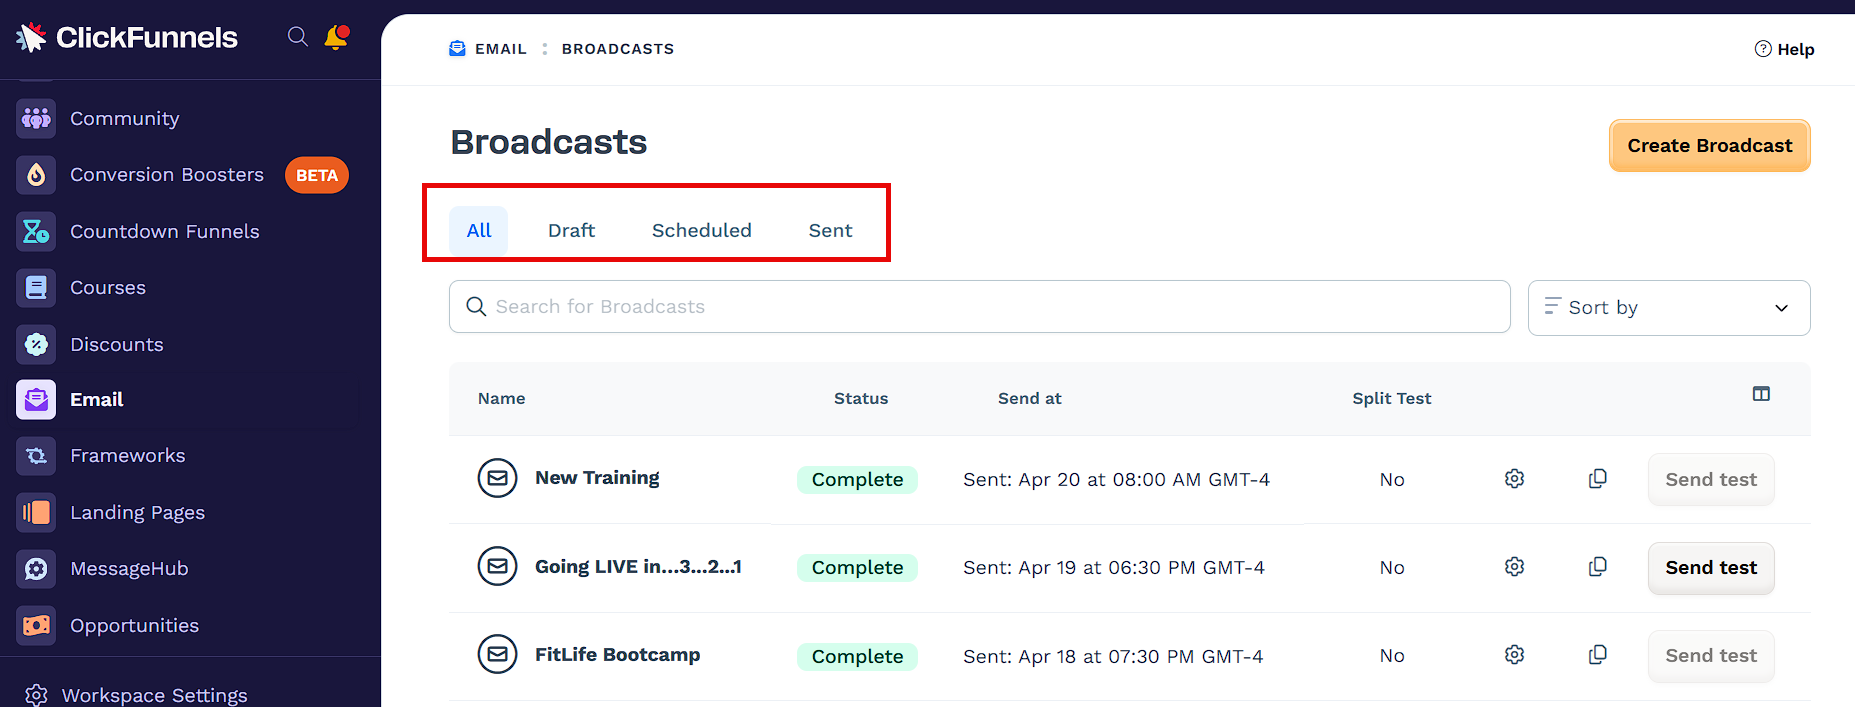
From your ClickFunnels dashboard, open the Email app located in the left-side menu. This will take you directly to the Broadcasts dashboard, where all your email campaigns are listed.
At the top of the page, you’ll see filter tabs that let you view broadcasts by status:
All: Displays every broadcast in your account.
Draft: Shows broadcasts that are still being created or edited.
Scheduled: Lists broadcasts that have a future send date and time.
Sent: Includes all broadcasts that have already been delivered.
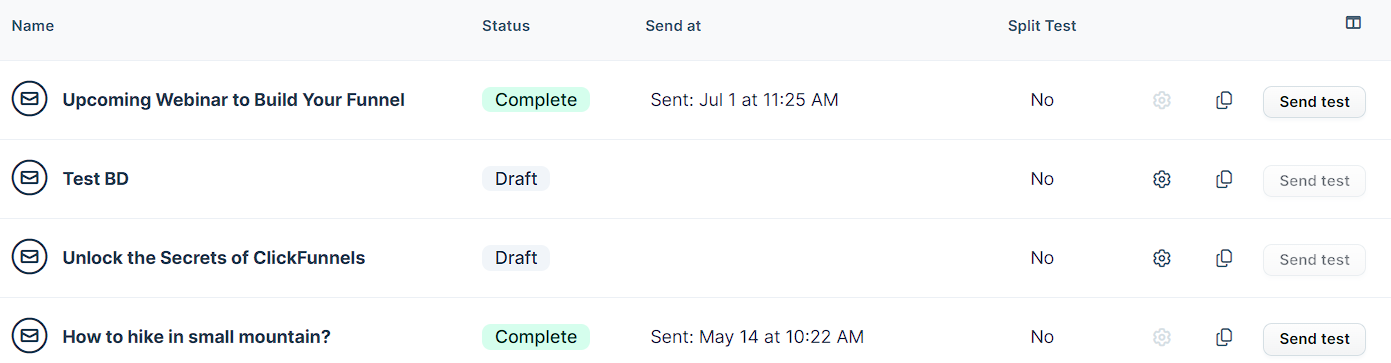
On this screen, you’ll see the following columns for each broadcast:
Name: The title of your email broadcast.
Status: Indicates whether it’s a Draft, Scheduled, or Sent.
Send at: Displays the scheduled send time (if applicable).
Split Test: Shows whether a subject line A/B test is configured.
Actions: Icons for editing settings, duplicating, or sending a test email.
Use the search bar to quickly find specific broadcasts by name, and the sort dropdown to organize them by name or date.
To create a new email campaign, click the Create Broadcast button in the top-right corner.
Edit a Broadcast
You can only edit broadcasts that are in Draft or Scheduled status. Once a broadcast has been sent, it becomes locked and can no longer be modified.
On the Broadcasts dashboard, locate the draft or scheduled broadcast you want to update.
Click the Settings (⚙️) icon next to the broadcast name to open the broadcast details page.

In the broadcast details page, make any necessary changes:
Update the broadcast name or topics.
Adjust your audience settings by clicking Edit audience.
Modify sender and reply-to details, subject line, or preheader text.
Enable or disable split testing and update sending options as needed.
Click Design email to revise the content of the email.
Once your updates are complete, click Update broadcast in the top-right corner to save your changes.
Delete a Broadcast
You can permanently delete a Draft or Scheduled broadcast if it’s no longer needed. Deleting a broadcast will also remove any associated setup or data. This action cannot be undone.
On the Broadcasts dashboard, locate the draft or scheduled broadcast you want to delete.
Click the Settings (⚙️) icon next to the broadcast name to to open the broadcast details page.
Click the Delete broadcast button located at the top right of the screen.
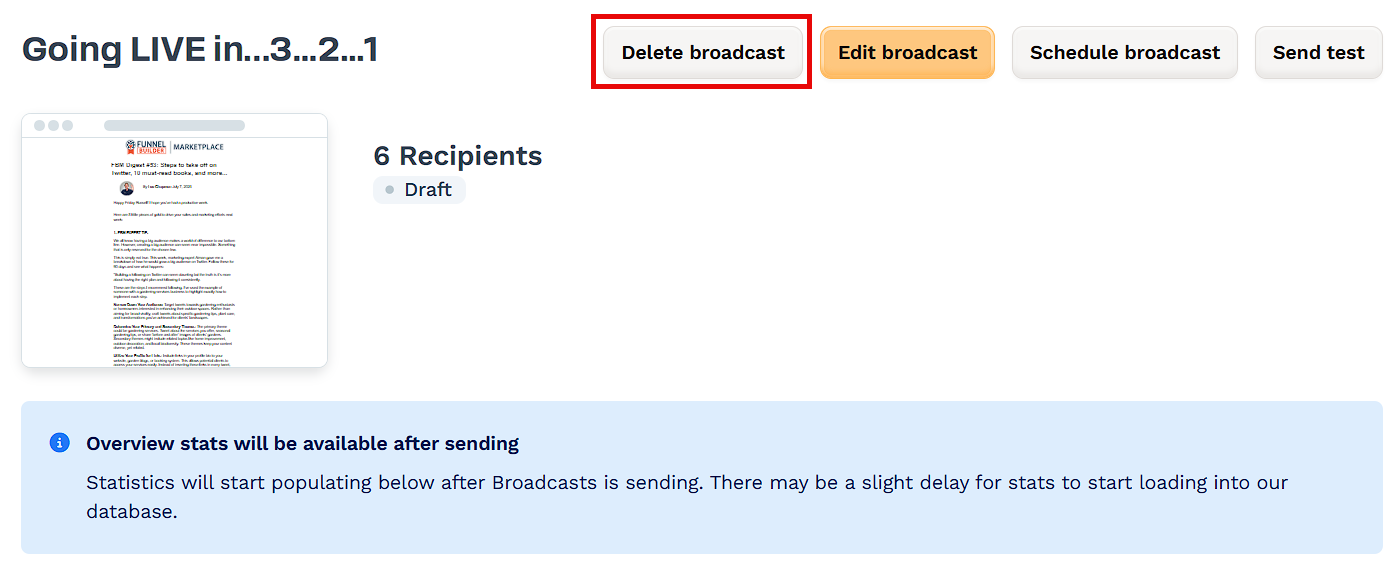
Click Proceed to confirm the action, or Cancel to go back.
Duplicate a Broadcast
Duplicating a broadcast allows you to quickly reuse the structure and settings from an existing campaign. This is helpful for recurring emails or campaigns with similar formatting.
On the Broadcasts dashboard, locate the broadcast you want to duplicate. This can be a Draft, Scheduled, or Sent broadcast.
Click the Duplicate (📄) icon next to the broadcast name to open the broadcast details page.

Click Proceed to confirm. The duplicated broadcast will appear as a new Draft with the same content and configuration. Be sure to review and update any details before sending.
Send a Test Email
Before sending your broadcast to your full audience, it's best practice to send a test email. This allows you to review the layout, content, and formatting in your inbox before it goes live.
To send a test email, make sure the following setup steps are complete:
A design has been selected and published.
Required fields such as subject line, sender email, and audience are filled in.
You can send a test email from these locations:
Broadcasts Dashboard
On the dashboard, locate your broadcast and click Send test in the Actions column.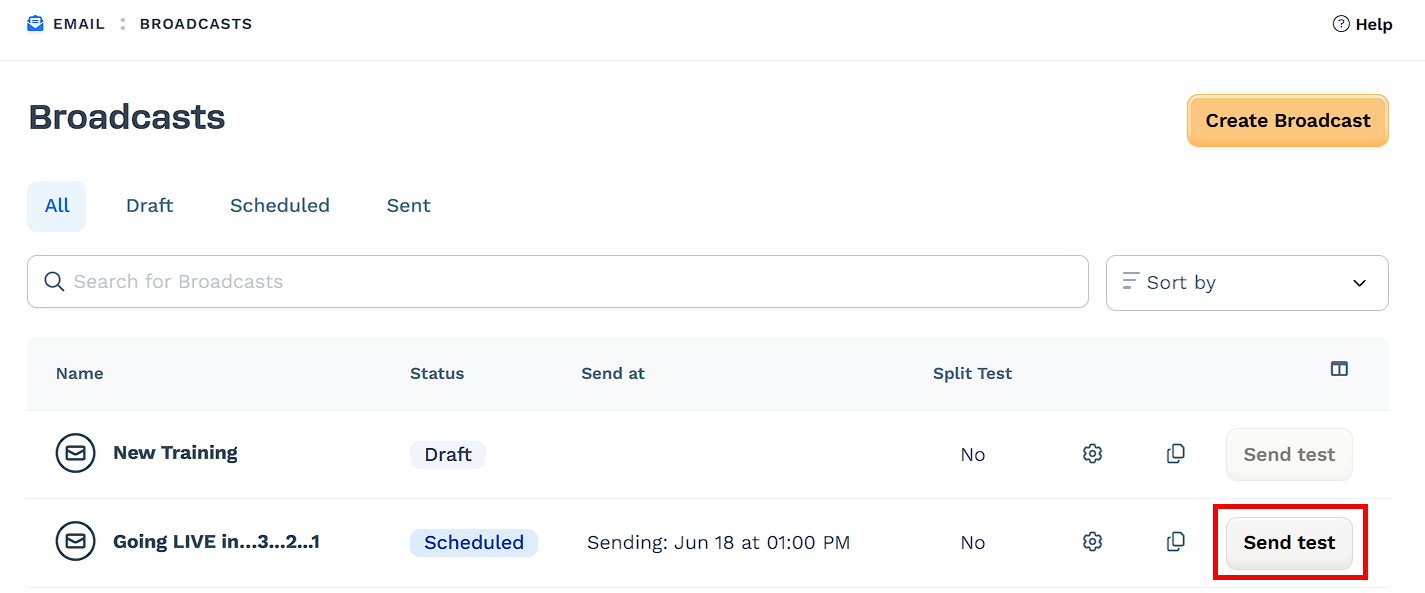
Broadcast Details Page
Click the Settings ⚙️ icon to open the details page, then click Send test at the top right.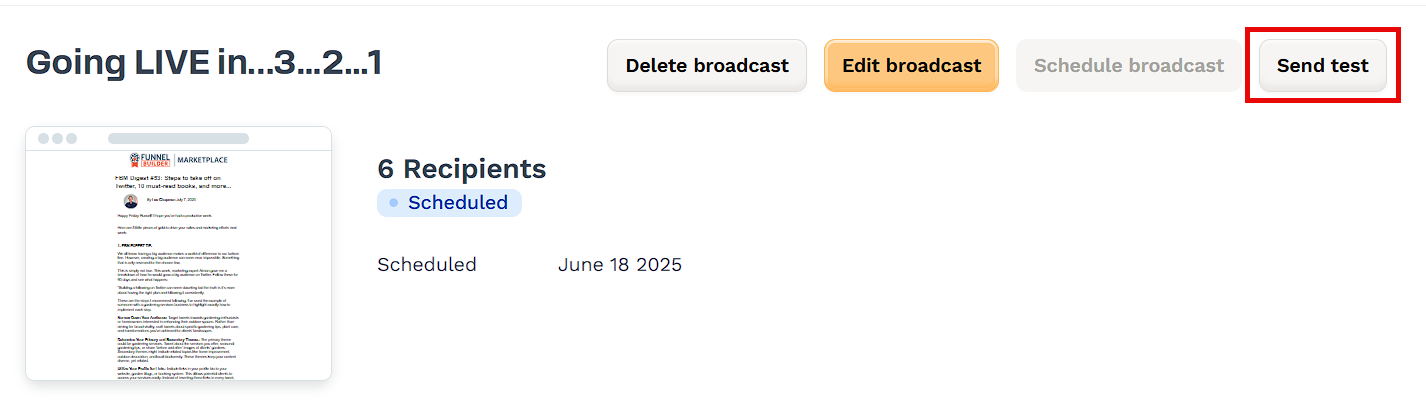
Email Design Editor
While editing the email content, click Send test in the editor toolbar to preview your email exactly as it will appear.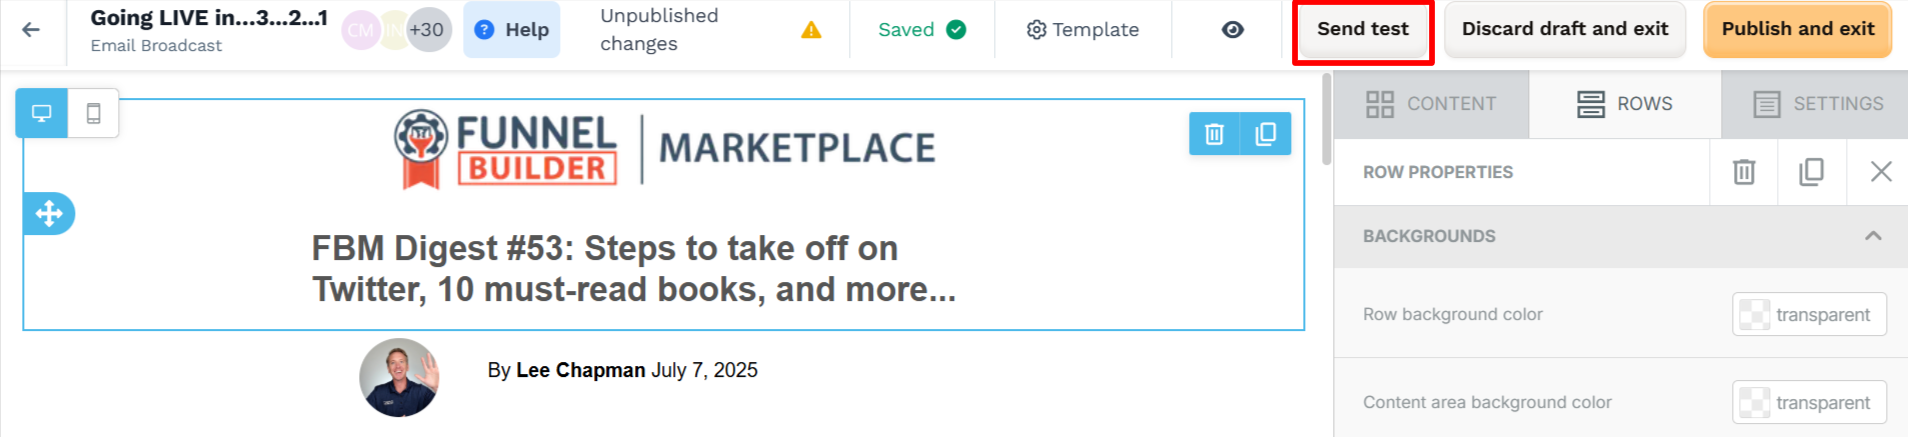
A modal will appear where you can enter up to 5 recipient email addresses, separated by commas. Click Send test to deliver the test email immediately. For a detailed walkthrough, see: Send a Test Email.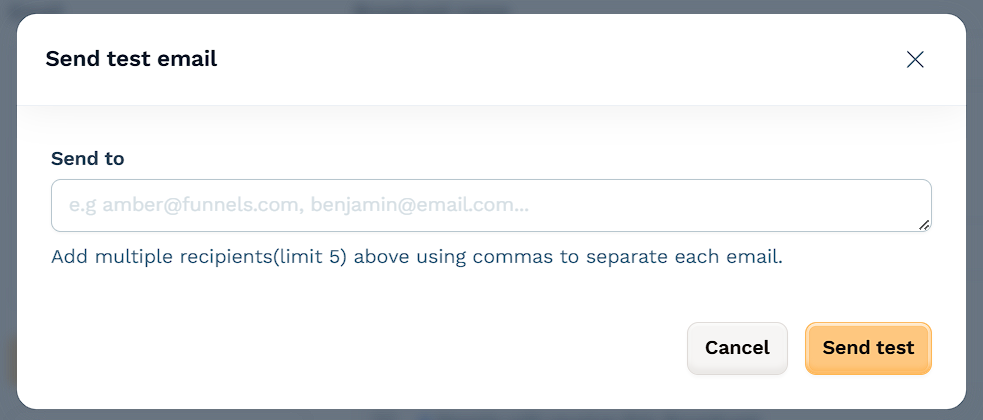
View Broadcast Performance
Once a broadcast has been sent, you can view its performance metrics to track engagement and understand how your audience responded.
To view performance results:
Go to the Broadcasts dashboard.
Click the name of any broadcast that has a Sent or Complete status.
You will be taken to the broadcast performance page, where detailed analytics are displayed.
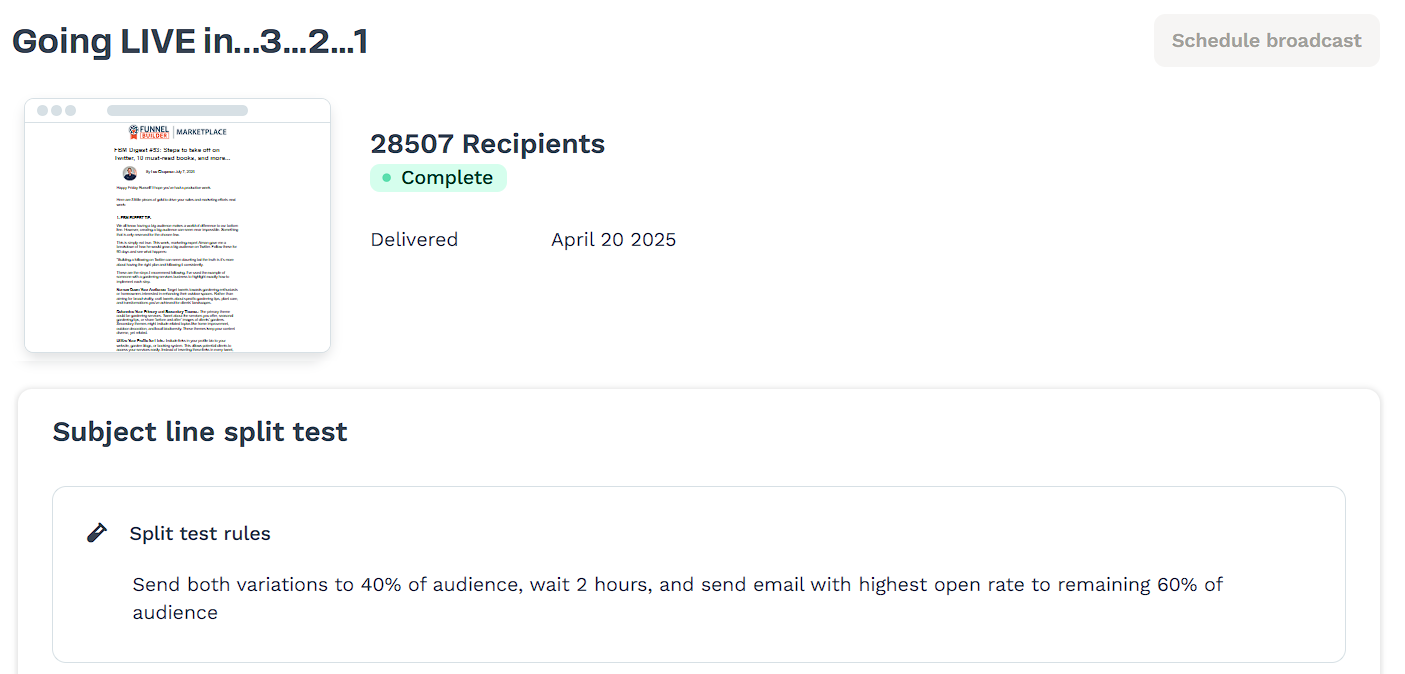
On this screen, you can review key data, including:
Subject Line Split Test Results (if enabled):
See which version performed better and how it was distributed based on open rate.Revenue:
Total revenue generated from the broadcast, including per recipient and per click values.Delivery & Engagement Metrics:
View delivery success, open and click rates, bounce counts, and unsubscribe numbers.
These insights can help you evaluate performance, optimize future broadcasts, and better understand your audience’s behavior.