Email is an essential tool for businesses to build relationships, nurture leads, and drive sales by providing direct and personalized communication. ClickFunnels provides built-in email capabilities that help businesses engage customers and automate follow-ups. With email workflows and broadcasts, you can send targeted messages to your audience at the right time, enhancing conversions and customer relationships. In this article, we'll walk through how to set up your emails, create campaigns, and ensure your messages reach the right people.
Requirements
An active ClickFunnels account
Why Email Marketing Matters for Your Business
Email remains one of the most powerful tools for customer engagement and sales. Unlike social media, where algorithms control visibility, email allows you to communicate directly with your audience. Whether you’re nurturing leads, onboarding new customers, promoting special offers, or automating follow-ups, email provides a cost-effective way to build strong relationships and drive revenue.
ClickFunnels' email tools enable businesses to:
Stay Connected with Your Audience
People don’t always buy the first time they see an offer. Emails let you check in, provide value, and remind them why they were interested in the first place. A well-timed message can turn a maybe into a yes.Automate Your Follow-Ups
Sending emails manually takes time. Automation helps you send the right message at the right time. Welcome emails, special offers, and abandoned cart reminders can all run in the background while you focus on other parts of your business.Keep Your Business in Front of Customers
Even if someone doesn’t buy today, regular emails keep your brand fresh in their mind. When they’re ready, you’ll be the first business they think of.
Real-World Examples
An online store sends a discount code to customers who added items to their cart but didn’t check out.
A course creator welcomes new students with an email series that introduces them to the content.
A local business updates customers about special events and exclusive deals.
A coach or consultant shares helpful tips before inviting leads to book a call.
Adding Marketing Contact Address
Your Marketing Contact Address appears at the bottom of your emails and is required by international spam laws, including the CAN-SPAM Act. This helps ensure transparency and allows recipients to contact your business if needed.
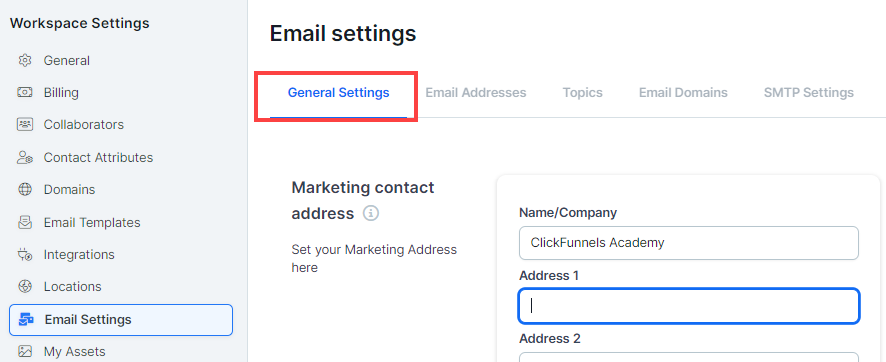
From the ClickFunnels dashboard, select Workspace Settings and then Email Settings.
In the General Settings tab, enter your business information:
Name/Company: Add your company or brand name.
Address 1 & 2: Enter your business address.
Country, City, State, and Postal Code: Provide the complete location details.
Scroll down and Save your changes.
Adding a Custom Email Address
A custom email address is an email that uses your own domain instead of a generic provider (e.g., yourname@yourdomain.com instead of Outlook or Yahoo). Using a custom email makes your messages look more professional and improves email deliverability.
ClickFunnels provides temporary email addresses using the @clickfunnelsmail.com shared domain. However, this address is only for testing purposes and is not suitable for marketing. You can send a maximum of 100 emails using this temporary email before needing a custom domain.
Before adding a custom email address, you need to have your domain set up in ClickFunnels. If you haven’t set up your domain yet, follow the steps in this article: Domains - How to Connect an Existing Domain (Automated Setup).
Once your domain is set up, you can add a custom email address.
How to Add a Custom Email Address
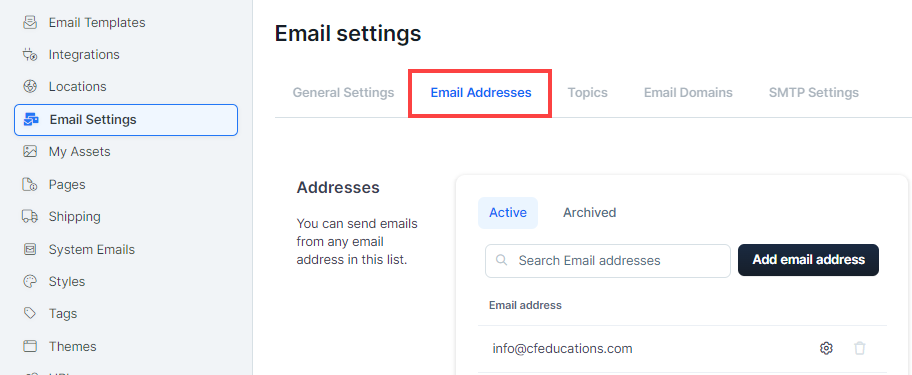
Go to Workspace Settings and select Email Settings.
Click on the Email Addresses tab.
Click Add Email Address.
Fill out the required details:
Name: This will appear as the sender name in emails.
Nickname: A reference name for internal organization.
Username: The part before @ in your email (e.g., "info" in
info@yourdomain.com).Domain: Select the domain linked to this email address.
Click Add Email Address to save.
Once added, your custom email can be used for sending broadcasts and workflows. If you need to update or archive an email address, you can do so from the same Email Settings page. For detailed steps, check out this article: How to Add a Custom Email Address in ClickFunnels.
Sending Emails: Broadcasts and Workflows
In ClickFunnels, you can send emails in two ways: Broadcasts for one-time messages and Workflows for automated sequences. Choosing the right method depends on your goal, whether it’s sending an announcement or nurturing leads over time.
Sending an Email Using Broadcasts
Broadcasts let you send a one-time email to your audience. This is useful for promotions, product launches, and important updates.
Go to the Email app from the left menu and click Create Broadcast.
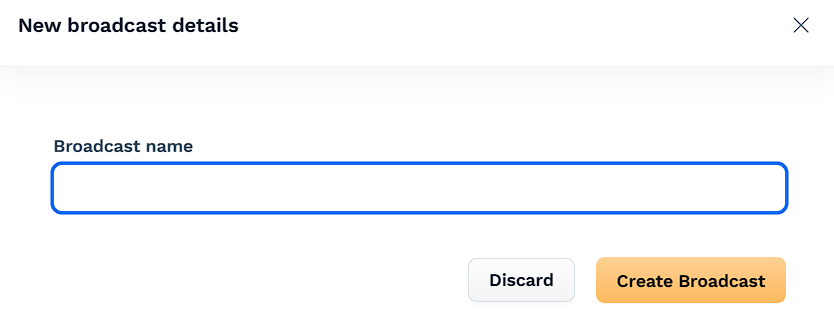
Enter a Broadcast Name and click Create Broadcast.
Click Design Email to choose a template or start from scratch. Customize your email, then click Publish and Exit. To learn more about designing emails, check our How to Design Emails article.
Select a Topic for your broadcast. If you need to create one, go to Workspace Settings > Marketing Settings > Topics.
Click Edit Audience to select an email list or apply filters, then click Save.
Choose a From Email Address and a Reply-To Email Address.
Enter a Subject Line and Preheader (optional).
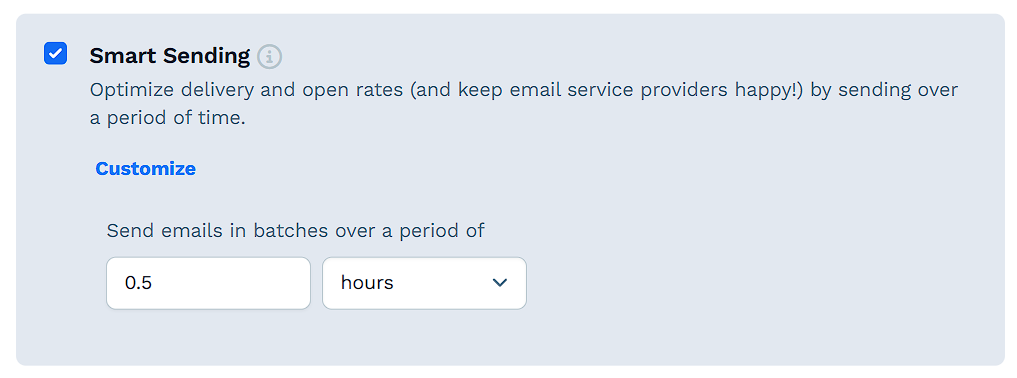
(Optional) Enable Smart Sending to optimize email delivery and reduce the chances of emails being marked as spam. This feature sends emails gradually instead of all at once, which helps improve deliverability.
Choose when to send:
Send Immediately to send right away.
Schedule for Later to pick a future date and time.
Click Send Broadcast or Schedule Broadcast.
(Optional) Send a Test Email before finalizing.
For more details on designing emails and advanced options, check out Create and Send a New Broadcast
Sending an Email Using Workflows
Workflows allow you to automate emails based on triggers like form submissions or purchases. This is great for welcome sequences, abandoned cart emails, and follow-ups.
Navigate to the Automations app from the left menu and click Workflows.
Click Add Workflow or select an existing workflow.
Click + Add a Trigger to define when the workflow will start.
To add a step, click Plus Icon (+) and select Send Email.
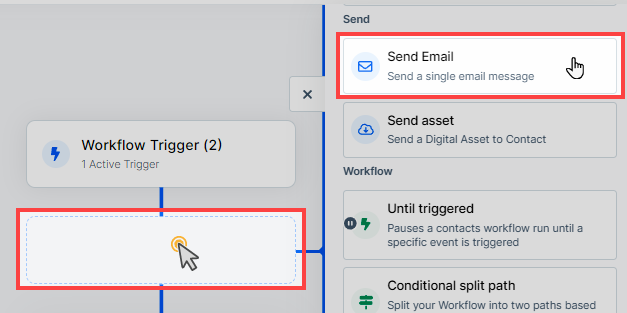
Choose an email template or create one from scratch.
Configure Email Settings. In the Create new email step window, fill in the required fields:
Name: Internal name for the email step (not visible to recipients).
Subject: The subject line of the email. Use + Contact Field to personalize it.
Preheader (optional): Preview text that appears next to the subject line in inboxes.
From Address: The email address from which the email will be sent.
Reply-To Address: Where replies to the email will be sent.
Click Create to save the email step.
To access “Send Email” Step Settings, click the three-dot icon next to the email step and select:
Split Test Step to create a split test for the email step.
Edit Email to modify the email content.
Preview Email to see how it appears before sending.
Settings to adjust the step name, sender email, subject, and reply-to address.
Enable the Workflow by toggling the Status switch at the top right of the page.
For a full breakdown of settings and automation options, refer to Workflows "Send Email" Step - Automate Your Email Campaigns.
Triggering Email Workflows from a Funnel
You can trigger a workflow with an email step when someone takes action in a funnel, such as opting in or completing a purchase. This ensures emails are sent automatically based on user behavior.
Open the Funnels menu and select the funnel where you want to trigger the workflow.
Choose the funnel step (e.g., an opt-in page) where the workflow should activate.
Click the Lightning Bolt icon next to the funnel step.
In the pop-up window, select an existing workflow or create a new one.
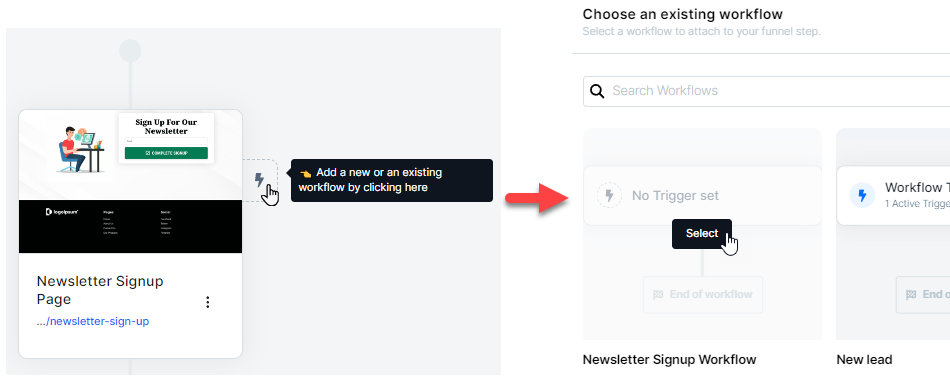
Once attached, the workflow will run automatically, sending emails when users complete the selected funnel step.
For more details, refer to the How to Create a Workflow article.
Understanding System Emails
System emails are automatically sent based on user actions. These emails confirm purchases, sign-ups, and other interactions, ensuring customers receive important information without you having to send it manually.
Types of System Emails
System emails cover different areas of your business, including:
Affiliates: Emails sent to affiliates for approvals, commissions, and account creation.
Courses: Notifications for course enrollments, module access, and removals.
Orders: Emails related to invoices, order status, fulfillment, cancellations, and digital asset access.
Community: Notifications for new community enrollments and access instructions.
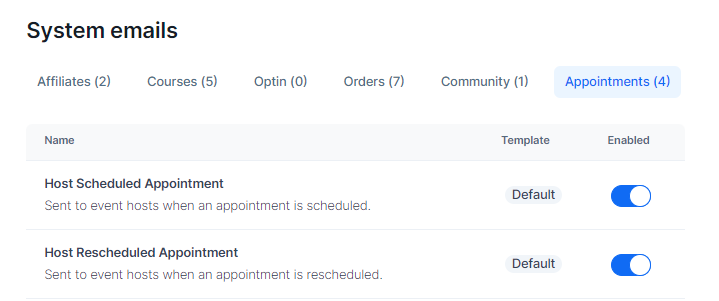
Appointments: Alerts for scheduled, rescheduled, and canceled appointments for hosts and invitees.
Managing System Emails
Go to Workspace Settings and select System Emails to see all available emails.
Use the toggles to enable or disable specific emails.
Click on an email to customize its content, including the subject line and message.
You can personalize system emails to match your brand’s voice. This includes editing text, adding images, and formatting the email to better engage recipients.
For full details on managing system emails, visit How to Customize and Manage System Emails in ClickFunnels.