The Daily Deal Funnel lets you offer time-sensitive promotions similar to popular deal sites, without the need for complex tools or custom development. It’s designed to highlight one compelling offer and guide customers through a quick purchase experience. This can be a great way to boost urgency, drive traffic, and increase conversions. In this article, we’ll walk through how to set up, customize, and launch your own Daily Deal Funnel.
Requirements
An active ClickFunnels account
How Daily Deal Funnels Work
Daily Deal Funnels are built to feature one irresistible offer and make it easy for customers to take action right away. These funnels are ideal for promotions with limited availability, such as flash sales, exclusive discounts, or special event pricing. Since the layout is focused and distraction-free, it helps convert visitors quickly and can be used to drive sales, test new products, or re-engage inactive leads.
For businesses, this funnel can serve as a low-effort campaign to generate buzz or fill gaps in sales. In the fitness niche for example, here are a few ways it can be used:
A coach offering a discounted one-on-one session or limited-time group challenge.
A digital product like a downloadable workout guide or meal plan.
A physical product such as resistance bands, protein samples, or branded gear.
Understanding the Daily Deal Funnel Structure
The Daily Deal Funnel is a simple two-step funnel that’s built for speed and clarity. Each step is designed to focus on the offer and move the customer through the process without distractions.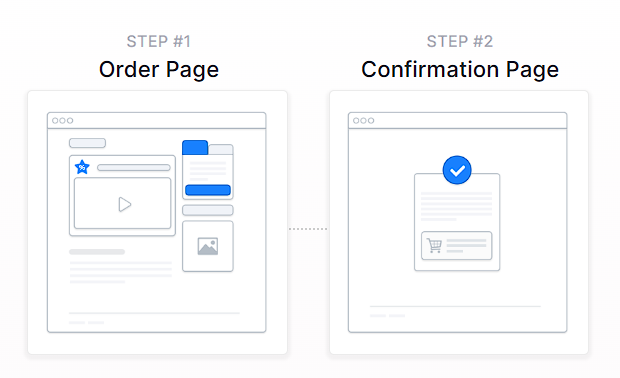
Order Page
This is where the offer is presented. The page typically includes product details, a strong headline, supporting media (such as an image or video), and an order form. Visitors can review the deal, fill out their information, and complete the purchase directly from this page.Confirmation Page
After the order is submitted, customers are taken to a confirmation page. This page confirms their purchase and delivers the next steps.
Creating a Daily Deal Funnel
A Daily Deal Funnel can be built quickly using ClickFunnels' pre-designed templates. Instead of starting from scratch, you can choose a template that matches your needs, customize it with your content, and launch your funnel in just a few steps.
In ClickFunnels, go to the Funnels section from the left navigation menu.
Click the Create Funnel button.
Browse the available funnel types and select a Daily Deal Funnel.
Each funnel type includes a training section with:
Overview: Understanding how a Daily Deal funnel works.
Strategy: Learning how to structure your funnel and offer for maximum impact.
Implementation: A step-by-step guide to customizing your funnel.
You can also watch the full training video at the top of this article. It covers all three parts in one walkthrough.
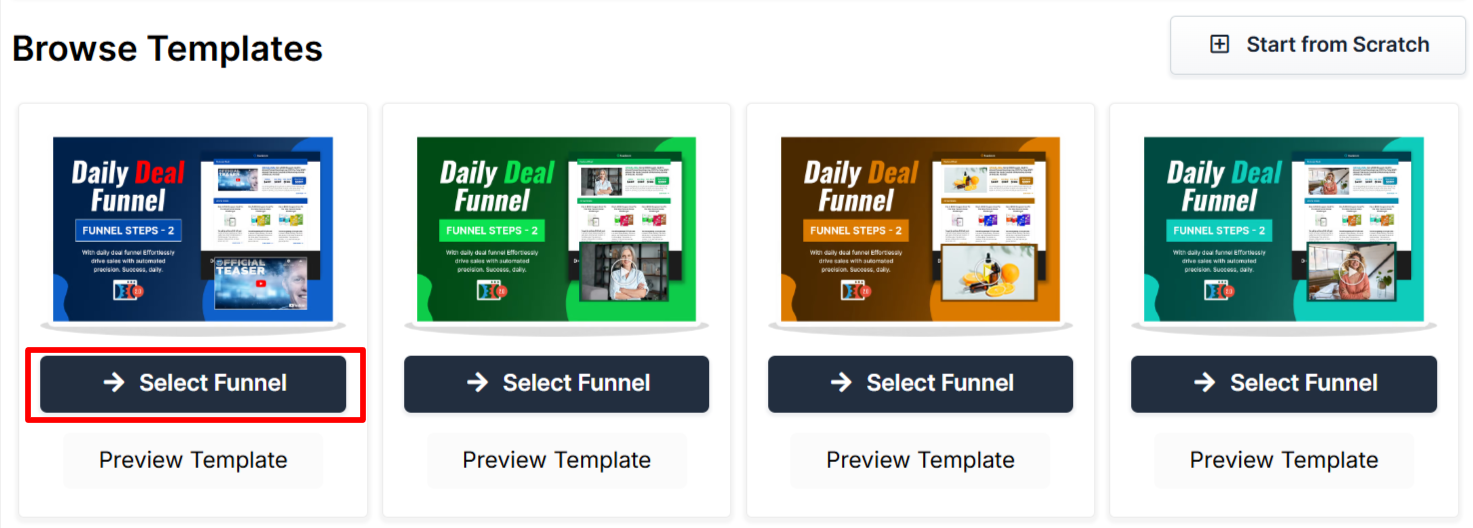
If you prefer a completely custom setup, click Start from Scratch to build your Daily Deal funnel manually. Refer to the How to Create a New Funnel article for instructions.
Scroll through the available templates and click Select Funnel under the one that best fits your business.
Wait for the funnel to install, then:
Click Close to exit the installation window.
Or click Customize Now to start editing your pages and adjust your call-to-action.
Once the template is loaded into your workspace, you can begin customizing it to fit your business, audience, and sales message.
Editing Daily Deal Funnel Pages
Once the Daily Deal Funnel is installed, you can customize it by clicking Customize Now from the installation screen or by going to the Funnels section in your dashboard. From there, select the Daily Deal Funnel to open the page editor.
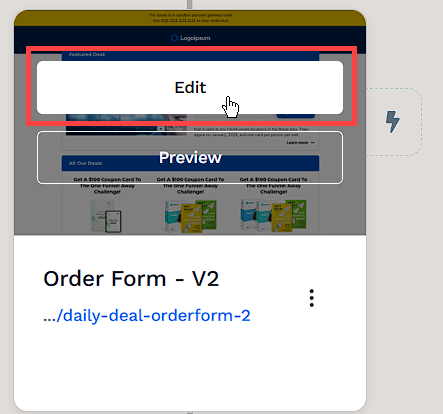
Open the Funnel Workflow Editor by clicking on the funnel. Find the page you want to edit, hover over it, and click Edit.
Each page is made up of sections, columns, rows, and elements. For a Daily Deal Funnel, key areas to customize include:
Headline: Clearly state the deal and create urgency.
Product Details: Highlight what’s included and why it’s valuable.
Order Form: Review and adjust settings as needed for your offers.
Buy Button: Use direct, action-focused text like Get the Deal.
Thank You Message: Confirm the order and provide next steps.
To learn more about editing elements in ClickFunnels, refer to the Getting Started with the ClickFunnels Page Editor article.
Click Save at the top right to keep your changes.
Use the Preview option to check how your funnel looks before publishing. Remember to view your funnel on mobile devices to ensure it looks great on all screens. For detailed instructions, check our article on Mobile Optimization Techniques.
Automating Follow-Ups with Workflows
Workflows allow you to automate follow-ups and actions based on customer behavior. Instead of manually managing emails, product access, or customer segmentation, workflows handle these tasks automatically.
With workflows, you can:
Send Order Confirmation Emails: Automatically email customers with purchase details.
Deliver Digital Products or Assets: Provide links to downloads or membership access.
Enroll Customers in a Course: Add buyers to an online course or members-only area.
Tag Customers Based on Behavior: Segment users based on purchases or actions.
Trigger Additional Offers or Sequences: Set up follow-up emails or SMS campaigns.
To create a workflow:
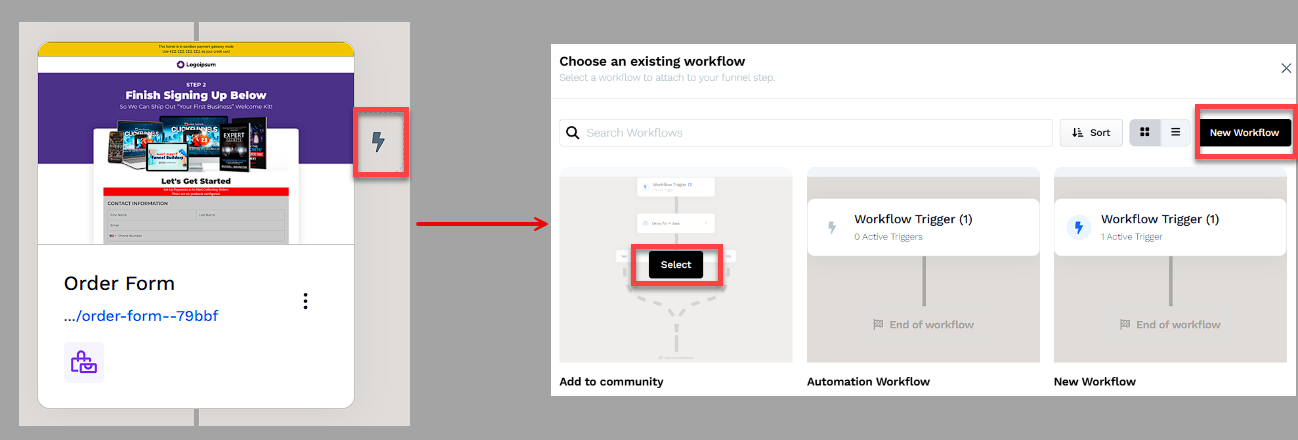
Locate the funnel step where you want to trigger the workflow.
Click the Lightning Bolt icon next to the step to add a new or existing workflow.
Select an existing workflow from the list or create a new one.
Click + (Plus) icon to add actions such as Send an Email, Send an Asset, Enroll in a Course, or Tag Contact.
(Optional) Add a Delay to space out follow-up actions over time.
In the top right corner of the workflow navigation, find the Status option.
Toggle the status option. The workflow status will change from disabled to active.
Helpful Resources:
Adding Products to the Order Page
Adding products to your Daily Deal Funnel is an essential step that allows you to process payments and fulfill orders. Without connecting a product to your Order Page, your order form will not function, and customers won’t be able to complete their purchase.
Navigate to the Daily Deal Funnel.
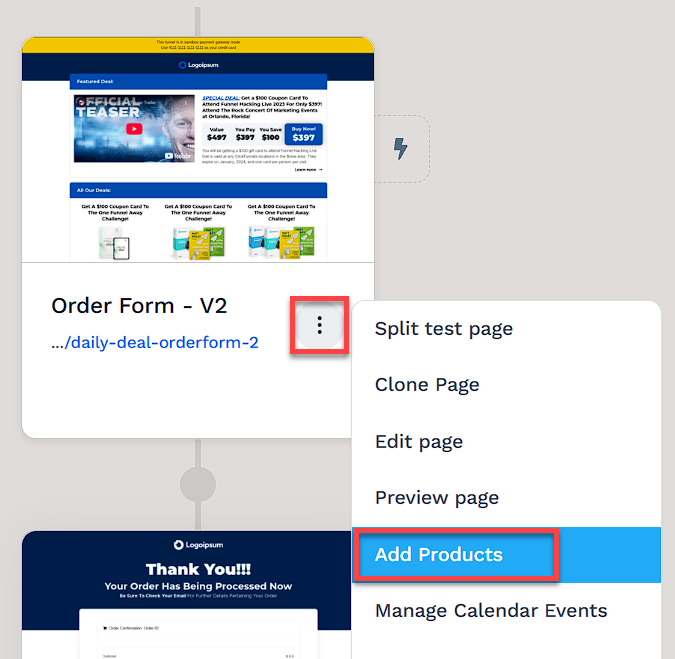
Locate the Order Page in your funnel.
Click the Three-Dot (⋮) icon beside the page.
Select Add Products.
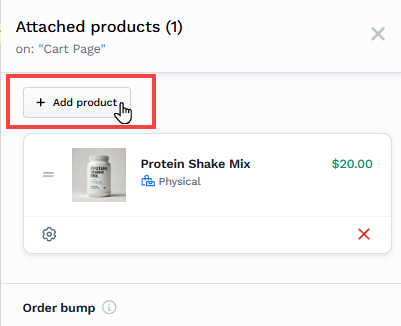
Click + Add Product to open the product selection window.
Hover over the desired product and click Select Product, or use the Add Product button at the top right to create a new product.
To add more products, click the Add Product button again to open the product selection window.
Helpful Resources:
Testing and Publishing Your Funnel
Before making your funnel live, it’s important to test its functionality to ensure everything works as expected.
Test the Funnel
Verify that all pages are connected in the correct order.
Check buttons, forms, and links to confirm they function properly.
Test the funnel on different devices and browsers for a smooth experience.
To run a full checkout test, follow the steps in How to Test Funnel Checkout in Test / Sandbox Mode.
Enable Live Mode
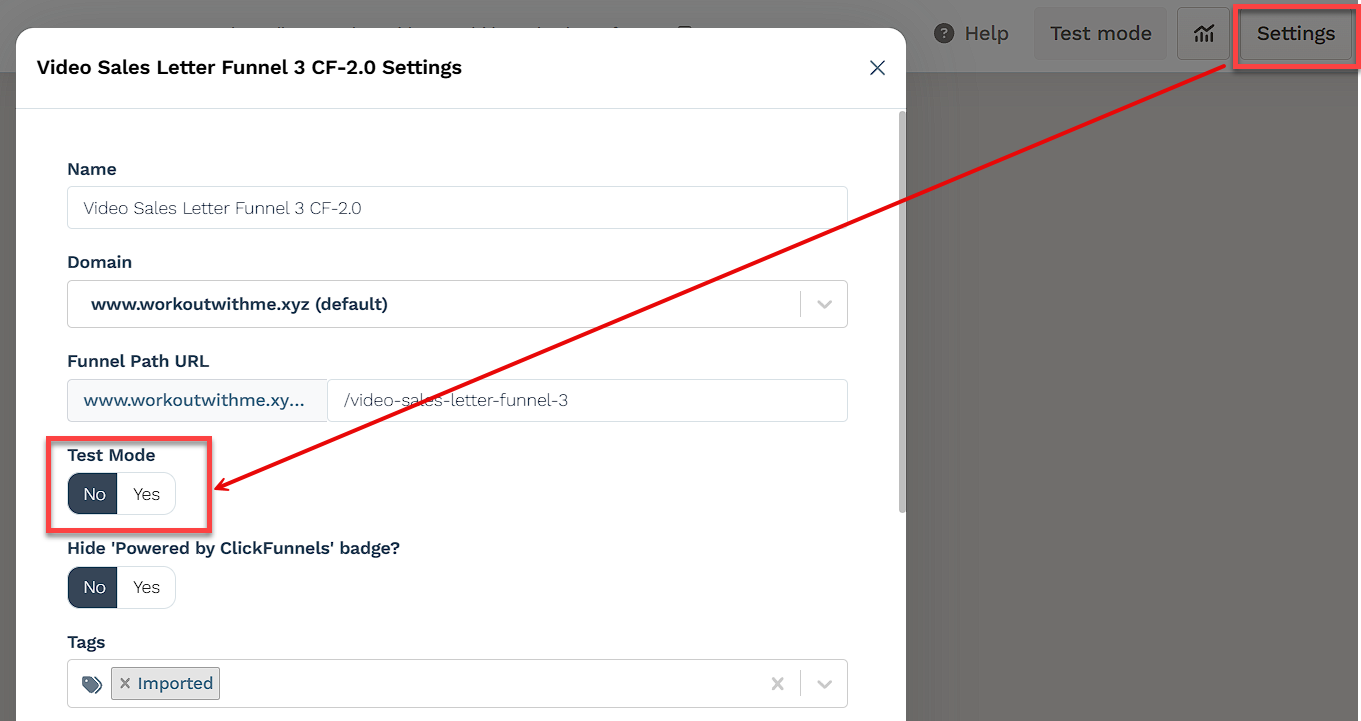
Click the Settings button at the top-right corner of the funnel workflow editor to open the funnel’s settings.
Set the funnel to Live Mode to make it accessible to customers.
Copy and Share Your Funnel URL
Hover over the URL at the top of the funnel workflow page and click to copy.
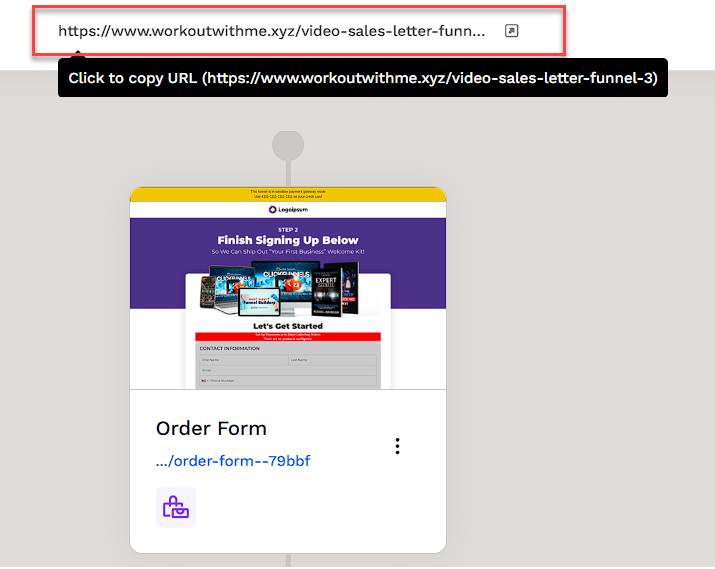
Share the link via your website, social media, or email campaigns.
Learn more about publishing and sharing your funnel in this article.
Fulfilling Customer Orders After Purchase
If your Daily Deal Funnel includes physical products, digital downloads, or a combination of both, it’s important to set up appropriate fulfillment methods to ensure a smooth post-purchase experience for your customers.
Physical Product Fulfillment Methods
ShipStation Integration: If your business uses ShipStation for logistics and shipping, you can connect your account in ClickFunnels. When a customer completes a purchase, order data is automatically sent to ShipStation for processing, packaging, and shipping.
Shippo Integration: ClickFunnels also integrates with Shippo, which allows you to generate accurate shipping labels, compare live carrier rates, and access discounted shipping prices. When connected, Shippo can automatically display calculated shipping costs at checkout, helping you streamline fulfillment while offering cost-effective shipping options for your customers.
Zendrop Fulfillment: If your product was imported from Zendrop, ClickFunnels automatically sends the order data to Zendrop when the purchase is made. Zendrop then handles the packaging and delivery of the product on your behalf.
Manual Fulfillment: If you're fulfilling orders manually, you can manage and track customer purchases inside your Orders tab. You’ll need to mark orders as fulfilled manually or use internal processes to ship products and notify customers.
To give you a general overview of how order fulfillment works in a Daily Deal Funnel, here are the most common scenarios depending on your business needs:
Automated Fulfillment with Shipping Services: If you want to fully automate shipping, including label generation, packaging, and delivery, you can use integrated services like ShipStation or Zendrop. These platforms handle logistics after the order is placed.
Manual Fulfillment with Live Shipping Rates: If you prefer to fulfill orders yourself (e.g., from your home or warehouse) but still want to charge accurate shipping fees, consider using Shippo. It allows you to display live carrier rates during checkout and print shipping labels manually.
Creating Shipping Profiles: You can set up domestic and international shipping profiles in ClickFunnels to display calculated shipping prices automatically when the customer enters their address during checkout.
Manual Order Management: You can also manually manage your entire fulfillment process by reviewing orders in the Orders tab, handling packaging and shipping yourself, and marking each order as fulfilled.
Manual Fulfillment: You can manually manage customer orders by reviewing purchases in your Orders tab. Once shipped, you can mark orders as fulfilled.
Shipping Integrations: If you're using third-party services like ShipStation or Shippo, ClickFunnels can send order data directly to those platforms for automated label creation and tracking.
Helpful Resources:
Digital Product Fulfillment
If you're selling a digital product, you can easily manage delivery using ClickFunnels Digital Assets feature.
Uploading Digital Assets:
Navigate to Workspace Settings > Digital Assets in your ClickFunnels workspace.
Upload your file (.pdf, .doc, .txt, or other formats).
Delivering Digital Assets Automatically:
Once uploaded, you can connect the digital asset to your product settings. When a customer completes a purchase, the file becomes accessible to the buyer.
From your ClickFunnels dashboard, click Products and select All Products.
Access the product added to your funnel.
Scroll down to the Purchase Actions section.
Click the Plus (+) icon next to the Digital Asset Access option.
Select an asset from the list with this product. You can also upload a new asset by clicking on New Digital Asset.
After selecting the assets, click Save to apply the settings.
Helpful Resources:
Funnel Builder Support Options
For additional support building your funnel, explore the Funnel Builder Coaching & Certification Program. The program offers step-by-step training and live coaching for members who want to build with guidance.
To hire a certified funnel builder, visit the Funnel Builder Directory to connect with a verified expert.