An Ask Campaign Funnel is a simple two-step funnel that helps you collect valuable insights directly from your audience. Instead of guessing what your customers want, you ask them then use their answers to shape your offers, content, or products. It's a fast way to validate ideas and build something people are already asking for. In this article, we’ll walk through how the funnel works and show you how to set it up inside your ClickFunnels account.
Requirements
An active ClickFunnels account
How Ask Campaign Funnels Work
An Ask Campaign Funnel helps you collect direct input from your audience by asking a single, open-ended question. Instead of building products, content, or offers based on assumptions, you start by asking people what they want to know or what they’re struggling with. Their responses give you a clear direction for what to create next.
This type of funnel is useful for testing new ideas, validating demand, or improving what you already offer. It gives you real data you can use to shape your messaging, adjust your marketing, or even design an entirely new product based on actual customer needs.
Here’s how it might be used in the fitness niche:
A personal trainer could ask prospects what’s holding them back from reaching their goals, then use the answers to build a custom coaching program.
A coach might ask customers what they find most confusing about nutrition, and use that input to create a series of educational emails or a beginner’s meal guide.
A gym could survey new members on what kind of classes they’re most interested in before finalizing their weekly schedule.
A content creator might ask followers what fitness topics they want covered in upcoming videos, then plan content around the most common responses.
Ask Campaign Funnels aren’t just for product creation, they’re also helpful for improving email content, lead magnets, course outlines, or webinar topics. The key benefit is that your audience tells you what they need, and you respond with something that’s already in demand.
Understanding the Ask Funnel Structure
The Ask Campaign Funnel is made up of just two pages: a Question Page and a Thank You Page. It’s a simple flow designed to collect a single piece of valuable input from each visitor.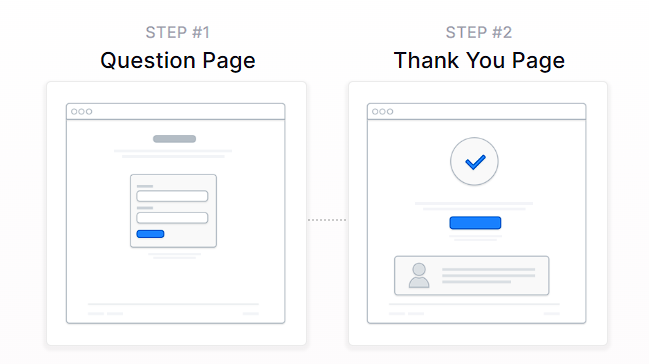
Question Page: This is the main page of the funnel. It includes a short introduction, one open-ended question (e.g. What’s your biggest challenge when it comes to [topic]?), and form fields for the visitor’s response, name, and email. This is where you gather insights that will help shape your content or offers.
Thank You Page: After submitting their answer, visitors are taken to a confirmation page that thanks them for their input. You can also include a message about what to expect next, an optional incentive (like a free resource), or a simple follow-up email sequence to keep the engagement going.
All responses are saved to your contact list, making it easy to review what people shared and use that information in future campaigns, product planning, or audience segmentation.
Creating an Ask Campaign Funnel
An Ask Campaign Funnel can be built quickly using ClickFunnels' pre-designed templates. Instead of starting from scratch, you can choose a template that matches your needs, customize it with your content, and launch your funnel in just a few steps.
In ClickFunnels, go to the Funnels section from the left navigation menu.
Click the Create Funnel button.
Browse the available funnel types and select a Ask Campaign Funnel.
Each funnel type includes a training section with:
Overview: Understanding how an Ask Campaign funnel works.
Strategy: Learning how to structure your funnel and offer for maximum impact.
Implementation: A step-by-step guide to customizing your funnel.
You can also watch the full training video at the top of this article. It covers all three parts in one walkthrough.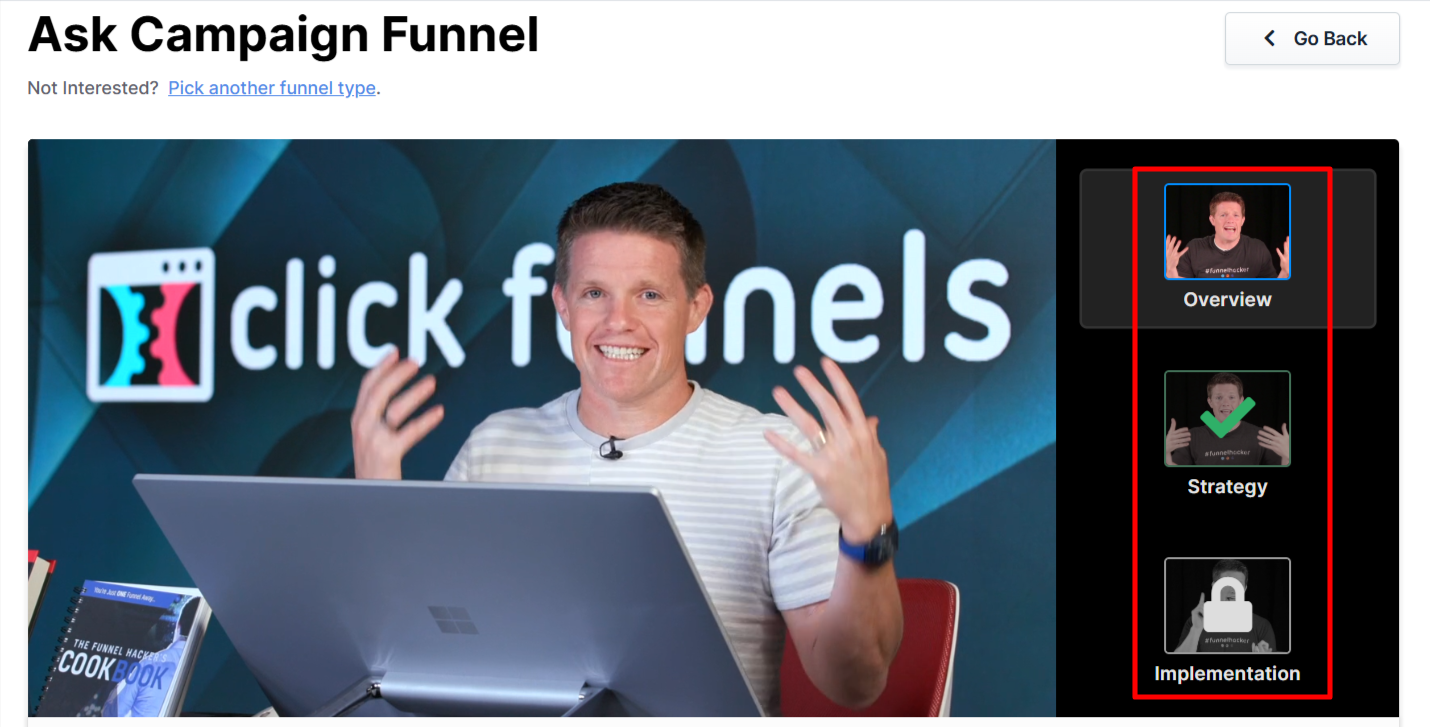
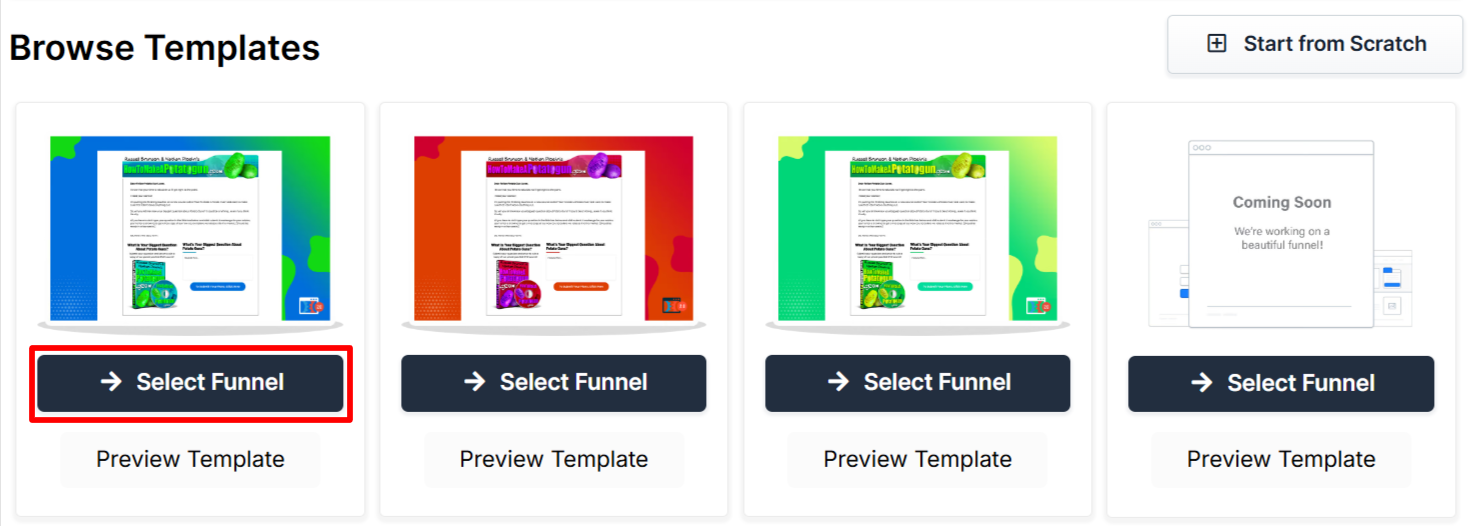
If you prefer a completely custom setup, click Start from Scratch to build your Ask Campaign funnel manually. Refer to the How to Create a New Funnel article for instructions.
Scroll through the available templates and click Select Funnel under the one that best fits your business.
Wait for the funnel to install, then:
Click Close to exit the installation window.
Or click Customize Now to start editing your pages and adjust your call-to-action.
Once the template is loaded into your workspace, you can begin customizing it to fit your business, audience, and sales message.
Editing Ask Campaign Funnel Pages
Once the Ask Campaign Funnel is installed, you can customize it by clicking Customize Now from the installation screen or by going to the Funnels section in your dashboard. From there, select the Ask Campaign Funnel to open the page editor.
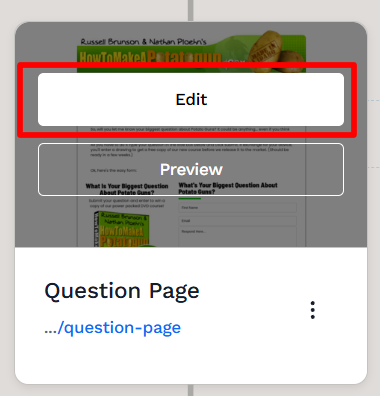
Open the Funnel Workflow Editor by clicking on the funnel. Find the page you want to edit, hover over it, and click Edit.
Each page is made up of sections, columns, rows, and elements. For an Ask Campaign Funnel, key areas to customize include:
Question Prompt: This is the main question you want to ask your audience. Edit the copy to match your topic. Keep it short and clear (e.g. What’s your #1 question about [topic]?).
Form Fields: Update the form input settings. Make sure the question input is labeled clearly and the Input Type is set to Custom Type for the main question.
Name and Email Fields: These fields should be required so you can follow up with people who respond.
Submit Button: Customize the button text to match your message. You can also use this area to encourage participation with a lead magnet (e.g. Submit your answer to get a free guide).
Thank You Page Message: After submission, the thank you page should confirm their response was received. You can also add a short follow-up message, optional free resource, or next step.
Click Save at the top right to keep your changes.
Use the Preview option to check how your funnel looks before publishing. Remember to view your funnel on mobile devices to ensure it looks great on all screens. For detailed instructions, check our article on Mobile Optimization Techniques.
Helpful Resources
Automating Email Follow-Up with Workflows
Workflows make it easy to send follow-up emails after someone submits an answer through the Ask Campaing funnel. Instead of manually emailing each lead, workflows can handle ongoing communication automatically.
With workflows, it's possible to:
Send a Thank You Email: Acknowledge the response and let the person know you’ve received it.
Deliver a Lead Magnet: Share a free download, checklist, or bonus resource as a thank-you for participating.
Tag Contacts Based on Responses: Add a tag to each contact (e.g.
ask-responded) so you can follow up later.Send Updates About Your Offer: Keep leads informed when you create content, launch a product, or answer the most common questions collected through your campaign.
To create a workflow:
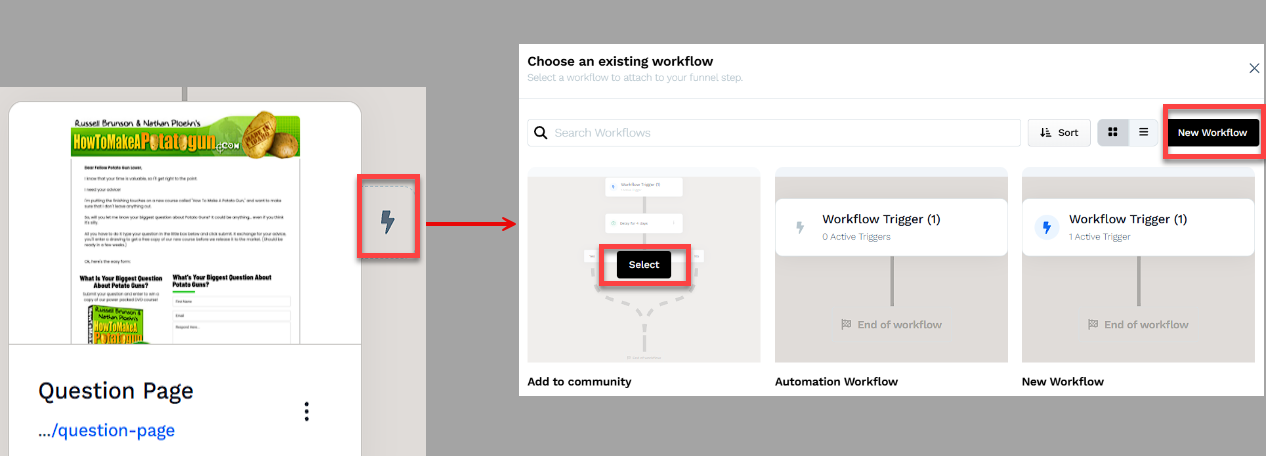
Find the funnel step where the follow-up should begin.
Click the Lightning Bolt icon next to that step to open the workflow settings.
Choose an existing workflow or click New Workflow to create one from scratch.
Click the + (Plus) icon to add actions such as Send an Email, Tag Contact, or Send an Asset.
(Optional) Add a Delay between actions to space out the emails over time.
In the top right corner of the workflow navigation, find the Status option.
Toggle the status option. The workflow status will change from disabled to active.
Helpful Resources
Finding Users Data After Form Submission
Once a user submits a form, their data, including custom input, is stored in their Contact Profile.
How to Access Submitted Data
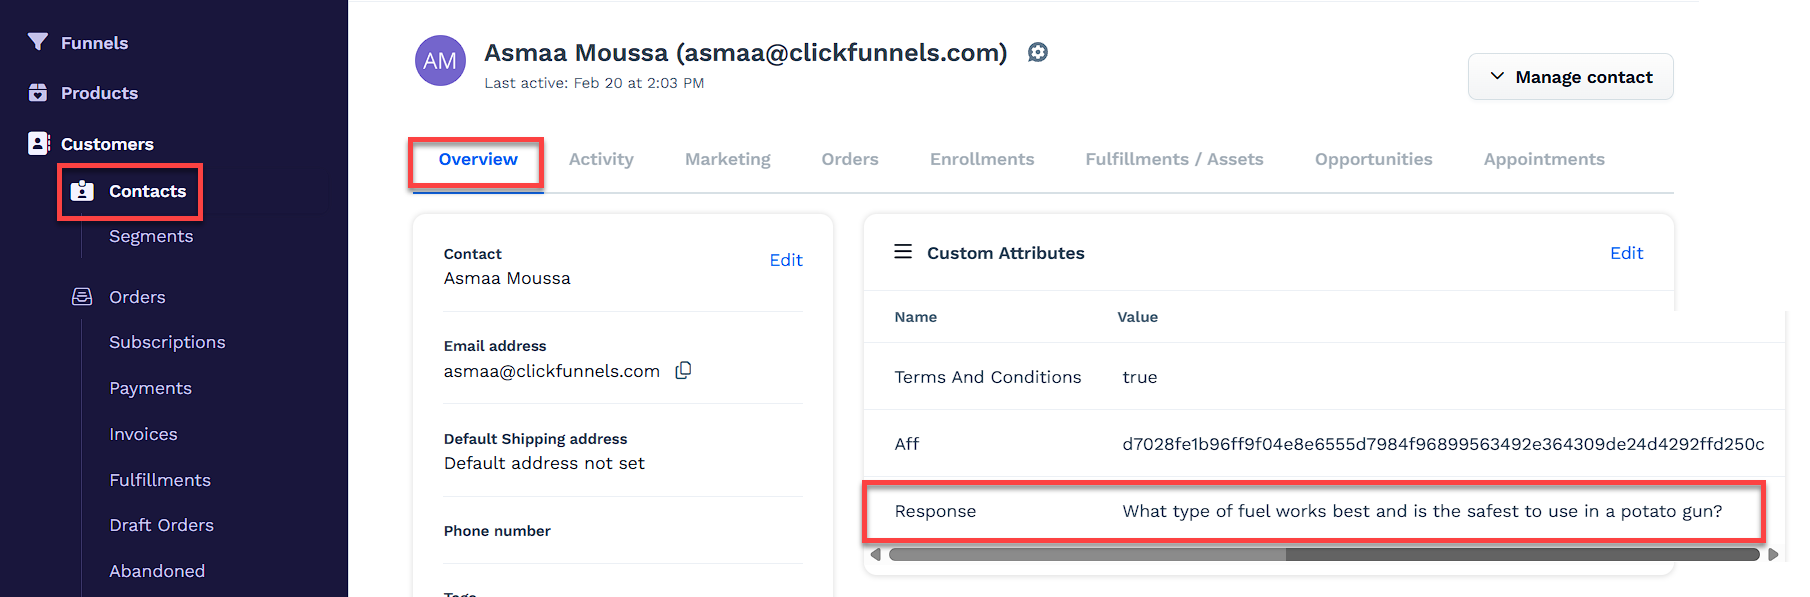
Go to the Customers » Contacts menu in your workspace.
Select a contact to view their profile.
Click the Overview tab.
In the Custom Attributes section, all the custom data collected from the user is displayed alongside the field name and value.
Testing and Publishing Your Funnel
Before making your funnel live, it’s important to test its functionality to ensure everything works as expected.
Test the Funnel
Verify that all pages are connected in the correct order.
Check buttons, forms, and links to confirm they function properly.
Test the funnel on different devices and browsers for a smooth experience.
Enable Live Mode
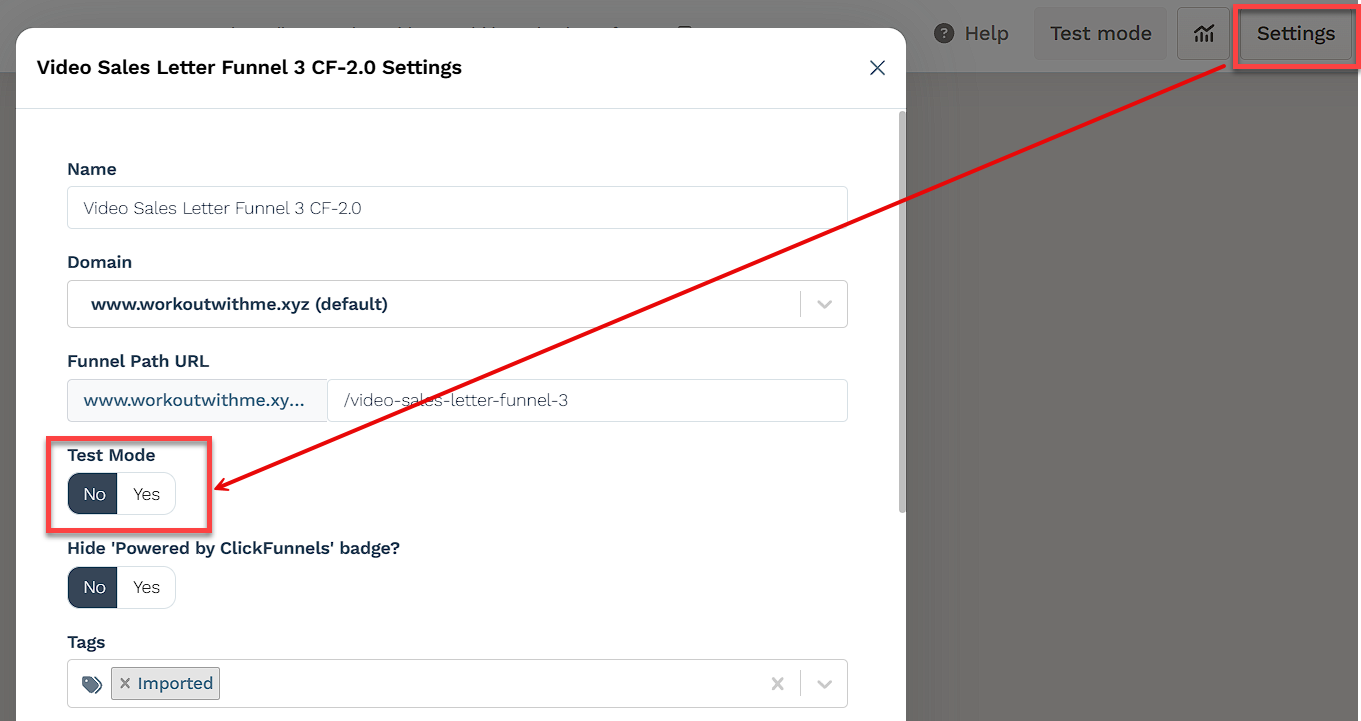
Click the Settings button at the top-right corner of the funnel workflow editor to open the funnel’s settings.
Set the funnel to Live Mode to make it accessible to customers.
Copy and Share Your Funnel URL
Hover over the URL at the top of the funnel workflow page and click to copy.
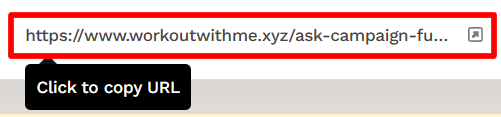
Share the link via your website, social media, or email campaigns.
Learn more about publishing and sharing your funnel in this article.
Funnel Builder Support Options
For additional support building your funnel, explore the Funnel Builder Coaching & Certification Program. The program offers step-by-step training and live coaching for members who want to build with guidance.
To hire a certified funnel builder, visit the Funnel Builder Directory to connect with a verified expert.