This article will guide you through attaching an existing product to a specific funnel step and making it available on order pages. You can attach multiple products and set individual products as order bumps on that step. By managing product settings and placements effectively, you’ll ensure that your products are properly integrated and managed within your funnel, enhancing the overall user experience.
Requirements
An active ClickFunnels account
A product created in the workspace
A page created in the funnel
Adding Products to a Funnels Step
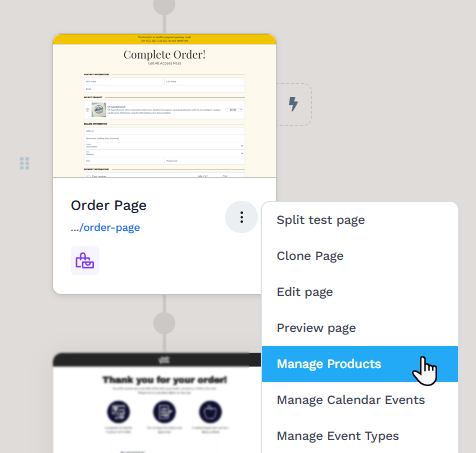
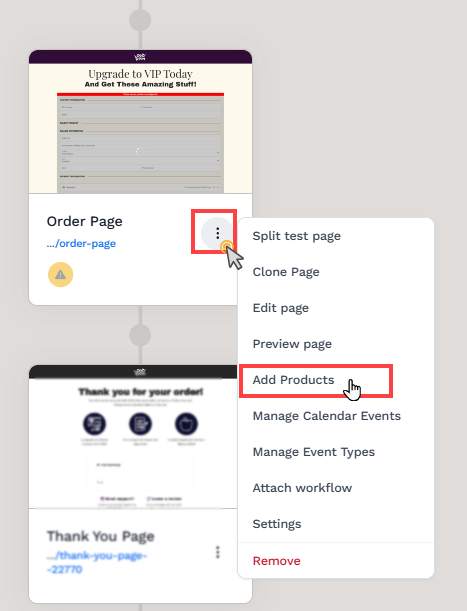
Locate the funnel step in your funnel where you want to attach a product.
Click the Three-Dot Menu (⋮) beside the page.
Select Add Products.
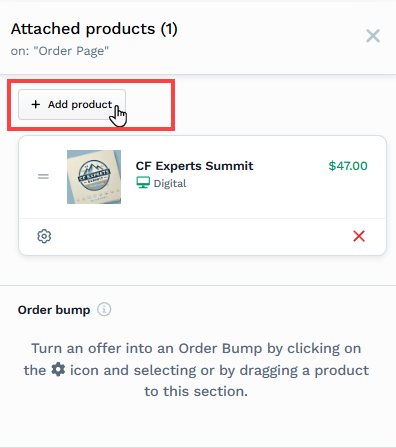
Click + Add Product to open the product selection window.
Hover over the desired product and click Select Product, or use the Add Product button at the top right to create a new product.
To add more products, click the Add Product button again to open the product selection window.
Configuring the Product for the Checkout Page
When you add a product to a Checkout page, ClickFunnels allows you to customize how the product appears and behaves on that specific page. These options let you adjust titles, pricing, and other settings without changing the original product. When the products are attached, click the Gear 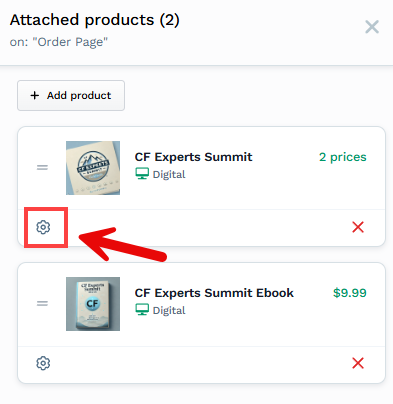
Title and Description Overrides
You can override the default product title and description displayed in the Checkout. This is helpful when you want to use the same product in multiple funnels but customize how it's presented in each one. For example, you may want the product to appear as “Summit Access Pass” in one funnel and “All-Access Ticket” in another.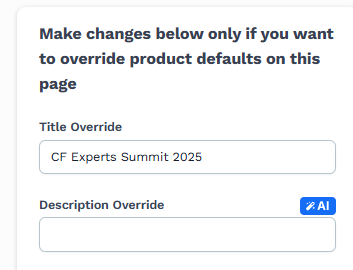
Marking a Product as an Order Bump
Selecting the option “Product is an order bump " shows the product as an add-on item that customers can choose to include with their main purchase or skip. Order bumps help increase the overall order value without interrupting the checkout experience.
Example: If someone is buying a course, you might offer a bonus ebook or checklist as an optional bump product they can add before completing the checkout.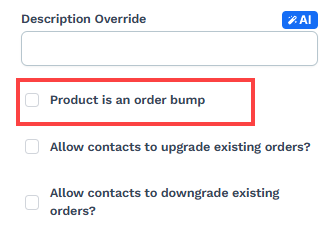
Important:
A bump product cannot be used alone. You must have at least one main product added to the Checkout page before you can add an order bump.
Upgrade and Downgrade Options
If your product includes subscription pricing, ClickFunnels allows you to offer returning customers the ability to upgrade or downgrade their existing subscriptions. This feature only applies to customers who have already purchased a subscription from your workspace and is recognized when they revisit your Checkout page—typically after entering their contact information, such as an email address.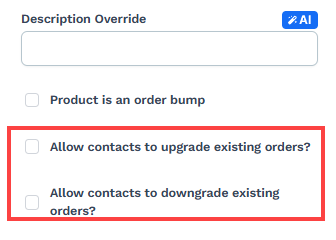
Upgrade: Customers subscribed to a lower-tier plan (e.g., $9/month) can choose to switch to a higher-tier plan (e.g., $29/month) to access additional features or benefits. For example, a customer subscribed to a basic monthly plan may choose to upgrade to a premium monthly plan with extra resources or bonus content.
Downgrade: Similarly, customers can move from a higher-tier plan to a lower-priced plan if enabled. This gives them the flexibility to adjust their subscription based on their needs.
Important:
Even though you have enabled these settings, it is essential to activate the “Customer can upgrade” and “Customer can downgrade” options in the product price settings for the upgrade and downgrade feature to be visible in the Checkout form for returning customers. For more detail refer to our article: How to Set Up Upgrade and Downgrade Options for Subscription Products.
Availability and Prices
You can choose which pricing options to display on the Checkout page. If your product has multiple prices—such as a one-time price and a subscription plan—you can select one of each to present.
Example: You may want to offer a one-time payment of $47 or a monthly payment of $9 for 6 months.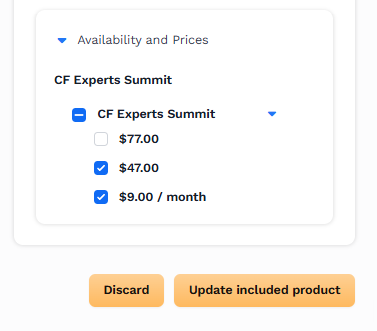
Important:
You can only select one one-time price and one subscription price per variant on a Checkout page. If your product includes multiple variants—for example, a "Basic Plan" and a "Premium Plan"—you can configure separate pricing options for each variant.
For instance, the Basic Plan might offer a one-time payment of $47 or a $9/month subscription for 6 months, while the Premium Plan could offer a one-time payment of $197 or a $40/month subscription over the same period. However, within each variant, you can only display one one-time price and one subscription option at a time. You cannot present multiple one-time or multiple subscription options for a single variant on the Checkout page.
Learn how to add prices in a product in the article: Products - How to Add and Manage Pricing.
Configuring Checkout Settings
The Checkout Settings panel allows you to define how customers interact with the products on your Checkout page. You can configure two settings: Products quantity type and Bump Products quantity type. These settings control how many products a customer can select during checkout and how the selection appears.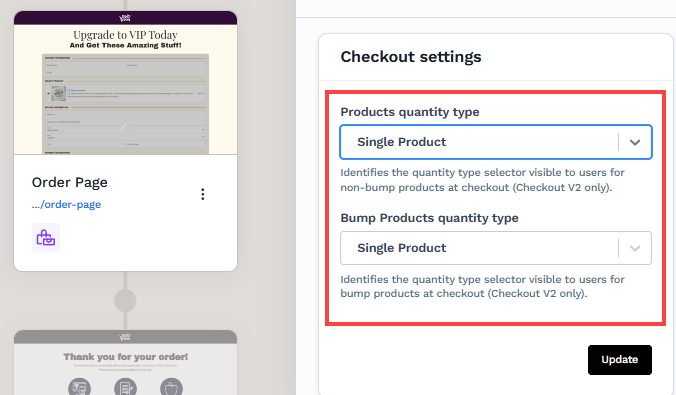
Single Product
This option allows the buyer to select only one product at a time. It is ideal when you're offering product variants or mutually exclusive offers.
Example: A fitness business selling access to two different bootcamps—"Morning Bootcamp" and "Evening Bootcamp". With the single product setting, the customer can only choose one of the two sessions.
Multiple Products with Quantity
This setting allows buyers to add multiple products to their cart and specify the quantity for each product individually. Quantity selectors (such as plus/minus buttons) appear beside each item, enabling buyers to choose how many units they want. If a buyer sets the quantity to zero, the product will not be included in the checkout. This approach is especially useful when selling physical items, packages, or event tickets where buyers may want to purchase multiple units of the same product.
Example: A fitness store selling protein shakes and resistance bands. Customers can choose to buy 3 protein shakes and 2 resistance bands in one checkout session.
Multiple Products with Checkbox
This option allows customers to select multiple products using checkboxes. However, quantity selection is unavailable—they can only choose whether to include the product.
Example: A fitness instructor offering multiple digital resources like a workout planner, meal prep guide, and mobility guide. Customers can select any combination of these guides without choosing quantity.