Pipelines in ClickFunnels are a visual tool that helps you track and manage opportunities from start to finish. They break down the workflow into different stages, making it easy to see where each opportunity stands at a glance. This is incredibly helpful for keeping your business organized, ensuring tasks are completed on time, and identifying any bottlenecks that need attention. For example, if you’re managing sales leads, a pipeline can help you track each lead from initial contact to closing the deal. In this article, we’ll show you how to set up and manage your pipelines to keep your business running smoothly and efficiently.
.png)
Requirements
An active ClickFunnels account
The Opportunities app added to the workspace
Understanding Pipelines and Stages
Pipelines are part of the Opportunities app, which works as the CRM inside ClickFunnels. It’s designed to help you manage leads, track progress, and organize your sales process. If you’re collecting leads in your workspace, the Opportunities app gives you one place to follow up, assign contacts to your team, and keep deals moving.
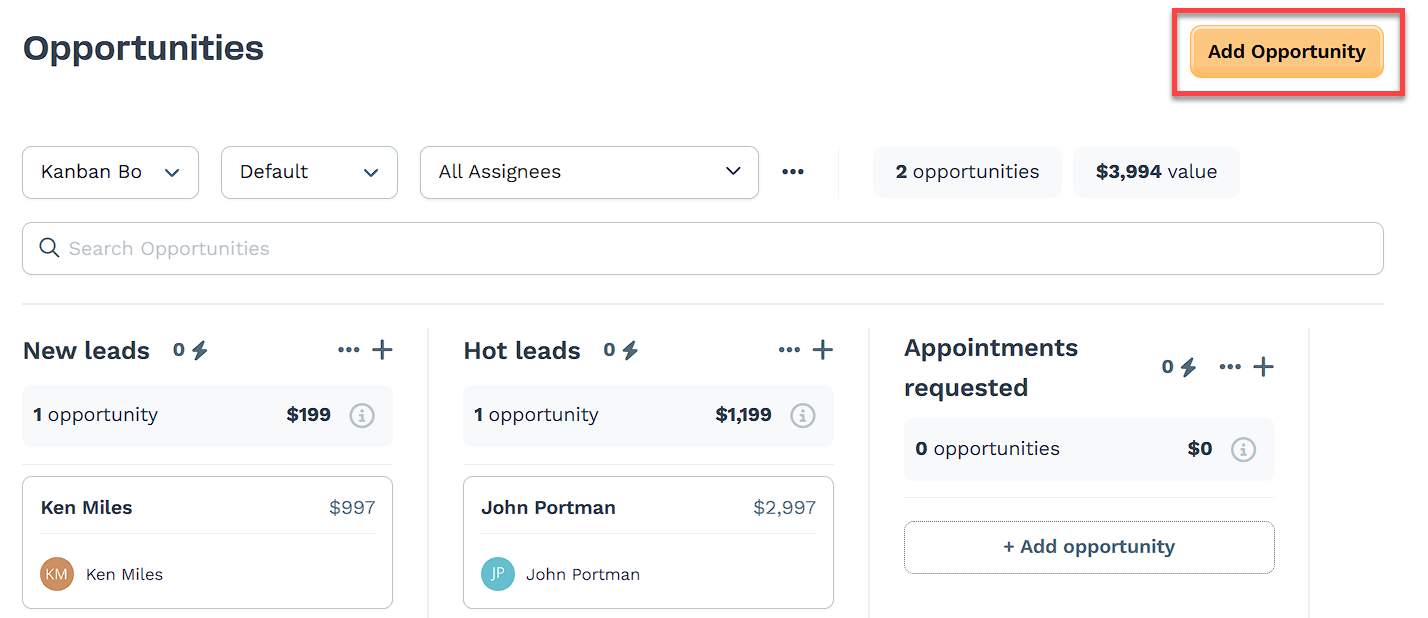
A pipeline is a visual layout of your sales or customer journey. It shows each step a contact goes through, from the moment they enter your system until the final outcome, whether that’s a sale, onboarding, or another result. Pipelines help you and your team see what’s happening with every opportunity, understand what needs attention, and keep your workflow on track. You can create several pipelines, depending on your business model or team structure.
Each pipeline is made up of stages, which represent the key steps or milestones within that process. A stage might be something like New Lead, Consult Scheduled, Qualified, or Waiting on Payment. You can define your own stage names and assign a close probability to each one, which helps estimate how likely a deal is to convert at that point. As contacts move from one stage to the next, you can track momentum and identify gaps or drop-offs.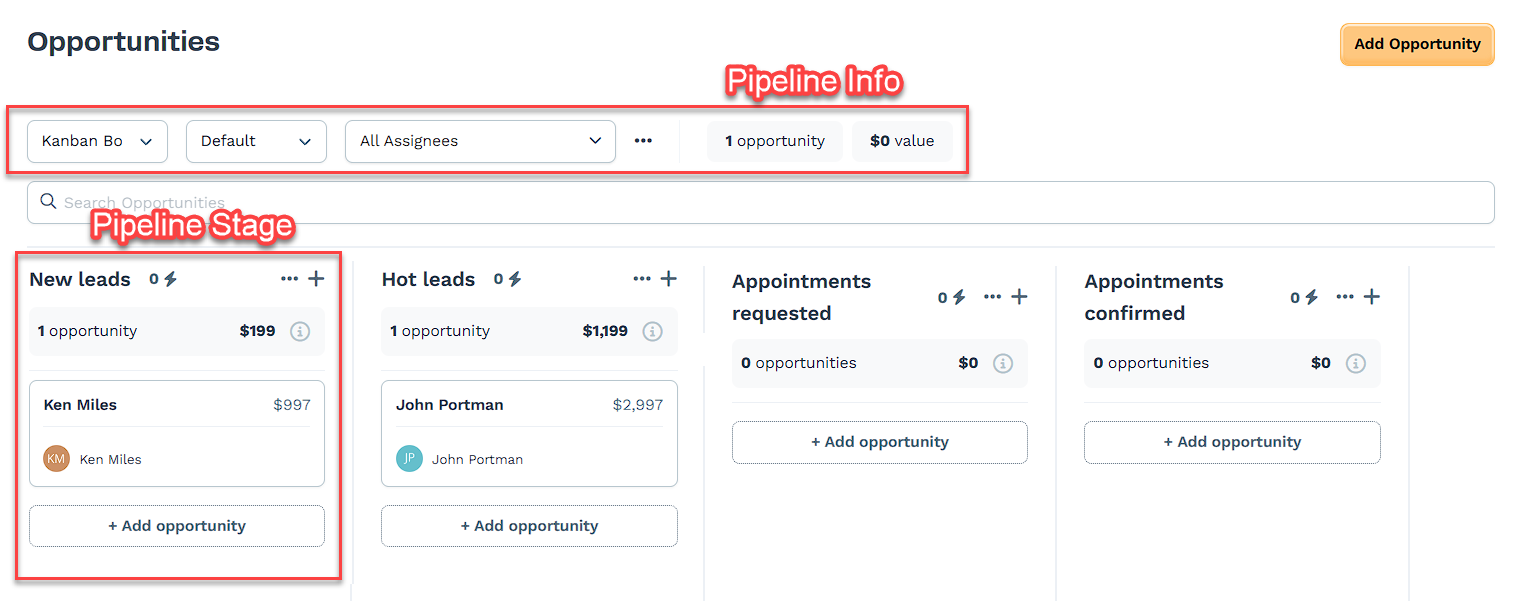
Customers use pipelines to manage things like:
Sales leads collected from landing pages
Coaching or service applications that move through qualification steps
Demo or discovery requests that require follow-up
Client onboarding workflows with specific action steps
Using the CRM tools inside Opportunities helps your team stay organized, avoid bottlenecks, and make sure nothing slips through the cracks.
You can also add Quick Actions to pipeline stages. These allow you to trigger simple automations when someone enters or leaves a stage, such as tagging a contact, assigning it to a teammate, or starting a follow-up task.
How to Add a New Pipeline
Navigate to the Opportunities app from the left-side menu in your ClickFunnels Workspace.
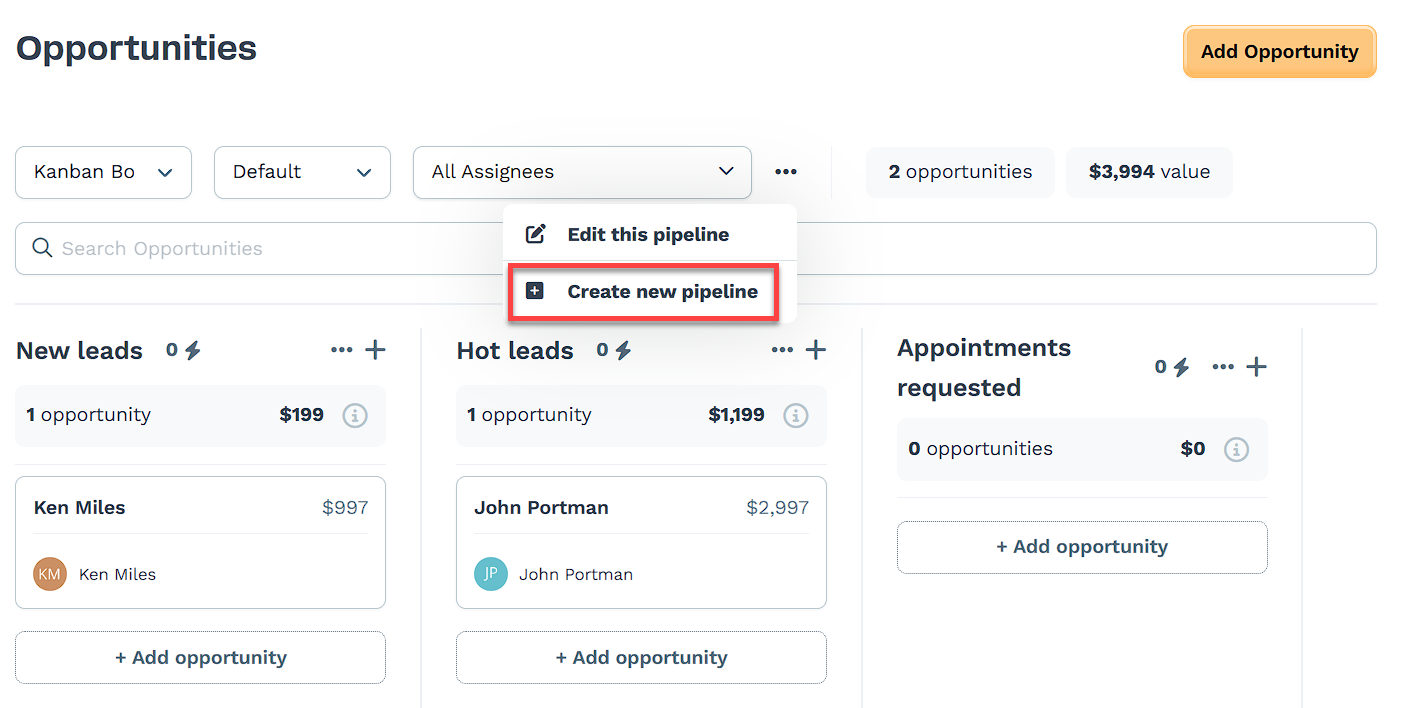
In the Opportunities dashboard, click on the three dots next to the Opportunities information.
Choose Create new pipeline from the drop-down menu.
Enter the details for your new pipeline:
Give your pipeline a Name.
(Optional) Turn on Automatically round-robin assign opportunities? toggle if you want to assign opportunities to multiple team members automatically. Enabling this feature will display an Assignee option where you can select team members to be assigned to this pipeline’s opportunities.
NOTE
The Round Robin feature helps distribute opportunities evenly among your team members, ensuring a balanced workload and faster response times.
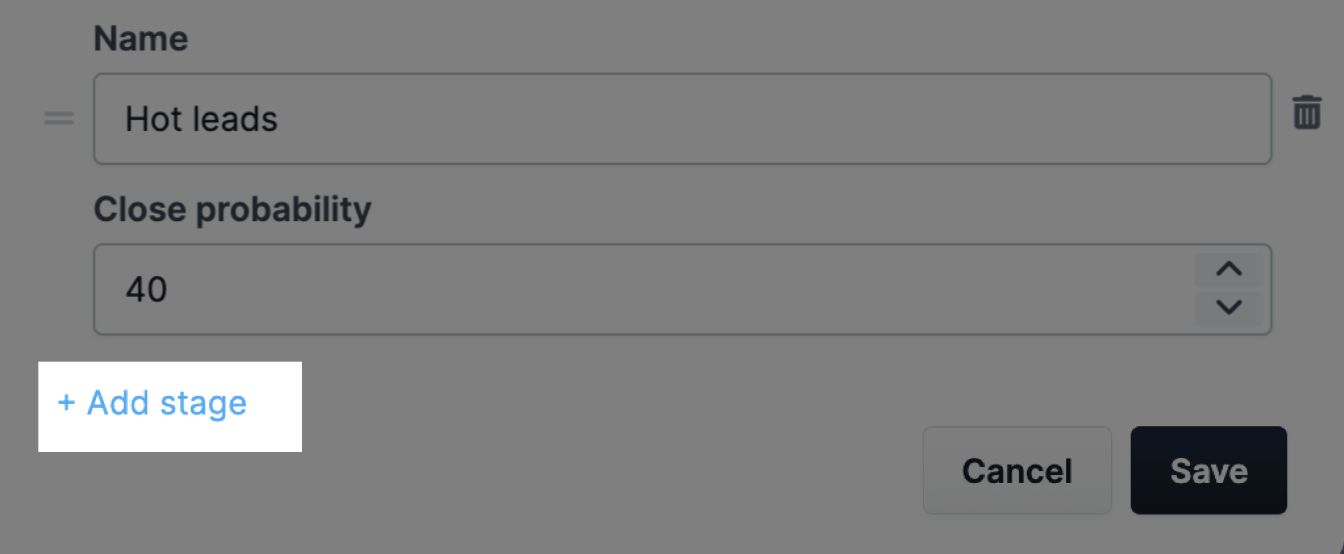
Add a Stage Name and set its Close Probability percentage.
To add more stages, click the Add stage link.
Rearrange the stages by clicking and dragging them to your desired order.
Click Save to create the new pipeline.
How to Edit Pipelines
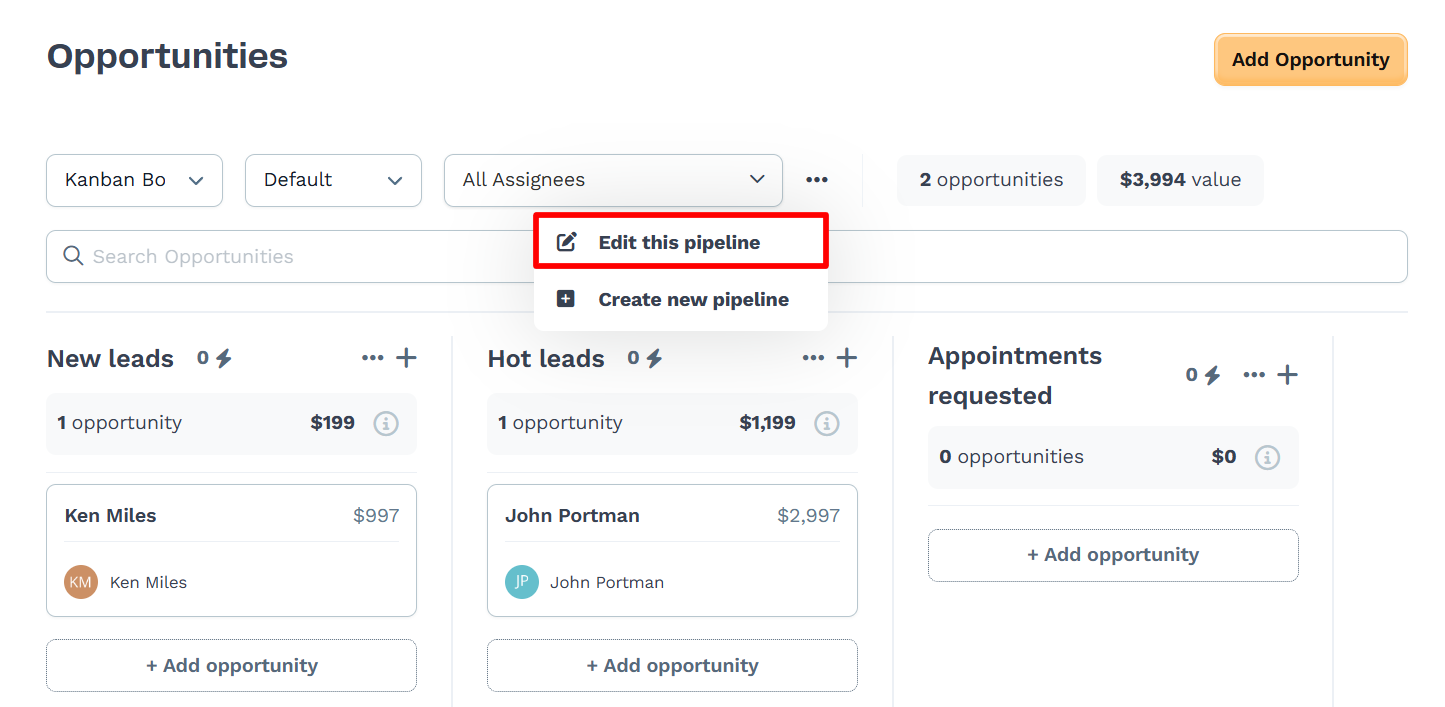
Click on the three dots next to the Opportunities information.
Choose Edit this pipeline from the drop-down menu.
Update the pipeline name if needed.
Add or remove stages, or rename existing ones.
Set a close probability for each stage to help estimate deal progress.
Drag and drop stages to rearrange them in your preferred order.
Click Save to keep your edits.
Managing Pipeline Stages
Each pipeline comes with default stages, but you can customize them to reflect how your team handles leads or opportunities. Editing your stages allows you to map your sales process more accurately, set expectations, and make it easier to track progress from first contact to close.
For example, you might want to rename stages to match your internal terminology, add steps for qualifying leads, or include checkpoints for proposals or follow-ups. You can also assign a close probability to each stage to estimate how likely a deal is to convert as it moves forward.
To manage your stages:
Select the pipeline you want to update.
Click the three dots next to the pipeline name, then choose Edit this pipeline.
In the Stages section:
Click + Add stage to create a new one.
Use the text fields to rename stages or adjust their close probability.
Drag and drop stages to change the order.
Click the trash icon to remove a stage.
Click Save when you're done.
For full details, refer to How to Manage Pipeline Stages.
How to Add Opportunities to a Pipeline
On the Opportunities dashboard, click the Add Opportunity button located at the top left.
Enter the Name of your new opportunity.
Choose the Pipeline where this opportunity belongs.
Select the appropriate Pipeline Stage for this opportunity.
Choose the Primary Contact to select or create the Contact associated with this opportunity.
Assign the opportunity to a specific team member by selecting the Assignee. Assignees must have a supported role in the workspace. Opportunities can be assigned to users with the Funnel Builder, Admin, or Marketing roles. Other roles are excluded unless their access level is updated. For more details on roles and how to update access, refer to How to Add Team Members.
IMPORTANT
Manually selecting an assignee will override the round-robin assignment, if applicable, for this specific opportunity, but it will not affect the round-robin assignment for future opportunities.
Enter the Value of the opportunity, indicating its worth.
Set the Close Date for when you expect to finalize this opportunity.
Finally, click Create Opportunity to add it to your pipeline.
Automating Stages with Quick Actions
Quick Actions let you automate simple tasks when leads enter or leave a specific stage in your pipeline. This can help your team follow up faster, stay organized, and reduce manual work as opportunities move through the funnel.
For example, you can use Quick Actions to automatically send an email, notify a team member, or trigger another workflow when a lead reaches a certain stage. You choose what happens and when, so your system stays in sync with how you work.
To set up a Quick Action:
Open the Opportunities app and choose your pipeline.
Find the stage where you want to add automation.
Click the lightning bolt icon next to the stage name.
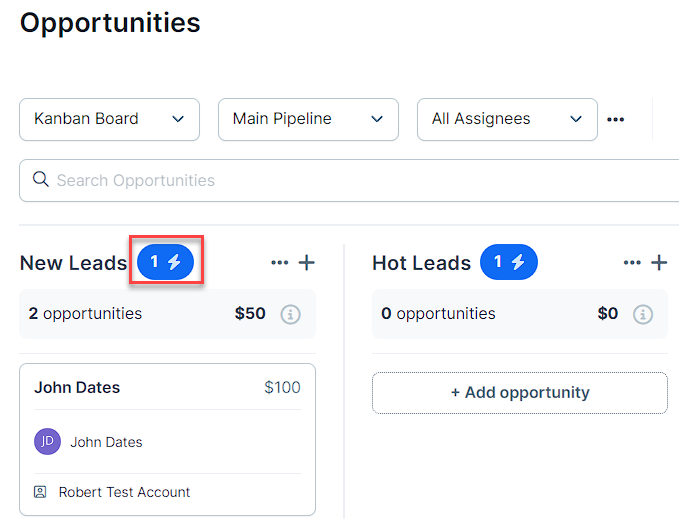
Select Add Quick Action.
Choose when the action should trigger: enters or exits the stage.
Pick what the action will do, such as tagging a contact or notifying a teammate.
Use the toggle to turn the action on.
You can add more than one action per stage if needed, and you can remove or change them anytime.
For step-by-step instructions and more details, see How to Add Quick Actions to Pipeline Stages.
Sharing a Pipeline
Pipelines can be shared so other users can copy the setup and use it in their own funnels and pages. This is useful for workspaces that follow repeatable processes or want to distribute consistent pipeline structures across teams or clients.
Sharing is only available through the Frameworks feature. Pipeline sharing settings become available after the pipeline is saved; they aren’t accessible during the initial creation step.
To adjust the sharing settings:
Click the three dots next to the pipeline name.
Select Edit this pipeline, then click Share settings.
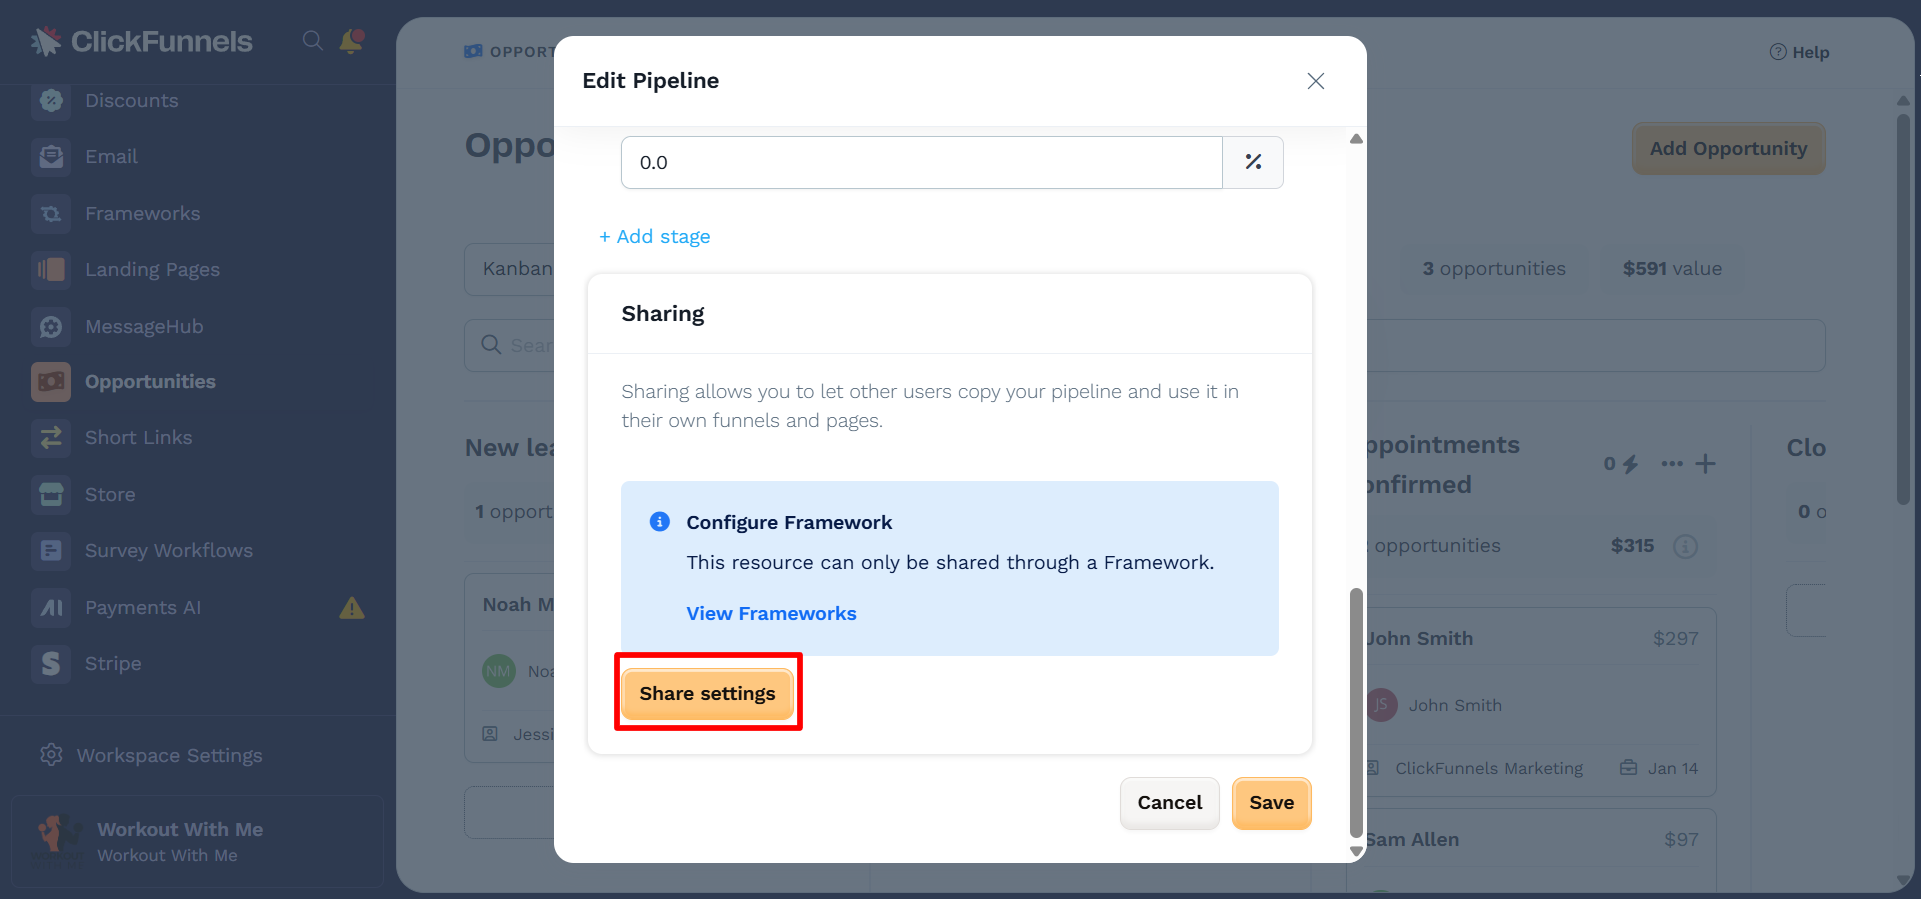
Enter a public name for the pipeline.
Choose a Reshare Setting:
Reshareable allows others to reshare the pipeline after claiming it.
Restricted prevents additional resharing once it's claimed.
Save the changes to apply the settings.
For more details, see How to Create and Manage Frameworks in ClickFunnels.