The Opportunities app is a built-in CRM that helps you track and manage sales leads inside your ClickFunnels account. It gives you a visual way to organize contacts using pipelines and stages so you can follow up more effectively and close more deals. This article introduces the main features of the Opportunities app and how to start using it in your business.
Requirements
An active ClickFunnels account
What is the Opportunities app?
The Opportunities app is a built-in CRM tool that helps you track leads as they move through your sales process. It works through visual pipelines made up of custom stages, where each opportunity represents a person or deal you're managing. You can create opportunities manually or through automated workflows and assign them to team members for follow-up. Each opportunity stores important information like contact details, deal value, close date, and notes.
This feature is designed for sales teams, coaches, course creators, service providers, and ecommerce businesses. It gives you an organized way to manage leads from first contact to closing the deal. You’ll save time with automation, improve team collaboration, and gain insights to make better decisions.
Here are a few ways it can be used in the fitness space:
Coaching: A lead opts in for a free consultation → moves to "Consult Scheduled" after booking → then to "Signed Up" if they enroll in a coaching program.
Digital products: A contact downloads a free workout guide → progresses to "Purchased Challenge" after buying a 30-day program → moves to "Upsell Offer Sent" if you pitch a higher-tier course.
Physical products: A customer adds supplements to their cart → enters "Abandoned Cart" if they don't buy → moves to "Purchased" after completing checkout → later added to "Follow-Up for Subscription" stage.
Using Opportunities helps you work faster with automation, collaborate better with team-based assignments, and gain visibility into your sales progress. You’ll be able to identify what’s working, spot bottlenecks, and take action at the right time.
Adding the Opportunities app
Before using the Opportunities CRM, you'll need to add the app and create your first opportunity.
From your ClickFunnels dashboard, click the Add Apps button under the Apps section.
Find the Opportunities app card and click Add App.
A setup window will open. Fill out the required fields to create your first opportunity:
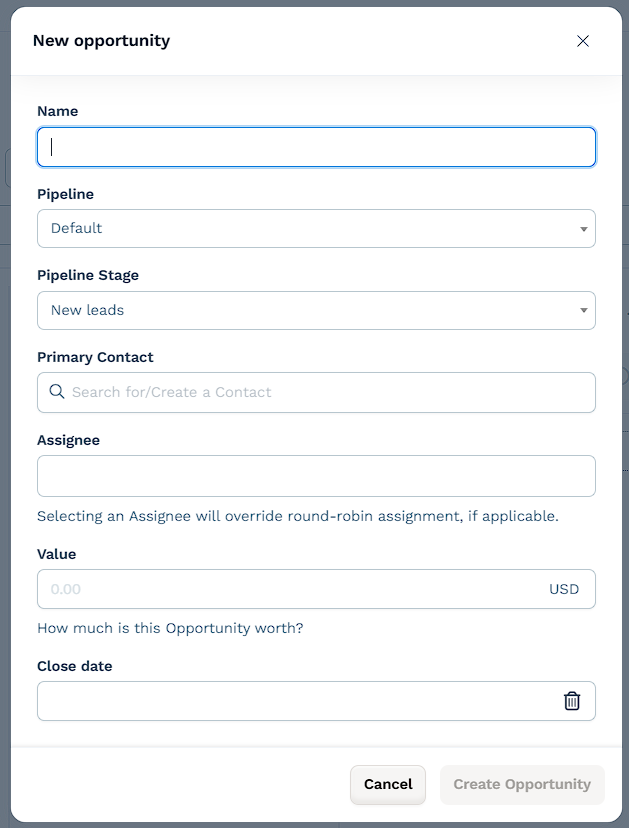
Name: Enter a label for the opportunity (usually the lead's name or deal name).
Pipeline: The first opportunity will be added to the Default pipeline. You can create more pipelines later.
Pipeline stage: Select the current stage for this lead (such as "New leads").
Primary contact: Search for or create the contact linked to this opportunity.
Assignee (optional): Choose a team member to handle this opportunity. This overrides round-robin assignment if enabled. Assignees must have a supported role in the workspace. Opportunities can be assigned to users with the Funnel Builder, Admin, or Marketing roles. Other roles are excluded unless their access level is updated. For more details on roles and how to update access, refer to How to Add Team Members or Subusers for Collaboration.
Value (optional): Add a deal value to track potential revenue.
Close date (optional): Pick a target date to close the deal.
Click Create Opportunity.
After saving, the Opportunities app will be added to your workspace and appear in the sidebar. You’ll land inside the app, where you can see your new opportunity in the pipeline and start managing leads from there.
Core Components of the Opportunities App
The Opportunities app is built around a visual CRM that helps you track sales activity at a glance. Here’s a quick overview of the main parts you’ll work with inside the app: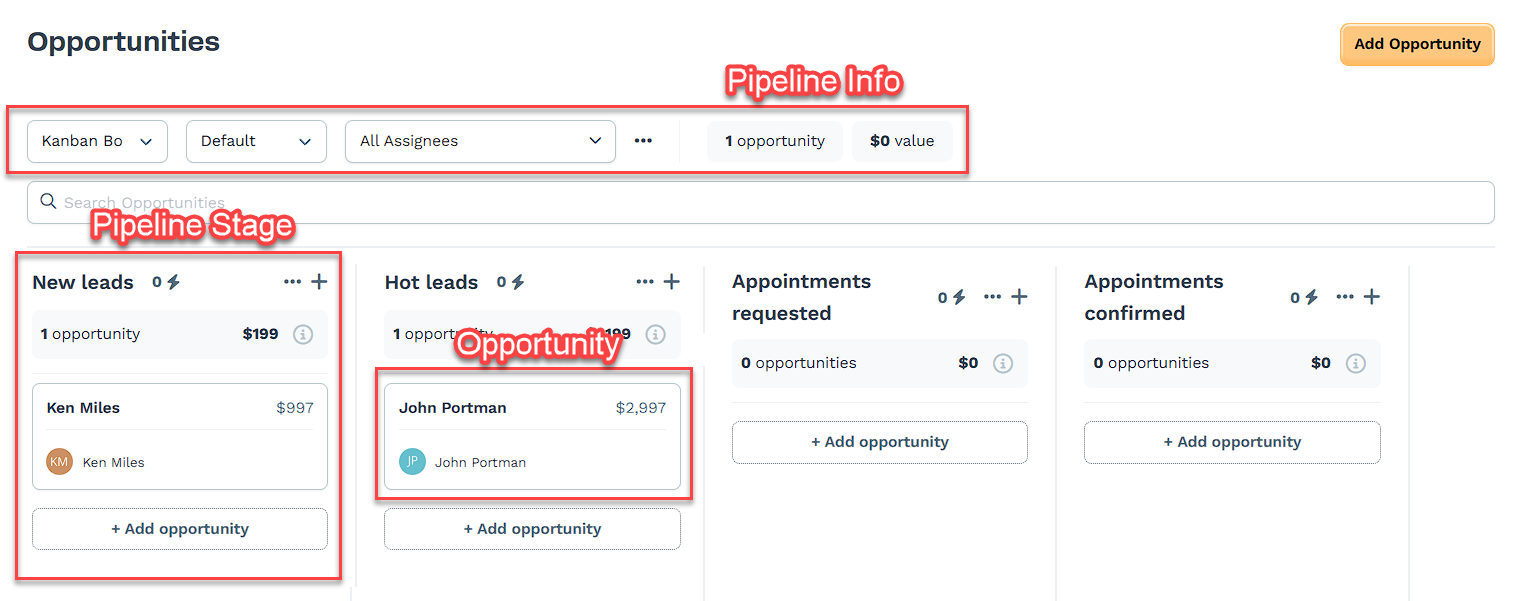
Pipelines: A pipeline is the overall board that holds your stages. While only one pipeline is shown at a time, you can switch or create new ones using the dropdown menu at the top of the page. This is useful if you manage different offers, teams, or lead types.
Stages: Stages are the columns you see in the dashboard, such as New leads, Hot leads, and Appointments requested. They help you track where each lead stands in your process. You can drag opportunities from one stage to another as things progress.
Opportunities: Each opportunity represents a lead or contact you're managing. These appear as cards inside the pipeline stages. You can click an opportunity to view or edit its details, assign it to a team member, or add notes.
Opportunity View Options
The Opportunities app supports two ways to view and interact with opportunity records:
Kanban Board: Displays opportunities in columns by pipeline stage (e.g., New leads, Appointments confirmed, Closed). This view is ideal for visually tracking progress and moving opportunities between stages using drag-and-drop.
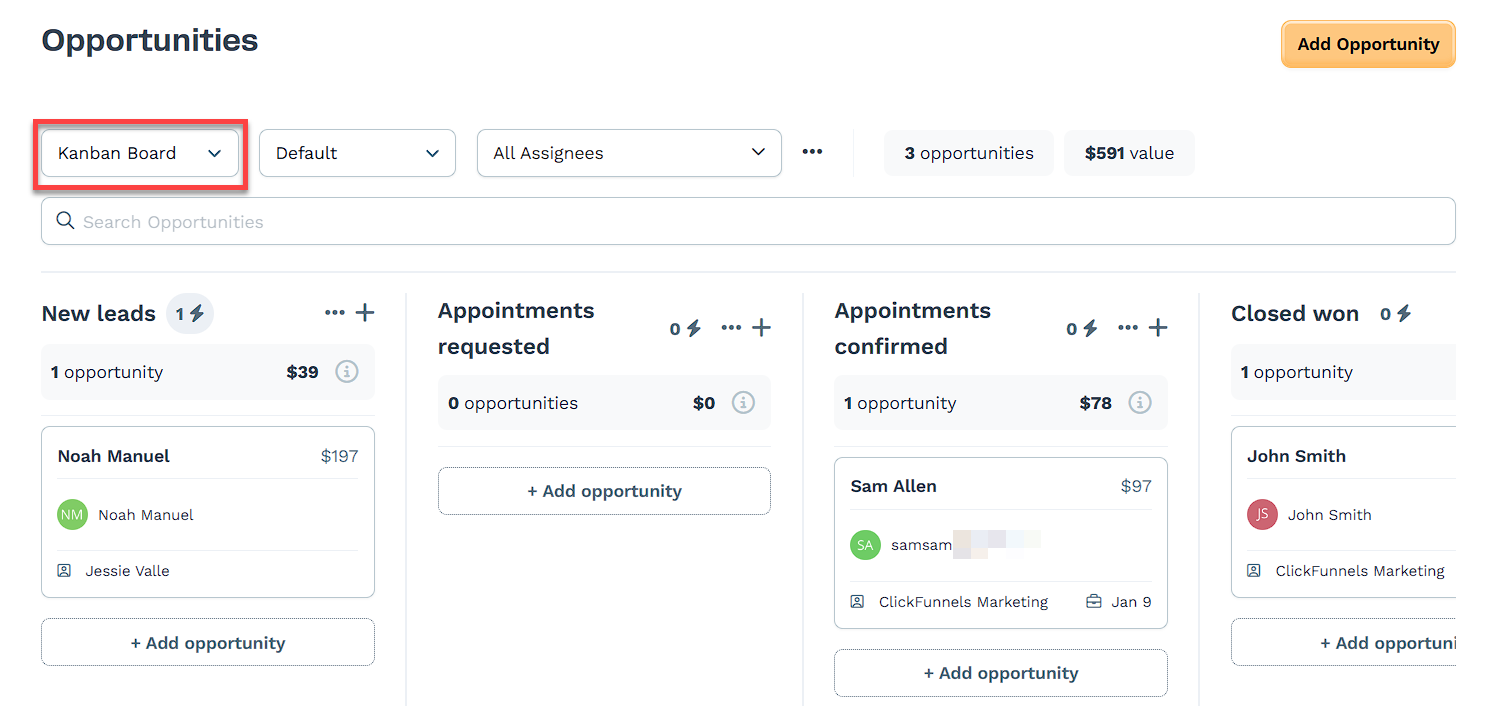
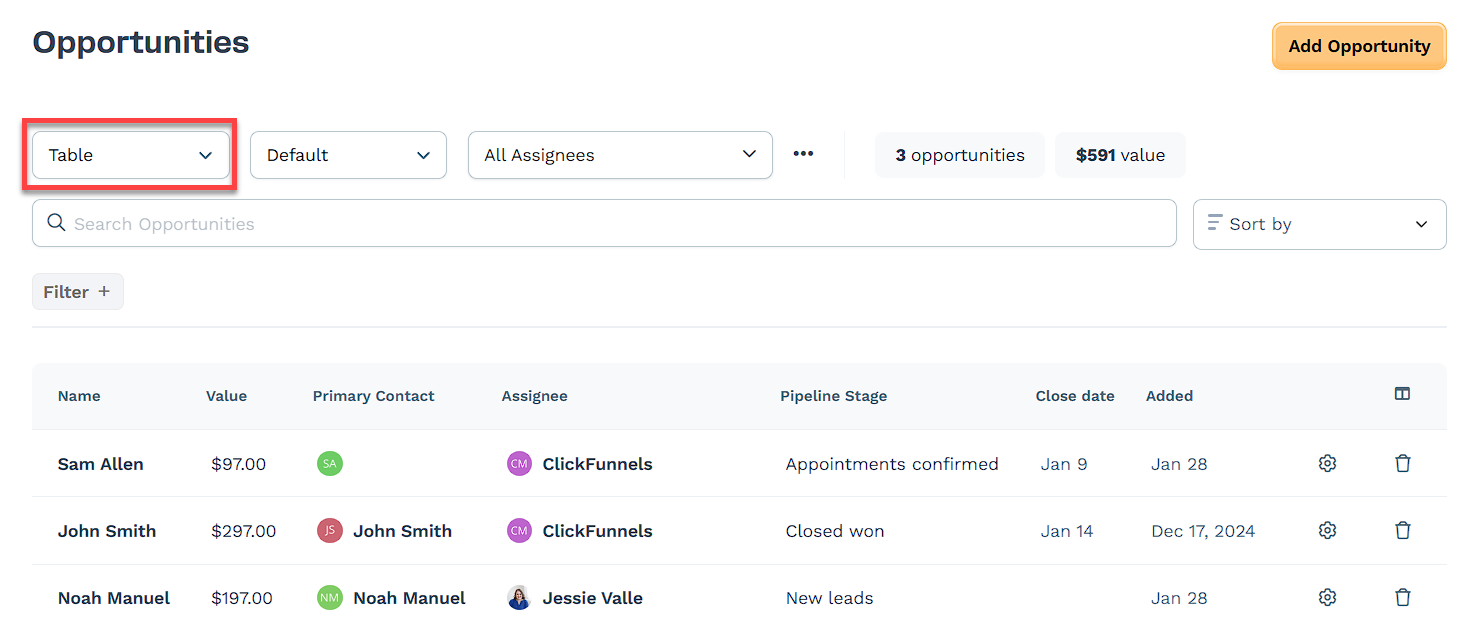
Table: Displays opportunities in a sortable list with columns like Name, Value, Contact, Assignee, and Close Date. This view is useful for comparing records and working with larger sets of data.
When using the Table view:
Use the Sort by dropdown to sort records by key fields like Name, Value, or Close Date.
Click Filter + to add conditions such as specific assignees, stages, or custom criteria.
Both views include a Search Opportunities bar at the top, allowing you to quickly locate records by name or keyword.
To switch views, click the dropdown in the upper-left and select either Kanban Board or Table.
Creating and Managing Opportunities
After adding the app, your first opportunity is placed in the default pipeline. Opportunities represent your leads and can be updated, moved, or reassigned as they progress through your sales process.
You can create and manage opportunities manually inside the dashboard. To add a new opportunity:
Click Add Opportunity at the top right.

Fill out the details:
Name: Label the opportunity.
Pipeline and Pipeline stage: Choose where the opportunity should be placed.
Primary contact: Link or create the associated contact.
Assignee (optional): Choose a team member to handle the lead.
Value and Close date (optional): Add deal information.
Click Create Opportunity.
Managing existing opportunities
Once opportunities are in your pipeline, you can interact with them in several ways:
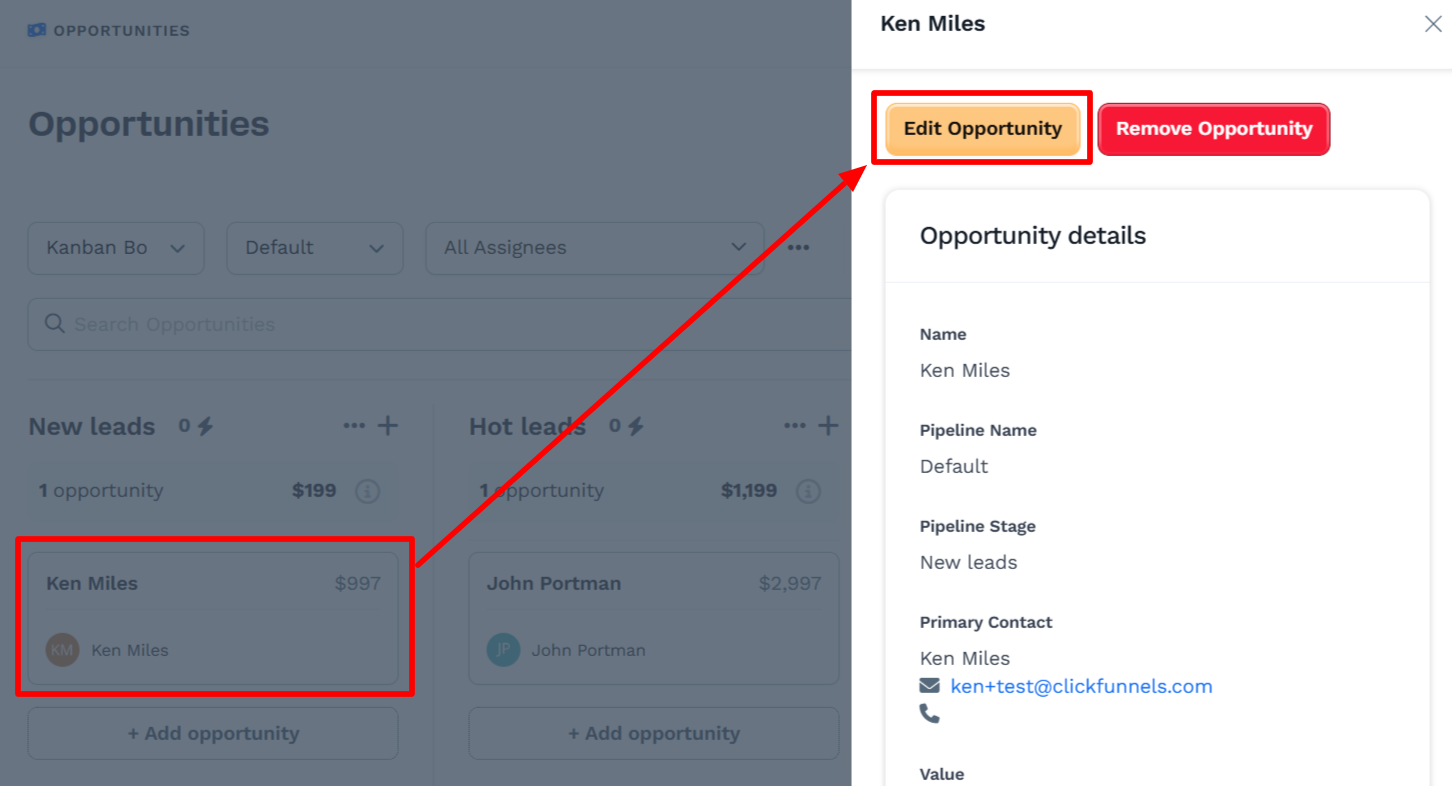
Edit Opportunity: Click the opportunity card to update the name, value, close date, contact, or assigned team member.
Add notes: Use the notes section to log conversations, updates, or reminders. Notes can be added, edited, or removed as needed.
Move between stages: Drag and drop opportunities from one stage to another as leads move forward.
Search and filter: Use the search bar or dropdown filters to find opportunities by contact name, pipeline, or assignee.
Delete if needed: Open the opportunity and click Remove Opportunity to permanently remove it from your pipeline.
To learn more about creating and managing opportunities, refer to the How to Create and Manage Opportunities article.
Working with Pipelines in the Opportunities App
Each opportunity you create is placed inside a pipeline—a visual board that holds the stages of your sales process. Pipelines help you stay organized by grouping opportunities based on where they are in your workflow.
By default, your workspace starts with one pipeline. You can update it or create new pipelines to fit different products, services, or teams.
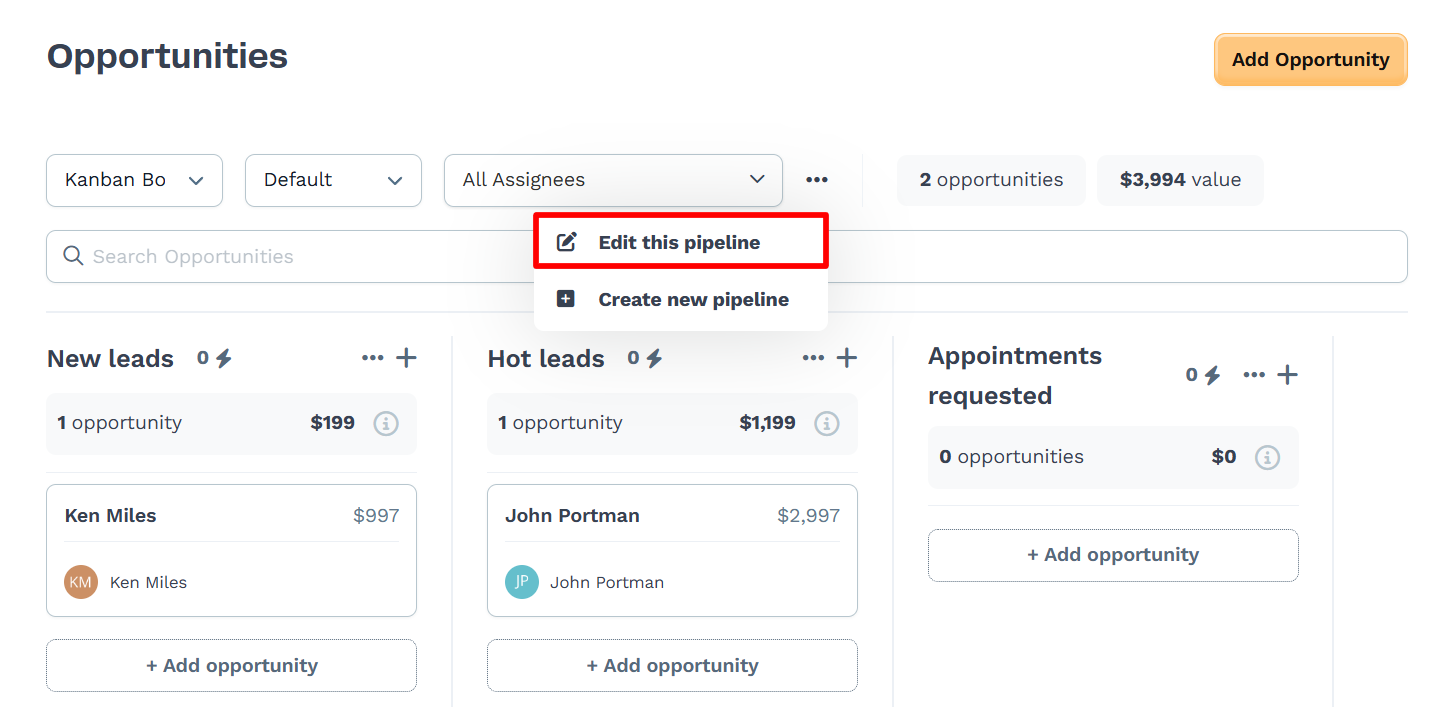
To edit your pipeline:
Click the three dots to the right of the assignee dropdown.
Select Edit this pipeline.
Update the pipeline name if needed.
Add or remove stages, or rename existing ones.
Set a close probability for each stage to help estimate deal progress.
Drag and drop stages to rearrange them in your preferred order.
Click Save to apply your changes.
To create a new pipeline:
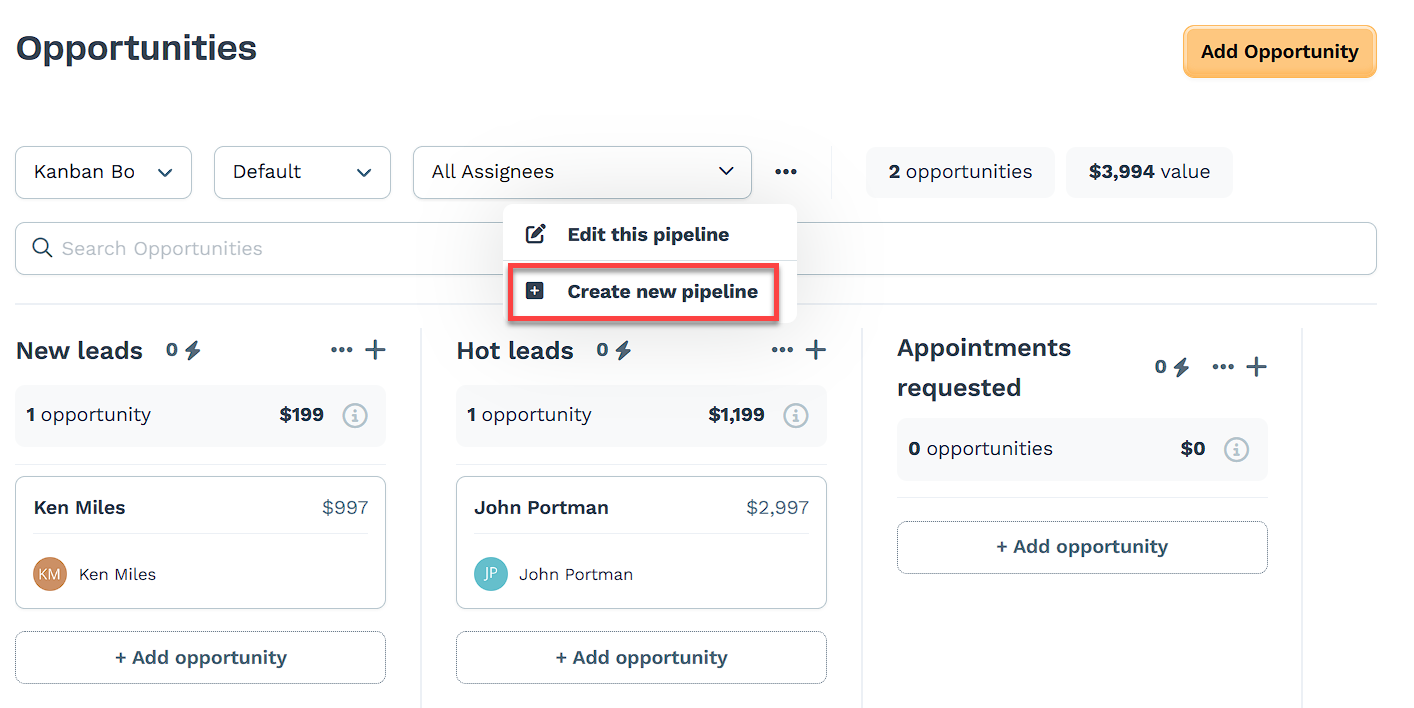
Click the three dots next to the pipeline dropdown.
Choose Create new pipeline.
Enter a name for your new pipeline.
(Optional) Turn on round-robin assignment to evenly distribute opportunities across your team.
Add the stages you want to use and set close probabilities.
Click Save to finish.
Use the dropdown at the top of the Opportunities dashboard to switch between pipelines at any time.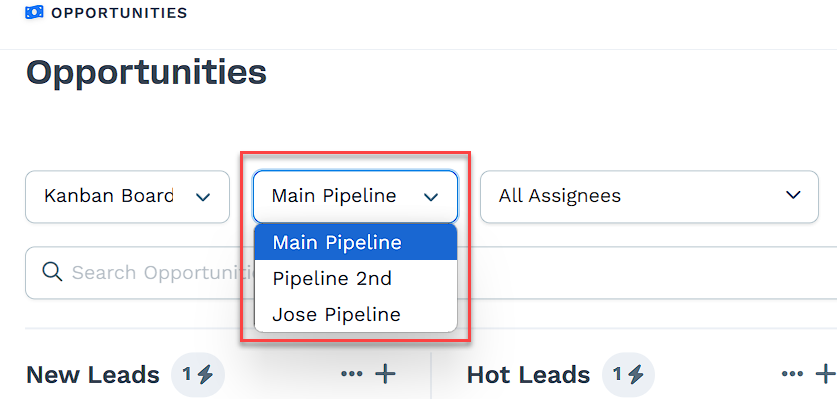
For more detail on pipelines and stages, refer to the How to Create and Manage Pipelines article.
Using Workflows to Automate Opportunities
Instead of manually adding every lead to your pipeline, you can use workflows to automatically create or move opportunities based on specific actions your contacts take, like opting into a funnel, scheduling a call, or purchasing a product.
This is helpful when you want to track leads at scale without having to enter them one by one.
To automate opportunity creation:
Open your Workflows app from the left-hand menu.
Open an existing workflow or create a new one.
Click the + icon to add a new step.
In the right panel, choose Create / Move Opportunity from the Internal category.

You’ll then set up the automation by selecting:
Pipeline: Where the opportunity should be placed
Stage: The step you want the lead to start at
Assignment: Who will handle the opportunity (a specific person, round robin, or leave unassigned)
Name and value: What to call the opportunity and how much it's worth
Move existing (optional): If enabled, updates the current opportunity for a contact instead of creating a new one
When the workflow runs, the opportunity is created or moved instantly based on your settings. You can view and manage these opportunities in the Opportunities dashboard just like manually created ones.
For a full walkthrough of automating the management of opportunities within your sales pipelines, refer to the Workflows "Create / Move Opportunity" Step - Manage Opportunities in Pipelines article.
Using Quick Actions in Pipeline Stages
Quick actions let you automate what happens when an opportunity enters or exits a specific stage. You can use them to send follow-ups, notify team members, or trigger other tools, all without building a full workflow.
To set up a quick action:
In the Opportunities app, select the pipeline you want to work with.
Find the stage where you want the automation.
Click the lightning bolt icon (⚡) next to the stage name.
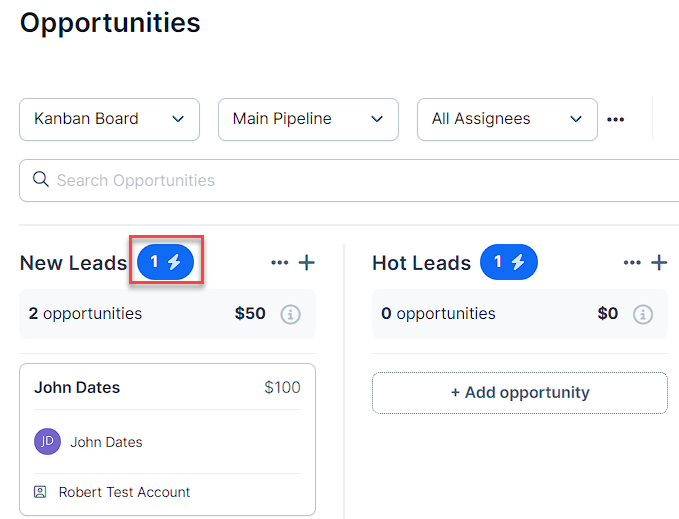
Choose the trigger and effect you want.
Use the toggle to activate the automation.
Click Add Quick Action.
Quick actions run automatically whenever the selected condition is met. You can test them by moving opportunities in or out of the stage.
To remove a quick action, click the three dots next to the action and select Delete from the menu.
For more information about Quick action, check our How to Add Quick Actions to Pipeline Stages article.
FAQs
Can I create multiple pipelines?
Yes, you can create as many as you need to match different workflows or teams.
What happens if I delete a stage that has opportunities?
If you try to delete a stage that still has opportunities in it, you’ll be asked to move those opportunities to another stage first. If you don’t select a stage, those opportunities will be permanently deleted when you confirm the action. This operation cannot be undone.
Can I move an opportunity to a different pipeline?
Yes. Open the opportunity and click Edit Opportunity. Then click the Pipeline dropdown, and select a different pipeline. After selecting the new pipeline, click Update Opportunity to save the change.
What’s the difference between a stage and a pipeline?
A pipeline is the full board that holds your opportunities. Stages are the columns within that pipeline that represent steps in your sales process (e.g. New leads, Appointments requested).
What happens to round-robin if I manually assign a team member to an opportunity?
If you manually assign someone to an opportunity, it overrides the round-robin assignment for that opportunity only. If activated, round-robin will still apply to future opportunities unless they’re also manually assigned.
Why can’t I assign an opportunity to a specific team member?
Only users with supported roles appear in the assignee dropdown. Opportunities can be assigned to team members with the Funnel Builder, Admin, or Marketing roles. Roles like Reader, Customer Support, Payments, Community Manager, and Affiliate Manager are not eligible for assignment unless their access level is changed.
To update a team member's role, see How to Add Team Members.
Do opportunities support multiple contacts?
No. Each opportunity is linked to a single primary contact. If you’re tracking communication with more than one person, you’ll need to choose one contact to associate with the opportunity. You can still add relevant context in the Notes section to reference other individuals involved.