Conversion Boosters highlight real-time user activity, like sign-ups and purchases, to build trust and encourage action. Seeing others engage creates urgency and confidence, which can lead to more conversions. This article covers how to access, set up, and customize Conversion Boosters for your business.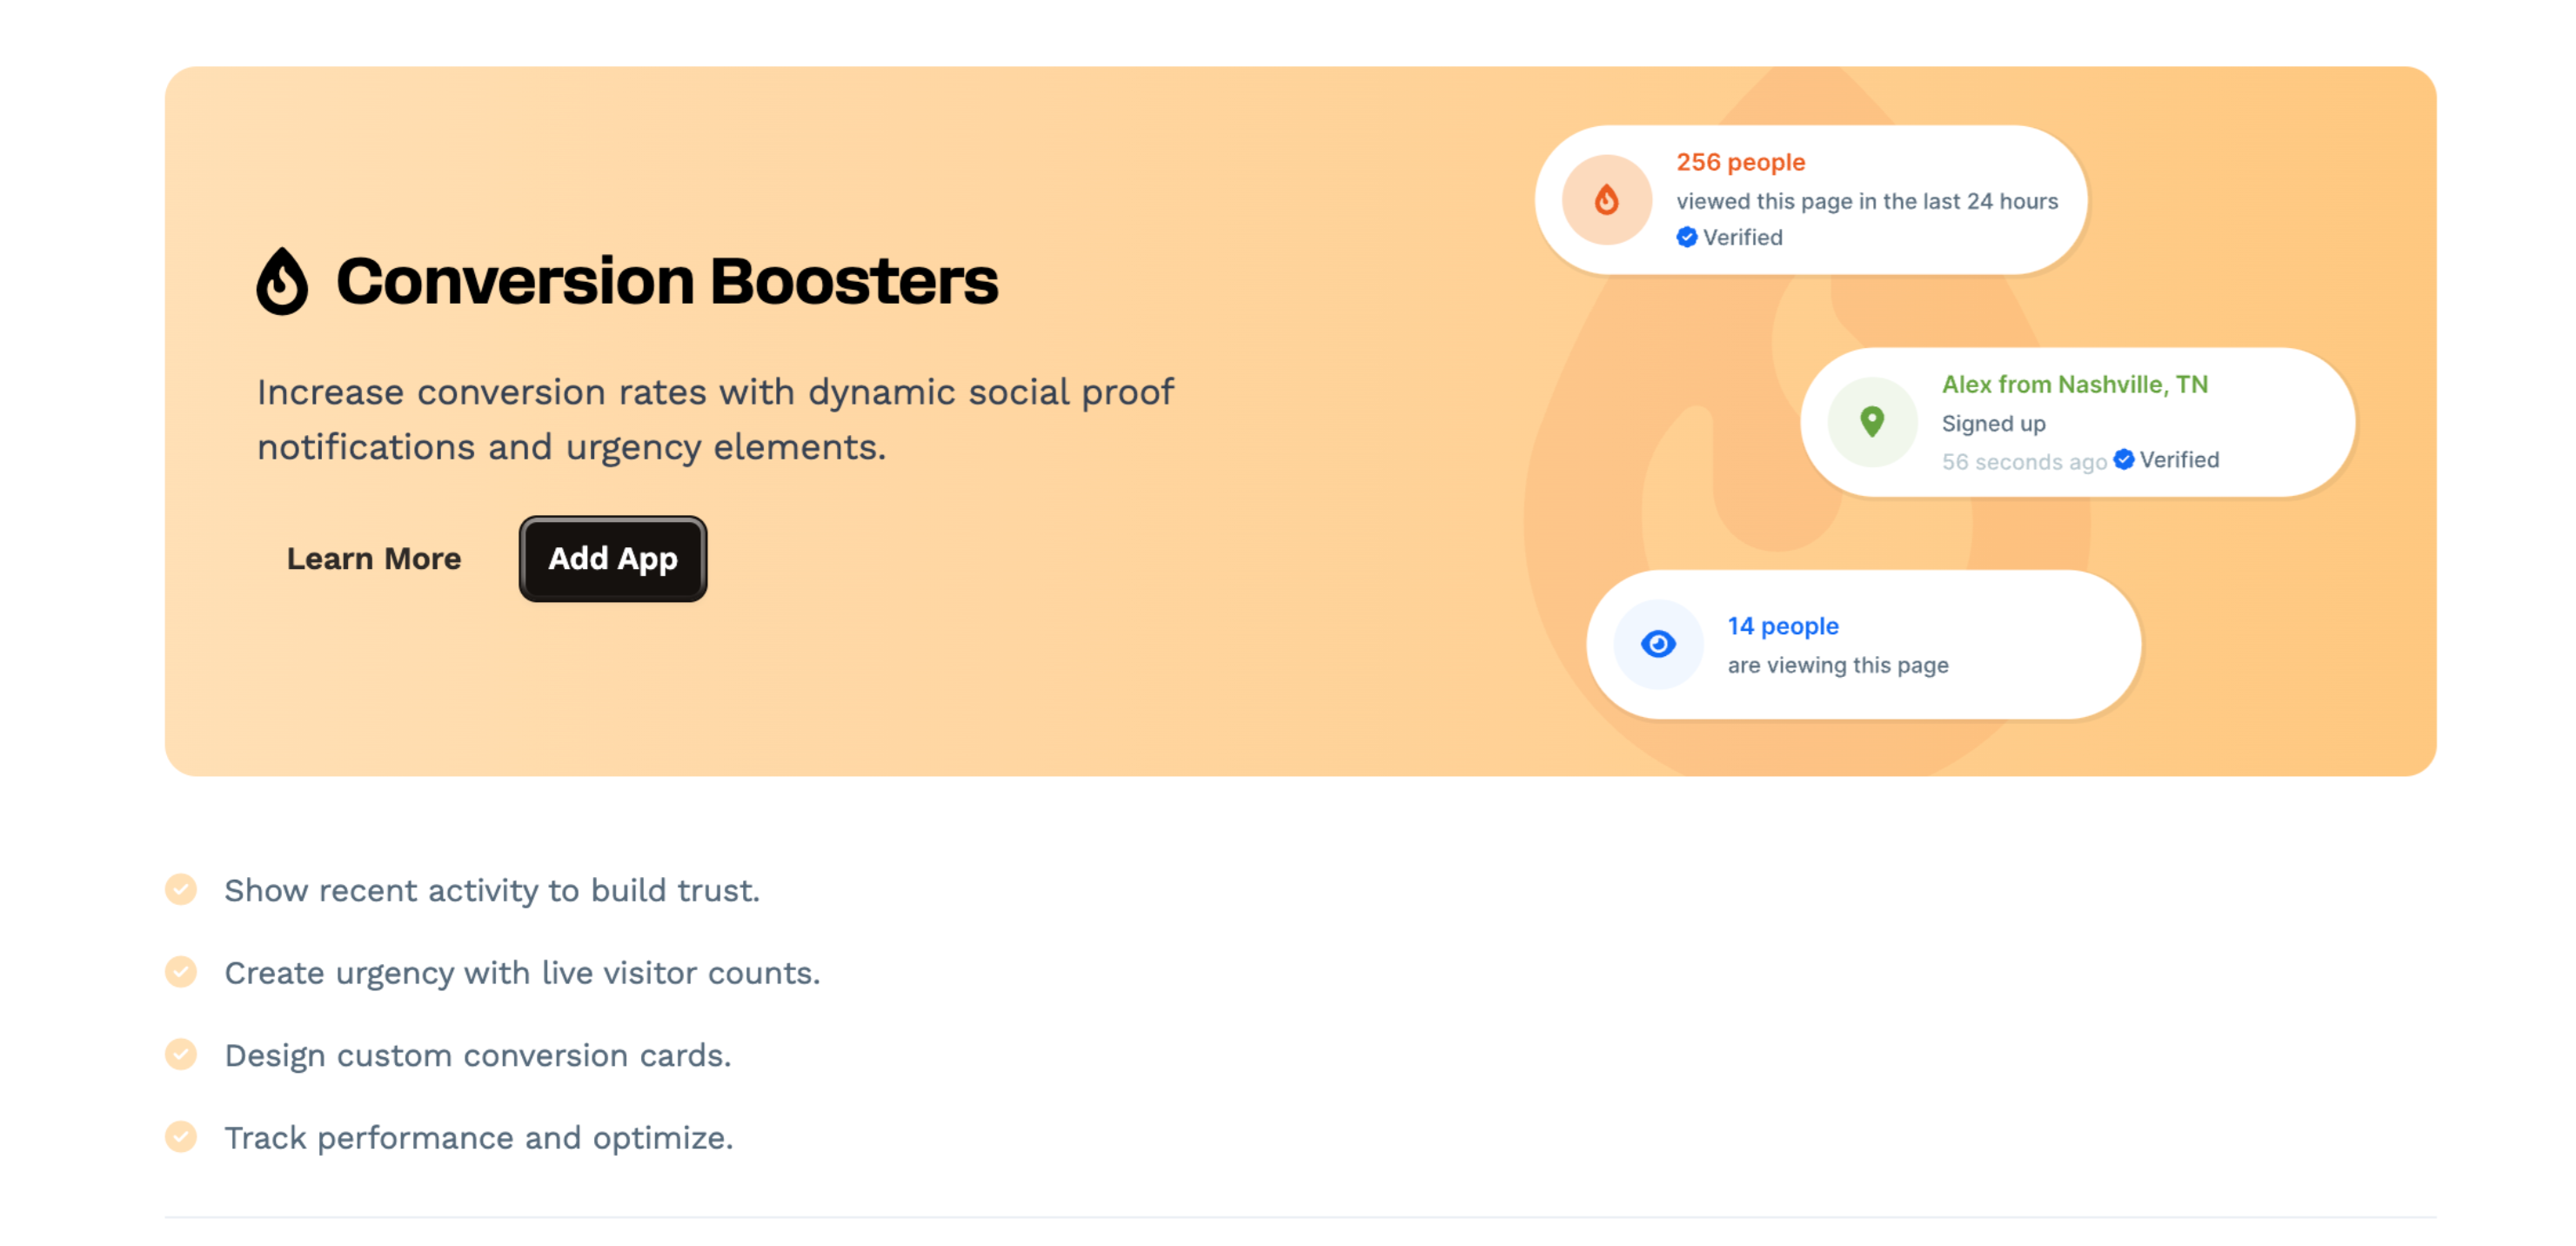
Requirements
ClickFunnels Scale, Optimize or Dominate plan
Understanding Conversion Boosters
Conversion Boosters help businesses show real-time activity on their pages. When someone signs up, makes a purchase, or takes another key action, a small notification appears. This makes the page feel active and encourages visitors to do the same. By default, Conversion Boosters display only the user’s first name and last initial to protect privacy.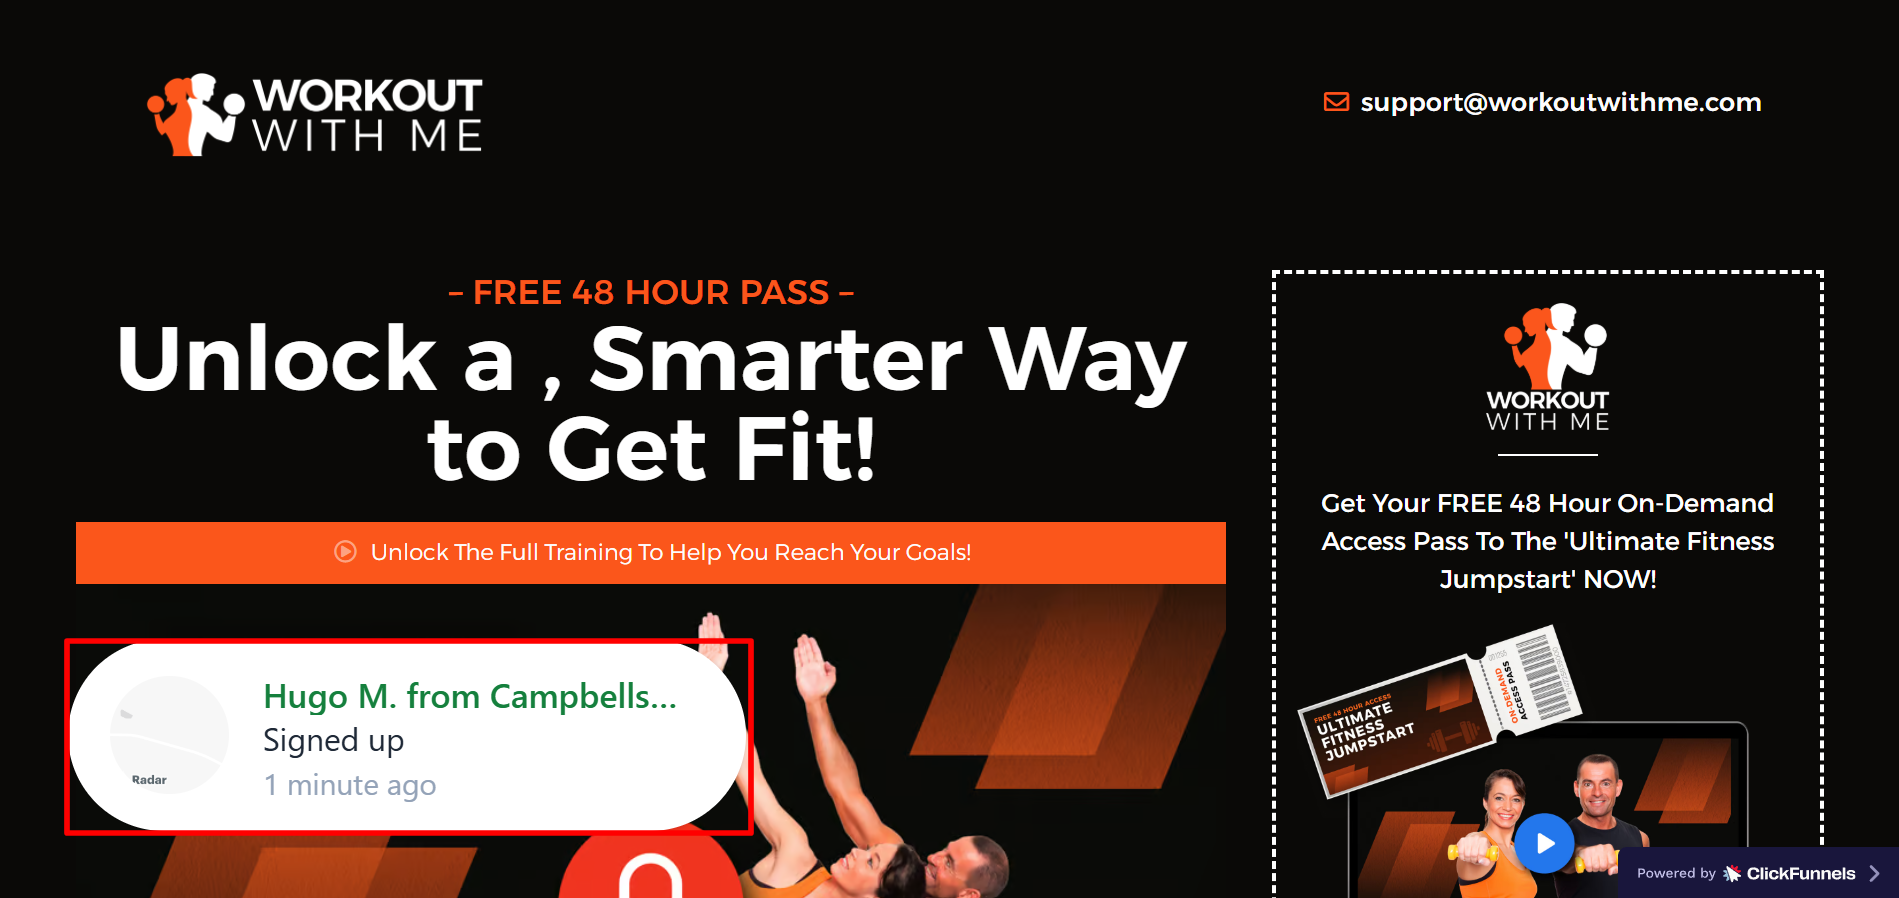
Businesses can use these notifications to:
Build trust by showing real people engaging with their product
Create urgency by highlighting recent sign-ups or purchases
Increase conversions by making visitors feel part of the action
Adding the Conversion Boosters App
Steps to Add the App:
Conversion Boosters is available as an app in ClickFunnels. To start using it, you need to add it to your account.
From the left sidebar menu, click on + Add Apps to navigate to the Apps page.
Navigate to the Conversion Boosters app card, then click on it.
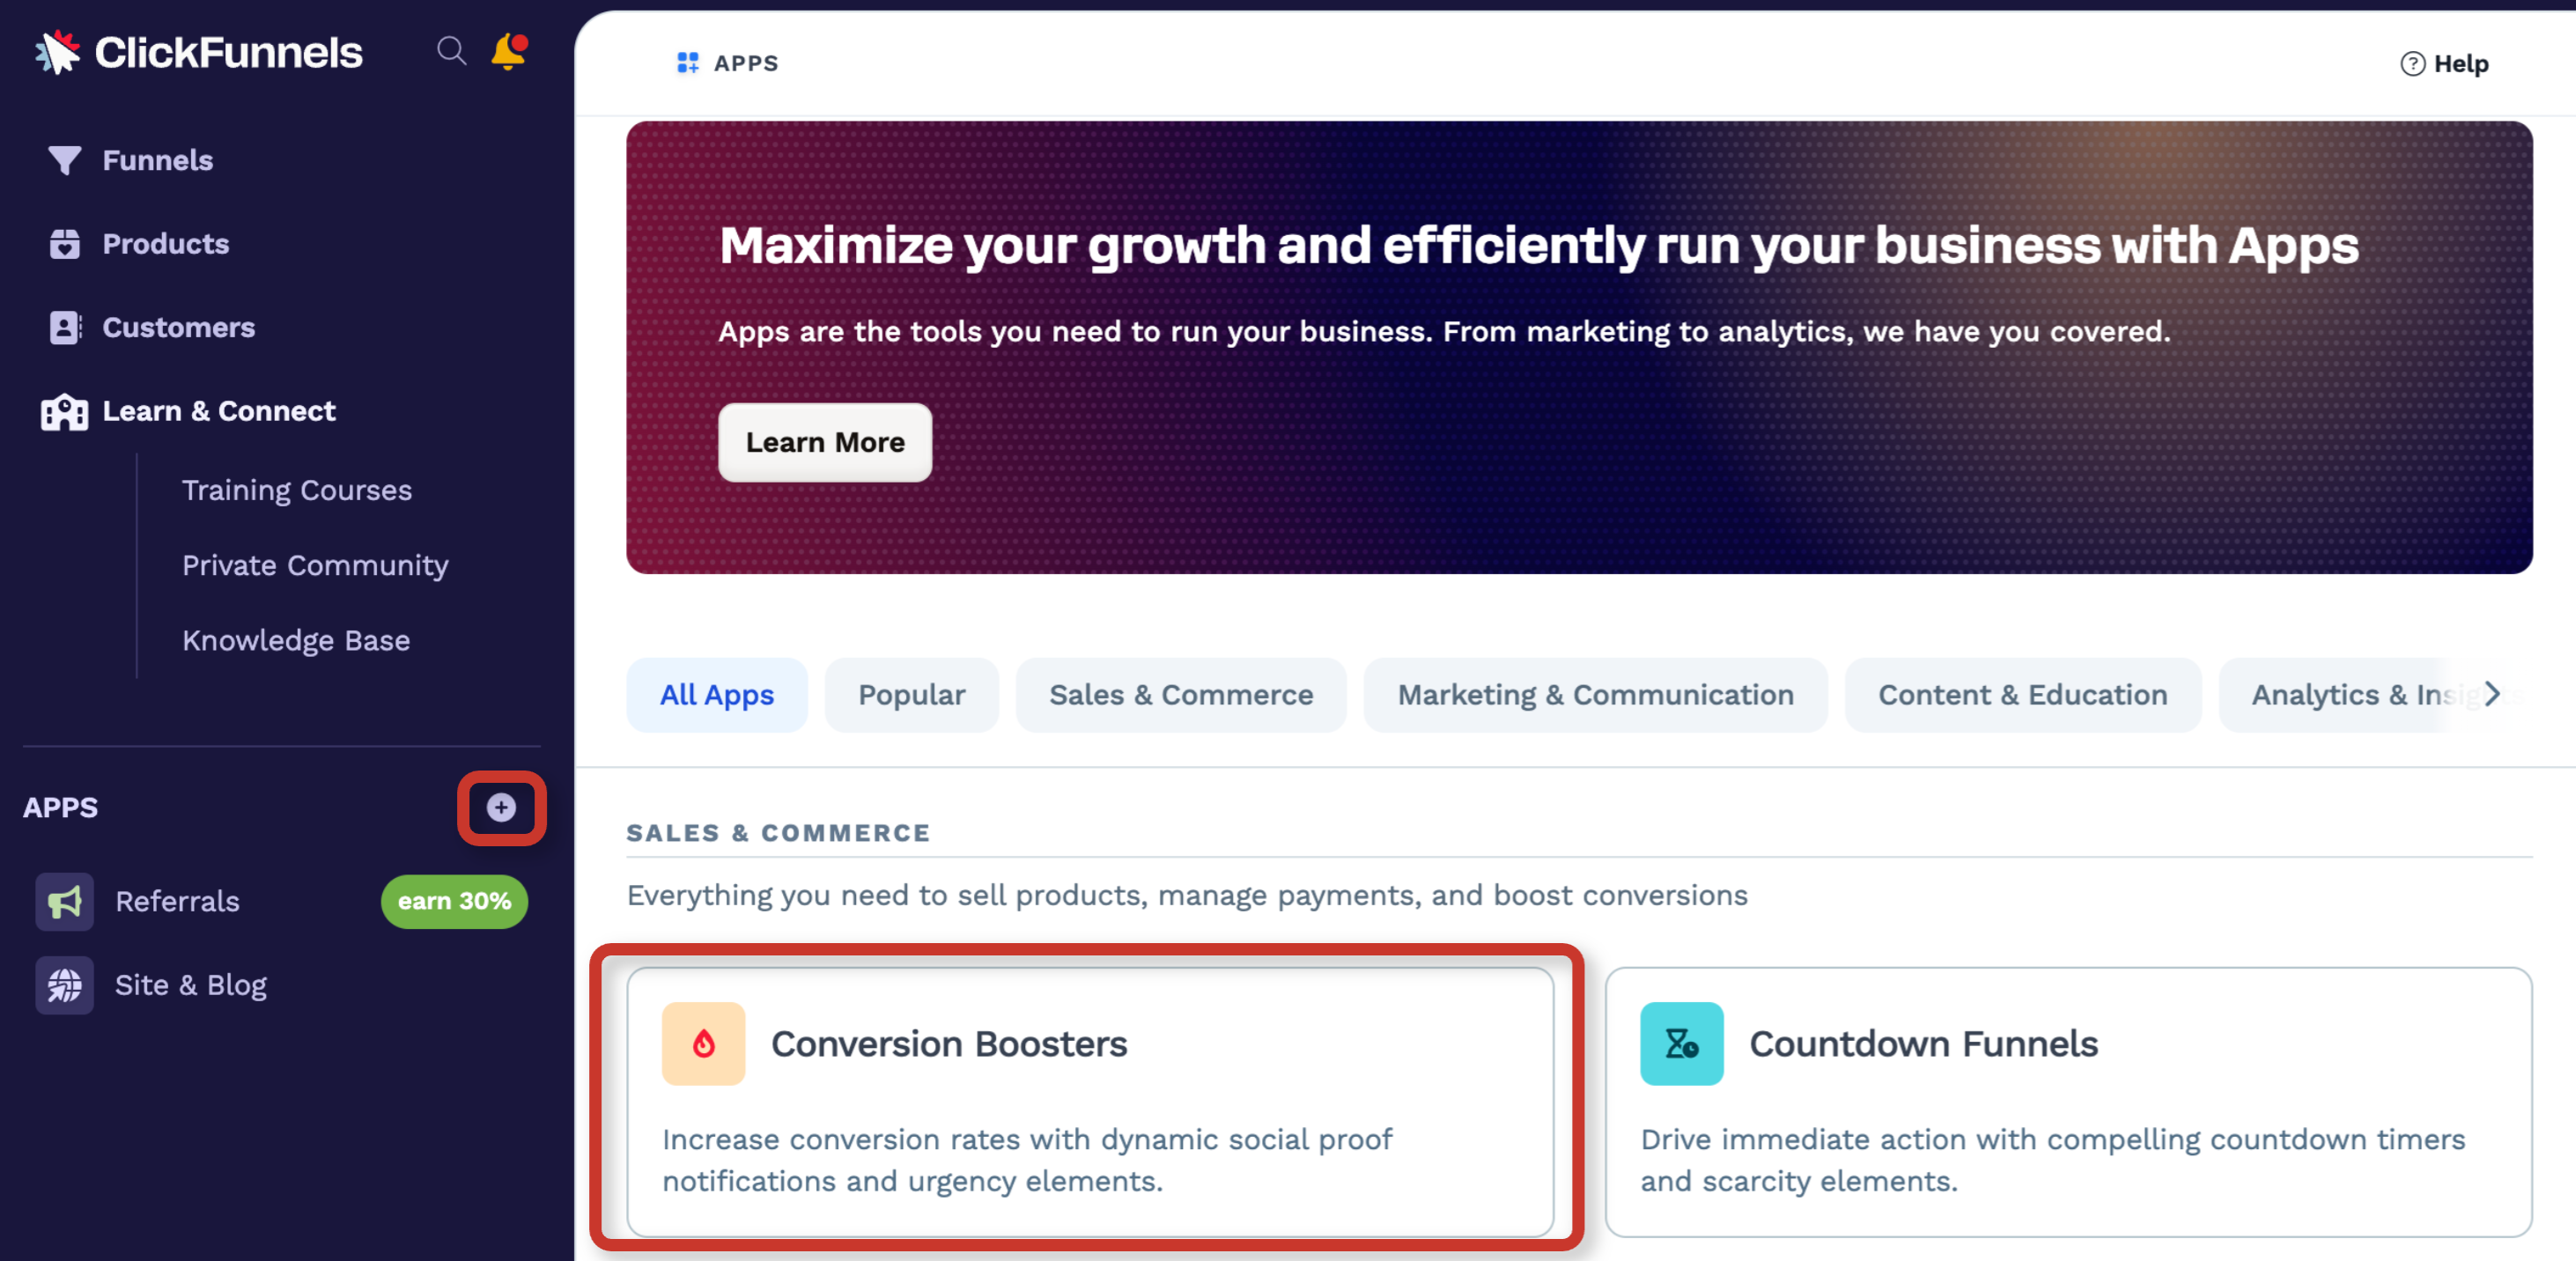
Click Add App. Once added, the app will be ready to use. You can then create your first Conversion Booster.
Conversion Booster Types
Recent Activity: Shows real-time actions, such as sign-ups and purchases, as they happen.
Adding a Conversion Booster
Navigate to the Conversion Boosters app in the side navigation menu.
Click Add New Conversion Booster.
Enter a Name to help identify it.
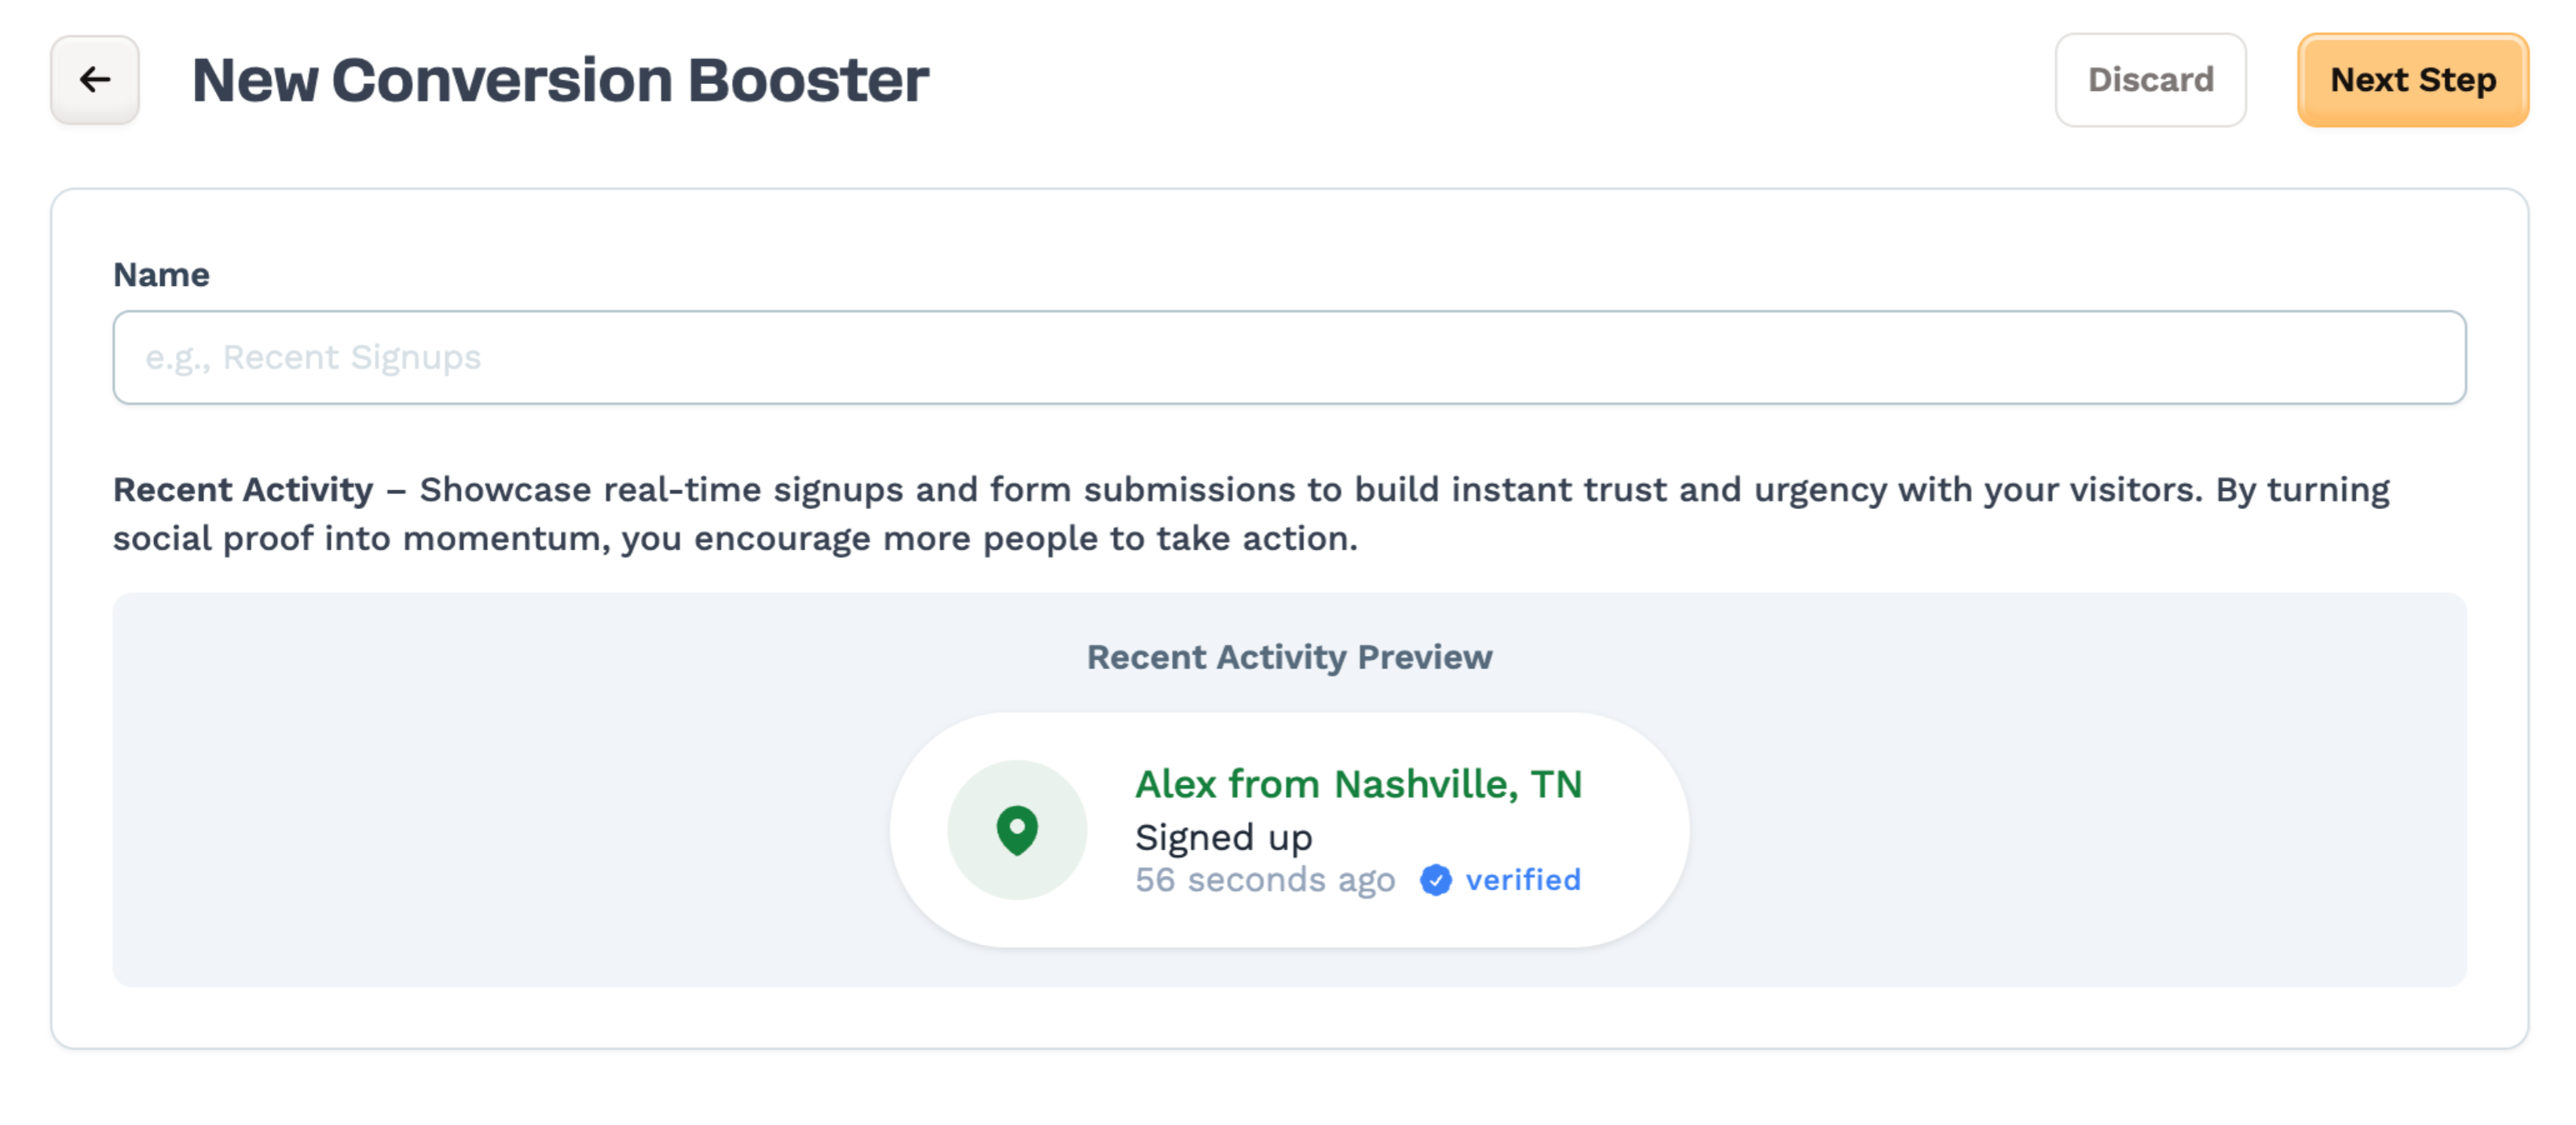
Click Next Step to continue setup.
Managing a Conversion Booster
Once you’ve created a Conversion Booster, you’ll be taken directly to its management page. You can return to this page anytime by opening the Conversion Boosters app and clicking on the name of the booster you'd like to update. This is where you’ll configure how your booster works, where it displays, how it looks, and what activity it shows.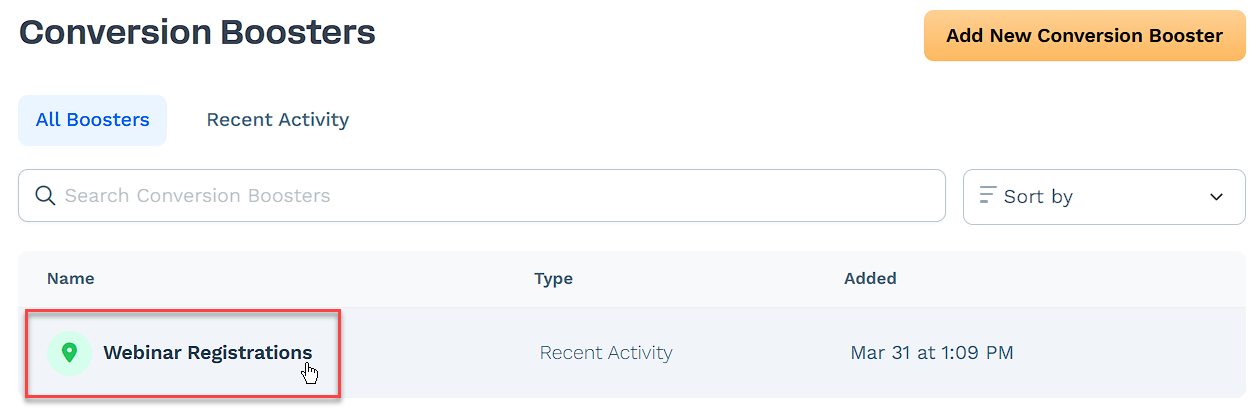
The page is organized into four main sections, each focused on a different aspect of your booster:
Display & Tracking: Control where the booster appears and which pages track activity.
Preview: View how the booster looks based on current activity and settings.
Booster Settings: Customize the design, position, and display behavior.
Recent Activity: Monitor or simulate activity events for testing and review.
Display & Tracking
This section defines where your booster will appear, and which pages should track activity such as form submissions or sign-ups. The settings in this section allow you to:
Display Settings: Choose to show the booster on all pages or only on specific ones.
Tracking Settings: Determine which pages will be monitored for user actions. You can track all pages or define specific paths for tracking events.
Embed Code: Use this option if you want to place the booster in a different workspace. The code provided can be added to supported page elements using JavaScript or HTML.
To control where your booster appears and which pages track user activity:
Click Edit in the Display & Tracking section of your booster settings.
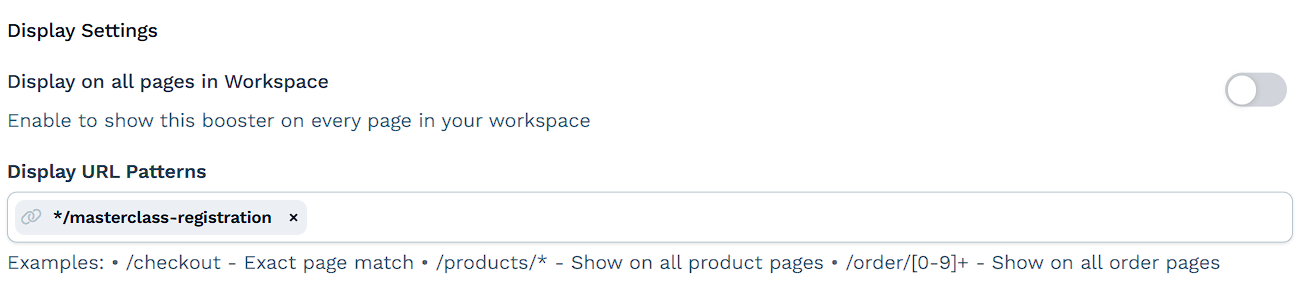
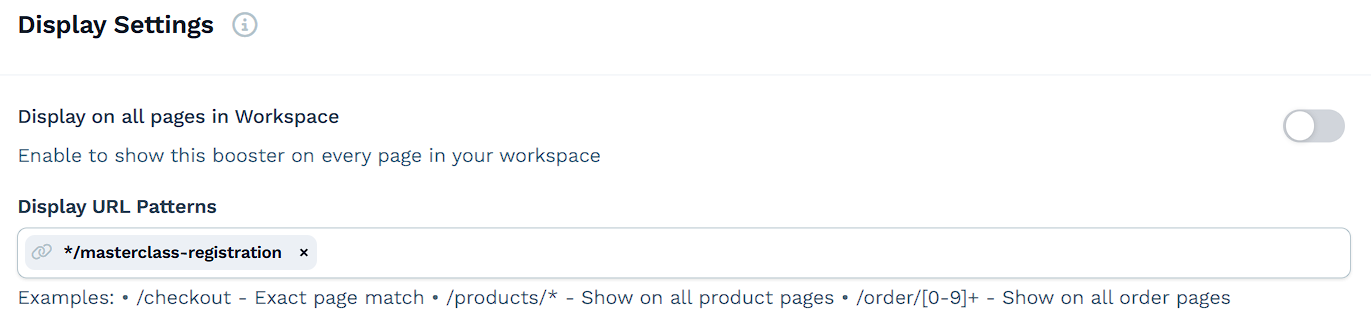
Update Display Settings to control where the booster is shown:
Turn on Display on all pages in Workspace to show the booster across your entire site pages.
If you prefer to show it only on specific pages, leave that toggle off and enter one or more Display URL Patterns. You can use:
Exact paths like
/checkoutWildcards like
/products/*to target all product pagesRegex-style patterns like
/order/[0-9]+to target all order pages
Update Tracking Settings to control where user actions are tracked:
Turn on Track on all pages in Workspace to capture activity everywhere.
Or leave it off and enter Capture URL Patterns (e.g.,
/signup,/contact) to track only specific pages.
(Optional) Use the Embed Code if you want to display the booster on a different workspace:
Click Show embed code (Advanced) at the bottom of the section.
Copy the script and paste it into your target page using a custom HTML or JS element.
To learn how to to properly add HTML and JavaScript code within a funnel page, refer to the Insert Custom HTML and JavaScript Code article.
Click Save Changes to apply your updates.
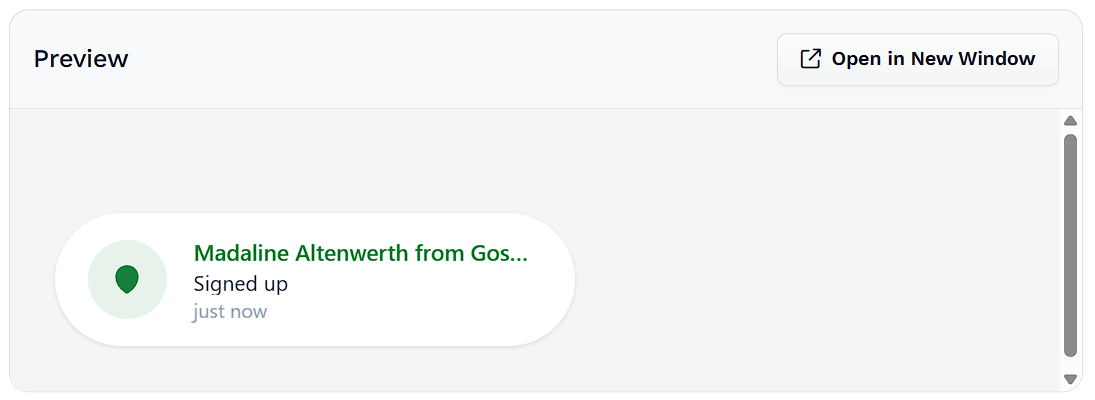
Preview
This section shows how your booster will appear on live pages. It updates in real time based on your design and activity settings. This allows you to review how your booster looks and behaves before publishing it live.
If no activity has been captured yet, the preview will display a placeholder indicating that it’s waiting for data. This simply means the booster is active but hasn't received any events yet.
To see how it will look once activity starts:
Use the Simulate Event button in the Recent Activity section to trigger a test notification.
Click Open in New Window to view the booster in a standalone preview tab.
Booster Settings
The Booster Settings section lets you control how your booster appears and behaves for visitors. It includes two areas:
Display Settings: Control how the booster appears, including duration, delay, position, mobile behavior, and color.
Recent Activity Booster Settings: Define what activity to show, how many events to display, and options like message text, time window, and visibility rules.
To update Conversion Booster settings:
Click Edit in the Booster Settings section.
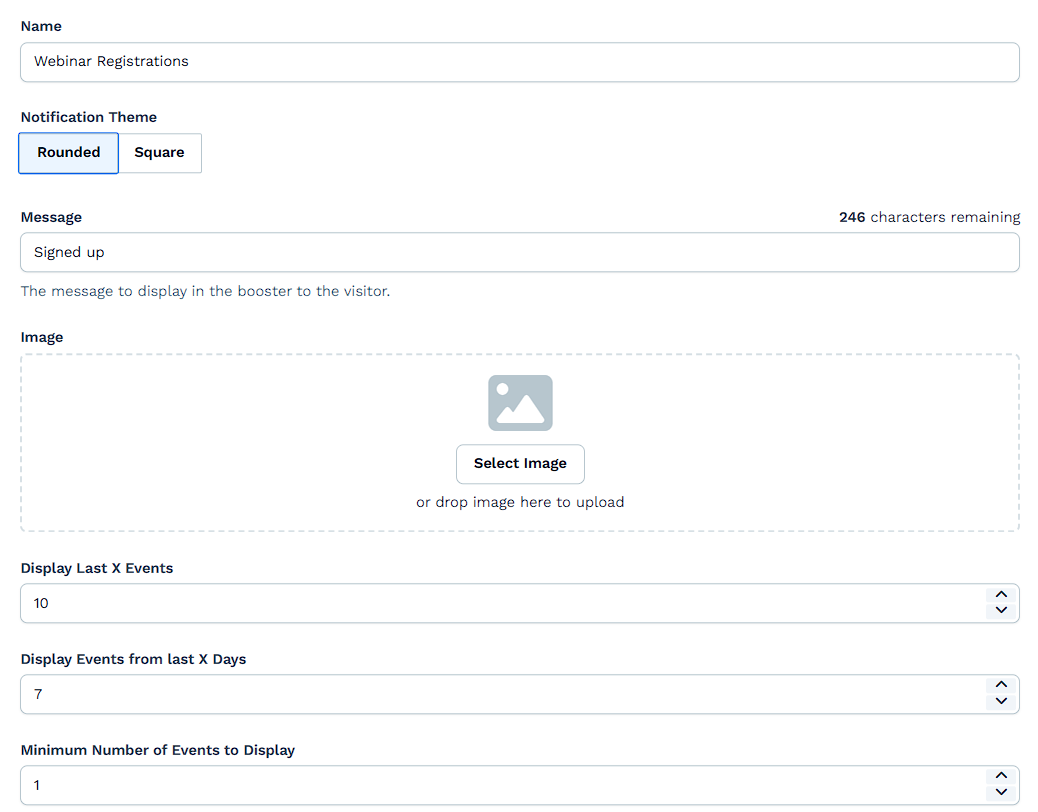
In the Message Settings section:
Set the Name to help identify your booster internally.
Choose a Notification Theme (Rounded or Square).
Enter the Message that will appear to the visitor.
(Optional) Upload an Image if you want to show a custom graphic instead of the map icon.
Use the dropdowns to define:
Display Last X Events: Maximum number of events to rotate through. The value for “Display Last X Events” is limited to a maximum of 20. This means you can display up to 20 recent events, but no more, regardless of how many have occurred in your page.
Display Events from Last X Days: Defines the activity window.
Minimum Number of Events to Display: Booster won't appear unless this threshold is met.
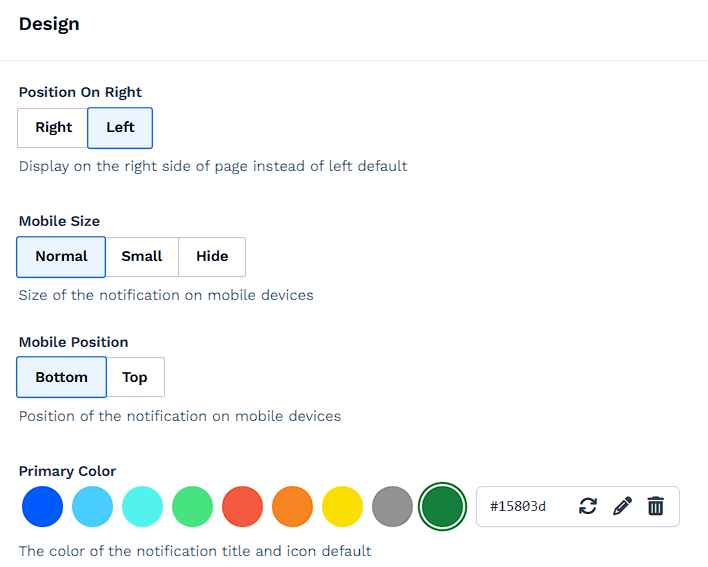
Adjust the Design settings:
Select the booster’s screen position (Left or Right).
Choose how it behaves on mobile: Size (Normal, Small, Hide) and Position (Top or Bottom).
Pick a Primary Color that matches your brand.
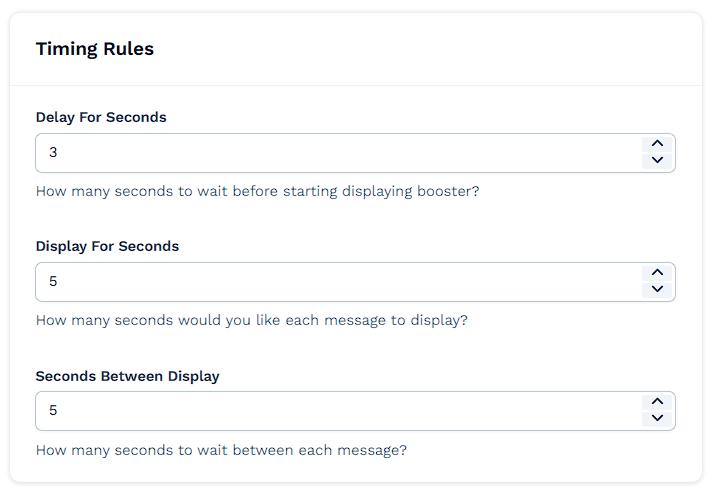
Set your Timing Rules:
Delay For Seconds: How long to wait before the first booster appears.
Display For Seconds: How long each message stays visible.
Seconds Between Display: How long to wait between messages.
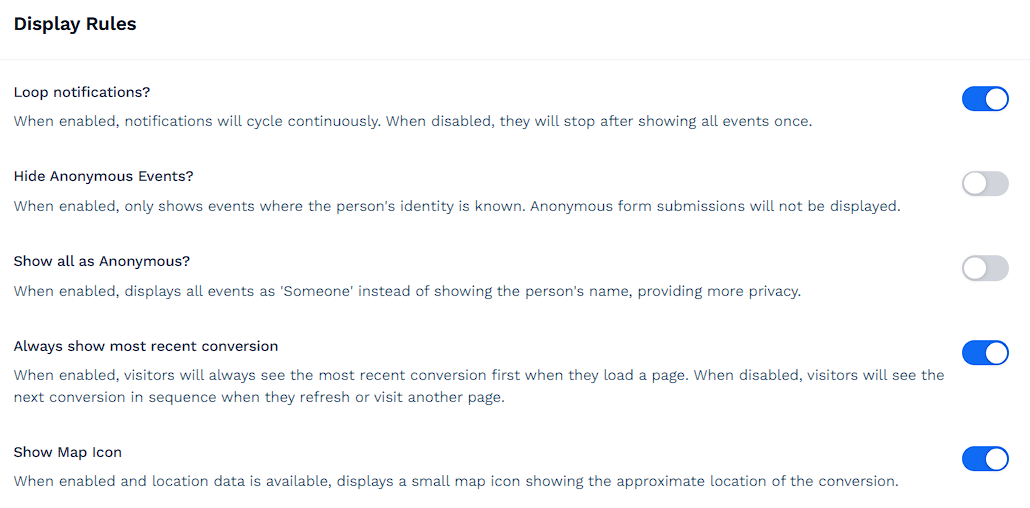
Review Display Rules and enable or disable each toggle:
Loop notifications: Repeats messages in a loop. If disabled, messages stop after showing once.
Hide Anonymous Events: Only displays events that include a name and location.
Show all as Anonymous: Masks all names and shows events as “Someone”, for privacy.
Always show most recent conversion: When enabled, the booster always displays the latest conversion event first each time the page loads. Other events will appear only if the visitor refreshes the page or navigates to a different one. When disabled, events rotate in sequence, picking up where the last visitor left off.
Show Map Icon: Displays a map pin if location data is available.
Control Time Display Settings:
Toggle Hide Exact Time to switch to relative language like “recently.”
Use Hours Before Hiding Time to define when that change happens.

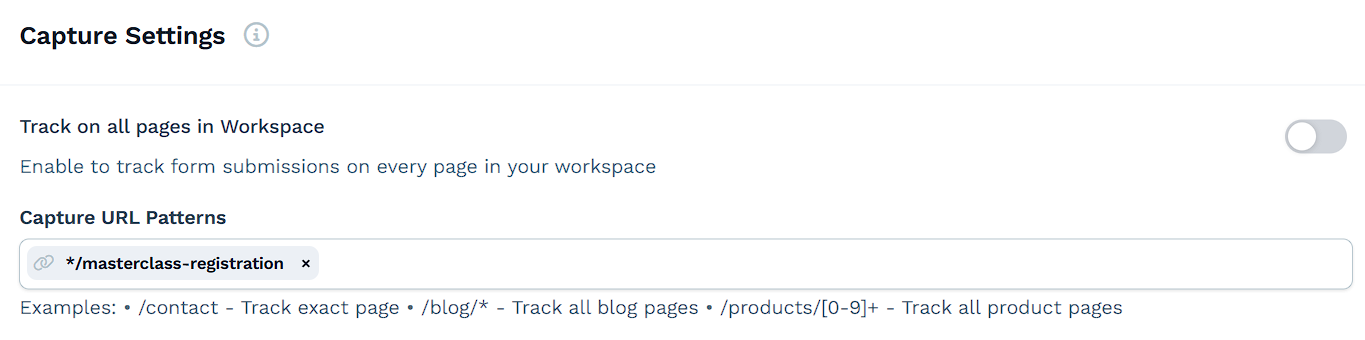
Capture Settings control where the booster tracks form submissions across your workspace.
Track on all pages in Workspace: Turn this on to automatically capture form events from every page.
If you only want to track activity from specific pages, leave that option off and use Capture URL Patterns instead. Here, you can list one or more URL paths that match where your forms live.
In the Display Settings section, choose where the booster will be shown:
Toggle Display on all pages in Workspace to show the booster everywhere.
Or leave it off and use Display URL Patterns to target specific page paths.
Click Update to save your changes, or Discard changes to cancel.
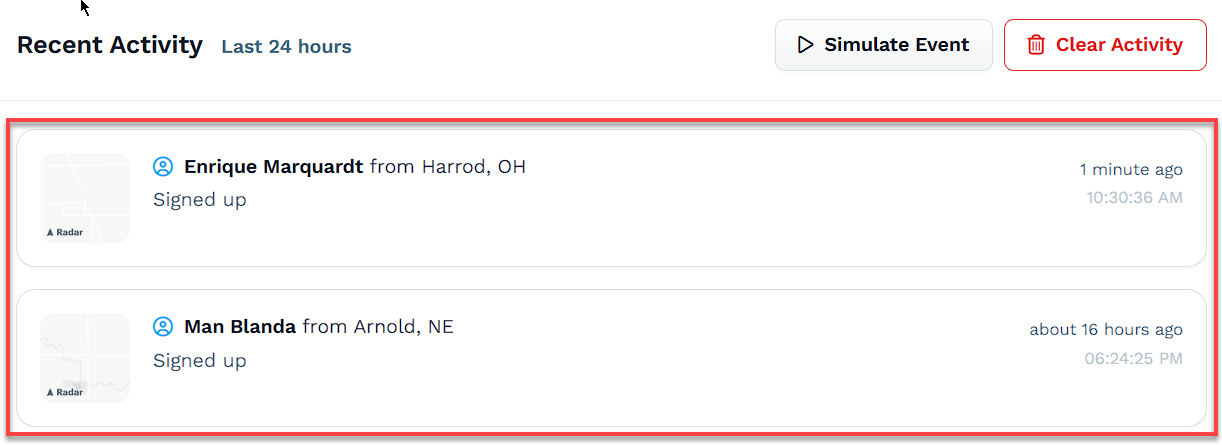
Recent Activity
This section shows the most recent events your booster has captured, either real user actions or simulated events for testing. It's a great way to preview how your booster will appear before going live.
Here’s how you can use and understand each part of it:
Simulate Event
Use this to generate a test activity and see how it would display in real time. Simulated events are helpful when you’re setting up or customizing your booster and want to test the look and feel before collecting real data.
Click Simulate Event to open the input window.
Enter a Name (e.g., “John Smith”) and a Location (e.g., “Austin, TX”). These fields mimic what would be captured from a real user.
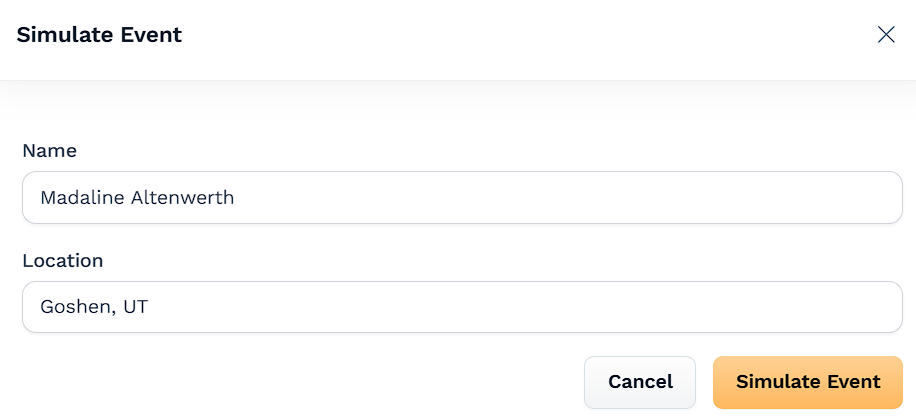
Click Simulate Event again to save it. The event will immediately appear in both the Recent Activity feed and the Preview area.
View Activity Feed
This list updates in real time based on the booster’s data settings (like time window and number of events to display). Once an event is captured or simulated, it appears here with:
The user’s name and location
The action message (e.g., “Signed up”)
A timestamp showing when the event occurred
Clear Activity
Use this to remove all events currently listed. This is especially useful if you’ve been running test events and want to clean the slate before going live.
Click Clear Activity to reset the list.
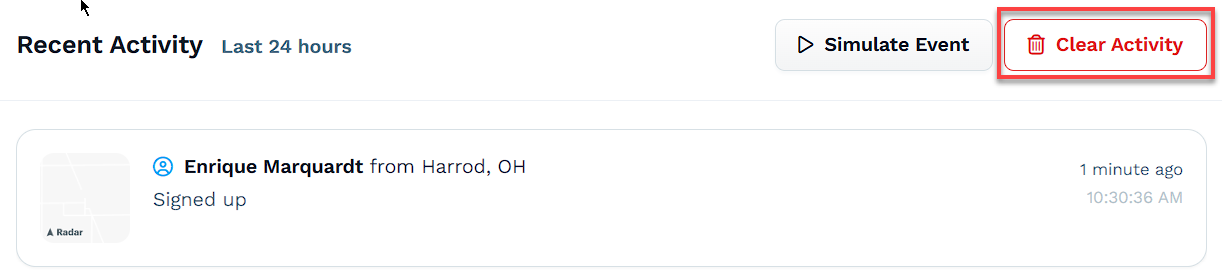
Click Proceed to confirm the action.
Deleting a Conversion Booster
If you no longer need a Conversion Booster, you can remove it from your workspace at any time. Deleting a booster also removes its associated event history and settings. This action is permanent and cannot be undone.
To delete a Conversion Booster:
Open the booster you'd like to delete.
Scroll to the bottom of the page and click Remove.
Click Proceed to permanently delete the booster, or Cancel to exit without making changes.