The Site Settings in ClickFunnels allow you to manage essential properties of your site, such as branding, SEO, tracking codes, and more. In this article, you will learn about the available settings and detailed information on configuring them to align with your business needs.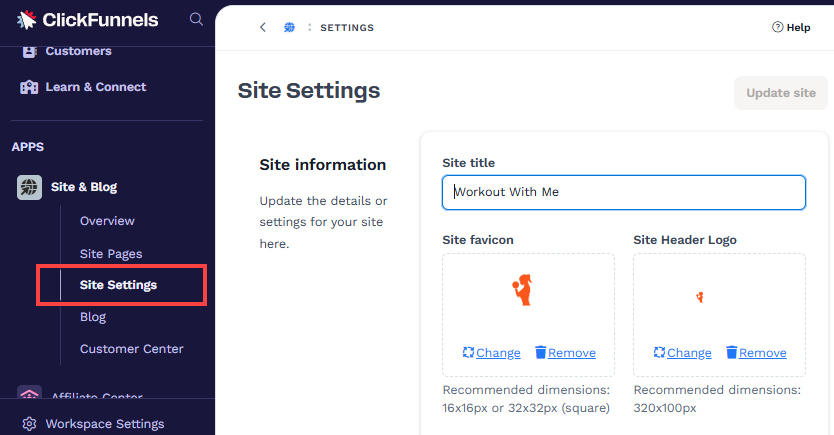
Requirements
An active ClickFunnels account
The Site & Blog app added to your workspace
Accessing Site Settings
From your workspace, click on the Site & Blog app in the left-hand menu.
Select Site Settings.
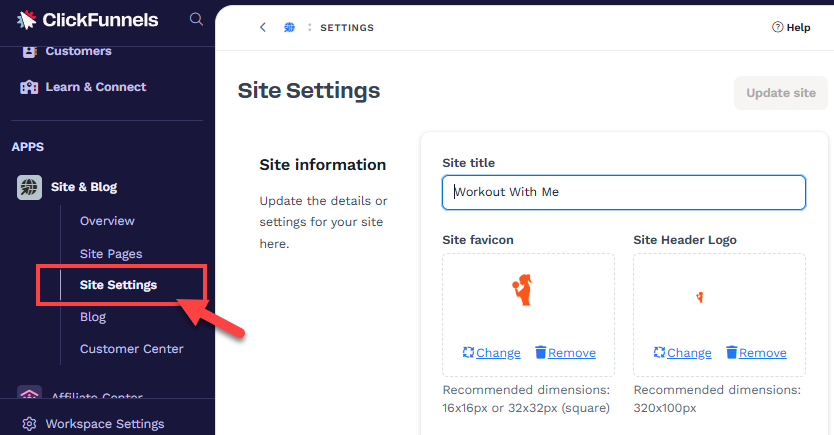
Once inside Site Settings, you can manage your site's various properties, such as branding, SEO, and tracking codes, all in one place.
Site Information - Naming and Branding Your Site
The "Site Information" section in Site Settings allows you to configure essential details that define your site’s identity and establish its branding. Below is an overview of each option and guidance to make informed decisions: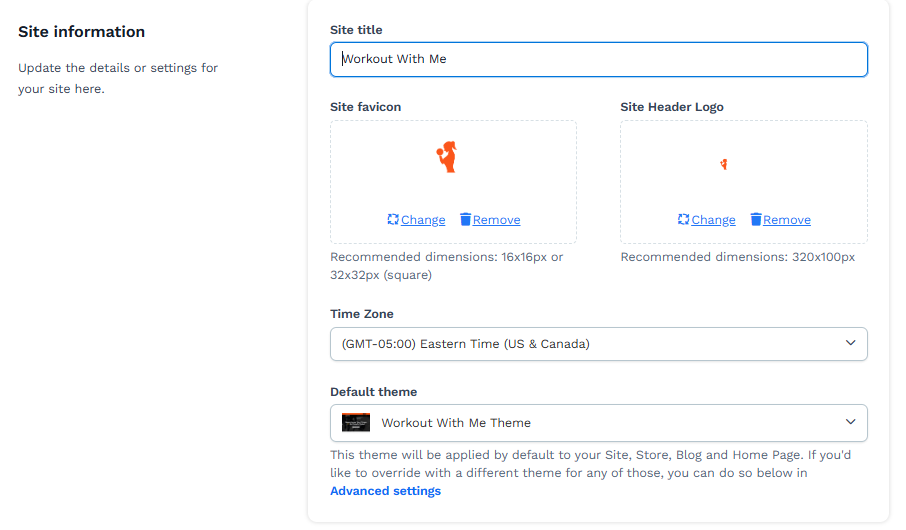
Site Title
The Site Title represents the name of your site. It appears in browser tabs, search results, and other visible areas, quickly identifying your audience. Choose a concise, descriptive title that reflects your brand’s purpose or audience. For example, ClickFunnels uses a site title when you visit clickfunnels.com, "ClickFunnels™ - Marketing Funnels Made Easy," highlighting its core functionality. If you are running a fitness coaching site, you might choose something like "Peak Performance Coaching" to clearly define your niche and expertise.
Site Favicon
A favicon is a small icon displayed in browser tabs and bookmarks. It enhances brand recognition and makes your site visually distinctive. Use a 16x16 or 32x32 pixel version of your logo or brand icon. Keep the file size under 100KB to ensure fast loading..png)
Site Header Logo
Site Header Logo appears prominently at the top of your site, helping reinforce your brand identity. Use a high-quality PNG or SVG file with a width between 200-300 pixels. Keep the file size below 200KB for better performance.
Dynamic Usage: Instead of uploading the logo separately on each page, you can insert an Image Element in the ClickFunnels editor, set the Image Source to Dynamic, and select the Site Logo option. This ensures that the logo updates dynamically across all pages.
.png)
Why Use Dynamic Logo: If you update your site logo in the Site Settings later, it will automatically reflect across all pages where the dynamic logo is used. This saves time and effort by eliminating the need to update the logo on multiple pages manually.
Time Zone
The time zone determines your site’s default scheduling and analytics settings. If your business operates in London, set the time zone to "GMT (Greenwich Mean Time).
Default Theme
The Default Theme determines the design and layout applied to various pages across the apps within your workspace, including Site pages. A theme is essentially a collection of pre-designed template pages that ensures consistency in branding and user experience throughout your site.
Default Hero Theme: When you create a new workspace in ClickFunnels, the system assigns the default Hero Theme to the Site app. This theme serves as a starting point; you can customize it further or replace it with a different theme.
Creating and Applying a New Theme: You can create a new theme by navigating to Workspace Settings > Themes. After creating a theme, return to Site Settings and select the new theme as the Default Theme. Once applied, all template pages, such as the Site Home Page, 404 Page, and Coming Soon Page, will be updated to reflect the new theme's design.
Helpful Resources:
Site Domain
The Site Domain section enables you to associate a connected domain with your site.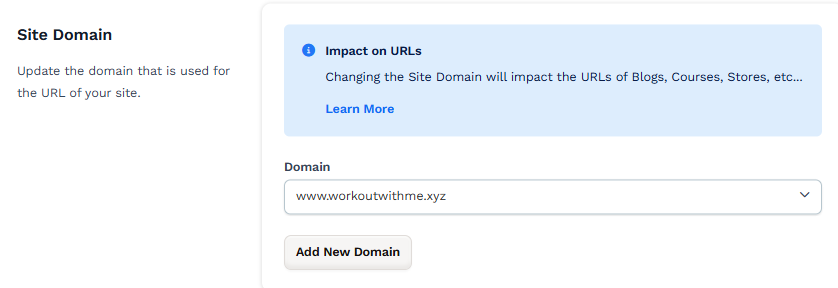
Domain
The domain is your site’s web address. ClickFunnels provides a default subdomain (e.g., workspace.myclickfunnels.com), but connecting a custom domain (e.g., www.yourdomainname.com) significantly enhances your branding and credibility.
Key Steps:
Connect your domain in the Domains section of your workspace settings.
Ensure the domain is verified and secured (SSL-enabled) before selecting it in Site Settings.
Once verified, choose the domain from the dropdown list.
You can also click the Add New Domain button in this section to connect a new domain to your ClickFunnels workspace.
Important:
Choosing the correct site domain is a critical step. The site domain will be applied across various apps, including Courses, Blogs, Customer Center, Community, Products and Store, where switching to a different domain is not possible.
Additionally, the site domain is set as the default domain for new Funnels and Event Types in the Appointments app. While these can be changed later in their respective settings, the site domain serves as the default.
Select a domain that represents your brand and works seamlessly across all applications in your workspace.
Site Availability
The Site Availability section allows you to control who can access your site. This setting is particularly useful during the development phase or when you want to prepare for a public launch. You can choose between two visibility options:
.png)
Public: Your site is live and accessible to all visitors. Choose this option once your site is ready to go live and available to your audience.
Coming Soon: Displays a "Coming Soon" page while your site is under development. This page is ideal for building anticipation and collecting leads before the official launch. To edit the "Coming Soon" page, navigate to the Overview menu, click Edit Site, and select the Coming Soon Page template from the Site Theme pages.
Tracking Codes
The Tracking Codes section allows you to integrate analytics and custom scripts into your site to enhance tracking and user engagement. Here’s a detailed explanation of each option and how it can be utilized:.png)
Header Code
This option allows you to insert scripts that load in the <head> section of your site. Scripts added here are executed early in the page-loading process and are commonly used for global analytics, site verification, or platform integrations. For example, you can add Google Analytics tracking codes to monitor traffic and user behavior or Meta tags to verify your site with platforms like Google Search Console or Facebook Business Manager.
Footer Code
The Footer Code section lets you insert scripts that load within the <body> tag of your site, typically after the main content has been loaded. This is useful for services that don’t require immediate execution, such as live chat widgets, remarketing tags, or additional tracking scripts. For example, embedding a chatbot script here ensures that it loads after the page content, optimizing site performance and user experience.
Note:
Adding tracking codes to the Site Header and Footer sections applies the code globally to all pages within your workspace, including funnel pages, store pages, blog posts, and other site-related pages. If you need to add tracking code to specific pages only, you can edit those pages individually in the Page Editor and insert the code in the page’s header or footer areas. For step-by-step instructions, refer to the Adding JavaScript and Tracking Code for Advanced Features article.
Facebook Pixel ID
The Facebook Pixel tracks user activity on your site and helps optimize your Facebook ad campaigns. By entering your Facebook Pixel ID, you can track important events like page views, form submissions, and more.
Facebook Access Token
This field is used to authenticate Facebook API integrations. If you use the Facebook Conversions API to send events directly from your ClickFunnels account to Facebook, entering your Facebook Access Token here ensures smooth and secure integration.
Facebook Test Event Code
During the development or testing phase, you can add a test event code here to validate that your Facebook Pixel is working correctly. This lets you confirm that tracking events are firing as expected before your site goes live.
GA4/GTM Measurement ID
Paste the Measurement ID from your GA4 Web Data Stream. This connects your site to the correct GA4 property for tracking.
Format: G-XXXXXXXXXX
Find it in GA4 (steps):
Go to Admin.
Under Property, click Data streams.
Select the Web stream (or create one).
Copy the Measurement ID (format:
G-XXXXXXXXXX).
GA4/GTM Api Secret
Enter the Measurement Protocol API Secret from the same GA4 Web Data Stream. ClickFunnels uses this server-side for reliable event delivery.
Find it in GA4 (steps):
Go to Admin » Data streams and open the Web stream.
Scroll to Measurement Protocol API secrets.
Click Create, give it a nickname, and Create.
Copy the Secret value.
Add GTagJS Script
Lets ClickFunnels automatically inject Google’s gtag.js on all pages.
Choose a setting (steps):
Turn ON if GA4/gtag or GTM has not already been added elsewhere. ClickFunnels will load
gtag.jsfor you.Turn OFF if GA4/gtag or GTM is already deployed. It prevents duplicate pageviews/events.
Hide Powered by ClickFunnels Badge
This option lets you remove the “Powered by ClickFunnels” branding from your site’s footer. By default, this badge includes a referral link tied to your ClickFunnels affiliate account. If a visitor clicks the badge, signs up for ClickFunnels, and continues their subscription, you will earn recurring commissions as part of the ClickFunnels affiliate program. Keeping the badge visible is a simple way to generate passive income through referrals potentially.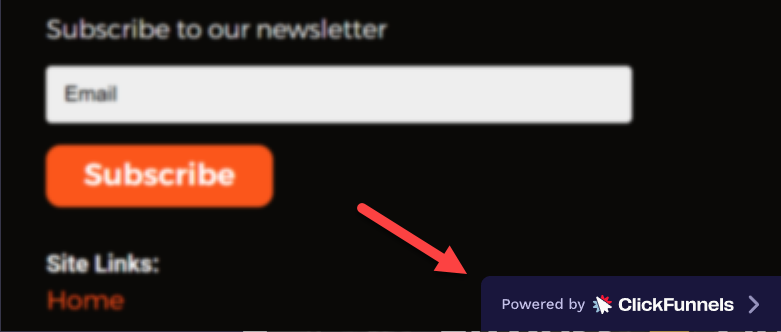
Helpful Resources:
MessageHub Chat Widget
The MessageHub Chat Widget allows you to integrate a live chat feature directly into your site pages, enabling real-time visitor communication and improving customer engagement. By adding the MessageHub Inbox Token, you can activate the widget and link it to your workspace's MessageHub app..png)
How to Find and Add the Inbox Token:
Navigate to the MessageHub app in your ClickFunnels workspace.
Click the Gear
⚙️ icon (Chat Settings) and select Chat Inboxes.Access an existing chat inbox and go to the Configuration tab.
In the Messenger Script code, find the
websiteTokenvalue and copy it..png)
Paste the websiteToken into the MessageHub Inbox Token field in the Site Settings to enable the widget.
Helpful Resources:
Advanced Settings
The Advanced Settings section allows you to customize the themes and styles of your site, giving you additional flexibility. Here’s an overview of the available options:.png)
Style
A Style Guide is a pre-defined set of visual styles, such as fonts, colors, button designs, shadows, and borders. It ensures that your pages have a consistent and professional appearance without manually updating styles on each page. To create a style guide, go to Workspace Settings > Styles, define your style properties, and save the style guide. Once created, you can select the style guide from the dropdown menu here to apply it globally across your site.
Override Themes for Blog, Store, and Site Homepage
When you create and promote a new theme in your workspace, it provides templates for various sections, including Site Pages, Blog, Store, and other apps like Customer Center and Courses. By default, the theme’s templates will be applied across all areas of your workspace. However, you can override the default settings here if you want to use a different theme for specific sections like your Blog, Store, or Site Homepage. Select a new theme from the dropdown to apply a unique design to any of these areas while the rest of the templates continue to follow the default theme. If no theme is selected, the default theme templates remain in use.
Helpful Resources:
SEO & Sharing
The SEO & Sharing section allows you to optimize your site's appearance in search engine results and on social media platforms. Configuring these options helps improve visibility, drive traffic to your site, and ensure a polished appearance when shared online.
.png)
Default Page Title
The Default Page Title is the title for your site domain, appearing in search engine results and social media. It gives visitors and search engines an immediate understanding of your site’s purpose. Use a clear and concise title that reflects your brand or offerings.
For example:
“Elite Coaching Academy | Learn from Fitness Experts” for a coaching platform.
“Fresh Eats Café – Healthy Meals Made Simple” for a restaurant website.
Keep the title under 60 characters to ensure it displays correctly in search results.
Default Page Description
The Default Page Description summarizes your site and appears under the title in search engine results and social media. This description helps users decide whether to click on your link. Write a compelling and informative summary that highlights your value proposition.
For example:
“Join Elite Coaching Academy for personalized fitness plans, expert advice, and tailored nutrition to help you reach your goals faster.”
Keep the description under 160 characters for optimal display.
Default Sharing Image
The Default Sharing Image is the image displayed when your site link is shared on social media platforms such as Facebook, Twitter, and LinkedIn. This image plays a key role in grabbing attention and encouraging users to click through to your site.
To create an effective social sharing image, follow these best practices:
Use a resolution of 1200x630 pixels recommended by most social platforms for optimal display.
Save the image in JPG or PNG format to ensure compatibility and high quality.
Keep the file size under 500KB to prevent slow loading.
Incorporate your brand logo, relevant visuals, or a strong call-to-action that reflects your content or offering.
Avoid excessive text; social platforms may truncate text-heavy images.
An eye-catching, well-optimized image ensures your site appears professional and visually appealing when shared, increasing click-through rates and audience engagement.