Discounts are reductions applied to the original price of a product or service, used to incentivize purchases and boost sales. They can attract new customers, retain existing ones, clear inventory, and enhance overall sales performance. ClickFunnels offers a comprehensive Discounts feature, enabling you to create and manage percentage-based and fixed-amount discounts for specific products or collections in both funnels and stores.
For example, you could offer a 10% discount to new customers to encourage their first purchase, or a fixed $20 off during a summer sale to clear inventory and boost seasonal sales. ClickFunnels equips you to create these discounts effortlessly.
In this article, You’ll learn how to craft strategic discount codes, explore various settings, track their usage, and integrate them seamlessly into your checkout process.
Important:
The Discounts feature is only compatible with the new Checkout element and will not work with the Legacy Checkout element.
Requirements
An active ClickFunnels account
Adding the Discount App in the Workspace
From the main menu on the left, click on + Add an App to navigate to the Apps page.
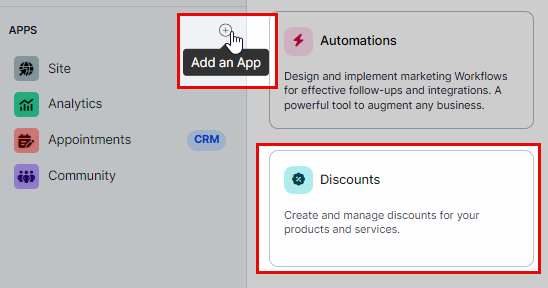
Scroll down until you find the Discounts app, then click on it.
Confirm your selection by clicking the Add App button.
Creating a Discount
Creating a discount code in ClickFunnels is a straightforward process that allows you to offer enticing deals to your customers. Follow these steps to set up your first discount code:
From your ClickFunnels dashboard, click on the Discounts app in the left-hand menu.
Click Create Discount to create a new discount.
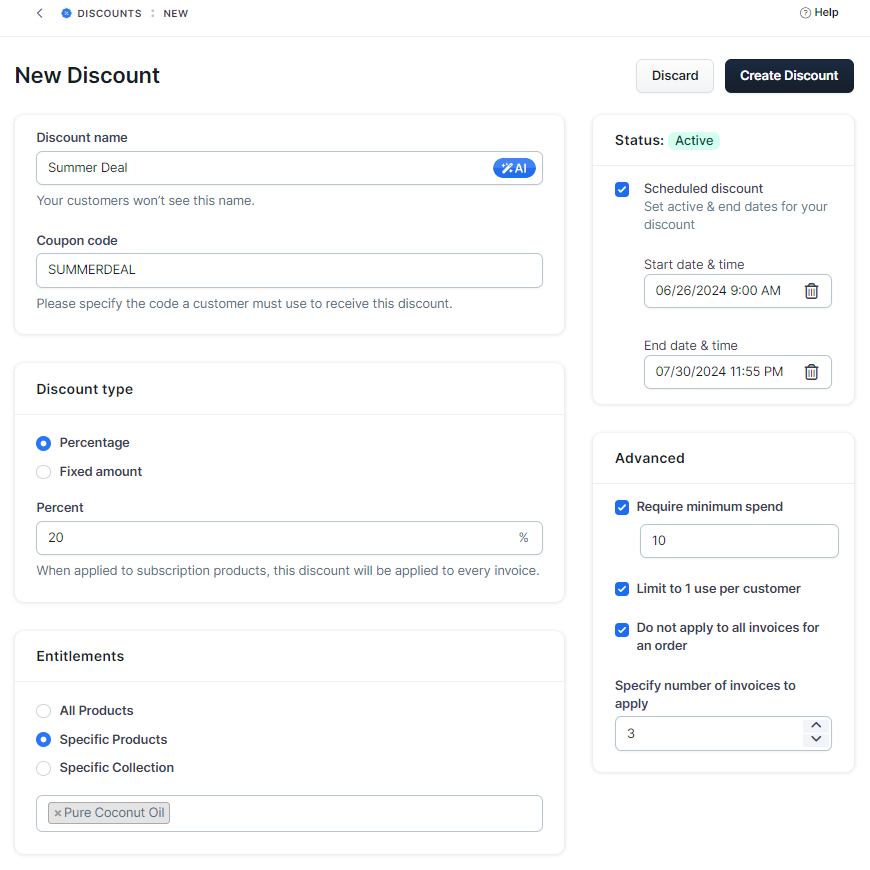
Configure Discount Settings: After clicking “Create Discount”, you will be taken to a page where you can define the parameters of your discount:
Discount Name and Code:
Discount Name: Enter the name of the discount for internal reference (e.g., “Summer Sale”).
Coupon Code: Create a unique and memorable code for customers to use at checkout (e.g., “SUMMER23”).
Discount Type:
Percentage: A discount based on a percentage of the product price.
Fixed Amount: A specific dollar amount deducted from the product price.
Important:
The ability to limit a discount to one use per customer depends on the payment integration connected to your workspace. When the Stripe App is the only payment integration added, this option is not available due to a limitation within Stripe’s platform. To enable this functionality, add the Payments AI (PAI) integration to your workspace.
All Products: The discount applies to all products in your workspace.
Specific Products: The discount applies only to selected products.
Specific Collection: The discount applies to a specific collection of products.
Status:
Schedule Discount: Set a start and end date, along with the time zone, to define the active period of the discount. This feature is useful for time-limited promotions, such as seasonal sales. If not specified, the discount remains active indefinitely. For example, if you set a start date of June 1st at 9:00 AM Eastern Time and an end date of June 30th at 11:55 PM Eastern Time, the coupon will be active during this period and will expire after the end date. If not specified, the discount remains active indefinitely.
Expire Discount: Clicking on this option will expire the discount code immediately. The code will show invalid in the checkout.
Remove Expiration: If you have set a discount to expire, clicking the “Remove Expiration” option will re-activate the discount code. However, please note that you cannot unexpire a discount if the coupon has already been redeemed by customers and subsequently expired.
Advanced Settings:
Require Minimum Spend: Customers must spend a minimum amount to use the discount. If the minimum cart value is not met, the discount will not apply.
Note:
Stripe does not support the Minimum Spend option. If this feature is enabled, this discount code won't work correctly for Stripe transactions. Currently the Minimm Spend option will only work with Payments AI.
Limit to 1 Use per Customer: Each customer can use the discount only once.
Do Not Apply to All Invoices for an Order: Specify the number of invoices to which the discount will apply for subscription products. This setting is beneficial for managing recurring discounts. For example, if a customer subscribes to a product priced at $100 per month with a 20% discount applied, the discounted price is $80. If you set the discount to apply to three invoices, the customer will be charged $80 for the first three months. Starting from the fourth month, the regular price of $100 will be charged if the subscription continues.
Save Your Discount: Once you’ve entered all the details, click the Create Discount button to save your new discount code.
Editing an Existing Discount
Navigate to the Discounts App in your ClickFunnels dashboard.
Find the discount you want to edit and click on it to open its settings.
Make the necessary changes and click the Update Discount button to save your changes.
Managing Discount Activation and Expiration
Discounts have a lifecycle. There may come a time when you need to manually deactivate them. This can be done by expiring the discount code, rendering it inactive and preventing further use by customers. Conversely, if you’ve previously expired a discount code but want to bring it back, you can easily reactivate it and breathe new life into the promotion. Follow the steps below:
Click on the Name of the Discount you want to edit from the “Discounts” page.
Expire a Discount:
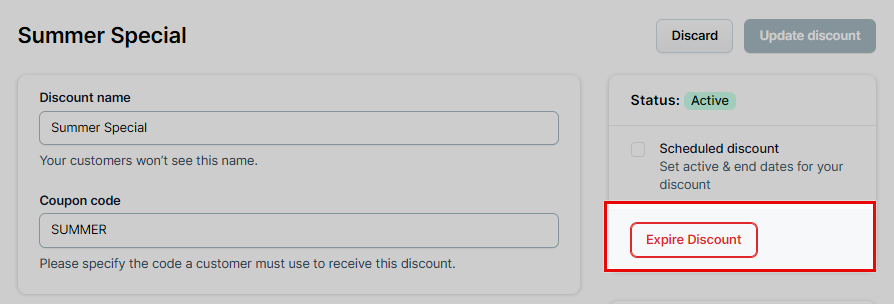
In the Status section on the right side of the discount page, click on Expire Discount.
Confirm the action by clicking the Proceed button in the popup.
Re-Activate an Expired Discount:
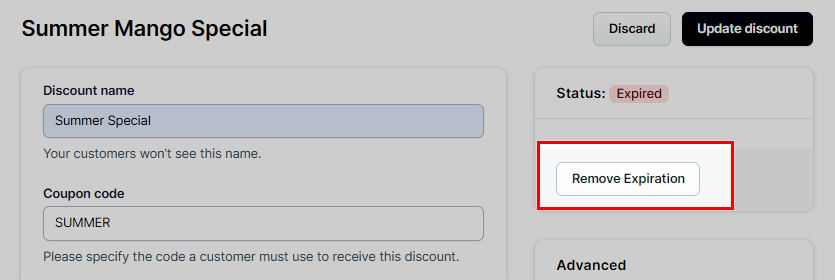
In the Status section on the right side of the discount page, click on Remove Expiration.
Confirm the action by clicking the Proceed button in the pop-up.
Note:
Once a discount code has been redeemed by customers and subsequently expired, it cannot be re-activated for future use.
Enabling Discounts at Checkout
Enhance your customer experience and boost sales by offering discounts directly on the checkout page of your funnel or the product page in your ClickFunnels store. Follow these steps to seamlessly integrate discount codes into your checkout process:
Edit the Checkout or Product Page:
Navigate to the funnel that includes the checkout page you want to edit. or
Edit the “Product” page within “Store Front” in the “Store” app.
Insert a Checkout Element:
In the page editor, add a “Checkout” element if it’s not already present.
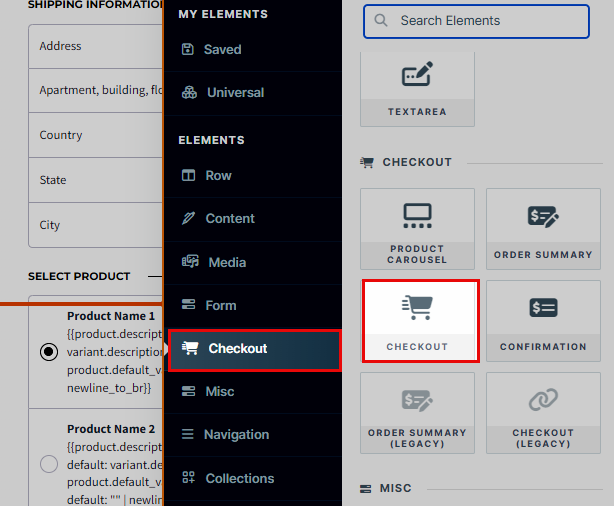
Enable the Discounts Feature:
Click on the “Checkout” element to access its settings.
Find the “Checkout Order Summary” settings and enable “Coupon Field”.
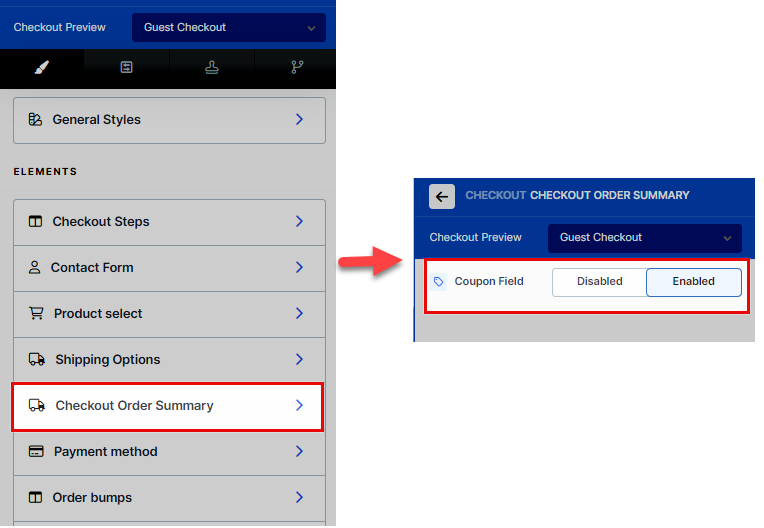
Once these steps are completed, preview the page to ensure the discount field is visible. Customers will be able to enter their discount codes at checkout and see the discount applied to their order total in real-time.
For more information on offering discounts in your funnel and store, visit the How to Apply Discounts in the Funnels and Store article.
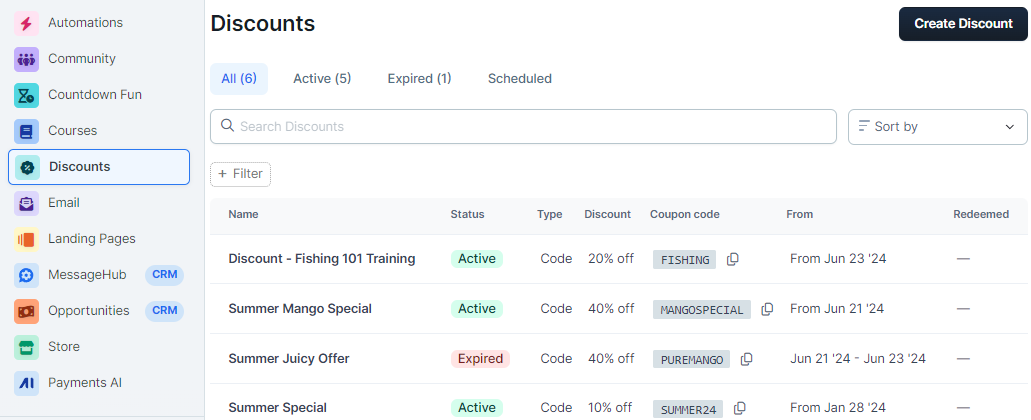
Tracking Discount Redemptions
ClickFunnels empowers you to monitor how effectively your discount codes are performing. Here’s how to track discount redemptions:
Navigate to the Discounts App: Go to the “Discounts” app within your ClickFunnels workspace.
Find the Discount You Want to Track: Identify the specific discount you’d like to analyze usage for.
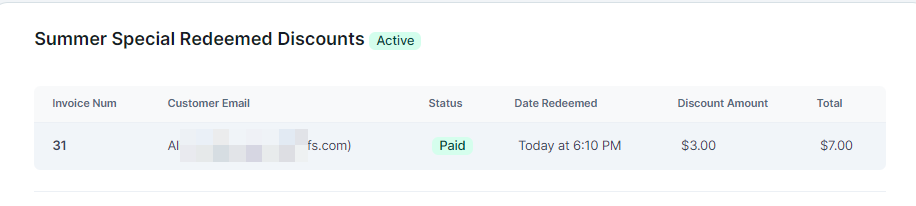
View Redemptions at a Glance: In the “Discounts” table, look for the “Redeemed” column. This column displays the total number of times the chosen discount code has been used by customers.
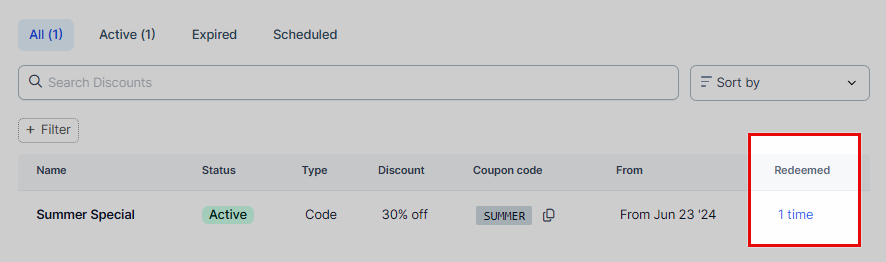
Dive Deeper into Customer Usage: Click on the number displayed in the “Redeemed” column. This will reveal detailed information about the specific customers who have redeemed your discount code.
Manually Adding a Discount to a Subscription Order
In some cases, you may want to manually add a discount to a customer’s order, especially for subscription purchases. This feature allows the ClickFunnels owner to apply discounts manually, which will then be reflected in subsequent invoices. Follow these steps to add a discount manually:
Navigate to Orders:
From your ClickFunnels dashboard, go to the Customers > Orders > Subscriptions.
Select the Subscription Order:
Locate the subscription order to which you want to add the discount. Click on the order to open its details.
Access the Discount Settings:
On the order details page, find the section where you can manage the discount. This is usually within the Discount section of the order summary.
Click on the Discount field to open the discount application panel.
.png)
Apply the Discount:
In the discount application panel, select the discount you wish to apply from the dropdown menu.
Click on Update Order to save the changes and apply the discount.
.png)
Verify the Discount Application:
Check the order summary to ensure that the discount has been applied.
This discount will be reflected in the subsequent invoices for the subscription, providing the customer with the discounted rate for the specified duration.
.png)
Note:
Any manually applied discount will be reflected in the customer’s upcoming invoices associated with the subscription.
Learn more in the Manually Adding a Discount to a Subscription Order article.