 Dashboard
 Site & Funnels
 Products
 Orders
 Contacts
 Analytics
 Marketing
 Sales
Sales Settings
 Apps
Apps Payments
 MessageHub
Learn how to create, edit, and remove webhooks from your ClickFunnels workspace. Doing so lets you control the destinations and types of data sent out from your workspace. Using webhooks requires understanding some developer concepts, and our support team can provide limited assistance with troubleshooting. For detailed developer documentation and discussions, please visit developers.myclickfunnels.com.
Table of Contents
- Requirements
- Accessing Webhooks
- Creating a Webhook
- Editing a Webhook
- Deleting a Webhook
- Viewing Webhook Deliveries
- Troubleshooting
- Additional Information
Requirements
- An active ClickFunnels 2.0 account
- An external webhook endpoint URL
Accessing Webhooks
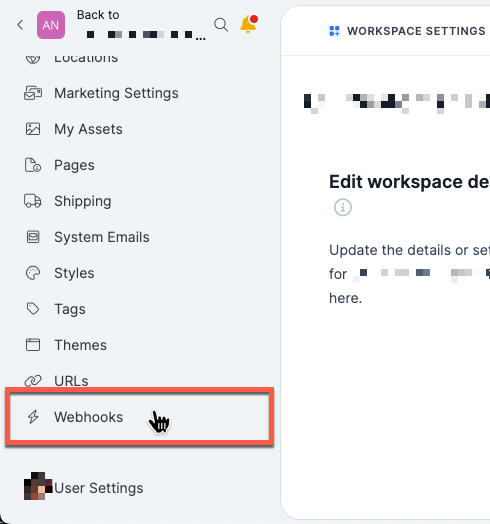
Follow these steps to navigate to the “Webhooks” area within your Workspace.
-
Click “Workspace Settings” from the bottom-left corner.

-
Click “Webhooks” from the left navigation menu.
Creating a Webhook
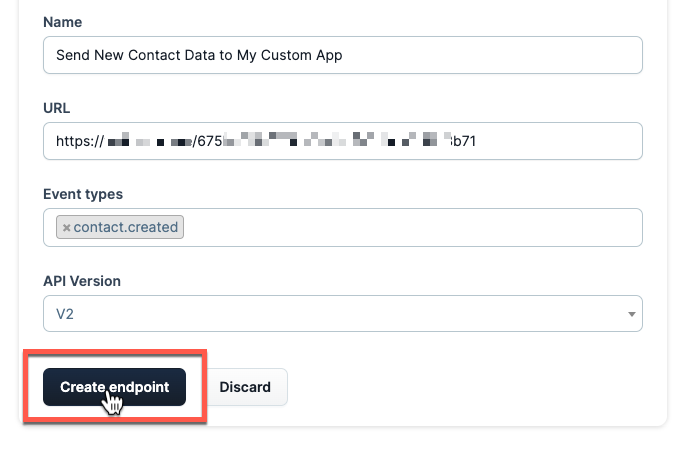
Follow these steps from the “Webhooks” area to create a new outgoing webhook for your Workspace.
-
Click the “Add new endpoint” button.

-
Fill in the “Name” field with something that will help you identify this webhook. Then, paste the endpoint URL to which you wish to send data into the “URL” field.

-
Click inside the “Event types” field and select the event types whose data you wish to send to the endpoint URL. Multiple event types can be added to this field.
For details about each event type and associated data, please explore the developer documentation at ClickFunnels Developer Hub - Webhook Event Types.

-
Select an “API Version” to use.
The API version cannot be changed after the webhook is created. To see which API versions an event type can be used on, please explore the developer documentation at ClickFunnels Developer Hub - Webhook Event Types.

-
Click the “Create endpoint” button to create the new webhook.
Editing a Webhook
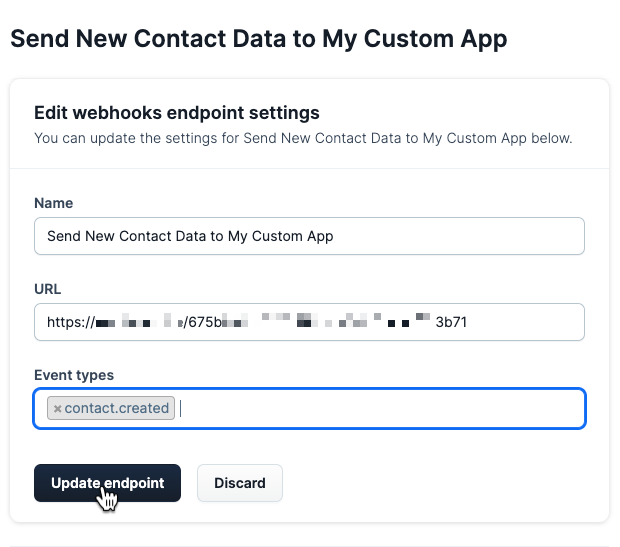
Follow these steps from the “Webhooks” area to modify an existing webhook, allowing you to change the endpoint URL or types of data sent out.
-
Click the “Settings” button to the right of the webhook you wish to modify.

-
Change any of the available settings, such as the “Name”, “URL”, or “Event types”.
The API version, selected when the webhook was created, cannot be modified. Therefore, only event types that can be used on the webhook’s API version can be added. To see which API versions an event type can be used on, please explore the developer documentation at ClickFunnels Developer Hub - Webhook Event Types
-
Click the “Update endpoint” button when finished.

Deleting a Webhook
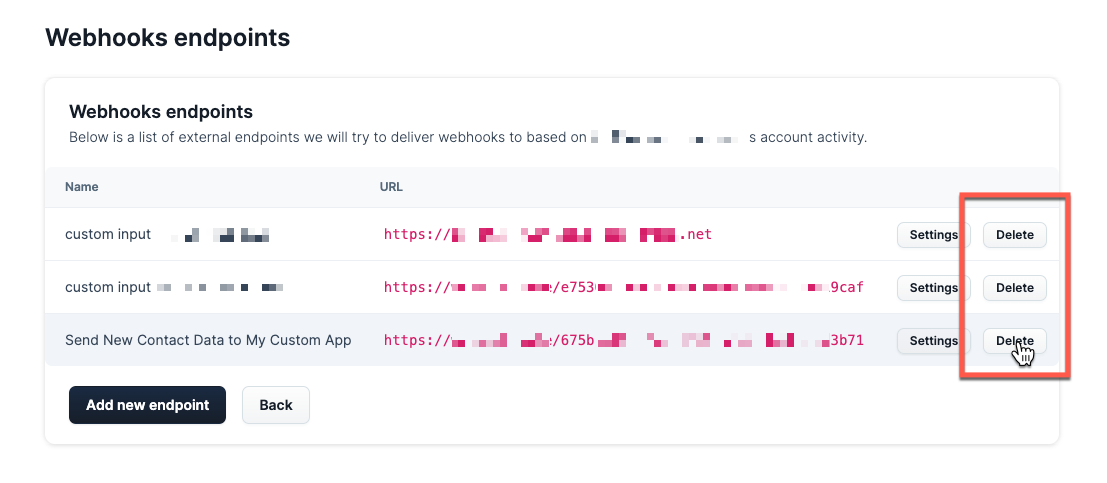
Follow these steps from the “Webhooks” area to remove a webhook from your Workspace. The webhook’s endpoint will stop receiving data from this webhook.
Deleting a webhook will also remove its associated data and cannot be undone!
-
Click the “Delete” button to the right of the webhook you wish to remove.
-
Click the “Proceed” button to delete the webhook and its associated data.

Viewing Webhook Deliveries
Follow these steps from the “Webhooks” area to view delivery attempts and details for an existing webhook.
-
Click the “Name” of the webhook whose delivery attempts and details you wish to view.

-
Find the “Deliveries” section at the bottom of the page to see a list of all deliveries. Click the “Details” button to the right of a delivery to see more details.
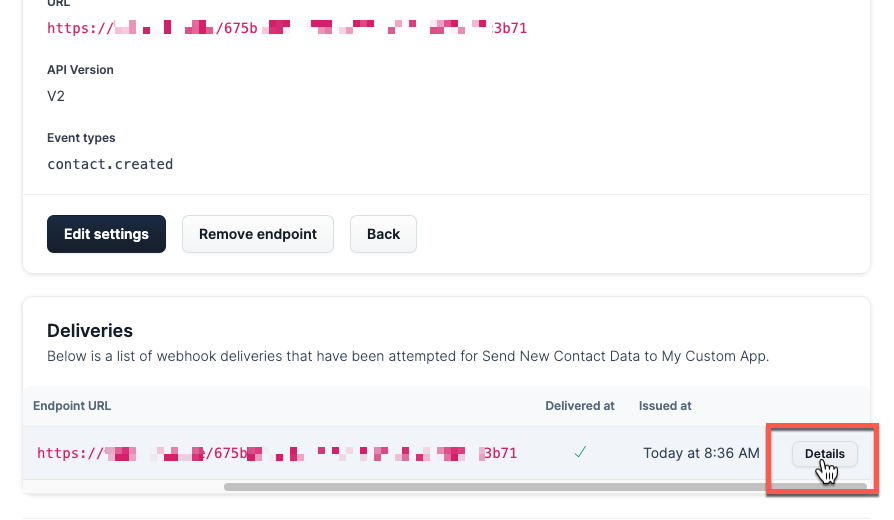
-
The “Webhook delivery details” will show you valuable information, such as the JSON payload, status, and delivery time.

-
-
Find the individual delivery attempts for the selected delivery in the “Delivery attempts” section at the bottom of this page. Click the “Details button to the right of a delivery attempt to see more details.
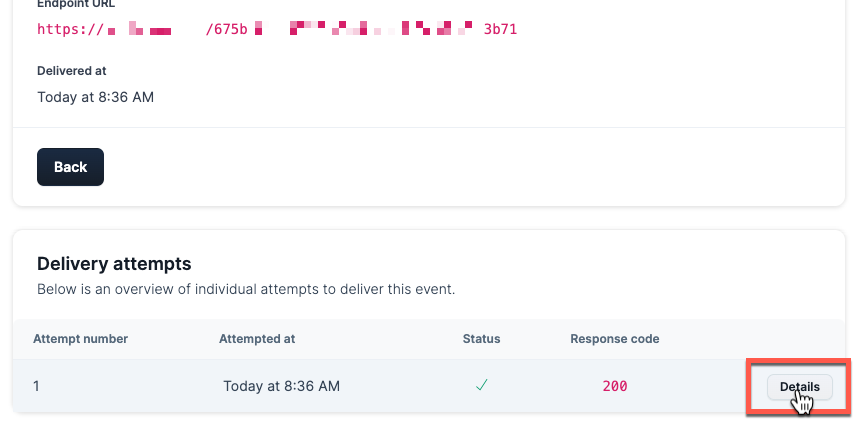
-
The “Delivery attempt details” will show you valuable troubleshooting information, such as the Response code, Response message, and Response body.

-
Troubleshooting
- In addition to viewing delivery details, you can test and troubleshoot webhooks by using any webhook testing site, such as webhook.site. Create a webhook you wish to test and use the testing site’s endpoint URL. Then, perform the actions you expect your clients to perform and check the webhook testing site to see the data it receives.
Additional Information
Was this article helpful?
That’s Great!
Thank you for your feedback
Sorry! We couldn't be helpful
Thank you for your feedback
Feedback sent
We appreciate your effort and will try to fix the article