ClickFunnels Courses enable you to create and manage online learning experiences for your audience. This article provides step-by-step instructions on how to use the Courses feature effectively. You’ll learn how to set up your first course, organize content, and explore the key aspects of course creation and management in ClickFunnels.
Requirements
An active ClickFunnels account
The Course App
Accessing a Course
Click Courses from the left-side navigation menu.
NOTE
Please visit our article Adding Apps to Your ClickFunnels Workspace for detailed information on how to add apps to your navigation menu.
The app will take you to the Course Page displaying your existing courses or the option to create a new one.
Creating a New Course
Click on the Create Course button at the top right-hand corner to create a blank new course.
Select your Course Type from the pop-up, then click the Next Step button.
Type the Title, and Description, then optionally add a Course Image for the new course, then click the Next Step button to continue.
NOTE
The app automatically uses the title as the Course Path URL. You can edit this, but remember that the system will add an alphanumeric string at the end if the URL already exists.
Select if you are creating a Free or Paid course. This option is available only when creating Drip and Simple courses, but not for Custom courses.
The app takes you to the course page where you can manage the course.
NOTE
The course URL will default to the LearningHub URL (community/c/…) and change to the full course URL (courses/title…) after enabling Advanced Customization under the Customize tab. See our article How to Customize the Course Theme for more details.
Important
Only the Site domain can be used for courses. While you can connect multiple domains to your ClickFunnels account, courses are restricted to the site domain. For more information, check these articles:
Scheduling and Publishing a Course
All new courses are set to Published status. However, new modules and lessons within the course will remain in draft status. To make your entire course visible to students, be sure to publish each module and lesson individually.
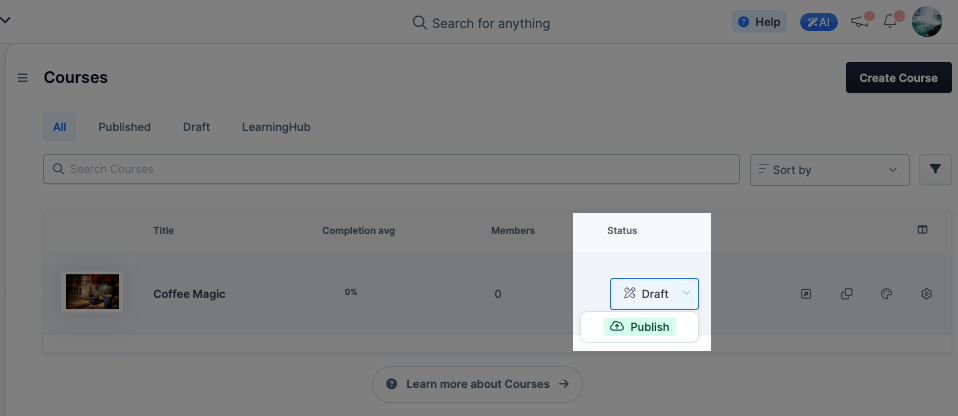
On the course page, click the Status drop-down.
Select Draft, then select Publish.
In the Available at field, choose a future availability date or leave blank for immediate availability.
Click the Update course button to save the changes and publish the course or the Discard changes to cancel any changes.
Duplicating a Course
On the Courses page, click the duplicate icon to the left of the preview icon to duplicate the course.
NOTE
All the Media (e.g., Image, Video, and Audio) Title, Description, Themes and Styles get duplicated when a course is cloned. The URLs in the course also get duplicated, but the app automatically adds alphanumeric characters to make the URL unique. You can change the URL by updating the Course Path URL in the Course settings.
Managing the Course Content
Click the Edit layout icon on the right side of your course row to access the course editor.

Add a new module by clicking the + icon next to Course Content.
To add submodules or lessons, click the + icon next to a module and choose the desired option.
Reorder content using the drag-and-drop feature.
Click the gear ⚙ icon next to any item to edit its settings.
Select a lesson to update the editor, then add sections, rows, columns, and elements as needed.
Click Save to maintain your changes.
For detailed instructions on managing course content, refer to the following articles:
How to Manage Course Modules
How to Manage Course Lessons
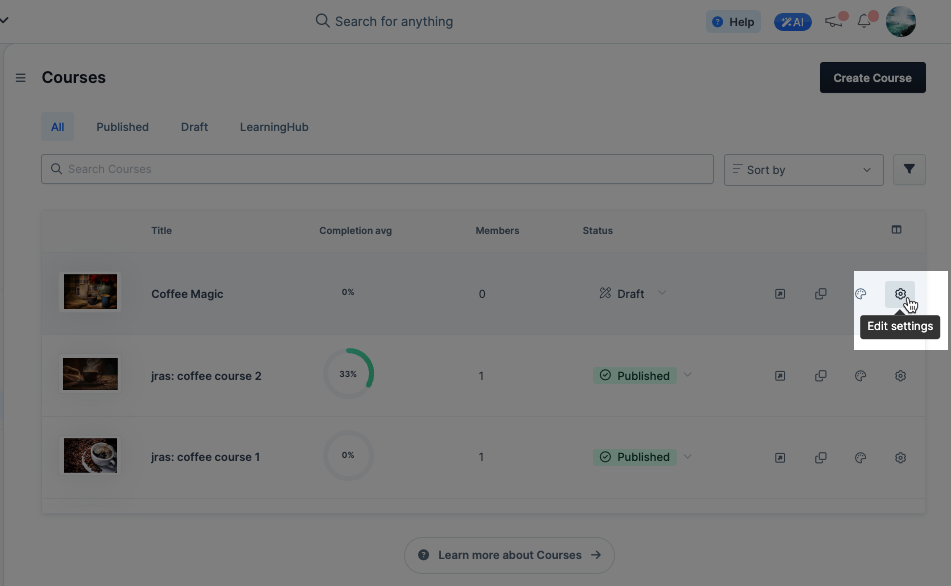
Editing the Course Settings
On the Courses page, click the Settings ⚙ icon to the far right of the course title to open the right-side menu.
Edit the settings of the course according to your preference. Visit our article Course Settings to learn more about the options found within the course settings.
Enrolling Your Customers
The Members tab will show all your enrolled customers. Please see our article on Enrolling Students in Courses for the step-by-step instructions on how to enroll students in your courses.
Customizing the Course Theme
ClickFunnels allows you to personalize the look and feel of your course to match your brand. By customizing the theme, you can align the aesthetics of your course content with your brand identity or preferences, enhancing the overall learning experience and engagement for your audience.
For step-by-step instructions on how to customize your course appearance, refer to our detailed article: How to Customize the Course Theme.
Deleting an Existing Course
Click the gear ⚙ icon on the right side of the page to open the course settings.
Scroll to the bottom of the right-side menu, then click the Delete button. Otherwise, click the Discard Changes button to cancel any changes.
Click the Proceed button in the popup to permanently delete the course. Otherwise, click the Cancel button to cancel any changes.
WARNING
Deleting a course is permanent and cannot be undone.
The app displays a confirmation banner at the upper-right corner of the page stating that the course has been deleted.