Opportunities in ClickFunnels are potential deals or sales that you are working on. They help you keep track of every step in the sales process, from the initial contact to closing the deal. Managing opportunities is incredibly useful for staying organized, prioritizing your tasks, and ensuring you don’t miss any potential sales. This article will show you how to make the most of opportunities in ClickFunnels!
Requirements
An active ClickFunnels account
The Opportunities app added to the workspace
Understanding Opportunities
Opportunities represent potential sales or deals that you're working on. In ClickFunnels, they’re used to track individual prospects as they move through your sales pipeline. Each opportunity acts as a record of a deal-in-progress and includes key information like who it’s assigned to, what stage it’s in, and its estimated value.
Opportunities are useful for keeping your pipeline organized and visible. Instead of relying on notes, spreadsheets, or memory, you can see all your open deals in one place, update their progress, and know what to focus on next.
Adding opportunities gives your sales process structure. It allows your team to:
Keep track of leads and where they stand
Assign deals to specific team members
Prioritize follow-ups
Forecast potential revenue
Avoid missed handoffs
Many businesses use opportunities in different ways. A service provider might add a new opportunity every time someone books a discovery call, updating the pipeline as follow-ups happen and marking deals as won once a client signs on. An agency might use workflows to create opportunities automatically when a lead fills out an application form, and then filter by assignee to see what each team member is handling. A coaching business might create opportunities manually for referrals and in-person signups so nothing falls through the cracks outside their automation flows.
Opportunities can support many types of sales processes, whether you’re closing a few high-ticket deals each month or managing hundreds of incoming leads.
How to Manually Add a New Opportunity
You can create an opportunity directly from the Opportunities app dashboard. This is useful when a new deal needs to be tracked and hasn’t been added through a workflow. You’ll enter details like the opportunity name, pipeline stage, and assigned team member before saving.
Navigate to the Opportunities app from the left-side menu in your ClickFunnels Workspace.
Click the Add Opportunity button located at the top left.

Enter the Name of your new opportunity.
Choose the Pipeline where this opportunity belongs.
Select the appropriate Pipeline Stage for this opportunity.
Choose the Primary Contact to select or create the Contact associated with this opportunity.
Assign the opportunity to a specific team member by selecting the Assignee. Assignees must have a supported role in the workspace. Opportunities can be assigned to users with the Funnel Builder, Admin, or Marketing roles. Other roles are excluded unless their access level is updated. For more details on roles and how to update access, refer to How to Add Team Members.
NOTE
Manually selecting an assignee will override the round-robin assignment, if applicable, for this specific opportunity. However, it will not affect the round-robin assignment for future opportunities.
Enter the Value of the opportunity, indicating its worth.
Set the Close Date for when you expect to finalize this opportunity.
Finally, click Create Opportunity to add it to your pipeline.
Creating Opportunities Using Workflows
Opportunities can also be created automatically through workflows. This method is helpful when you want new deals to be added based on user actions, such as filling out a form or making a purchase. The steps below explain how to set this up in the Automations tab.
Navigate to the Automations app from the left side menu.
Click the Add Workflow button at the top right of the page. You can also choose to edit an existing workflow.
Enter a Name for your new workflow.
Choose the Type of Run for the workflow.
Click Create Workflow.
Add a Trigger for the workflow, such as an opt-in, form submission, or page visit.
In the Workflow editor, click the + Sign under your trigger To add a step.
Scroll down and select Create/Move Opportunity from the sidebar.
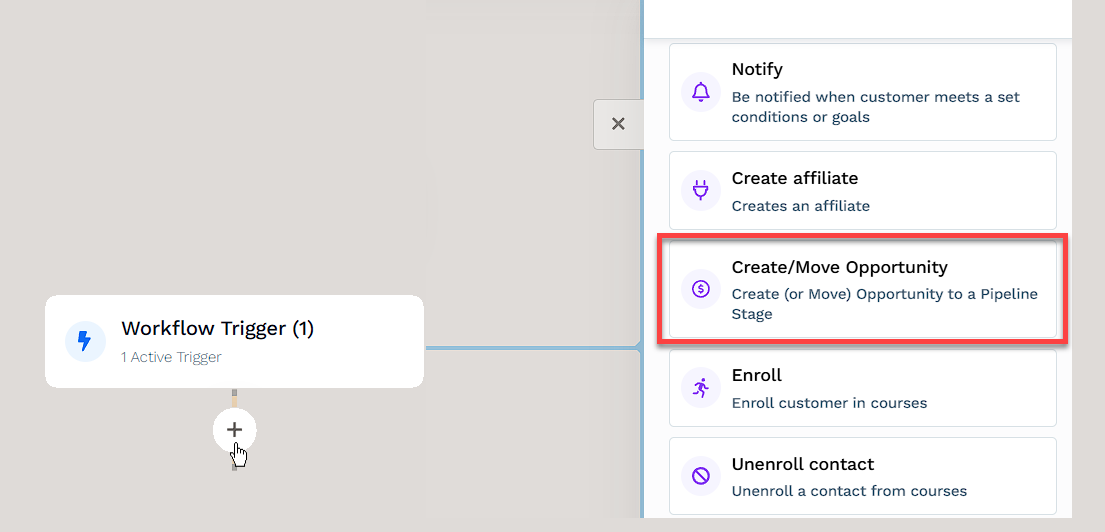
Pick the Pipeline where you want this opportunity to go.
Decide which Stage the opportunity should be in.
Choose an Assignment Strategy:
Do Not Assign: The opportunity won’t be assigned to anyone.
Assign to Team Member: Assign it to a specific team member. When you choose this, an input field will appear for you to add the team member’s name. Only users with the relevant permissions will be available to assign.
Use Pipeline Round Robin: This option uses the round robin settings of the selected pipeline to automatically assign opportunities to team members, ensuring an even distribution.
Configure Round Robin: Spread opportunities evenly among team members. Selecting this will open a field where you can add the team members involved.
Enter the opportunity Name. The default is
contact.email_address, and you can use Contact merge tags.Add the Deal Value of the opportunity to indicate how much it’s worth.
Toggle on Move existing opportunities if you want to move current opportunities to this workflow. If this is off, a new opportunity will be created for each contact instead.
Click the Create step button.
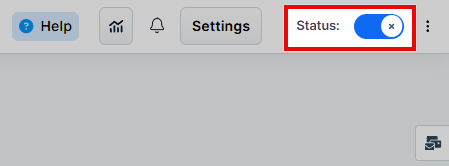
In the top right corner of the workflow navigation, toggle the Status option. The workflow status will change from disabled to active.
For more details, refer to the Workflows "Create / Move Opportunity" Step - Manage Opportunities in Pipelines doc.
How to Manage Opportunities
The Opportunities dashboard helps you keep track of every deal across your pipelines. You can adjust how you view the data depending on what you need to focus on, whether that’s by user, tag, or stage. This section shows you how to switch between views, filter the list, and access details so you can monitor activity and follow up as needed.
Switching Dashboard View
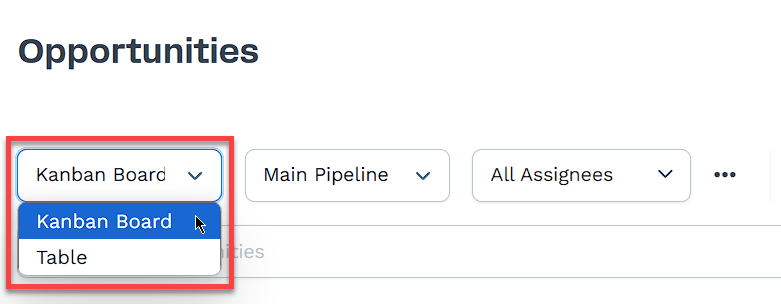
The Opportunities dashboard can be viewed in two formats to suit different preferences: Kanban Board and Table View. Switching between them helps visualize your pipeline in the way that works best for your workflow. Use the view selector to toggle between layouts at any time.
Click on the view option in the Opportunities dashboard.
Select between Kanban Board and Table View.
Viewing Opportunities Within Pipelines
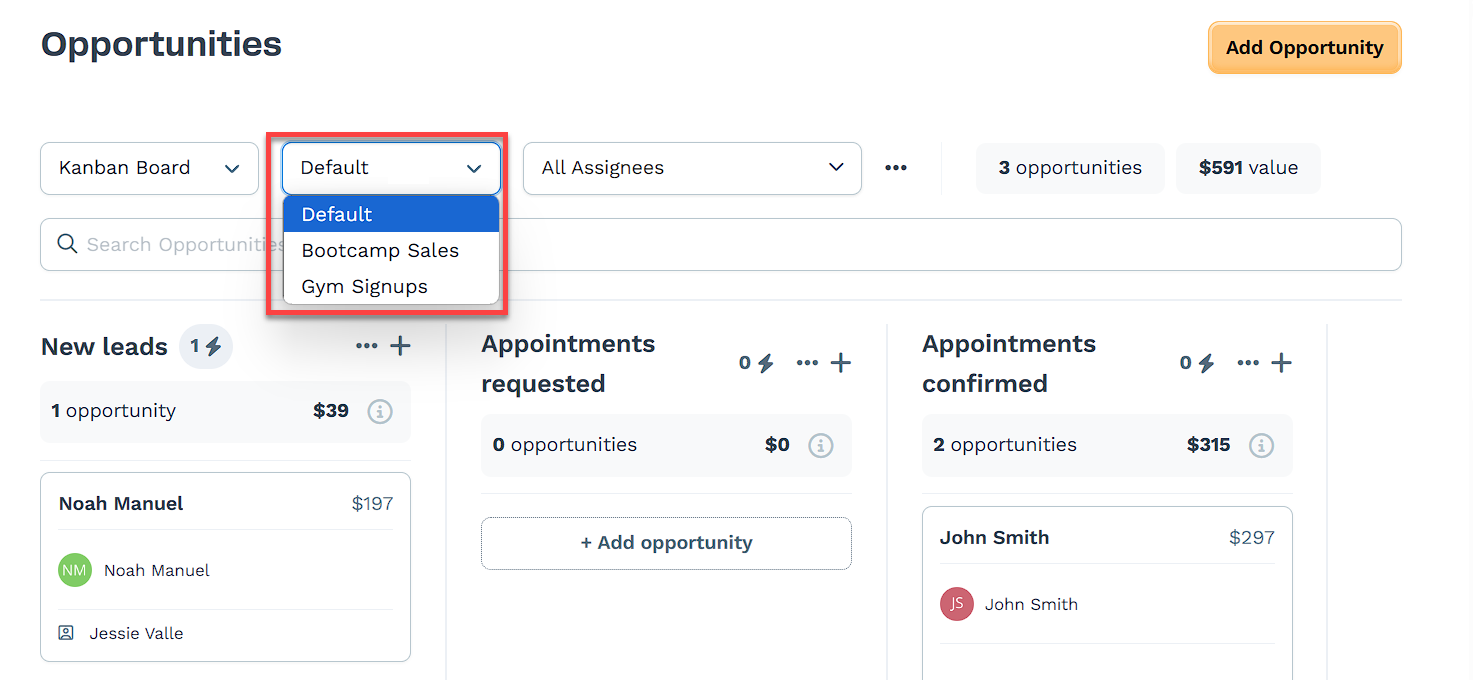
Whenever you create a new pipeline, it will become available on the Opportunities dashboard. To view opportunities within a certain pipeline:
Click on the Pipeline Name option.
Select the pipeline from the drop-down menu.
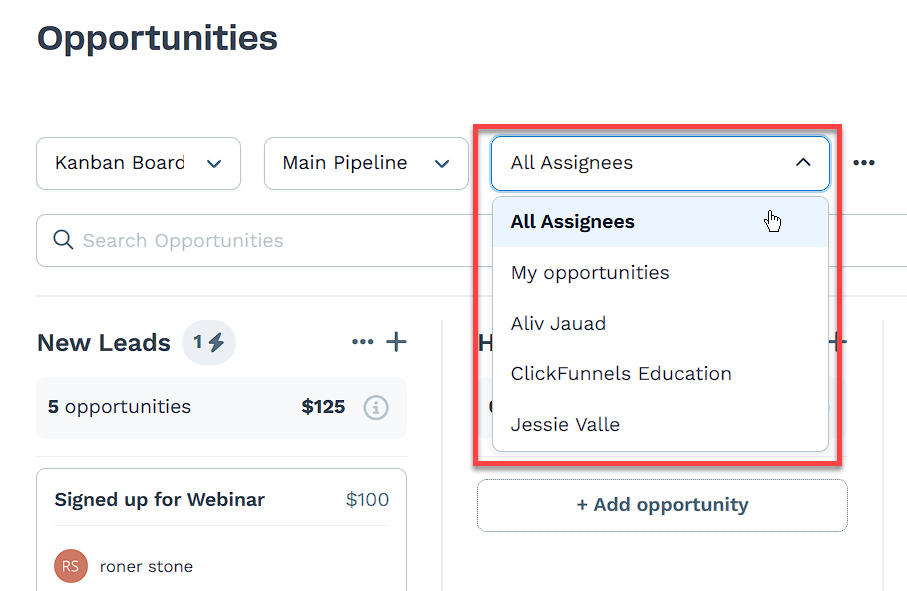
Filtering by Assignee
Click on the Assignee option to filter opportunities based on the assigned team member.
You can choose between All assignees or a specific assignee.
Using the Search Feature
Use the Search Opportunities bar to quickly find specific opportunities.
Type keywords or relevant details, and the list will update to display matching results.
How to Edit Opportunities
Click next to the opportunity Name.
A sidebar will appear showing the Opportunity details:
You can view additional contact information such as phone number, email, and contact tags within the sidebar.
Phone numbers and emails are clickable, allowing you to instantly call or email the contact directly.
Click on Edit Opportunity.
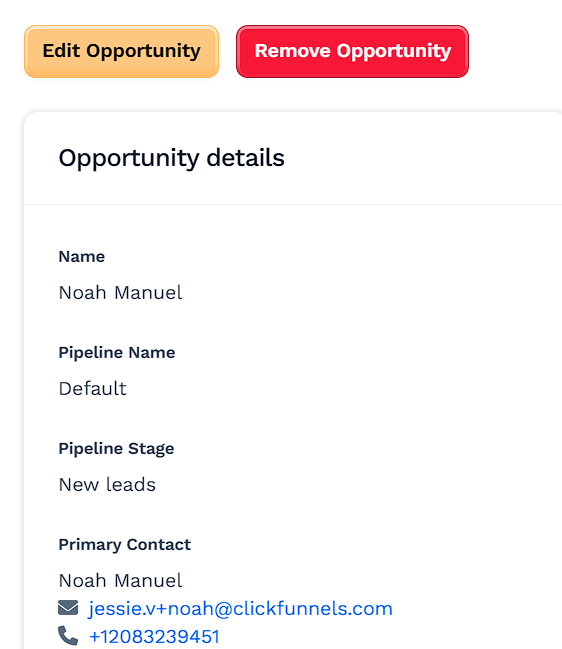
Edit the Opportunity details and click on Update Opportunity when finished.
Adding Notes to an Opportunity
Notes can be added to any opportunity to capture important updates, reminders, or context about the lead. These notes are visible in the opportunity details panel and help team members stay aligned.
To add a note:
Click on the opportunity card in the dashboard to open the details panel.
Scroll to the Notes section at the bottom.
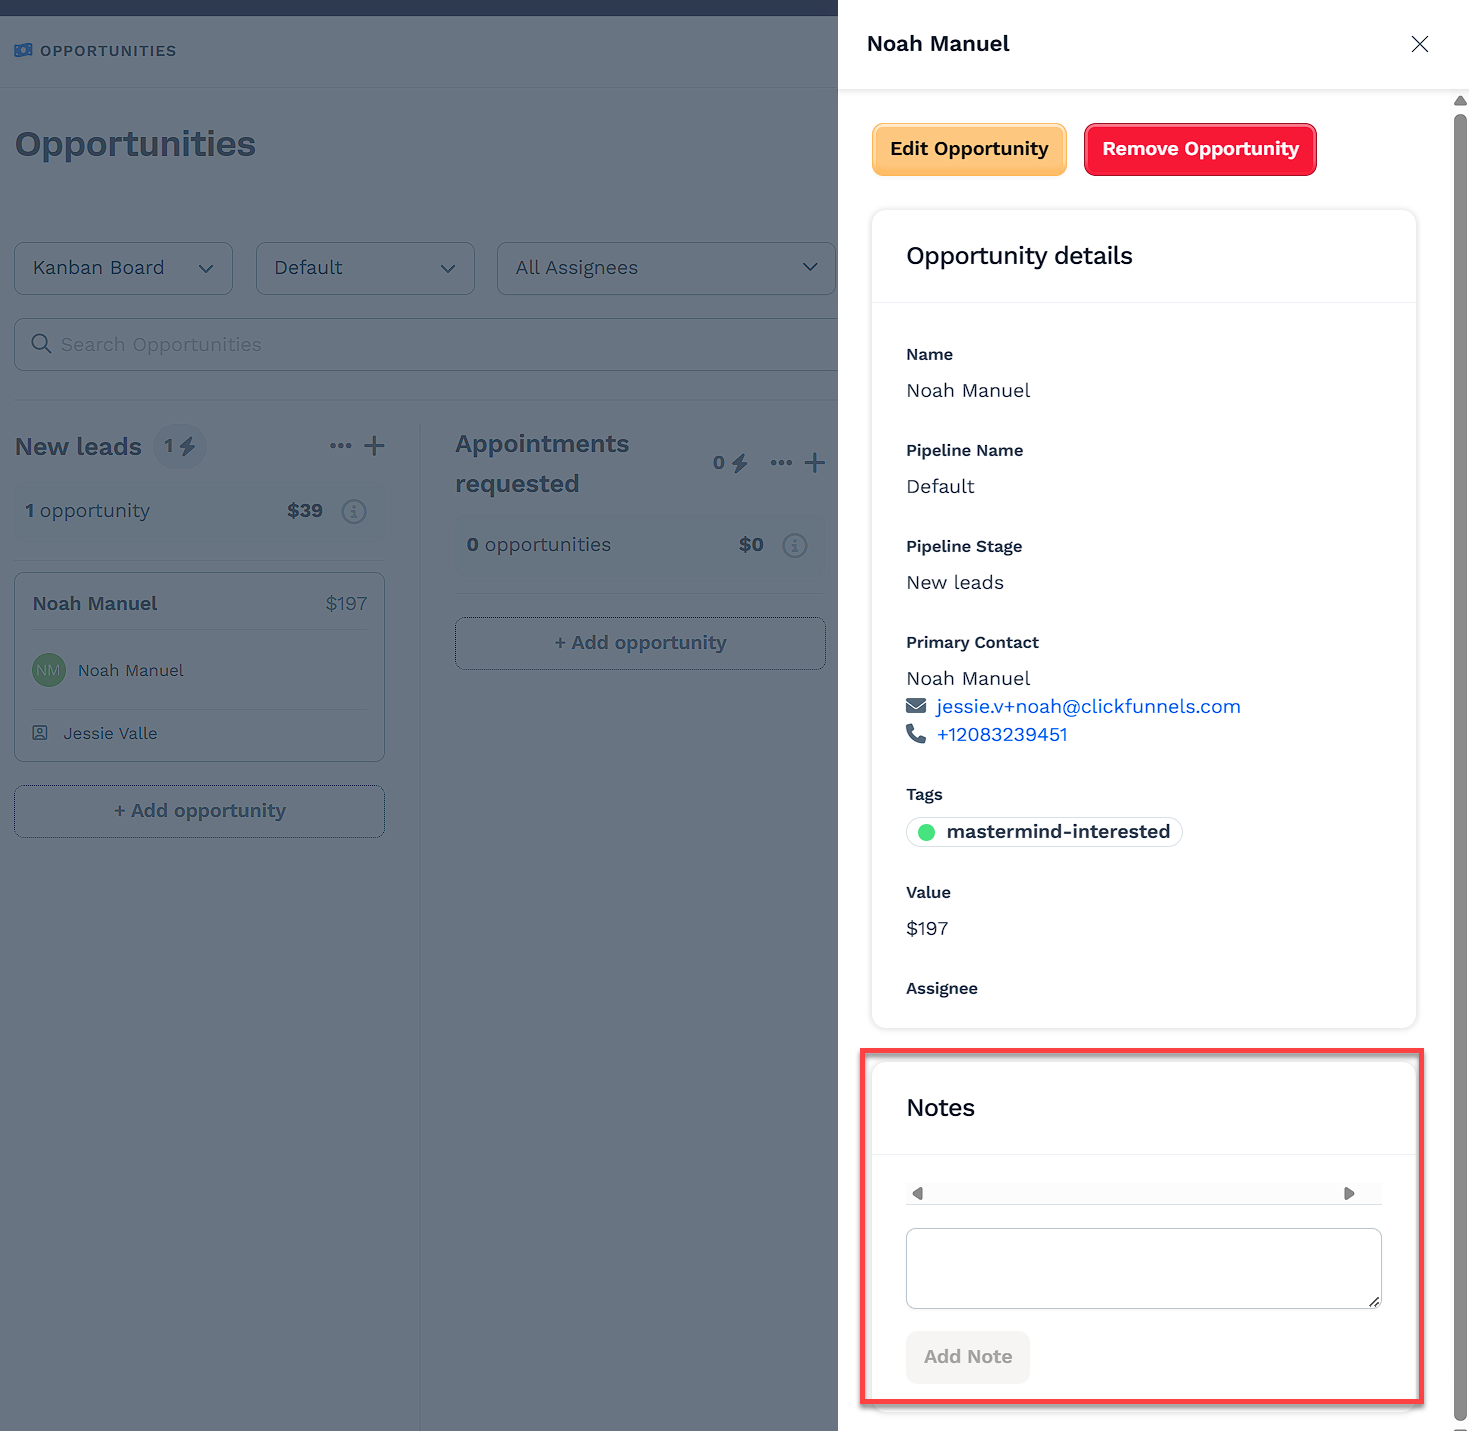
Type your note in the text field.
Click Add Note to save it.
How to Delete Opportunities
If an opportunity is no longer needed, it can be removed. Deleting is permanent and cannot be undone. Make sure the opportunity is no longer active before taking this step.
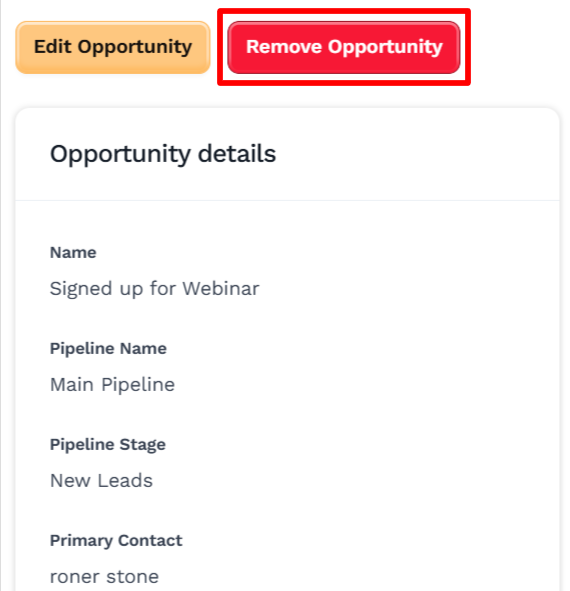
Click the opportunity Name.
Click the Remove Opportunity button at the top of the sidebar.
Click the Proceed button to remove the opportunity.