A Bridge Funnel is a simple two-page funnel that helps you warm up leads before sending them to a sales page you don’t control, like an affiliate offer or a network marketing site. It gives you a way to introduce the product in your own voice, build trust, and collect email addresses so you can follow up. This can make a big difference when you're promoting offers that don’t convert well on their own. In this article, we’ll walk you through the basics and show you how to set up your own Bridge Funnel.
Requirements
An active ClickFunnels account
How Bridge Funnels Work
A Bridge Funnel is used when promoting a product or service without having access to the sales page or control over the customer experience. This is common with affiliate offers, referral programs, or network marketing opportunities. The challenge in these cases is that sending traffic directly to someone else’s sales page often leads to poor conversions. Visitors land on a page they weren’t expecting, with no context or introduction, and most leave without taking action.
A Bridge Funnel solves this problem by acting as a “bridge” between the initial marketing and the final sales destination. Instead of sending traffic straight to the offer, leads are sent to a page that can be fully customized to introduce the product, share a personal message, and set clear expectations. This helps build trust and gives visitors a reason to continue through to the next step.
For example, in the fitness niche, a Bridge Funnel can be used to promote a third-party supplement or workout program. The bridge page might include a short video explaining how the product helped achieve specific fitness results, along with a downloadable checklist, a simple case study, or a bonus offer. Since the opt-in page collects emails, follow-ups can be sent to keep the lead engaged even if they don’t purchase immediately.
Understanding the Bridge Funnel Structure
A bridge funnel includes two core pages that work together to capture leads and introduce the offer. This setup is ideal for affiliate marketing, referral offers, or any situation where the final sales page is outside of the user's control. Each page plays a specific role in preparing visitors and increasing the chances of conversion.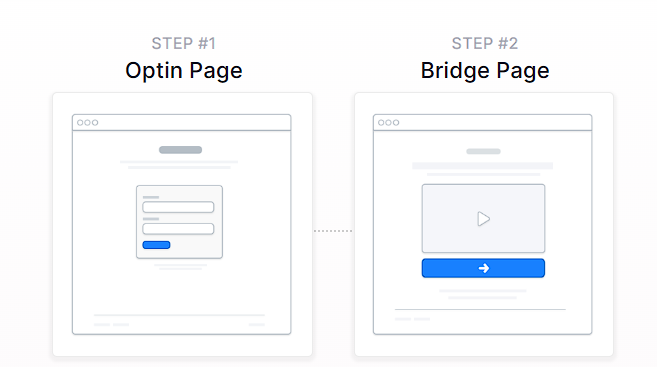
Opt-in Page: This is where visitors enter their email address to access the next step. It usually includes a headline, a short description, and a simple form. A lead magnet such as a free guide or bonus offer is often used to encourage signups.
Bridge Page: After opting in, visitors are taken to a bridge page that introduces the product or service. This page often includes a video that explains what the offer is, why it’s recommended, and what to do next. A call-to-action button links directly to the external sales or checkout page.
Creating a Bridge Funnel
A Bridge Funnel can be built quickly using ClickFunnels' pre-designed templates. Instead of starting from scratch, you can choose a template that matches your needs, customize it with your content, and launch your funnel in just a few steps.
In ClickFunnels, go to the Funnels section from the left navigation menu.
Click the Create Funnel button.
Browse the available funnel types and select a Bridge Funnel.
Each funnel type includes a training section with:
Overview: Understanding how a Bridge funnel works.
Strategy: Learning how to structure your funnel and offer for maximum impact.
Implementation: A step-by-step guide to customizing your funnel.
You can also watch the full training video at the top of this article. It covers all three parts in one walkthrough.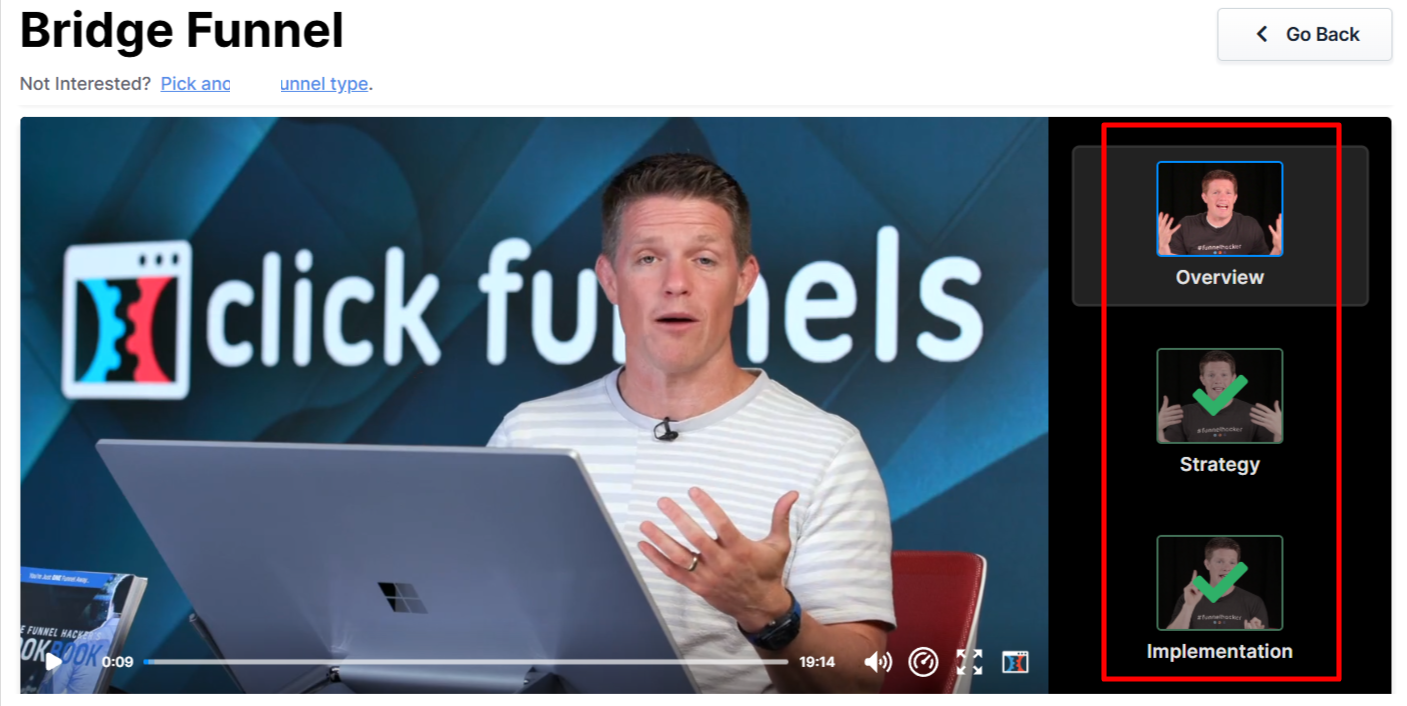
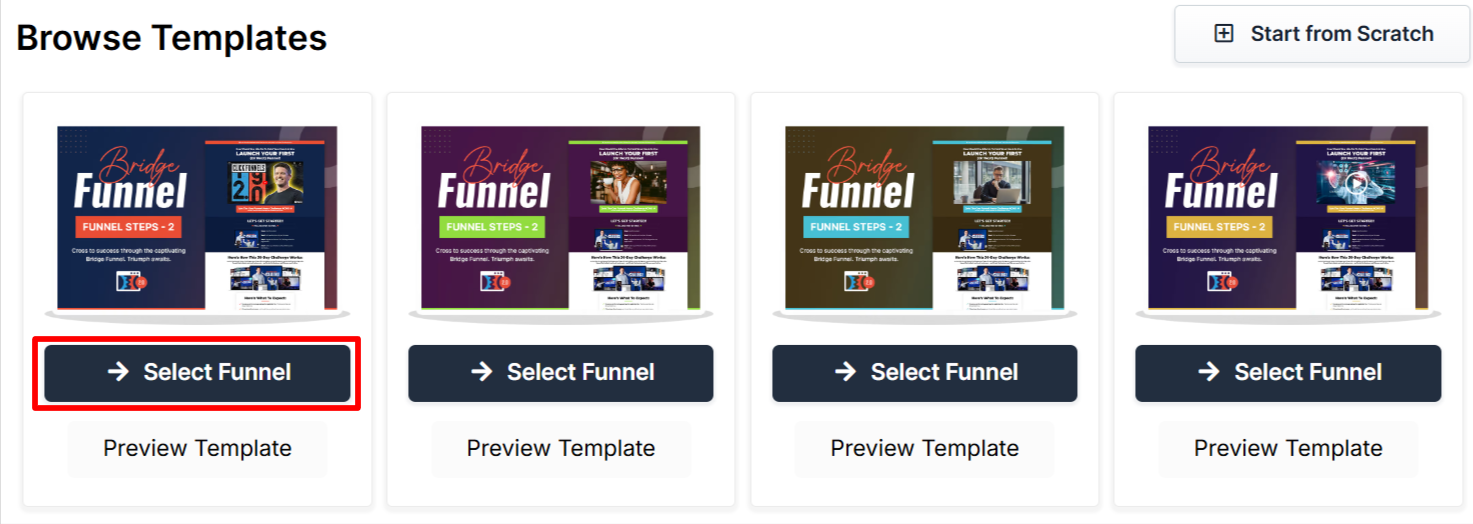
If you prefer a completely custom setup, click Start from Scratch to build your Bridge funnel manually. Refer to the How to Create a New Funnel article for instructions.
Scroll through the available templates and click Select Funnel under the one that best fits your business.
Wait for the funnel to install, then:
Click Close to exit the installation window.
Or click Customize Now to start editing your pages and adjust your call-to-action.
Once the template is loaded into your workspace, you can begin customizing it to fit your product, audience, and sales message.
Editing Bridge Funnel Pages
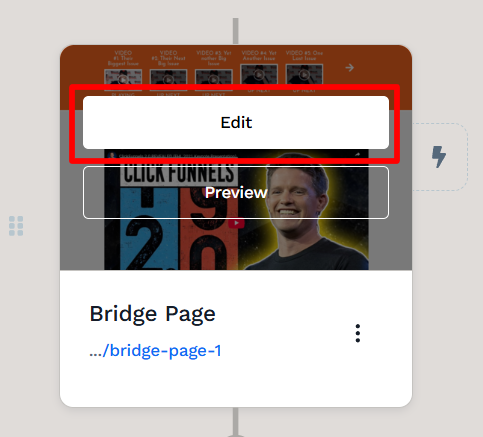
Once the Bridge funnel is installed, it can be customized by clicking Customize Now from the installation screen or by going to the Funnels section in the dashboard. From there, select the Bridge Funnel to open the page editor.
Open the Funnel Workflow Editor by clicking on the funnel. Find the page to edit, hover over it, and click Edit.
Each page is made up of sections, columns, rows, and elements. For a bridge funnel, key areas to customize include:
Opt-in Form: Update the form fields and settings to capture email addresses. Make sure the lead magnet offer is clear.
Headline and Subheadline: Use these to call out the main benefit of the offer and create curiosity.
Video: Add a short video to the bridge page explaining the product, why it’s recommended, and what the visitor should do next.
Call-to-Action Button: Link the button to the next step in the funnel or directly to the product page.
Bonus Section (Optional): Highlight any extra bonuses offered for purchasing through your link to increase interest.
To learn more about editing elements in ClickFunnels, refer to the Getting Started with the ClickFunnels Page Editor article.
Click Save at the top right to keep your changes.
Use the Preview option to see how the funnel looks before publishing.
NOTE
Remember to view your funnel on mobile devices to ensure it looks great on all screens. For detailed instructions, check our article on Mobile Optimization Techniques.
Automating Email Follow-Up with Workflows
Workflows make it easy to send follow-up emails after someone opts in through the bridge funnel. Instead of manually emailing each lead, workflows can handle ongoing communication automatically, helping keep the offer top of mind and increasing the chances of conversion.
With workflows, it's possible to:
Send a Welcome Email: Thank new leads and let them know what to expect.
Deliver Bonus Content: Share the lead magnet or any promised extras.
Remind Leads to Take Action: Follow up with gentle reminders to visit the bridge page or complete a sign-up.
Send a Series of Emails: Build trust over time with additional tips, stories, or value-based messages.
To create a workflow:
Find the funnel step where the follow-up should begin.
Click the Lightning Bolt icon next to that step to open the workflow settings.
Choose an existing workflow or click New Workflow to create one from scratch.
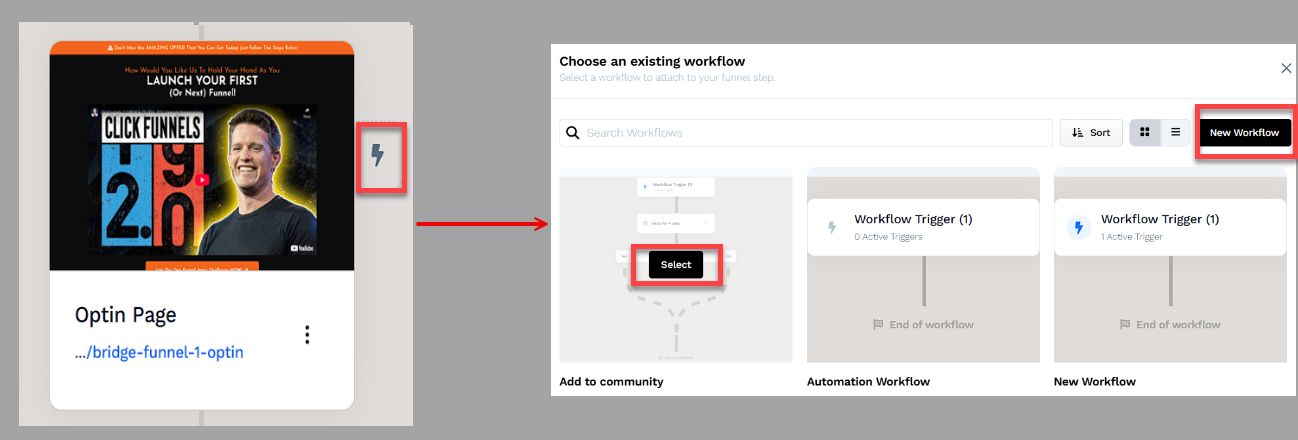
Click the + (Plus) icon to add actions such as Send an Email, Tag Contact, or Send an Asset.
(Optional) Add a Delay between actions to space out the emails over time.
In the top right corner of the workflow navigation, find the Status option.
Toggle the status option. The workflow status will change from disabled to active.
Helpful Resources:
Testing and Publishing Your Funnel
Before making your funnel live, it’s important to test its functionality to ensure everything works as expected.
Test the Funnel
Verify that all pages are connected in the correct order.
Check buttons, forms, and links to confirm they function properly.
Test the funnel on different devices and browsers for a smooth experience.
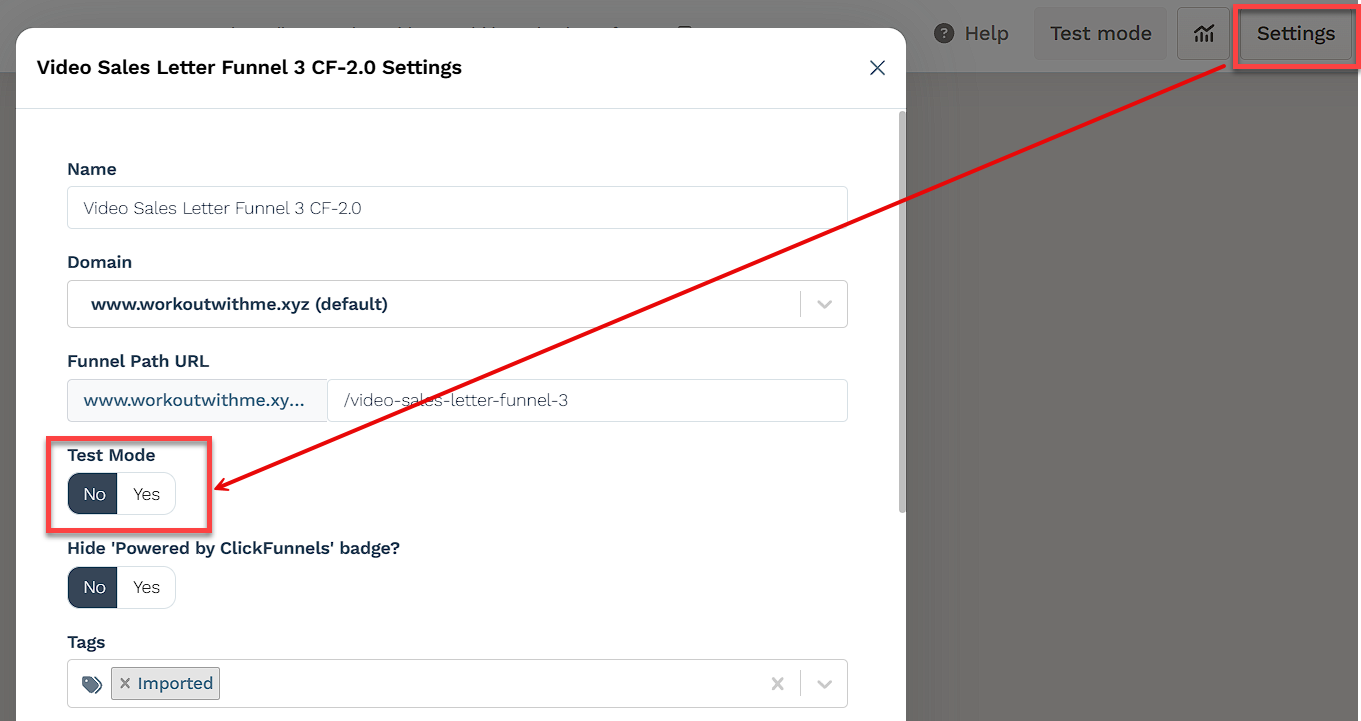
Enable Live Mode
Click the Settings button at the top-right corner of the funnel workflow editor to open the funnel’s settings.
Set the funnel to Live Mode to make it accessible to customers.
Copy and Share Your Funnel URL
Hover over the URL at the top of the funnel workflow page and click to copy.
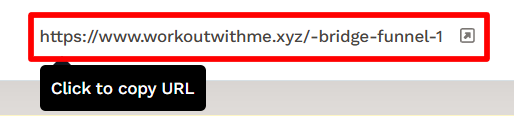
Share the link via your website, social media, or email campaigns.
Learn more about publishing and sharing your funnel in this article.
Funnel Builder Support Options
For additional support building your funnel, explore the Funnel Builder Coaching & Certification Program. The program offers step-by-step training and live coaching for members who want to build with guidance.
To hire a certified funnel builder, visit the Funnel Builder Directory to connect with a verified expert.