Imagine having a pre-built toolbox containing everything you need to launch and grow your business. ClickFunnels Frameworks makes this concept a reality. With Frameworks, you can share various components of your ClickFunnels workspace, such as funnels, themes, courses, workflows, and more, effectively packaging a complete business solution for others. In this article, you will learn how to create, manage, and utilize ClickFunnels Frameworks to streamline your processes and enhance collaboration within your business.
Requirements
An active ClickFunnels account
Components intended to be shared (e.g., Funnels, Workflows, Themes, Courses, etc.) created and set up in your workspace
Understanding the Frameworks Feature
A ClickFunnels Framework is a comprehensive template that allows you to share all key components of your ClickFunnels workspace. This includes funnels, workflows, themes, courses, products, stores, and more. It serves as a complete blueprint that can be implemented or customized to meet specific business needs.
For example, an online fitness coaching business can create a Framework that includes a lead generation funnel, an onboarding workflow, a branded theme, and courses with workout plans. Other coaches can then import this Framework to set up their businesses quickly, using proven strategies.
Benefits of Using a Framework
ClickFunnels Frameworks provide significant benefits for both sharing and receiving a complete business setup:
Pre-built funnels for clients: Frameworks offers a time-saving and efficient solution for delivering high-quality funnels to your clients without the need to build them from scratch each time.
Consistency and Scalability: By providing a pre-built, cohesive structure, Frameworks help maintain consistency across multiple accounts, making it easy to scale successful strategies.
Customization Flexibility: Share only the components you need, tailored to specific requirements.
Comprehensive Resource Sharing: Frameworks allow sharing of a variety of components, including themes, email templates, and pages, ensuring all the essential resources are available for a quick start.
Quick start for new ClickFunnels users: Frameworks provide a valuable starting point for new users of ClickFunnels. They can leverage pre-built components to learn the platform and build upon existing templates.
Business Transition: Ensure smooth transfers of ownership or management of your ClickFunnels setup.
Adding the Frameworks App
From the left sidebar menu, click on + Add Apps to navigate to the Apps page.
Navigate to the Frameworks app section, then click on it.

Confirm your selection by clicking the Add App button.
Learn more about how to add an App in ClickFunnels in the article Adding Apps to Your ClickFunnels Workspace.
Creating a New Framework
From the left sidebar menu, click on the Framesowks app.
On the Frameworks page, click on the Add New Framework button.

In the open prompt, add the Name of the Framework.
Add Framework Information: In the top right corner, click the Gear
⚙️ icon to access the Framework settings. This includes: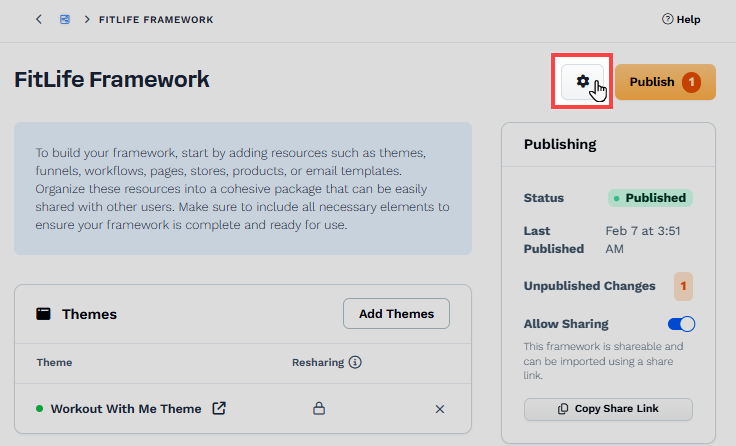
Name: Provide a name for your Framework so you can identify it easily.
Description: Provide a description of your Framework.
Learn More Link: You may create a landing page or funnel page that provides detailed information for your clients on how to claim the Frameworks and use them for their business. Enter the page URL in this field so they can access the page and learn about your Framework.
Affiliate Name and Code: You can enter your affiliate name and select affiliate code here. This will enable you to earn a commission if someone creates a new ClickFunnels account by clicking on your shareable link.
Add Resources: You can select the specific components another ClickFunnels user or entrepreneur would need to run a successful campaign or business using your Framework.
Themes: Click ‘Add Themes’ to include any theme you have created in your workspace and want to share within this Framework.
Courses: Click ‘Add Courses’ to add one or more courses from your workspace. If the course you wish to share is a paid course, you may activate the ‘Include Products’ option. Any product incorporated into the Access menu within the Course settings will be shared with the Framework.
Funnels: Click ‘Add Funnels’ to select specific funnels to include in the Framework. If your funnel checkout pages contain products and you wish to share them with the recipient, you may enable the ‘Include Products’ option.
Important:
When you add a funnel to the Framework, any workflows connected to its pages will be automatically shared and linked to the corresponding funnel pages in the recipient’s workspace. There is no need to add these workflows separately in the “Workflows” section.
Workflows: Click ‘Add Workflows’ to incorporate any relevant automated workflows into the Framework.
Pages: Click ‘Add Pages’ to include the landing pages essential for your ClickFunnels Framework's functionality.
Store: Click ‘Add Store’ to include the store from your workspace. Choose a theme that will be applied upon import. Configuring a theme will automatically add it as an included Theme in your Framework. If the “Include Products” toggle is enabled while adding the store, it will automatically add all products visible in the store to the Products section of the Framework. If the toggle is off, no products will be shared unless they are manually added to the Products section.
Important:
If the recipient’s workspace already has a store set up, the Framework cannot be imported into that workspace to avoid conflict. The recipient will need to select a different workspace or create a new workspace to import the Framework successfully.
Products: Click ‘Add Product’ to include individual products independently of a store or funnel. This option is useful if you want to share specific products without including the entire store setup.
Email Templates: Click ‘Add Email Templates’ to add any email templates from your workspace.
Opportunity Pipelines: Click ‘Add Opportunity Pipelines’ to share an Opportunity Pipeline with recipients.
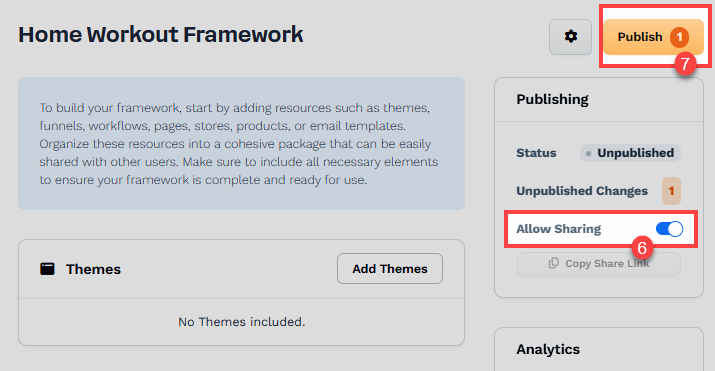
Ensure the Allow Sharing option is toggled on.
Click Publish to save your new Framework.
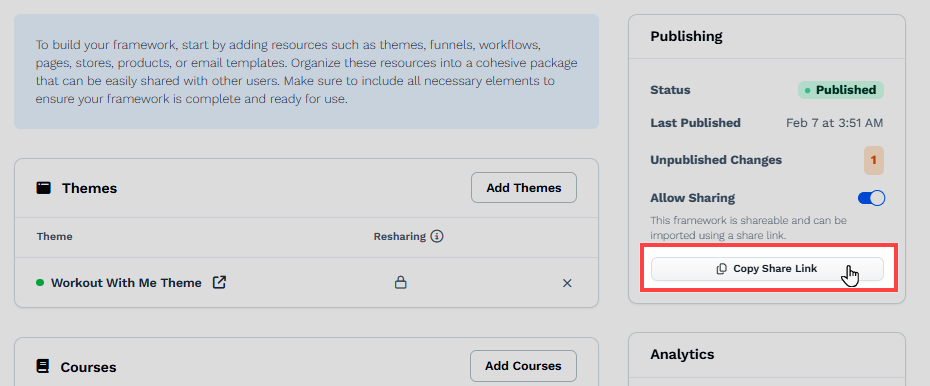
Click the Copy Share Link to copy the shareable link and distribute it to the audience to claim the Framework.
Preventing Re-Sharing of Framework Content
As a Framework owner, you have the ability to control whether the content shared within your Framework—such as funnels, courses, themes, workflows, landing pages, and email templates—can be reshared by recipients. This ensures that your proprietary content remains within your intended audience and is not redistributed without your permission.
How to Disable Re-Sharing
To prevent users from re-sharing content, you must adjust the Reshare settings within each content type. For instance, when sharing a funnel within the framework, it is necessary to access the specific funnel and adjust the resharing settings accordingly. Please follow the steps outlined below:
Navigate to the settings of the content you want to manage (e.g., Course, Funnel, Workflow, Theme, Landing Page, or Email Template).
Look for the Sharing section or try to generate a shared link.
Find the Reshare option.
Select No or toggle the option off to disable re-sharing.
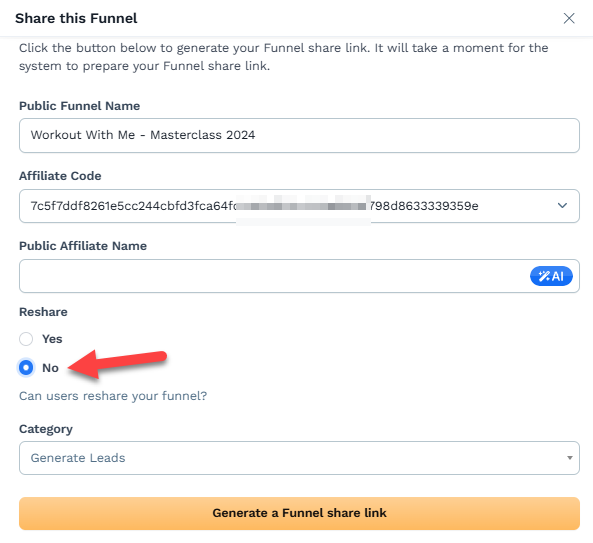
Save the changes to apply the settings.
By turning off the re-sharing option, you ensure that recipients cannot reshare the content you distribute through your Framework, maintaining control over your assets.
Viewing Framework Analytics
The Analytics section in a Framework tracks how often it has been imported into other workspaces. It includes:
Total Imports – Displays the total number of times the Framework has been installed.
Import History Chart – This shows a graphical timeline of imports.
Date Filter—Allows filtering import data by different time ranges (e.g., the Last 7 Days, the Last 30 Days).
Configuring the Framework Promo Banner
The Promo Banner feature allows Framework creators to display a customizable banner on the recipient’s ClickFunnels workspace dashboard once the Framework is claimed. This banner provides essential information, promotional details, or instructional content to help recipients better understand the Framework.
Benefits of Using a Promo Banner
Enhanced Visibility – Helps recipients quickly recognize and differentiate the Framework from others in their workspace.
Instant Access to Information – Provides a direct link to resources, tutorials, or promotional content.
Streamlined User Experience – Ensures recipients understand the purpose and value of the Framework immediately after claiming it.
Setting Up the Promo Banner
Locate the Promo Banner section in the right-side panel.
Click Customize Promo Banner to access the settings.
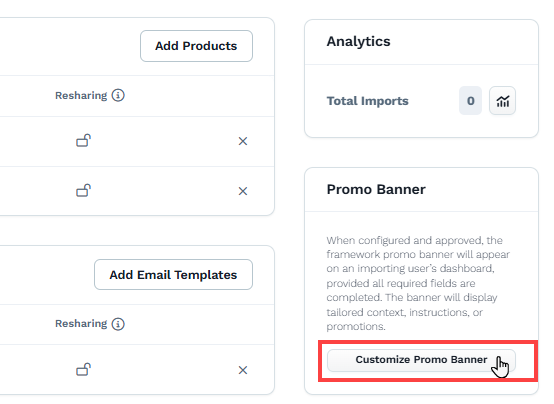
Fill in the following details:
Banner Thumbnail – Upload an image to represent your Framework.
Banner CTA Title – Enter a short, attention-grabbing title.
Banner CTA Description – Provide a brief description of the Framework.
Banner Learn More Link – Add a URL where recipients can get more details. You can create a landing page in your workspace to include details about your framework and use the page URL here.
Banner Button Text – Customize the call-to-action button text.
Click Save Changes to apply the settings.
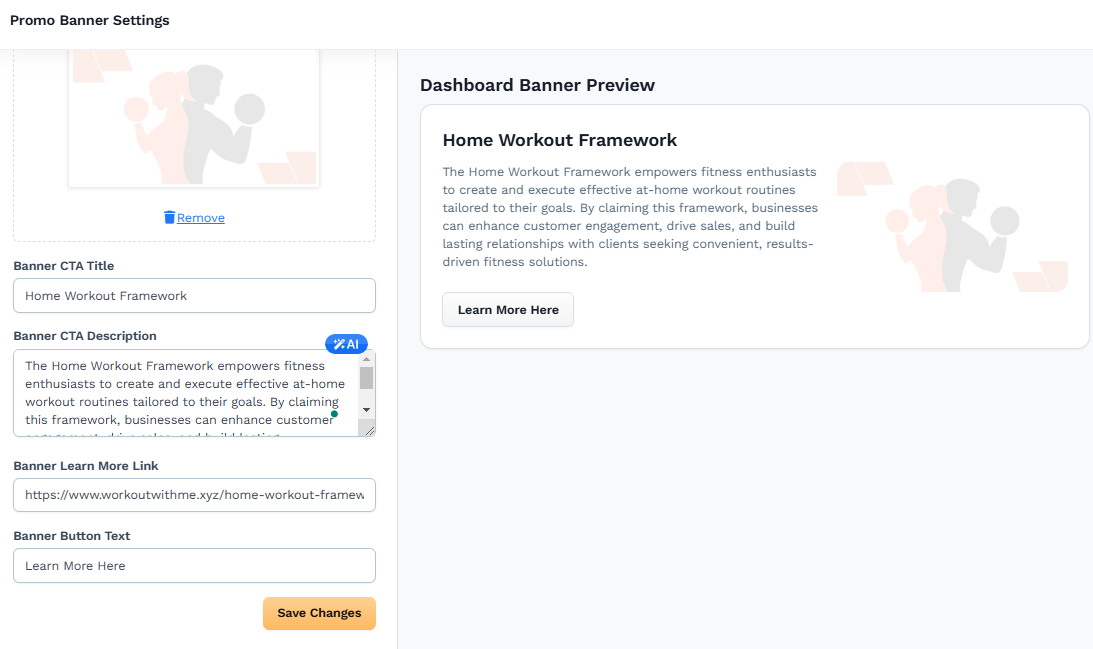
Once submitted, the promo banner will be marked as Pending Approval. One of the ClickFunnels team members will review the banner content and approve it to be displayed in the recipient's workspace. Once approved, it will appear on the recipient’s workspace dashboard when they claim the Framework.
Note:
You may still share a framework with your audience even if the promo banner has not yet been approved. The banner will only be visible in the recipients' ClickFunnels workspace dashboard once it receives approval.
Promo Banner Suggested Guidelines
Review these guidelines before submitting a promo banner for approval. If your banner has been denied, use these suggestions to edit and resubmit.
Ensure all content (image, text, and links) complies with local, state, and international laws.
Avoid misleading claims in the CTA title, description, and button text.
All content must align with ClickFunnels' terms of service.
Do not promote illegal activities or anything that could be considered harmful or discriminatory.
Use only licensed or original images.
Ensure content does not infringe on copyrights or trademarks.
Ensure all text is directly related to the framework.
Avoid linking to expired or outdated offers.
By adhering to these guidelines, you can create a promo banner that is visually appealing, effective, and compliant with all necessary regulations.
Editing and Modifying a Framework
Navigate to the Frameworks app.
Click on the Name of the Framework you wish to edit.
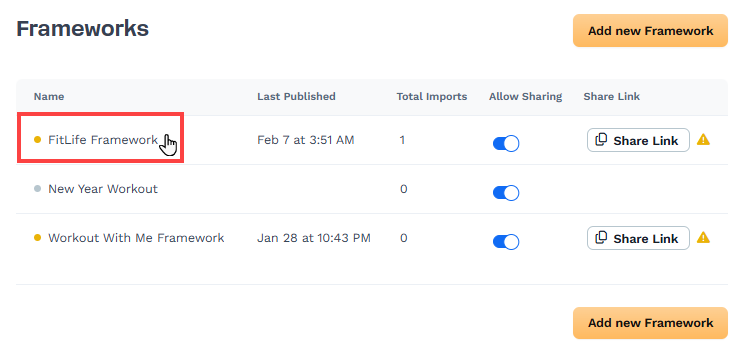
Modify the Framework information and other resources.
Ensure the Allow Sharing option is toggled on.
Click on Publish to update the shareable link.
Note:
Modifying a Framework does not change its shareable link; the link remains static, ensuring uninterrupted access for users. After modifying, make sure you click Publish button to update sharble link so receipient receives updated resources.
Deleting a Framework
Navigate to the Frameworks app.
Click on the Name of the Framework you wish to delete.
Scroll to the Framework settings page's bottom and click the Delete button.
A confirmation prompt will appear; click Proceed to delete the Framework permanently.
Warning:
Deleting a Framework is a permanent action and cannot be undone. Ensure you are deleting the correct Framework before proceeding.
Claiming a Framework to the Receipient’s Workspace
Open a web browser (such as Chrome, Firefox, Safari, etc.) and paste the shared link into the address bar.
If you are not already logged in, you will be prompted to log into your ClickFunnels account. If you do not have an account, you will need to create one.
Once logged in, you can choose which workspace you want to import the components into. Alternatively, you can create a new workspace for the imported Framework.

ClickFunnels will import all the resources from the shared Framework into the selected workspace. When the importing is completed, a success window will appear.
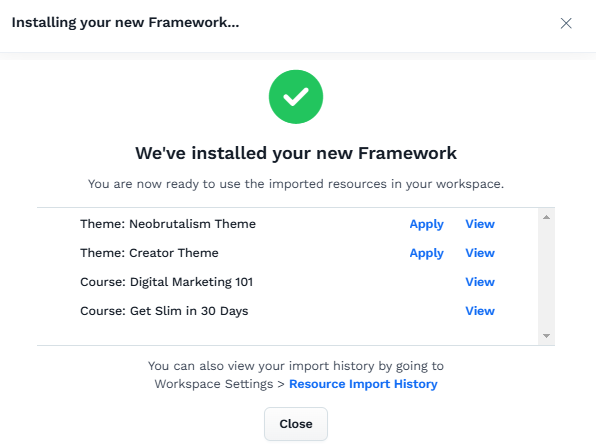
You can close the window during the import process, as it may take some time to finish. You can always view the import status in the Workspace Settings » Resource Import History.
Frameworks FAQs
If my funnels have products attached to their pages, will they be included when I share the Framework?
You can decide whether to include the products when you add the funnels to the Frameworks. If you turn this option on, the products linked to the funnels will appear in the Framework settings under the Products section.
When I include a store in the Framework, what happens if the recipient’s workspace already has the store set up?
You cannot import a Framework into a workspace with an existing store. To avoid this issue, the recipient can either create a new workspace to import the Framework, or you can create the Framework without including the store component.
Are there any limitations on what I can include in a Framework?
You can export workspace themes, courses, funnels, workflows, pages, store, products, and email templates.
Can I share a Framework with someone who does not have a ClickFunnels account?
Yes, you can share a Framework with someone who does not have a ClickFunnels account. They will be prompted to create a new ClickFunnels account when they click the shared link.
Will all product variants, images, and other details be imported if I include products in the Framework?
Yes, when products are included in a Framework, all details, such as variants, images, pricing, and other product-specific options, will be fully imported into the recipient’s workspace, ensuring consistency and completeness.