Blog theme pages in ClickFunnels allow you to structure how your blog appears to visitors. These template pages are part of your theme and include dynamic elements to enhance the presentation of blog content. Below, we’ll explore the different blog theme pages and how you can customize them using the editor.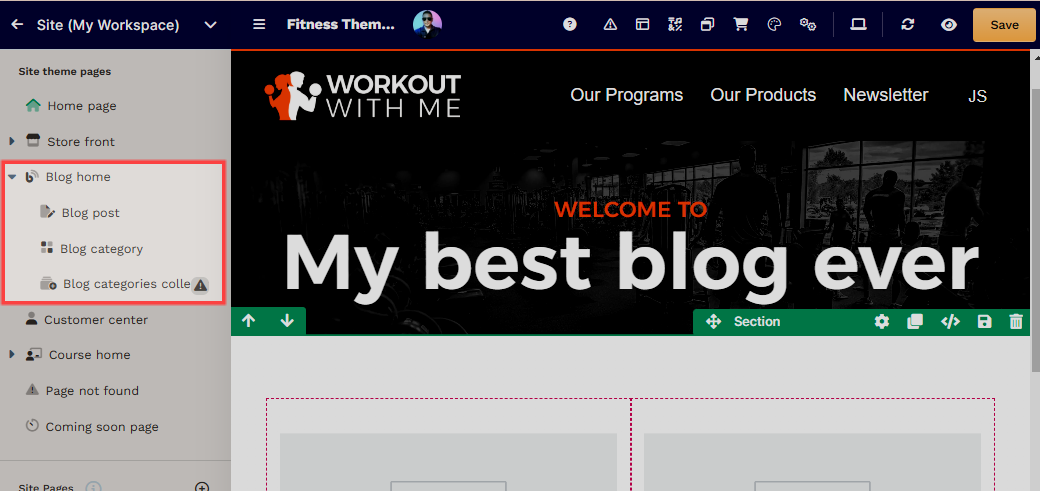
Requirements
An active ClickFunnels account
Understanding Blog Theme Pages
When you create a workspace in ClickFunnels, it comes with a default theme that includes pre-configured blog pages. These theme pages serve as the foundation of your blog and are designed to display blog content dynamically. Key details include:
Part of the Theme: Blog pages are part of the active theme in your workspace. Themes define your site's overall design and layout, including your blog.
Customizable Templates: While these pages are pre-designed, you can fully customize their content, layout, and styling to align with your brand.
Dynamic Functionality: The blog pages leverage dynamic elements to automatically display blog posts, categories, and other related content.
The main blog pages included in the theme are:
Blog Home Page: The primary landing page for your blog.
Blog Post Page: Displays individual blog posts.
Blog Category Page: Lists blog posts filtered by category.
Blog Categories Collection Page: Displays all available blog categories.
Accessing Blog Theme Pages
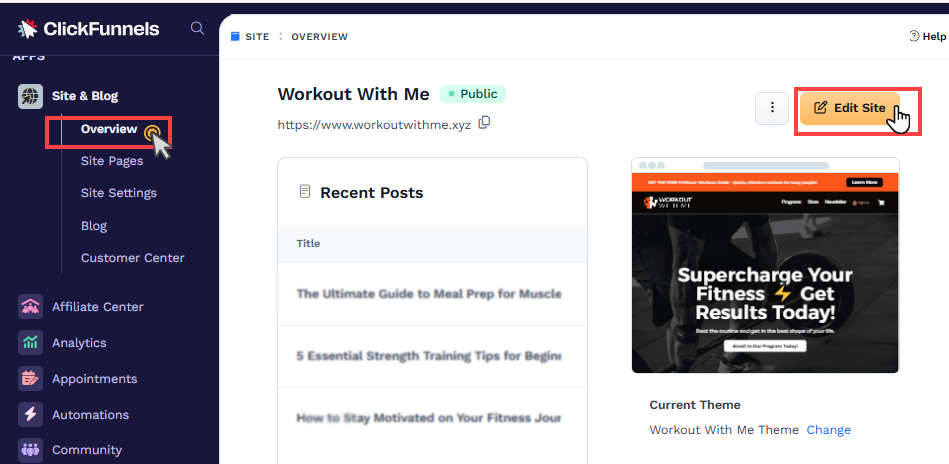
You can access and edit your blog theme pages directly from the Site & Blog app in ClickFunnels. Follow these steps:
Navigate to the Site & Blog app in the left-hand menu of your workspace.
Click on Overview to view a summary of your site, including blog posts and pages.
Select Edit Site to access the theme pages.
Locate the blog pages in the "Site Theme Pages" section. These include the Blog Home, Blog Post, Blog Category, and Blog Categories Collection page.
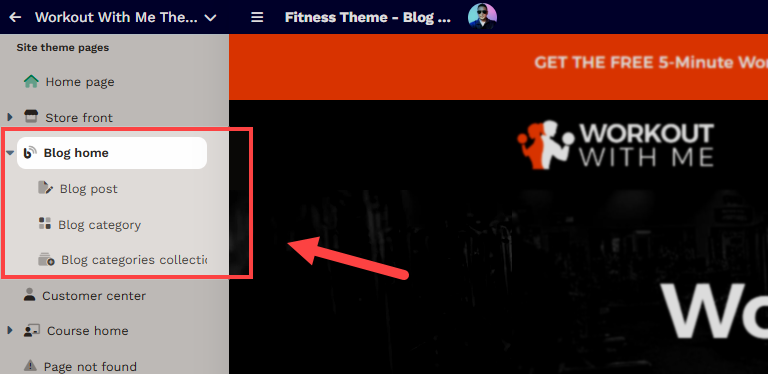
Clicking on the page name will open it in the page editor. After making the necessary edits to the content, please click Save to apply the changes.
Blog Home Page
The Blog Home Page is the main landing page of your blog. Visitors see this page when they access your blog's main URL. Visitors to the Blog Home Page will see a comprehensive overview of your blog's content. This includes:
A List of Available Blogs: Display recent or featured blog posts dynamically using the Collections elements.
Blog Categories Overview: Showcase categories prominently, allowing users to explore posts by topic or interest.
Adding Dynamic Blog Collection Elements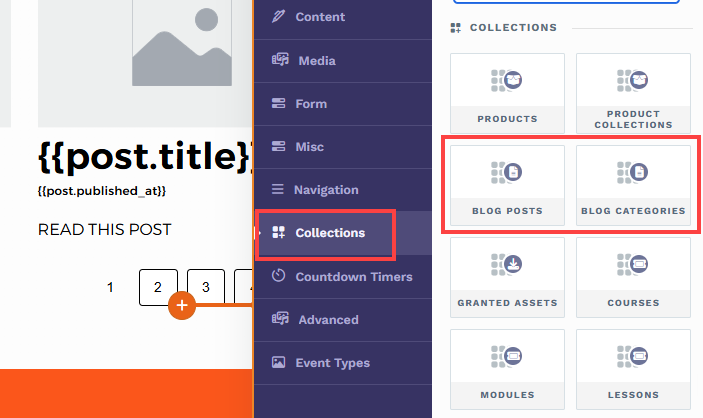
Blog Posts Collection Element: Use this element to display an organized list of blog posts that are updated dynamically. Learn more about the Blog Posts collection element in the article (Collections) Blog Posts: Display and Organize Your Blog Posts.
Blog Categories Collection Element: Add this element to feature your blog categories, helping users navigate your content effectively. Learn more about the Blog Categories collection element in the article (Collections) Blog Categories: Display Blog Categories.
These dynamic elements ensure that your Blog Home Page remains up-to-date and visually appealing without requiring constant manual updates.
Blog Post Page
The Blog Post Page is displayed when someone clicks on a specific blog post. It dynamically updates to show the content of the selected post.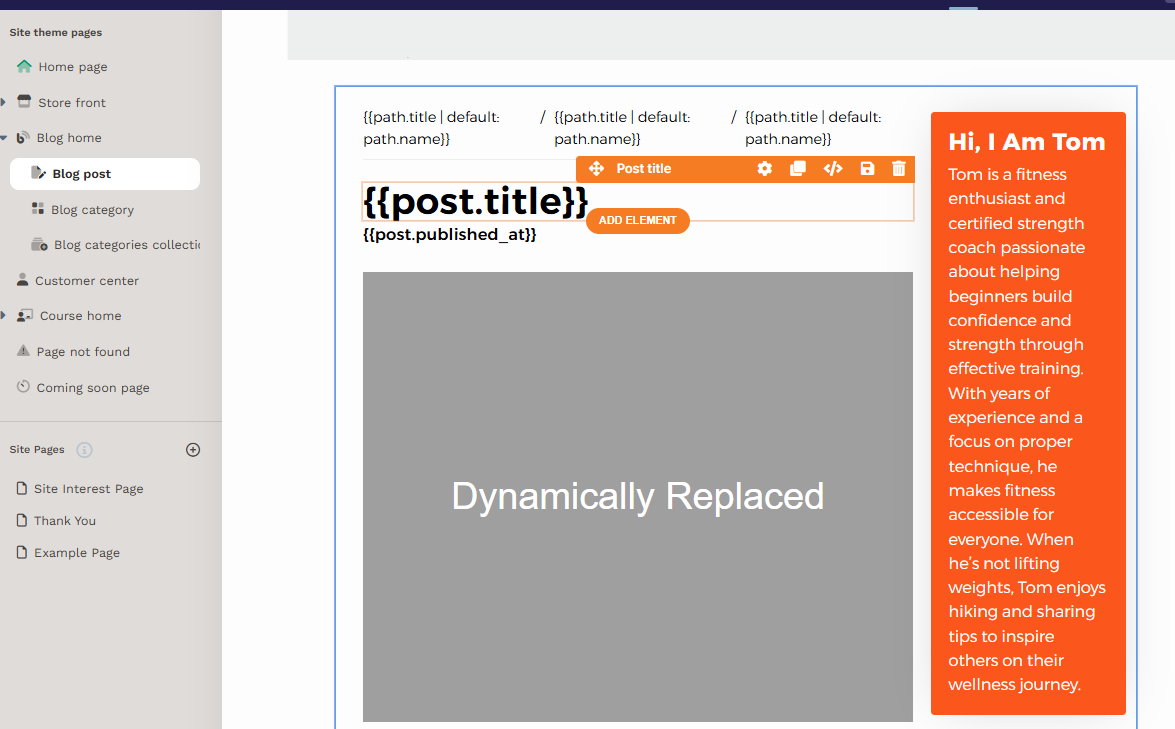
Using Dynamic Blog Elements
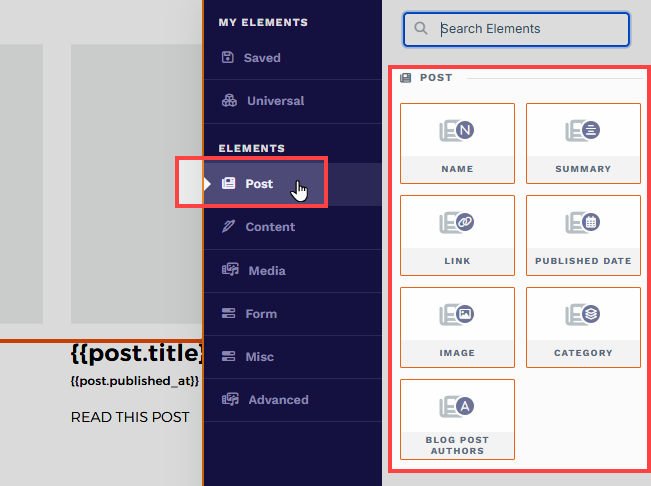
To display blog content dynamically, you can use the following Blog Post Advanced Elements:
Title: Displays the blog post's title.
Summary: Shows a brief description or excerpt from the blog post.
Published Date: Automatically populates the publication date of the post.
Image: Adds the main image associated with the post.
Category: Displays the category assigned to the blog post.
Blog Post Authors: Lists the authors of the post, if applicable.
These elements ensure your Blog Post Page adapts dynamically to the selected post's content, providing visitors with a seamless experience.
Adding Breadcrumb Navigation
To enhance navigation, you can add a Breadcrumb Navigation element. This feature helps users trace their path from the Blog Home Page to a specific category and then to the post itself.
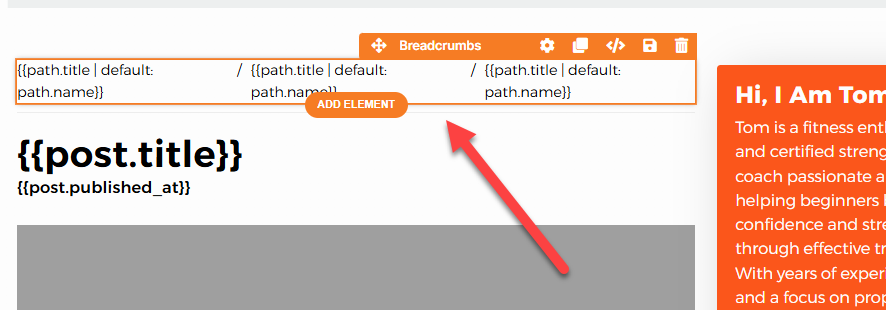
For detailed instructions on how to set up breadcrumb navigation, refer to the article Breadcrumbs: Enhance User Navigation with Dynamic Paths.
Blog Category Page
The Blog Category Page appears when visitors select a category. It dynamically displays all blog posts associated with that category.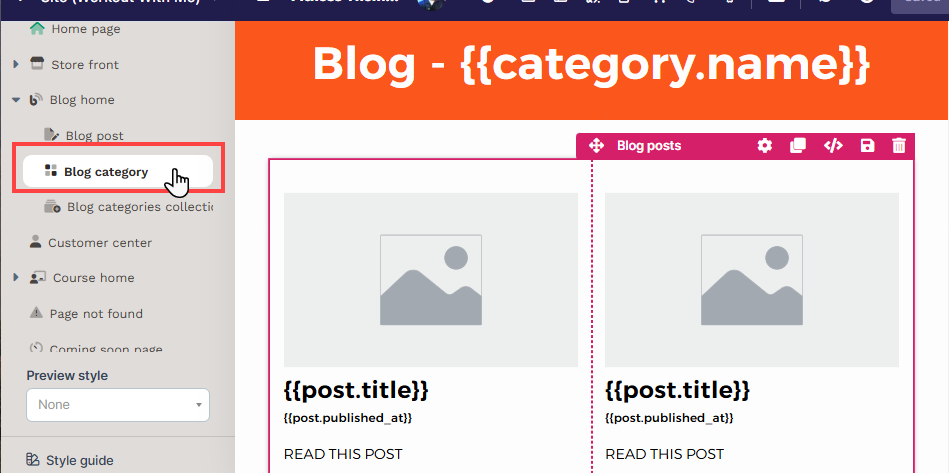
Displaying Blog Posts on the Category page:
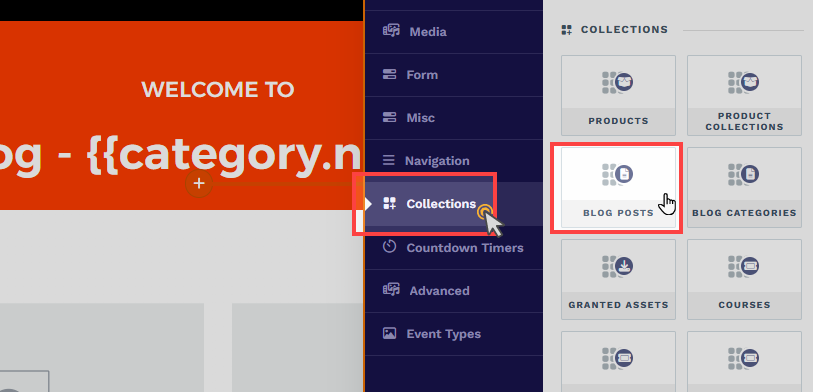
To display all the available blog posts within a selected category, you need to add the Blog Posts Collection element. This element allows you to create a grid layout with dynamic blog elements that can auto-populate the blog post information.
When you add the Blog Posts Collection element, you can configure it to display the following Post elements:
Name: Displays the title of the blog post.
Summary: Shows a brief description or excerpt of the blog post.
Link: Adds a clickable link to the full blog post.
Published Date: Shows the date the blog post was published.
Image: Displays the featured image for the blog post.
Category: Indicates the category associated with the blog post.
Blog Post Authors: Lists the authors of the post, if applicable.
Blog Categories Collection Page
The Blog Categories Collection Page shows a list of all your blog categories, enabling visitors to browse topics of interest.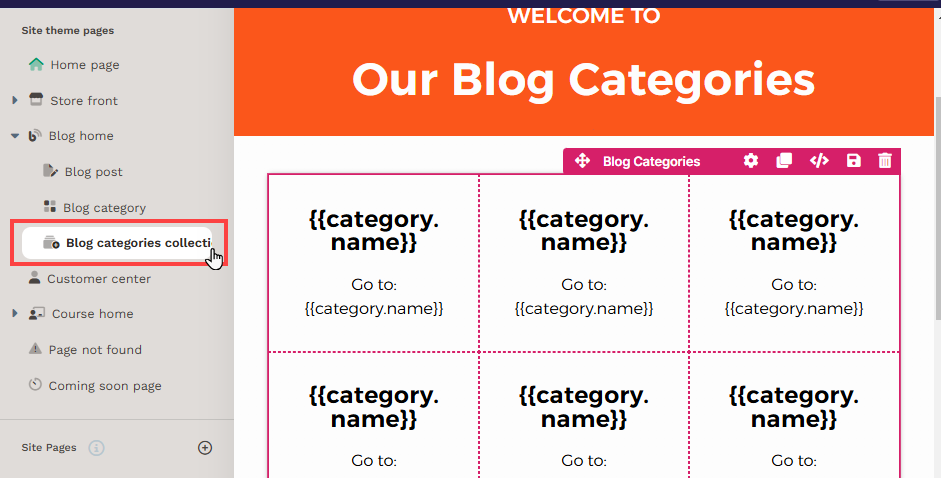
Displaying All Categories
To dynamically display all available blog categories, start by adding the Blog Categories Collection element. This element helps you create a structured layout for your categories.
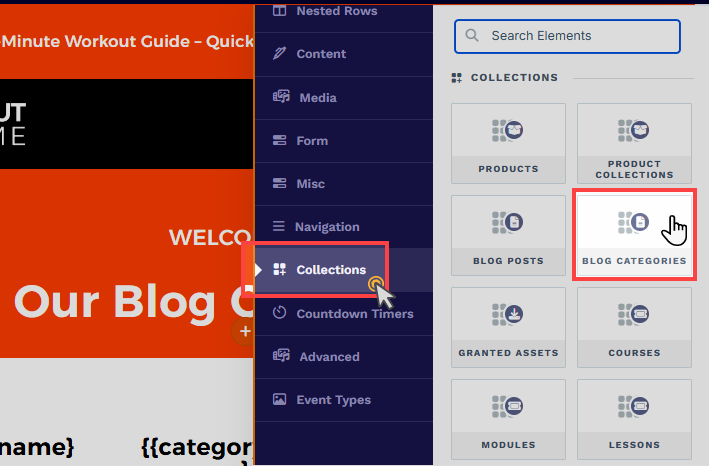
After adding the Blog Categories Collection element, you can configure it by including the following Blog Categories elements:
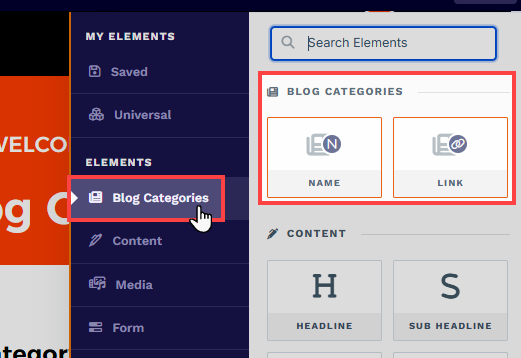
Name: Displays the name of each blog category.
Link: Adds a clickable link to each category's page where associated posts are listed.
Blog Theme Pages Settings
The Blog Theme Pages Settings allow you to fine-tune key aspects, such as its metadata, URL, and advanced options. Below is an explanation of the available settings:
Accessing Pages Settings
From your workspace, navigate to the Site & Blog app in the left-hand menu.
Select Overview.
Click Edit Site in the top-right corner.
Under Site Theme Pages, hover over to the Blog Pages. One page at a time.
Click the Gear
⚙️ icon to access the page settings.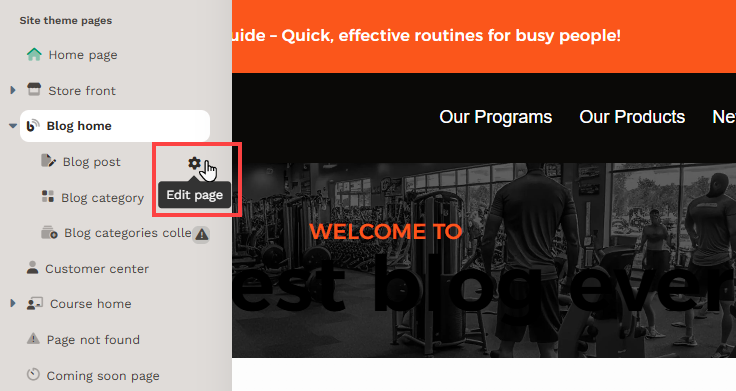
Page Name and Description
Page Name: This is the internal name of the page in your workspace. It helps you identify the page but is not visible to visitors.
Description: Provide a short description of the page for your reference.
SEO & Sharing
Page Title: This title appears in search engine results and browser tabs.
Page Description: Add a concise description (up to 160 characters) to summarize the content of your blog page for search engines.
Page URL: Customize the URL path for your blog pages (e.g.,
/blog, /blog-categories).Index in Search Engines: Activate this option if you want this page to appear in search engine results. When enabled, search engines like Google, Bing, and others can locate the page.
Sharing Image: Upload an image that appears when your page link is shared on social media.
Favicon Image: Add a small icon (usually 16x16 or 32x32 pixels) displayed in the browser tab.
Advanced Settings
Style: Select a specific style for the page if you want it to differ from the site’s default style. Otherwise, leave it set to "Use Default Style." To create a style guide, go to Workspace Settings > Styles, define your style properties and save the style guide. Once created, you can select the style guide from the dropdown menu here to apply it to the site home page.
Add to Site Navigation: Enable this option if you want the page to be classified as a "Site Page" and visible under the Site Pages menu. If disabled, the page will be created as a standalone landing page and will not appear in the Site Pages menu.
After configuring these settings, click Update Page to apply the changes.