Quick Actions allow you to automate tasks across your ClickFunnels workspace. Use them to automatically tag contacts, send emails, or perform other actions based on specific triggers. In this article, we will explore Quick Actions and how you can use them to create instant, one-step automations.

Requirements
An active ClickFunnels account
The Automations app added to your workspace
What are Quick Actions?
Quick Actions are simple, one-step automations that trigger specific actions based on user interactions within your Landing Pages, Pipelines, Courses (including modules and lessons), Products, and Appointments. These automations allow you to instantly respond to user behavior with a variety of predefined actions. Each Quick Action consists of:
a trigger (an event that initiates the action).
an effect (the resulting action taken by the system).
Use Cases for Quick Actions
Quick Actions are ideal for scenarios where you need immediate, targeted responses tied to areas in your workspace, such as Landing Pages, Pipeline stages, etc. For example, you might want to:
Trigger a welcome email when someone opts into a specific Landing Page
Add a contact tag when a lead moves to a particular stage in your Pipeline
Notify your sales team when a prospect completes a high-value action
Enroll a user in a course module after a purchase
Differences Between Workflows and Quick Actions
Workflows are better suited for complex, multi-step automations that span across your workspace, while Quick Actions are better at providing immediate, targeted responses to specific user interactions within specific areas of the platform. Both tools have their place in an efficient marketing and sales strategy, often complementing each other to create a comprehensive automation system. Here’s a quick comparison between both features:
Workflows:
Can be applied across multiple areas of your workspace.
Often involve multiple triggers and a sequence of actions.
Ideal for complex automation sequences involving various stages or multiple actions.
Provide more flexibility for intricate, multi-step processes.
Quick Actions:
Applied directly to several areas of your workspace.
Quick and easy to set up with a single trigger and action.
Suitable for simple, location-specific automation needs.
Offer immediate response to user interactions.
Accessing Quick Actions
Click Automations app from the left-side navigation menu. Please visit our article Adding Apps to Your ClickFunnels Workspace for detailed information on how to add apps to your navigation menu.
In the submenu that appears, select Quick Actions.
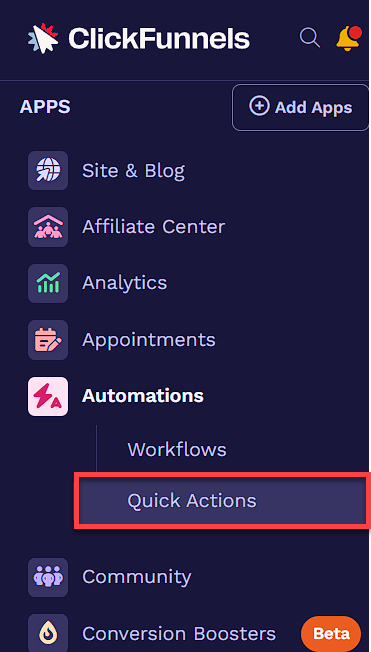
This will take you to the Quick Actions page, displaying an overview of your existing Quick Actions.
You can filter your Quick Actions by selecting the relevant category from the tabs at the top of the main content area.
Triggers and Effects in Quick Actions
Quick Actions in ClickFunnels are composed of two key components: triggers and effects. Understanding these components is crucial for effectively automating your marketing and sales processes.
Triggers
Triggers are specific events or actions that initiate a Quick Action. They act as the “if” part of an “if-then” statement. When a trigger event occurs, it prompts the system to execute the associated effect.
Quick Actions can be triggered by various user interactions across different areas of your workspace, such as:
Appointments, when scheduling an appointment.
Communities, such as when a member joins a community or interacts with posts.
Courses, such as when a user enrolls in or completes a course, module, or lesson.
Pages, including optins and page views.
Products, including purchases or subscription changes.
Pipeline stages, like when leads enter or exit a stage.
The available triggers vary depending on the specific area you’re automating.
Effects
Effects are the actions that ClickFunnels performs in response to a trigger. They represent the “then” part of the “if-then” statement. When a trigger event occurs, the system automatically executes the specified effect. For example, you might set up a Quick Action where the trigger is “Opts-in on page” and the effect is “Send MessageHub message”. This would automatically send a welcome email to anyone who submits a form on your landing page.
Send MessageHub message: Sends an automated message through your MessageHub system. You can customize the content of the message to suit your specific needs, whether it’s a promotional offer, a reminder, or any other important information.
Send asset: Delivers a digital asset (like a PDF, image, or document) to the contact. You simply select the asset you wish to send from your ClickFunnels account, and it will be delivered to the contact automatically when they reach this step in the workflow. This is particularly useful for delivering lead magnets or follow-up resources after a user takes a specific action.
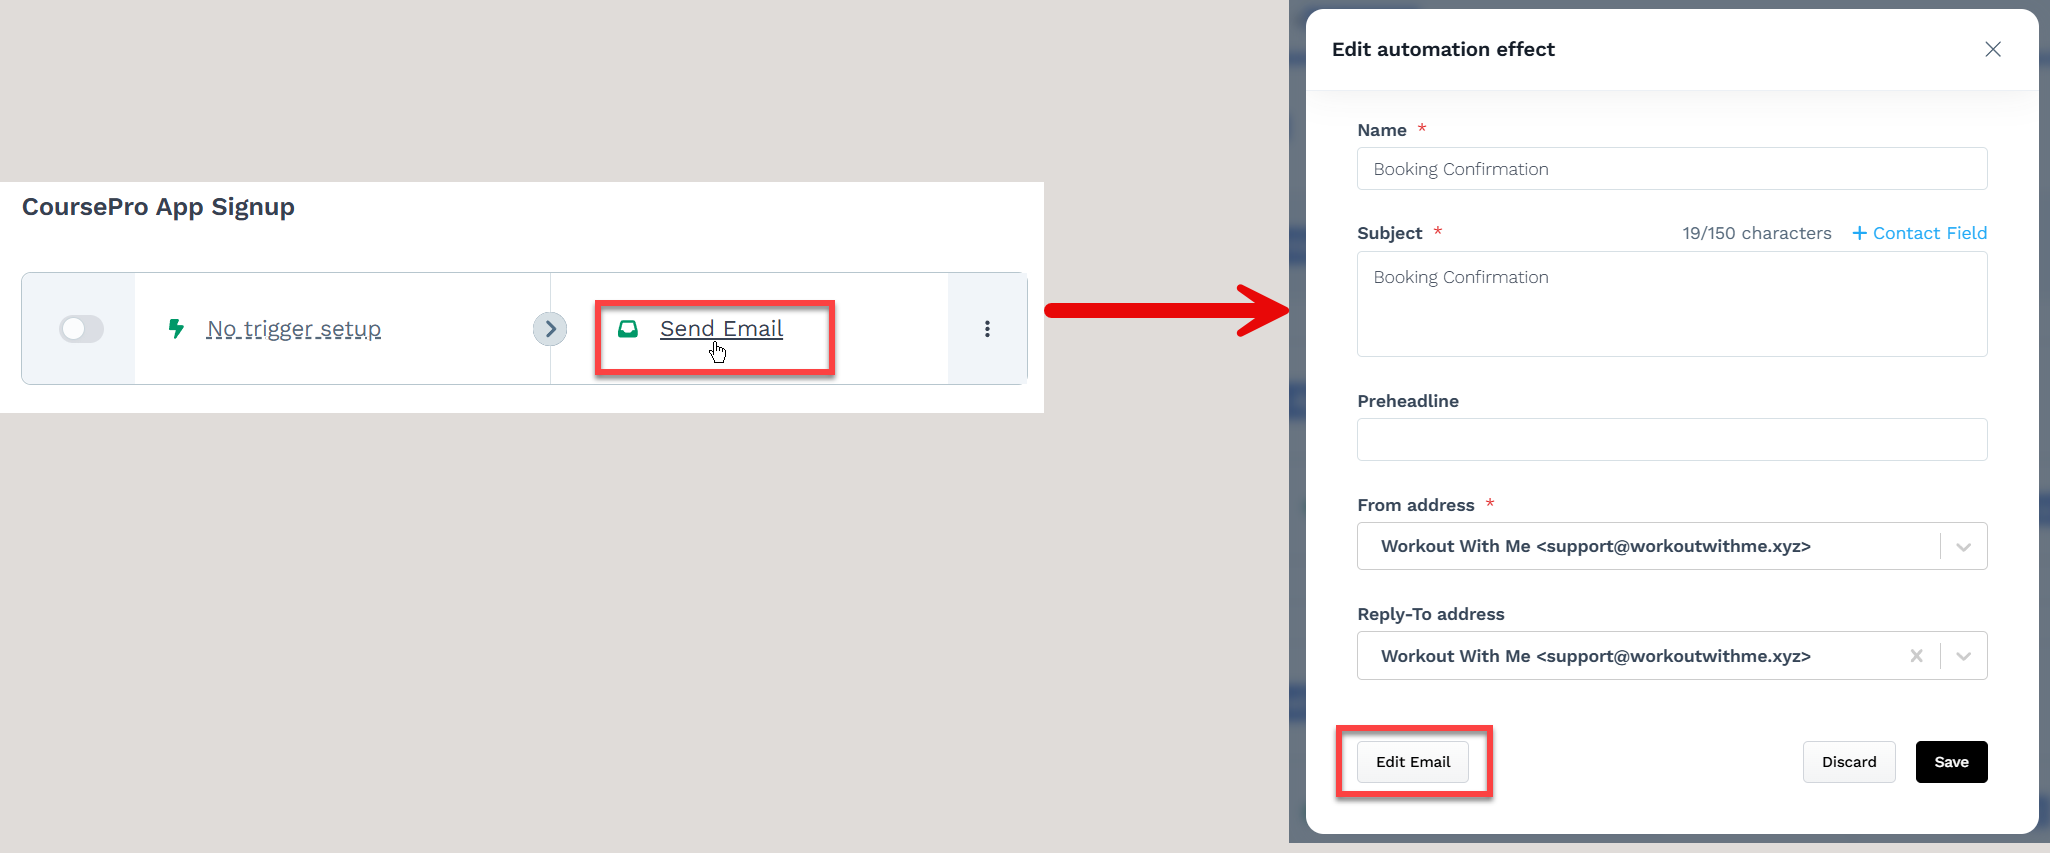
Send an email: Sends an email directly to the contact. This feature allows users to send emails through Quick Actions with the same customization and functionality as emails sent through full workflows. You can set the email's name, subject line, preheader, sender address, and reply-to address.
Note
To edit the content of the email, click the effect, then click “Edit email” to access the email editor. You can learn more by visiting the How to Design Emails article.
Trigger a workflow: Initiates a pre-defined workflow in your ClickFunnels system.
Add/remove contact tag: Applies or removes a tag from the contact’s profile for segmentation purposes.
Add note: Adds a note to the contact’s record for future reference.
Notify team member(s): Sends a notification to specified team members about the triggered action.
Create opportunity: Generates a new opportunity in your pipeline.
Enroll contact in course: Automatically enrolls the contact in a specified course.
Unenroll contact from course: Removes the contact from a specified course.
Grant community access: Provides the contact access to a community platform.
Revoke community access: Removes the contact’s access to a community platform.
Adding Quick Actions Across Different Apps
Quick Actions can be added to multiple areas within your ClickFunnels workspace, allowing you to automate key interactions based on specific triggers. The process for adding Quick Actions is consistent across features, with minor variations in the available triggers and effects.
You can add Quick Actions to the following areas:
Appointments: Automate follow-ups or actions when appointments are scheduled or modified. Learn more about adding Quick Actions to Appointments.
Community: Trigger automations when users join or interact with community. Learn more about adding Quick Actions to Community.
Courses: Automate actions when users enroll in, progress through, or complete course modules and lessons. Learn more about adding Quick Actions to Courses.
Pages: Site pages, theme pages, landing pages, and funnel pages. Learn more about adding Quick Actions to Pages.
Products: Automate actions based on product purchases, subscription changes, or payment events. Learn more about adding Quick Actions to Products.
Pipeline Stages: Automate actions when leads enter or exit a specific stage in your sales pipeline. Learn more about adding Quick Actions to Pipeline Stages.
General Steps to Add Quick Actions
Navigate to the relevant section (e.g., Pages, Pipeline Stages, Products, etc).
Click the lightning bolt (⚡) icon next to the item (e.g., page, product, community interaction) where you’d like to add a Quick Action.

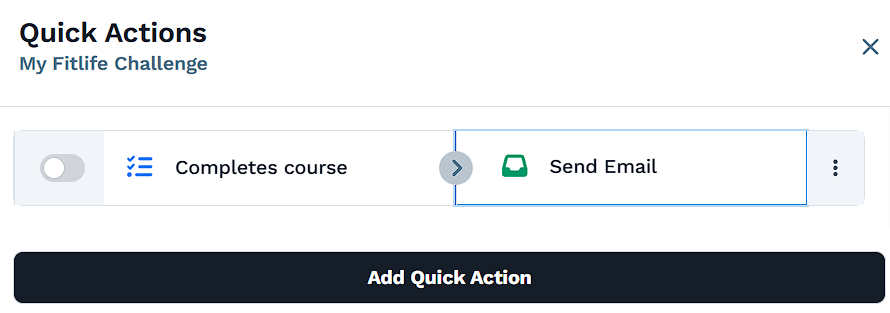
In the Quick Actions menu, click Add Quick Action.
Choose a trigger for your Quick Action (e.g., “Opt-in on page”, “Makes a purchase”, “Joins a community”).
Select the effect that will occur when the trigger is activated (e.g., “Send MessageHub message”, “Add tag”).
Activate the Quick Action using the toggle switch.
Managing Quick Actions
Changing the Trigger or Effect
Click the lightning bolt icon to locate the Quick Action you wish to update.
Click on the trigger or effect you want to change.
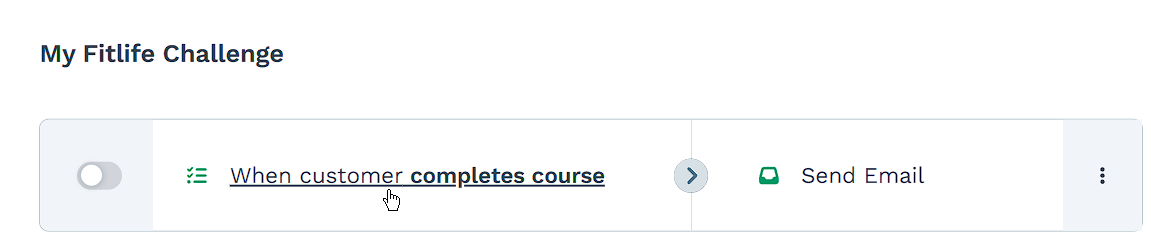
Make the necessary updates to the selected option.
Changing the Effect
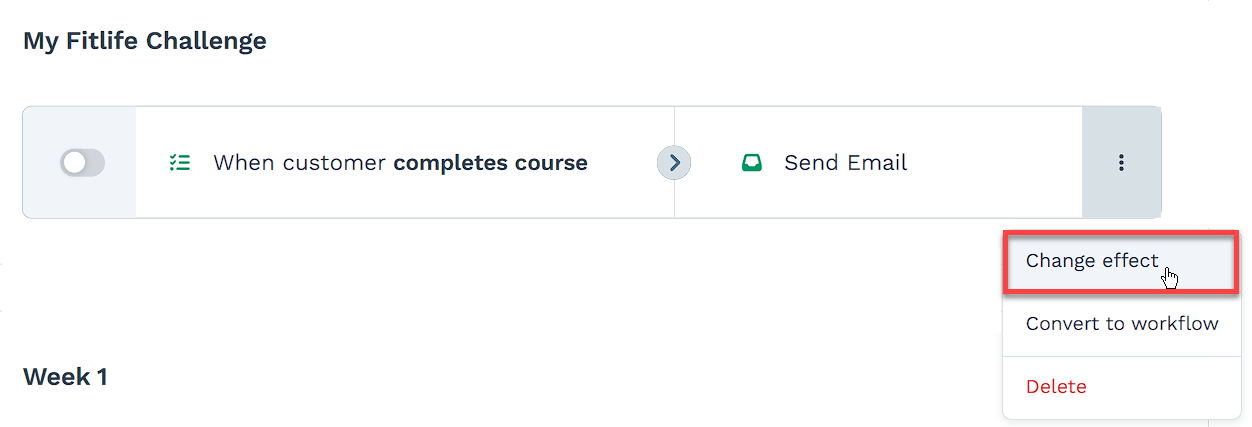
Click the lightning bolt icon again to locate the Quick Action you wish to edit.
Click on the three dots icon next to the selected effect.
From the dropdown menu, select Change effect.
Note
Available options may vary depending on the selected effect.
Adding Multiple Quick Actions
Click the lightning bolt icon again and click Add Quick Action.
Set up the new trigger and effect as desired.
Repeat this process for each additional Quick Action you want to create.
Removing Quick Actions
Click the lightning bolt icon again to locate the Quick Action you wish to remove.
Hover over the Quick Action entry.
Click the red cross icon (X) that appears on the right side.

Converting Quick Actions into Workflows
Converting a Quick Action into a workflow allows you to create more advanced, multi-step automations. Once converted, the Quick Action will no longer be visible in the Quick Actions section, and you can manage it as a full workflow. This is particularly useful when your automation requires multiple triggers or actions for more complex processes.
How to Convert a Quick Action into a Workflow:
Locate the Quick Action you wish to convert.
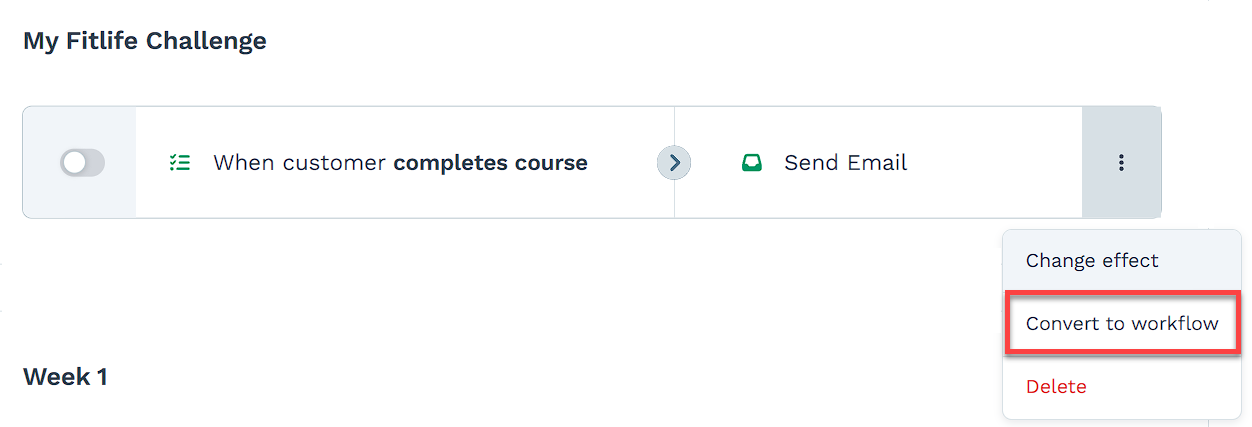
Click the three dots ⋮ next to the Quick Action.
Select Convert to Workflow from the dropdown menu.
In the popup that appears, confirm the conversion by providing a Workflow Name and clicking Submit.
The Quick Action will be removed from the Quick Actions list and moved to the Workflows section, where you can further customize it with additional triggers, actions, and conditions.
You can also convert a Quick Action to a workflow directly from the feature’s Quick Actions menu. For example, if you have a Quick Action set up in the Community app, click the lightning bolt (⚡) icon next to the action, and follow the same steps from the dropdown menu to convert it. This provides an alternative way to access and manage the conversion without navigating back to the main Quick Actions section.
For more details on managing workflows, please refer to our How to Create a Workflow article.