Giving members access to your community is an essential step in fostering engagement. Whether you’re granting access to the entire community, specific groups, or individual topics, ClickFunnels provides several options to manage permissions efficiently. This article also covers how to manage memberships, including revoking or banning access.

Requirements
An active ClickFunnels account
Granting Access Through the Members Section
Navigate to Community and select Members.
Click New Membership at the top right.
Select an existing contact or create a new contact if it isn’t already in your system.
.png)
Choose the Groups or Topics the contact should have access to.
Toggle the Community Moderator option if you want to grant moderator permissions.
Click Create Membership to save.
Granting Access Through Product Purchase
You can give members access to your community by linking it to a product purchase. This method allows you to automatically grant community, group, or topic access when someone buys a product.
From the Products section, select All Products in the left menu.
Choose the product you want to link with community access.
Scroll down to the Purchase Actions section.
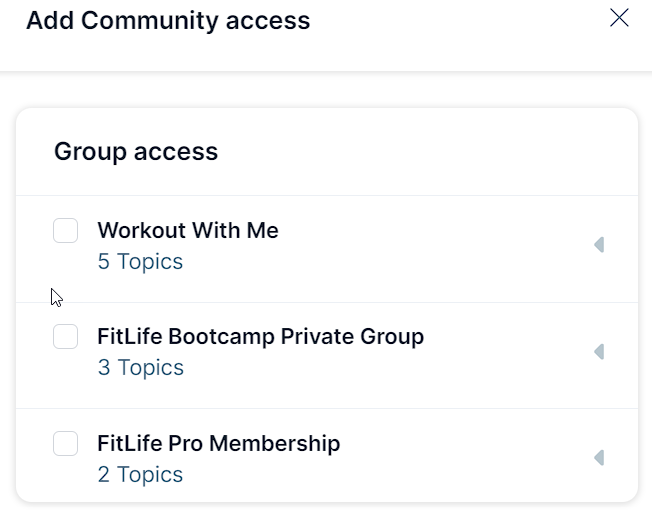
Click the (+) sign next to Community access option.
Check the boxes next to the Groups and Topics you want the product to grant access to.
Click Save to apply your changes.
Granting Access via Workflows
You can also automatically grant community access to contacts using the Grant Community Access step in ClickFunnels workflows. This method streamlines access management without manually adjusting permissions for each contact.
From the dashboard, navigate to Automations app and select Workflows.
Open an existing workflow or create a new one.
Click the plus (+) icon in the workflow editor to add a new step.
In the right-hand panel, select Grant Community Access under the Internal category.
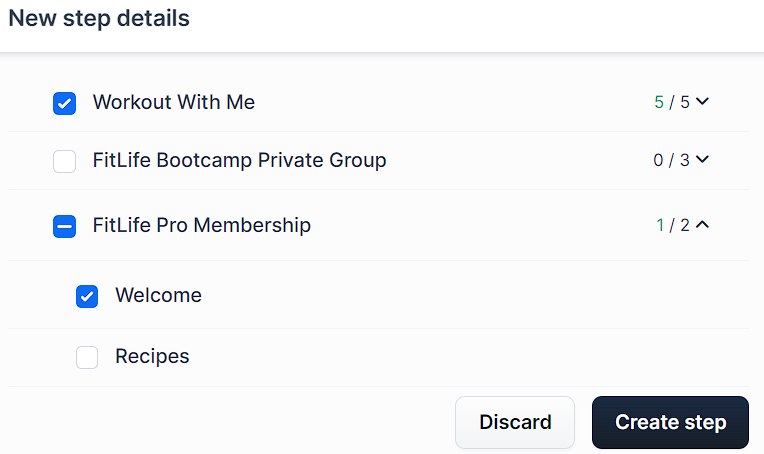
A dialog box will appear. Select the specific Community Groups, or Topics you want to grant access to.

After making your selections, click Create Step to save the workflow action.
Once the workflow is set, it will automatically grant access to the community based on the triggers you define. For detailed guidance on setting up workflows, refer to the Workflows “Grant Community Access” Step article.
Granting Access via the Community Manager Role
The Community Manager role allows a collaborator to manage community-related tasks, including overseeing posts, Topics, and Groups within your ClickFunnels workspace. Here’s how to assign this role to a collaborator:
From the dashboard, scroll down to Workspace Settings in the left menu.
Click Collaborators from the menu.
Select Add new collaborator at the top right of the Collaborators page.
Provide the collaborator’s details or click Add new to invite someone.
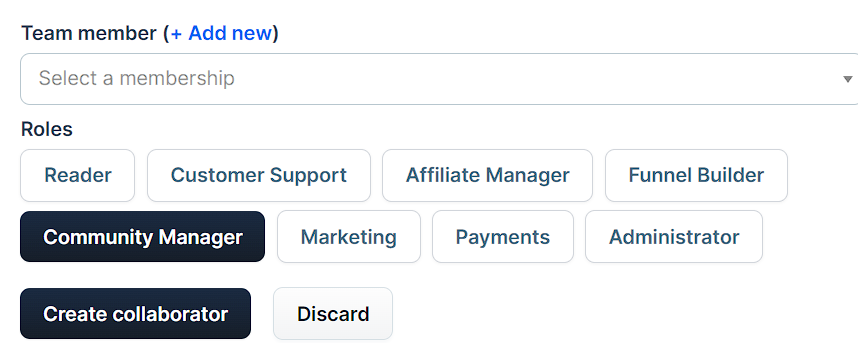
Under Roles, select Community Manager.
Click Create collaborator to assign the role.

Managing Community Members
Once a member is added, you can manage their access, moderation rights, or even ban them from the community. To view a list of community members, navigate to the Community app and select Members.
Viewing a Contact’s Profile
Click the profile icon next to a contact's name in the Members section to access their contact profile. For more details, refer to the Contacts Profile Overview.
.png)
Editing Memberships
From the Community > Members section, click the gear (⚙) icon next to the contact.
Modify their Groups or Topics, or toggle the Community Moderator setting.
Click Update Membership to save changes.
Revoking Access
Open the contact’s membership.
Click Revoke All Access.
Confirm the action when prompted.
Note
If your community is public, the user may rejoin independently. For private or secret communities, you must manually re-add them.
Banning Members
Banning removes all access and prevents a contact from rejoining, even in public communities.
From the contact’s membership, click Ban From Community.
Provide a reason (optional) and click Ban.
Confirm the ban by typing CONFIRM and clicking Proceed.
Viewing and Editing Ban Details
Navigate to Community > Members and switch to the Banned tab.
Click the profile icon next to the banned contact.
.png)
In the contact profile, go to the Activity tab and select View Ban Details.
.png)
The Ban Details screen will show:
The Reason for the ban (if provided).
Information about who banned the contact and when.
A list of Groups and Topics the contact had access to before the ban.
To update ban details:
Click Edit Ban at the top-right corner.
.png)
Update the Reason or other ban details as needed.
Click Update Ban to save changes.
Unbanning Members
Go to the Banned tab in the Members section.
Find the banned contact and click the Unban icon.
.png)
Confirm the unban by typing UNBAN and clicking Proceed.
Note
Once unbanned, the contact’s previous memberships and access are restored.