An unsubscribe link is essential for complying with regulations like the CAN-SPAM Act and GDPR, which require businesses to include clear unsubscribe options in their marketing emails. Adding a visible and functional unsubscribe link can also improve customer trust and reduce spam complaints. In this article, you will learn how to add and customize an unsubscribe link in emails.
Requirements
An active ClickFunnels account
Access to Email Settings (available only to users with the Funnel Builder, Marketing, or Administrator roles)
How to Add an Unsubscribe Link in Emails
For all marketing emails sent through ClickFunnels, such as broadcasts and workflow emails, ClickFunnels will automatically add an unsubscribe link to the bottom of the email. This link allows recipients to unsubscribe from specific topics or all future emails by directing them to a dedicated unsubscribe page.
However, ClickFunnels offers the flexibility to customize the text of this unsubscribe link. Instead of the default text “Unsubscribe”, you can modify it to something more personalized, such as “Manage Email Preferences,” providing a more user-friendly experience.
Customizing Email Footer in Email Settings
From your ClickFunnels dashboard, go to Workspace Settings.
Click on Email Settings, and then select the General Settings tab.
Scroll down to find the Unsubscribe Footer section.
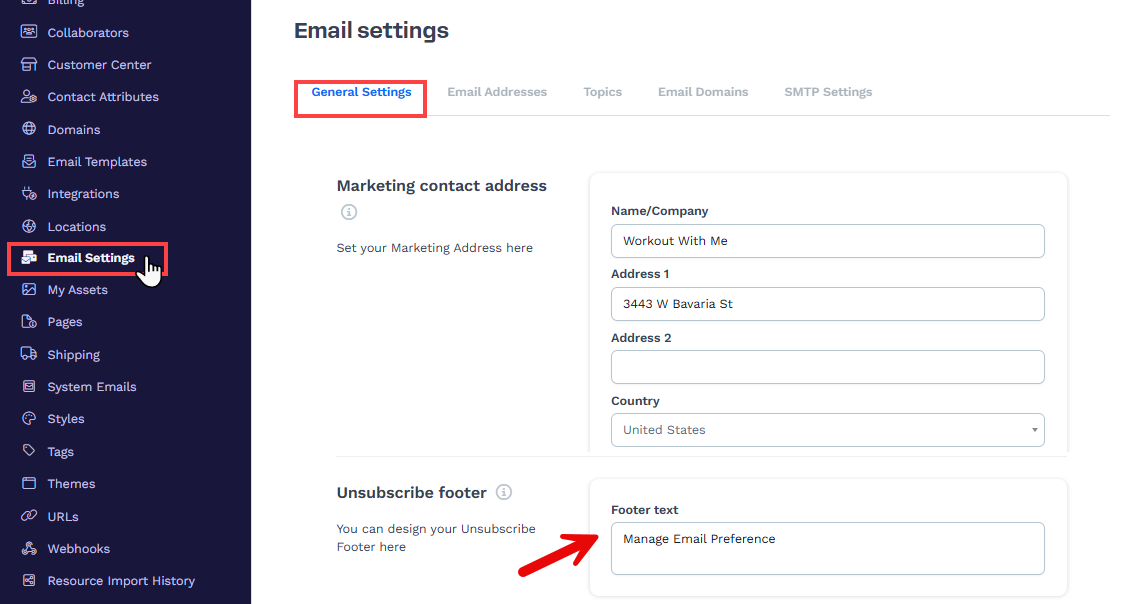
In the Footer Text field, you can add custom text that will automatically appear in the footer of your email. For example,
Manage Email Preferencesto provide more personalized options for your audience. This text will be hyperlinked to the unsubscribe page, allowing your recipients to manage their subscription preferences. If left blank, the default textUnsubscribewill be used. When clicked, users will be redirected to the unsubscribe page where they can update their preferences or opt out of future emails..png "D40dC4fRZzoI4bsnvYBp3XwqXbVK7jNPCw(1).png")
Note:
In ClickFunnels, you can set one marketing address for your workspace. This address is automatically added to the footer of all emails sent from Broadcasts and Workflows. You cannot add different marketing addresses for different emails. If you want to use another address, you will need to create a new workspace.