Adding Conferencing Connections in ClickFunnels enhances the functionality of your appointments by integrating popular meeting tools like Zoom, Google Meet, GoTo, and Microsoft Teams. This guide will walk you through the steps to add and manage conferencing connections, ensuring seamless scheduling and meeting management for your events.
Requirements
An active ClickFunnels account
The Appointments app added to your workspace
A calendar (Google, Outlook, iCloud, Office365, etc) connected to the Appointments app
An account of a conferencing application (e.g., Zoom, GoTo, Team, Google) for authorization
What is a Conferencing Connection
A Conferencing Connection in ClickFunnels links your appointments with your preferred virtual meeting platform, ensuring that every scheduled appointment includes the appropriate meeting link. This integration streamlines the process for organizers and attendees by automatically including virtual meeting links in calendar events. When a visitor books an appointment, the event is created in the calendar with the meeting link embedded, allowing attendees to join directly from their calendar. This feature supports popular tools such as Zoom, Google Meet, GoTo, and Microsoft Teams, enhancing the convenience and efficiency of your scheduling process.
Why do you need a Conferencing Connection?
Efficiency: Automates the inclusion of meeting links in your calendar events.
Convenience: Attendees can join meetings directly from their calendars.
Professionalism: Ensures a seamless booking and meeting experience.
Example:
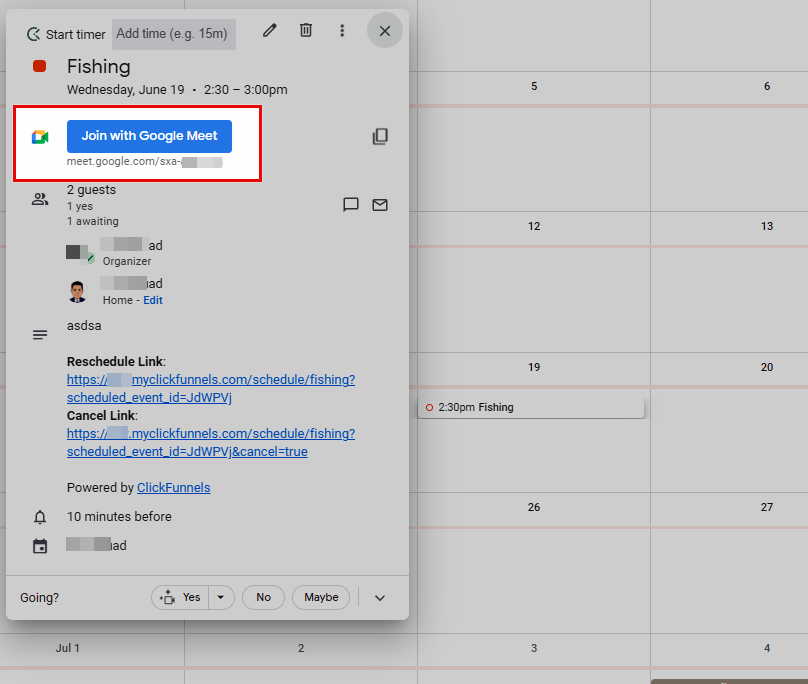
Imagine, in the Event Type settings, you have selected Google as the conferencing connection. When a client books a consultation appointment, a Google Meet meeting link is automatically generated and included in the calendar event. The client receives an email confirmation with the event details and can join the meeting directly from their calendar, simplifying the process and reducing the steps needed to start the consultation.
Adding a Conferencing Connection
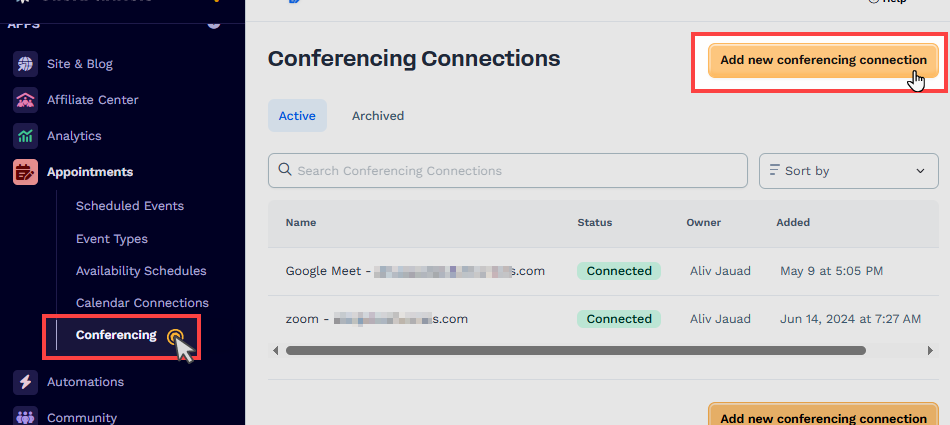
Navigate to the Appointments app.
Select Conferencing.
Click on the Add New Conferencing Connection button.
In the open prompt, select and authorize a conferencing service.
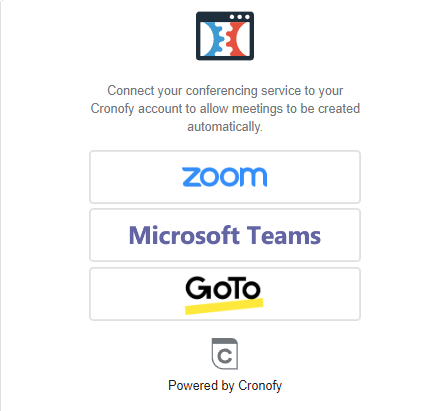
Select Zoom from the widget.
Authorize the connection by logging into your Zoom account.
Select GoTo from the widget.
Authorize the connection by logging into your GoTo account.
Select Microsoft Teams from the widget.
Authorize the connection by logging into your Microsoft Teams account.
Important:
If you connect a Google Calendar as a calendar connection, Google Meet will be the default for conferencing if you do not have any other conferencing connections configured.
If you add a new conferencing connection (Zoom, GoTo or Team) and Google Meet was previously available as the default option, a specific, named Google Meet connection will be created alongside the newly added conferencing option.
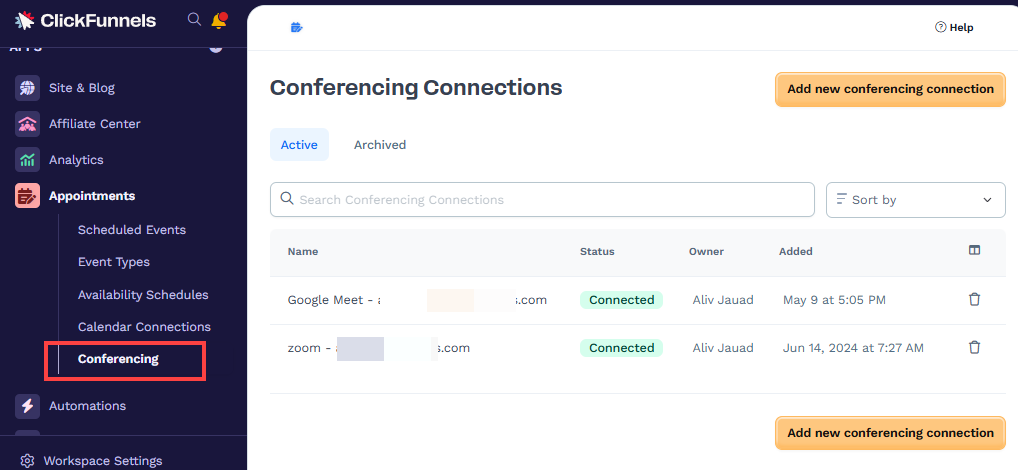
Once authorized, your conferencing service will be listed under the Conferencing Connections with a Connected status.
Selecting Conferencing Connection in the Event Type
After you have established a conferencing connection, you can assign it to an Event Type. Follow the steps below to select the connected conferencing connection for your Event Type:
Navigate to the Appointments app.
Select Event Types.
Click either on the Event Title or the Gear
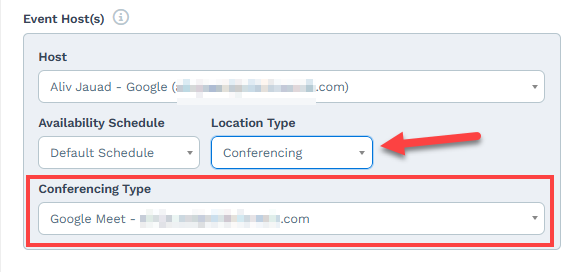
⚙️ icon next to it to access its settings.Scroll to the Event Host(s) section.
Set the location type to Conferencing.
In the Conferencing Type field, select your preferred conferencing connection from the list of connected services..
Deleting a Conferencing Connection
To maintain an organized and up-to-date list of conferencing connections in ClickFunnels, you may need to delete a connection that is no longer in use. Follow the steps below to remove an existing conferencing connection.
Navigate to the Appointments app.
Select Conferencing.
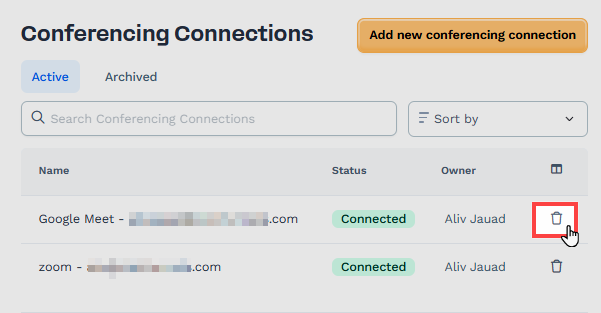
Locate the conferencing connection you wish to delete from the list.
Click the Trash Can
🗑️ icon next to the conferencing connection to remove it.
Restoring or Unarchiving a Conferencing Connection
If you have accidentally deleted or archived a conferencing connection, you can easily restore it by following these steps. This ensures that your previously configured connections can be quickly reinstated without setting them up again from scratch.
Navigate to the Appointments app.
Select Conferencing.
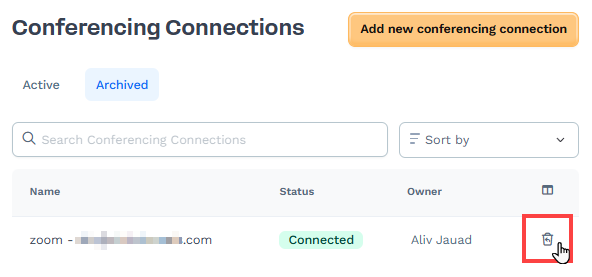
Click on the Archived tab to view the list of archived conferencing connections.
Locate the conferencing connection you wish to restore from the list.
Click the Restore icon next to the archived conferencing connection to unarchive it and restore its active status.