Mailgun is a powerful email delivery service that allows you to send both transactional and marketing emails via its SMTP service. By integrating Mailgun with ClickFunnels, you can take advantage of Mailgun’s infrastructure to ensure reliable email sending from within your ClickFunnels workspace. This article will guide you through connecting Mailgun as your SMTP provider for email delivery.

Requirements
An active ClickFunnels account
A Mailgun account
Important
To receive replies in ClickFunnels, ensure that an email inbox is configured. Without an email inbox, replies to emails sent from a custom address in ClickFunnels will not be received. For detailed instructions, refer to the Email Inbox Configuration article.
Step 1: Verify the Domain in Mailgun
Before you can use Mailgun as your SMTP provider in ClickFunnels, you will need to verify the domain or sub-domain you wish to send emails from.
Log in to your Mailgun account and navigate to the left-hand menu.
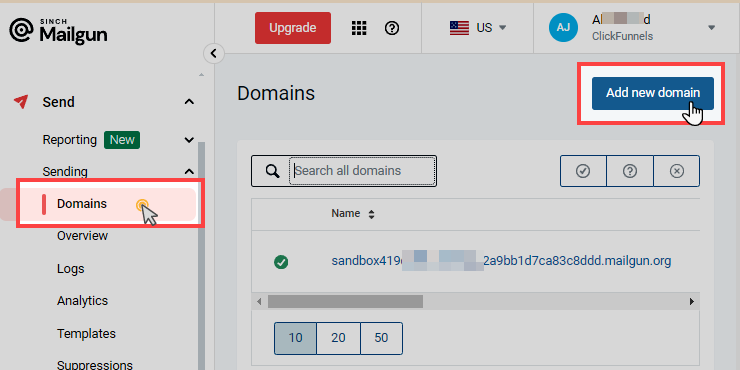
From the navigation, click on Send » Sending menu, and then select Domains sub-menu.
Click the Add New Domain button at the top right corner of the page.
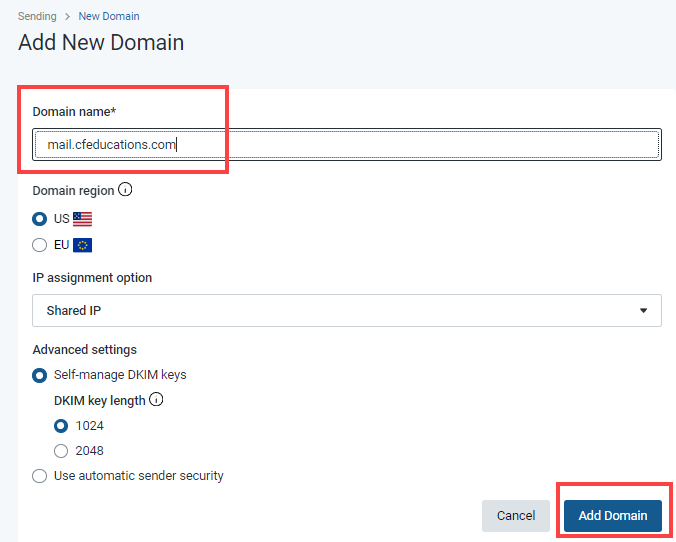
Enter your domain name (this can be either a root domain or a sub-domain). For instance, you could enter mail.yourdomain.com.
Select the appropriate Domain Region based on your domain location (US or EU).
Leave the IP assignment option as Shared IP unless you have a dedicated IP.
Under Advanced Settings, choose whether to manage your own DKIM keys or use automatic sender security. In our setup, we selected Self-manage DKIM keys for more control.
Once you’ve configured the settings, click Add Domain.
After adding your domain, you will be provided with a set of DNS records (TXT, MX, and CNAME) that you will need to add to your domain’s DNS provider. Copy each DNS record provided by Mailgun and enter them into the appropriate fields with your DNS provider (e.g., GoDaddy, Cloudflare). Once the records have been added, return to Mailgun and click Verify to confirm your domain setup.
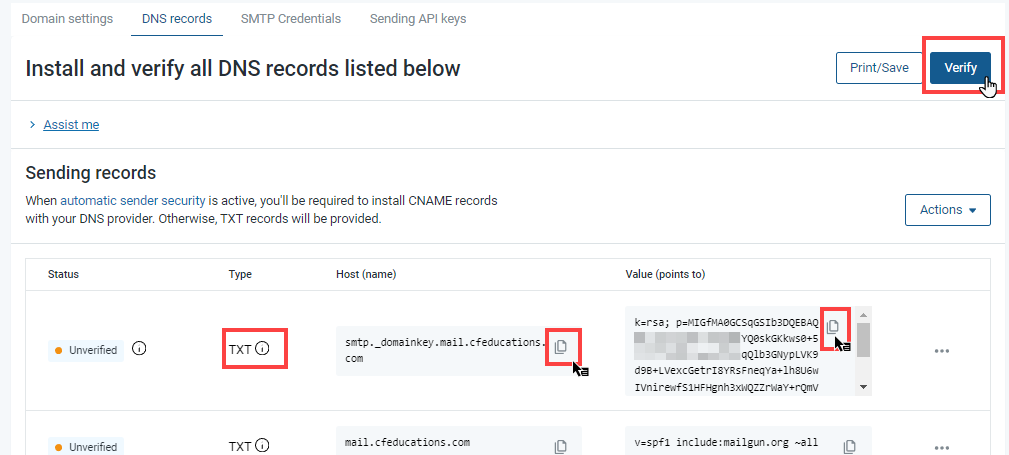
When adding DNS records, some DNS providers may not require you to input the full host(name) value provided by Mailgun. For example, instead of adding
smtp._domainkey.mail.cfeducations.com, you may only need to addsmtp._domainkey.mail. DNS behavior varies by provider, so if you encounter any issues, it’s best to consult your DNS provider or contact Mailgun support.Additionally, if you are using Cloudflare as your DNS provider, make sure to turn off the Proxy option when adding the records. This will help avoid any verification issues.
Step 2: Retrieve Mailgun SMTP Credentials
To use Mailgun as an SMTP provider in ClickFunnels, you will need to retrieve your SMTP credentials, which include a username and password. Follow the steps below to get these credentials:
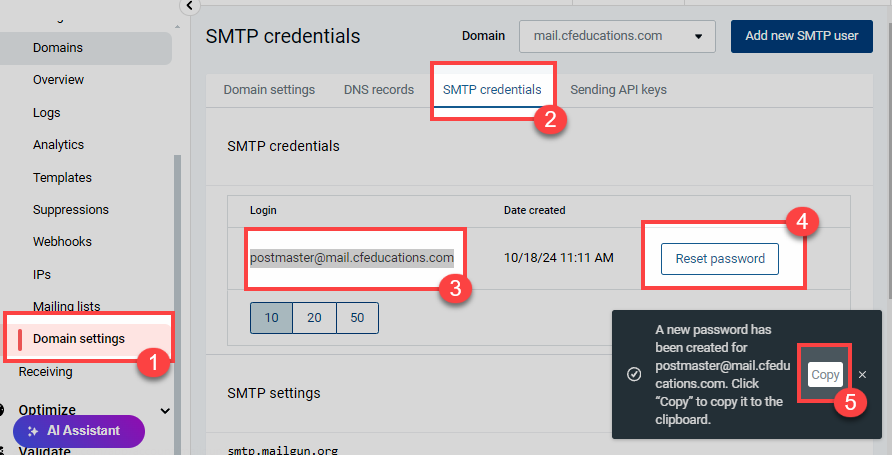
In your Mailgun account, navigate to the Domain Settings.
Click on the SMTP credentials tab to access your SMTP credentials.
You will see your Username displayed under Login.
Mailgun does not display the SMTP password directly for security reasons. To retrieve or reset your password, click on the Reset password button. A popup will appear allowing you to reset the password. You can either let Mailgun generate a password automatically (recommended) or create one manually.
After resetting the password, a notification will appear at the bottom-right corner of the screen. The password will be available to copy from this notification.
Once you have your username and password, keep them handy, as you will need to enter these credentials into ClickFunnels for the SMTP configuration.
Step 3: Add Mailgun as SMTP in ClickFunnels
Once you have verified your domain and retrieved your Mailgun SMTP credentials, the next step is to integrate Mailgun with your ClickFunnels workspace by adding it as an SMTP provider.
In your ClickFunnels account, go to Workspace Settings and select Email Settings.
Click on the SMTP Settings tab.
.png)
Click the Add SMTP Setting button to start the configuration.
In the new SMTP settings window, fill in the following fields:
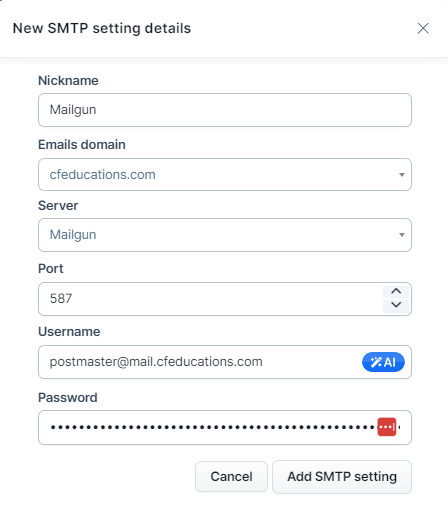
Nickname: Enter a name for this SMTP configuration (e.g., “Mailgun”).
Email Domain: Select the domain you verified in your ClickFunnels workspace.
Server: Choose Mailgun from the list.
Port: Enter
587, which is the standard port for Mailgun’s SMTP server.Username: Enter the SMTP username provided by Mailgun.
Password: Enter the SMTP password you retrieved from Mailgun.
Add Webhook for Event Tracking: Copy the Webhook URL provided by ClickFunnels. You will need to paste this URL into your Mailgun account in the Send »Sending » Webhooks menu to enable event tracking.
.png)
Refer to Step 4: Add ClickFunnels Webhook URL in Mailgun for detailed instructions on how to set up the webhook in Mailgun.
After completing the above steps, click Update SMTP Setting in ClickFunnels. ClickFunnels will verify the connection with Mailgun, and your SMTP status will be updated with a green checkmark.
Step 4: Add ClickFunnels Webhook URL in Mailgun
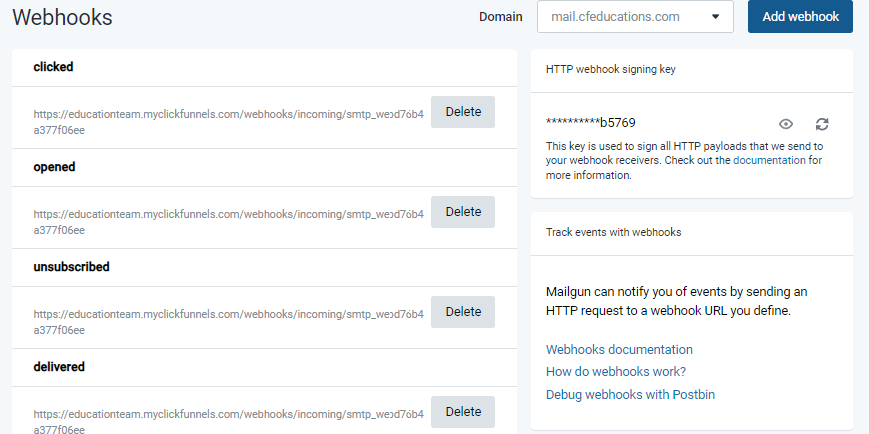
Mailgun allows you to add a Webhook URL for each event type. This means that if you want to track events such as opens, clicks, and unsubscribes, you will need to add the webhook URL multiple times, once for each event type. Follow these steps to add your webhook URL:
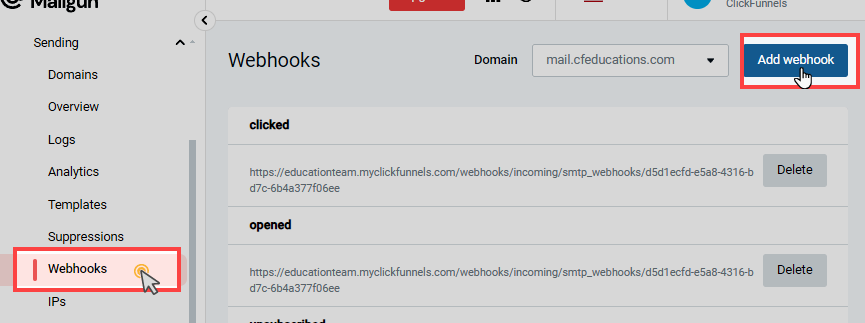
In your Mailgun account, navigate to the Send » Sending menu and select Webhooks from the options.
Click the Add Webhook button on the right-hand side.
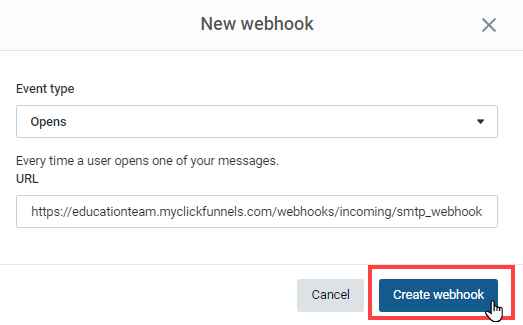
In the New Webhook window, select the Event Type (e.g., Delivered Messages, Opens, Clicked).
Paste the Webhook URL provided by ClickFunnels in the URL field.
Click Create Webhook to save the webhook.
Repeat the process for each event type you want to track, such as Opens, Clicks, Unsubscribed, Delivered etc.
How ClickFunnels Utilizes Mailgun SMTP for Email Sending
Once your Mailgun SMTP is successfully connected to your ClickFunnels workspace, the system will display the verified status for your associated email domain.
Any email address created within your workspace, linked to this domain, will automatically use the Mailgun SMTP for email delivery when sending broadcasts or emails within workflows. ClickFunnels dynamically makes this decision based on the connected SMTP and the selected email address.
Example:
For instance, you have verified the domain www.yourdomain.com in your ClickFunnels workspace and set up an email address like support@yourdomain.com. After verifying the domain and DNS records both in ClickFunnels and Mailgun, when you’re ready to send a broadcast or trigger an email step in a workflow, you will choose the email address you wish to send from. If you select support@yourdomain.com, ClickFunnels will automatically route the email through Mailgun’s SMTP, as the email address is associated with the verified domain connected to Mailgun. If Mailgun was not connected, ClickFunnels would use default internal mail server.