Survey workflows allow you to gather valuable insights from your customers efficiently. With this feature, you can customize questions, set distribution rules, and track responses all in one place. In this article, you’ll learn how to set up and customize your survey workflows so you can start collecting valuable data to improve your business decisions.
Requirements
An active ClickFunnels account
The Survey Workflow app added to your workspace
Creating a New Survey Workflow
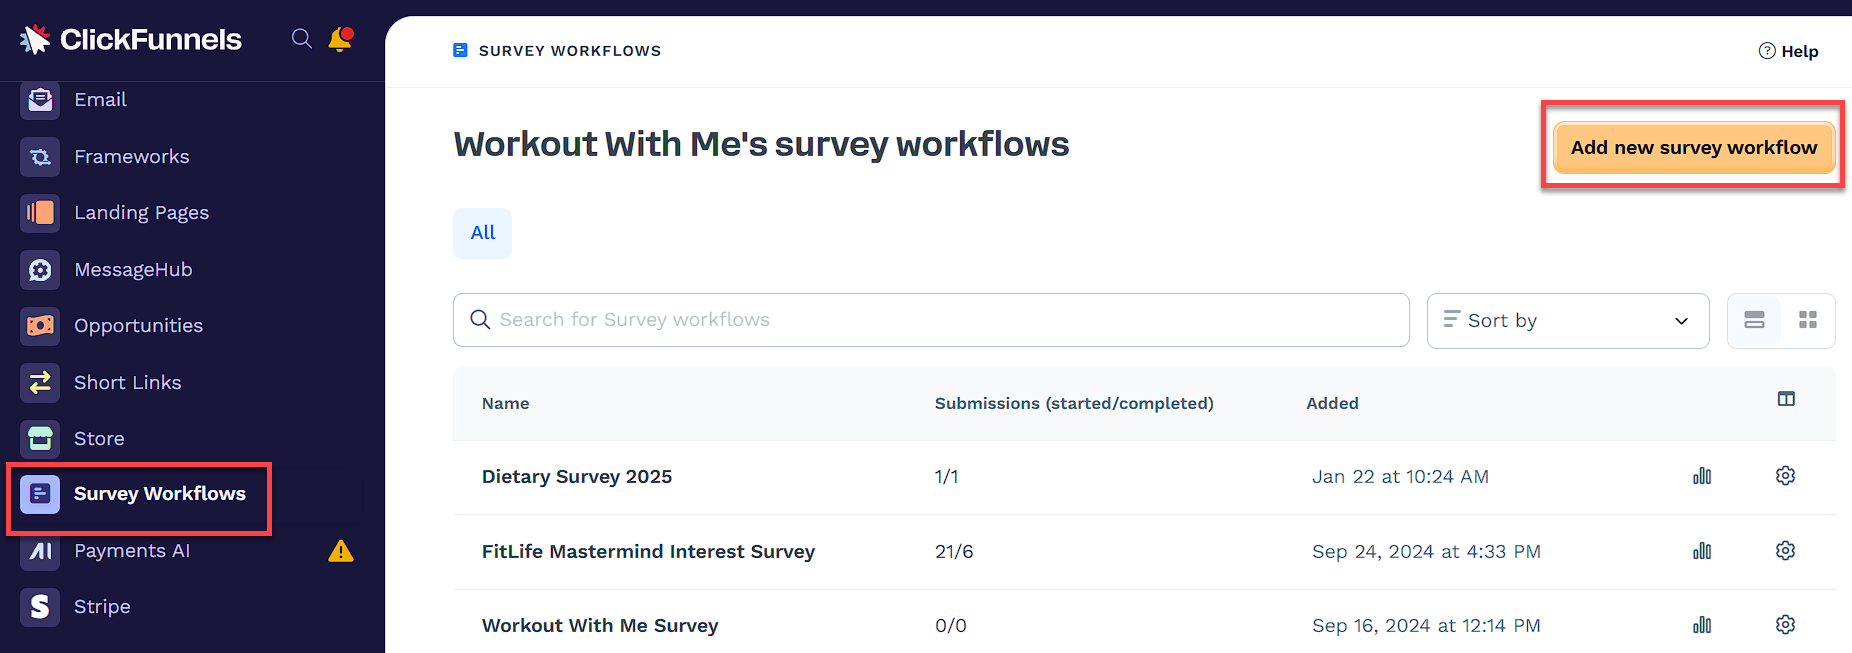
Navigate to the Survey Workflows app in the side navigation menu. Refer to our article Adding Apps to Your ClickFunnels Workspace for detailed information on how to add apps to your navigation menu.
Click Add new survey workflow.
Enter a Name for your survey workflow.
Click the Create survey workflow button to set up your new survey.
Adding Survey Workflow Questions
Survey questions are the core components of your workflow. hey determine what information you collect and how respondents interact with your survey. Each question type is designed for a specific kind of input, whether it's free text, a multiple-choice selection, or contact details. Before adding questions, it's helpful to understand the available formats and how their settings—like scoring, attributes, and response logic—affect both the user experience and the data you capture. This section explains how to select and configure the right questions for your goals.
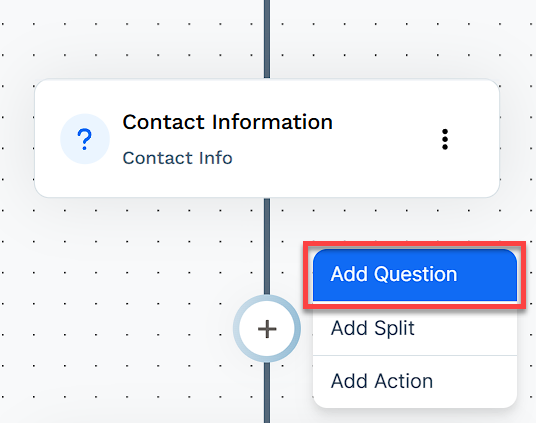
In the survey workflow builder, click the + icon.
Select Add Question from the options.
Choose a Question Type:
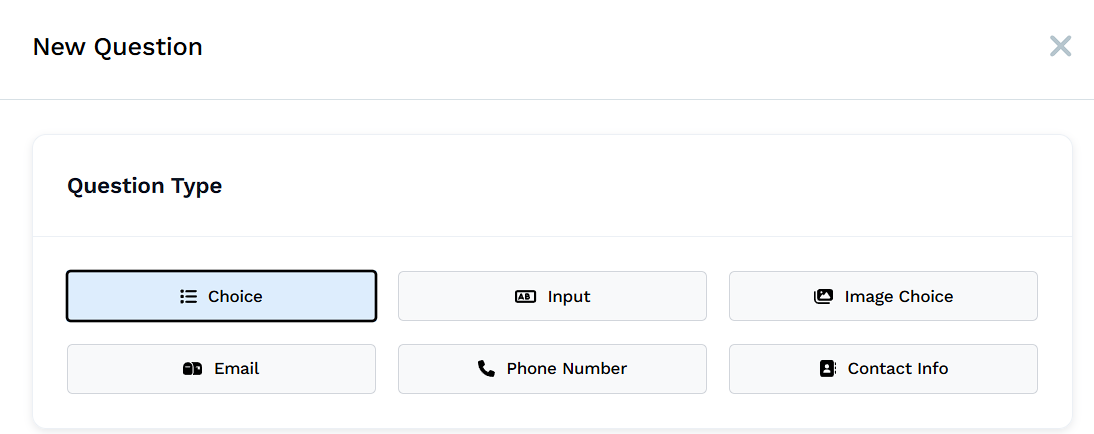
Choice: Allows for single or multiple selection answers.
Input: Free text response.
Image Choice: Allows respondents to choose from image-based answers.
Contact Info: A question type that allows you to collect contact details like name, email, and phone number in a single question.
Email: Collects the respondent’s email address.
Phone Number: Collects the respondent’s phone number.
Enter your Question Headline in the provided field.
Configure additional settings:
Choice Questions:
.png "image(541).png")
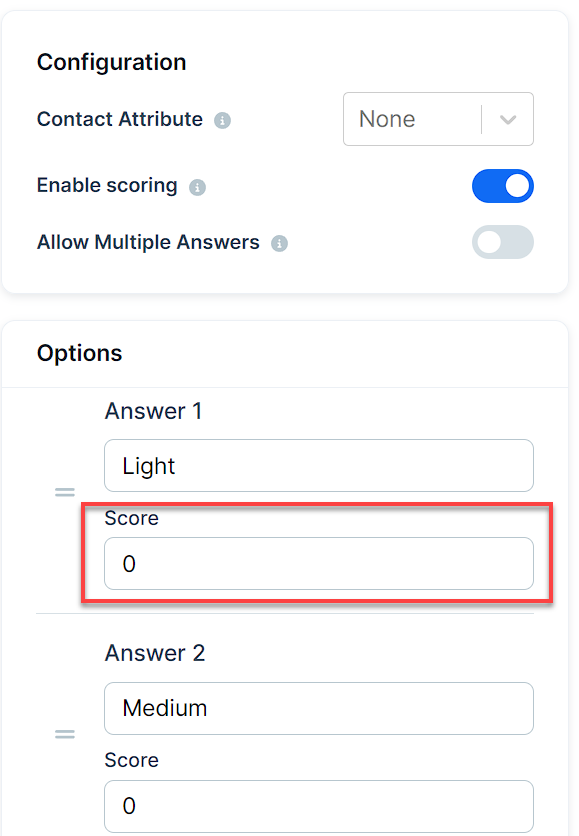
Enable scoring: Toggle this option to assign scores to answers.
Allow Multiple Answers: Enable this to allow respondents to select more than one answer.
Enable ‘Other’ Choice: Adds “Other” as the final option in the list of answers, allowing respondents to type a custom response directly in the survey.
Dynamically Generate Options: Automatically adds custom responses entered under “Other” to the list of answer options for future survey submissions. For example, if a respondent types in a unique response, it can become a selectable option for future respondents. Disable this if you do not want custom responses to appear as new answer options.
Contact Attribute: Optionally set this to save the response to a contact’s profile. You can access and add Contact Attributes from Workspace Settings > Contact Attributes.
Note
When configuring contact attributes for Choice Questions, the available options depend on whether Allow Multiple Answers is toggled on:
If Allow Multiple Answers is off, you can map to any contact attribute type.
ForAllow Multiple Answers is on, only multi-select contact attributes will be shown in the dropdown. These attributes store multiple answers for a single question. If no multi-select contact attributes exist, the dropdown will be empty. To use one, create it in Workspace Settings > Contact Attributes with the Select Field type and Allow Multiple enabled. For step-by-step instructions, refer to the How to Add and Manage Contact Attributes article.

Input Questions:
Contact Attribute: Optionally set this to save the response to a contact’s profile. You can access and add Contact Attributes from Workspace Settings > Contact Attributes.
Image Choice Questions:
Allow Multiple Answers: Enable this to allow respondents to select more than one image-based answer.
Show Labels: Toggle this option to display text labels under each image.
Image Size: Select the image size (e.g., small, medium, large).
Enable scoring: Toggle this option to assign scores to image-based answers.
Contact Info Questions:
Enter a Title for the contact information section.
Optionally, add a Description to provide additional instructions or context for respondents.
Toggle the options to collect Name, Email, and/or Phone Number fields in a single question.
You can choose which fields to collect by turning each one on or off as needed.
Email:
Headline: Enter a title or label for this field, such as “Email Address.”
Description: Optionally, add additional instructions or context for the respondent.
Phone Number:
Headline: Enter a title or label for this field, such as “Phone Number.”
Description: Optionally, provide guidance or additional context for entering a phone number.
For Choice and Image Choice questions, click Add Answer to include response options.
Click Save Changes to add the question to your survey.
If scoring is enabled for Choice or Image Choice questions:
Scroll down to the Options section to view answer choices.
Assign scores to each answer option in the Score field below each answer.
NOTE
Scores are arbitrary - you can use any numerical values that make sense for your survey.
You can use different score ranges (e.g., 0-100) or weighted scoring for more complex surveys.
Remember that the total possible score for the survey will be the sum of the highest scores for each question.
Repeat these steps to add more questions as needed.
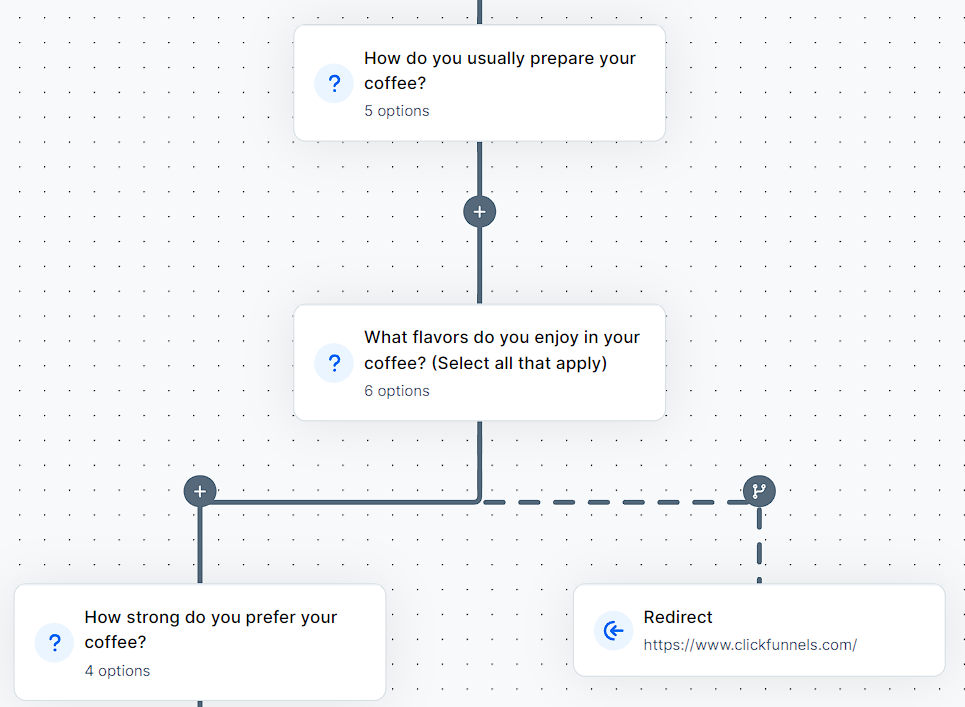
Adding Branching Logic with Splits
Branching logic helps you create a more personalized experience by adjusting the path of your survey based on how someone responds. Instead of showing every question to every respondent, you can guide each person through only the questions that are relevant to them. This makes your surveys shorter, more engaging, and more effective.
In the survey builder, branching logic is applied using splits. A split is a point in the survey where the flow can change depending on a respondent’s answers, score, or profile details. You can use splits to skip questions, redirect to a different part of the survey, or even end the survey early.
This section explains how splits work and shows you how to use them to build flexible, responsive surveys.
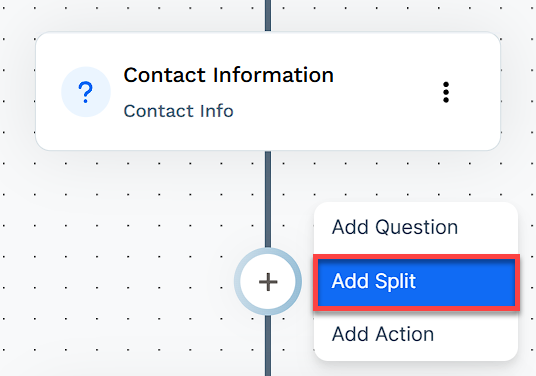
Creating a Split
Click the + sign where you want to add a split within your survey builder.
Choose Add Split from the options.
You’ll see a yellow icon at the end of the split branch.
Setting Up Split Rules
Rules define the logic behind a split. Each rule tells the system when to apply a specific survey path, such as when a respondent selects a certain answer, reaches a score threshold, or matches contact criteria. You can combine multiple rules to build more advanced conditions.
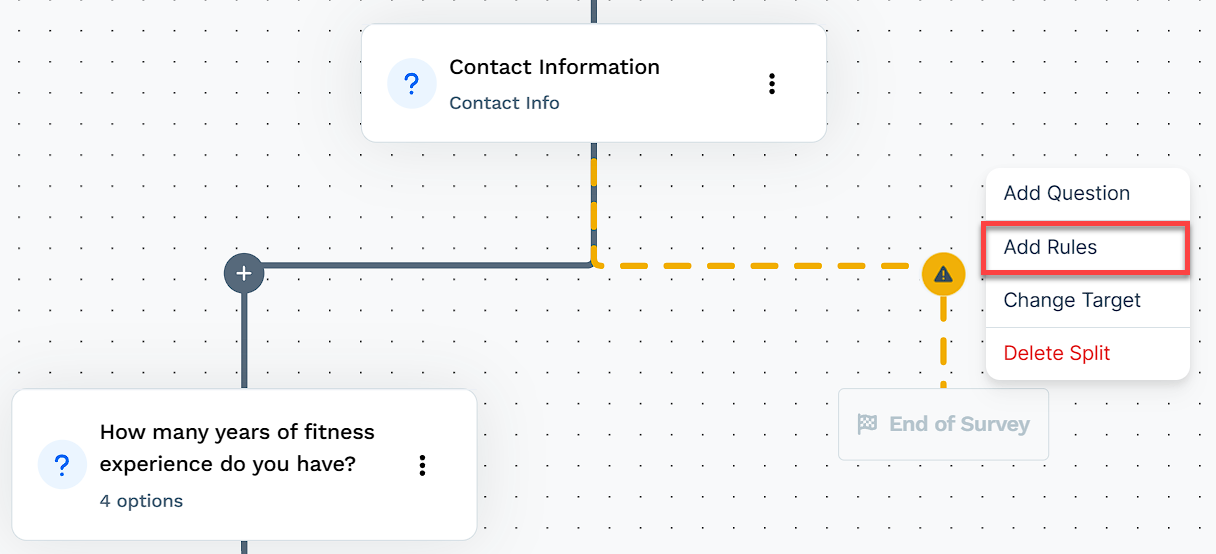
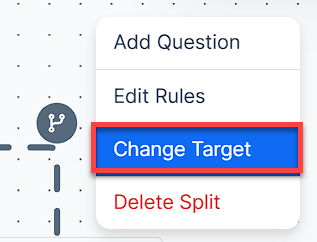
Click on the yellow ⚠ icon to open the split options menu with the following options:
Add Question: Adds a new question to the split branch.
Add Rules: Allows you to set or modify the conditions for the split.
Change Target: Lets you specify where respondents should be directed if they meet the split conditions.
Delete Split: Removes the split from your survey workflow.
To set up the split logic, click Add Rules.
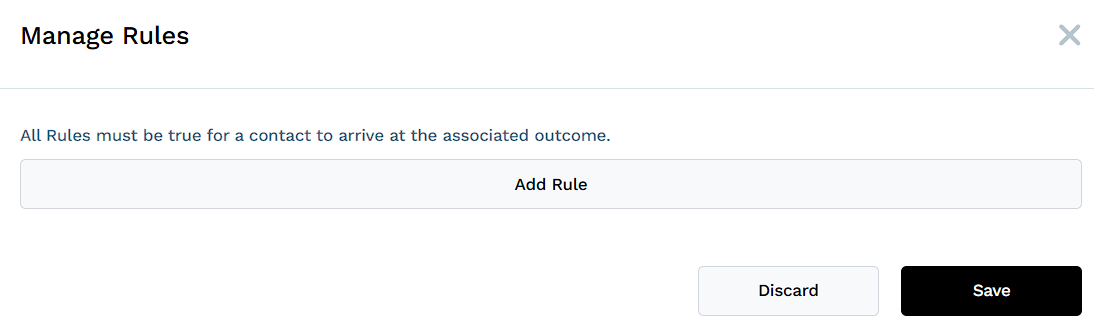
Click Add Rule to set conditions for the Split.
From the When dropdown, you can now choose between two options:
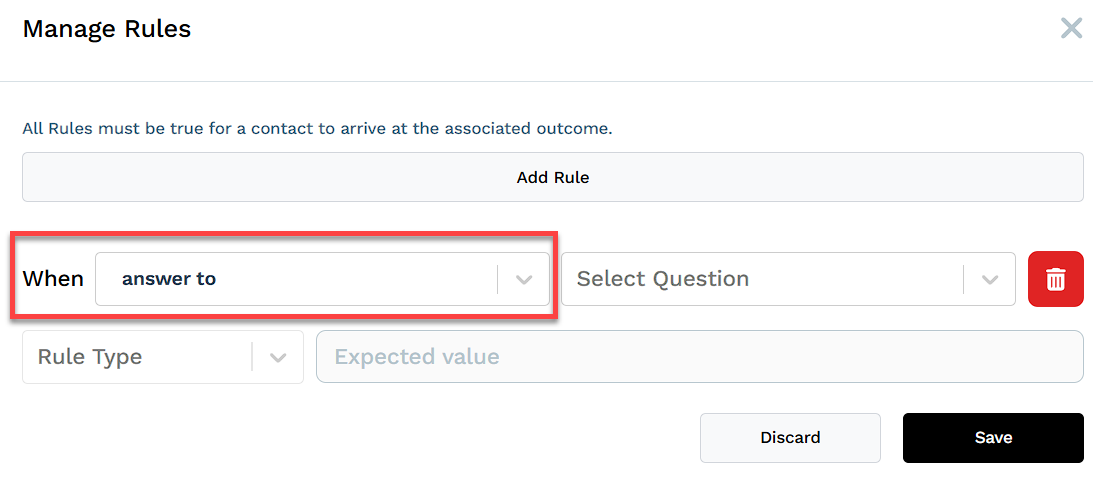
answer to: This allows you to create rules based on specific answers to questions.
score: This new option lets you create rules based on the cumulative score of the survey up to this point.
contact: Use existing contact attributes to define survey paths based on prior interactions, such as tags or other profile data.
If you selected answer to:
Choose a specific question from the second dropdown.
Select a Rule Type (e.g., “is Equal to” or “does not equal”).
Choose the answer that triggers this Split target.

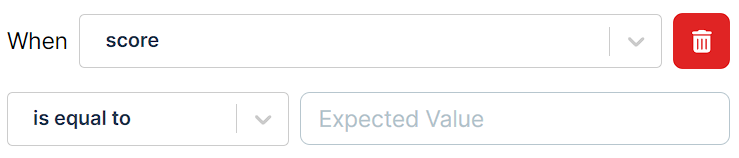
If you selected score:
Choose a condition (e.g., “is equal to”, “is greater than”, “is less than”).
Enter the score value in the Expected Value field.
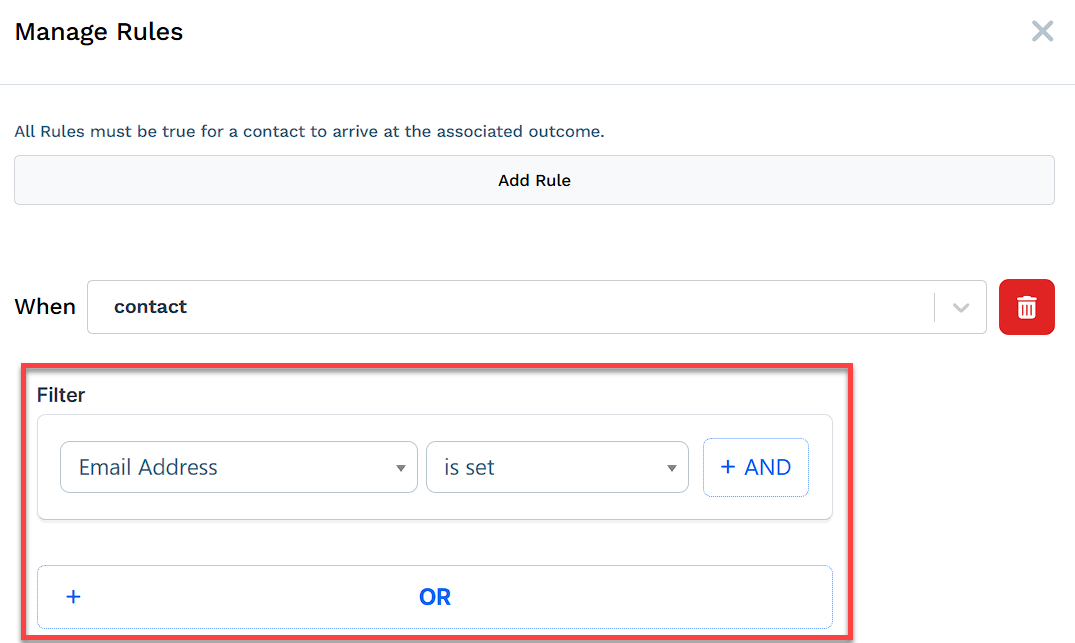
If you selected contact:
Choose a filter type from the dropdown (e.g., Contact Tags, Email Address, First Name).
Select a condition (e.g., “is,” “contains,” “starts with”).
Enter or select the specific value for the contact attribute that will trigger this Split target.

Use + AND or + OR to combine multiple conditions as needed. This allows you to create complex conditions based on both answers and scores.
Click Save to apply your rules.
The yellow icon will change to a branch icon after setting the rule.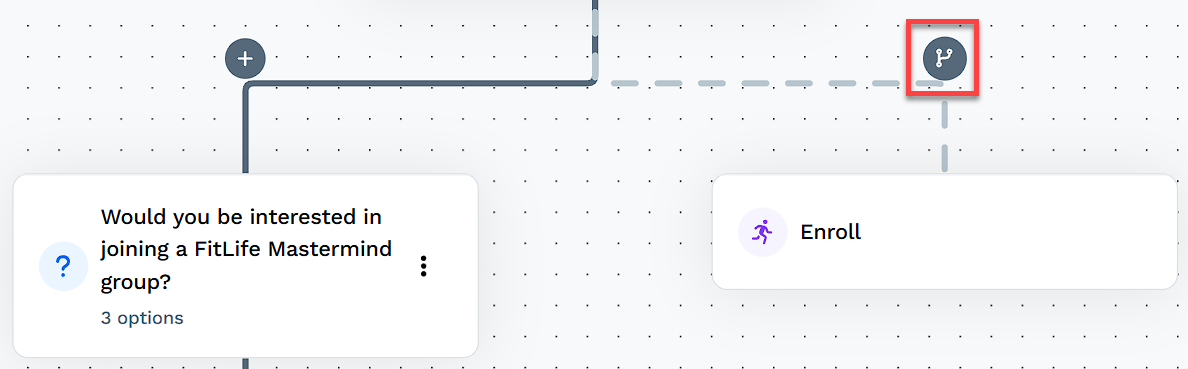
Defining the Split Target
Once a rule is in place, the split needs a target. This is what the respondent will see or experience if the rule conditions are met. Targets can direct the respondent to another question, end the survey, or redirect them to a specific page or funnel.
Click the branch icon to open the menu.
Select Change Target from the options.
In the Edit Branch window that appears, choose the appropriate Target Type from the following options:
End Survey: Finishes the survey at this point.
Redirect: Sends respondents to a different URL, page, or funnel.
Go to Question: Routes respondents to a specific question within the survey.
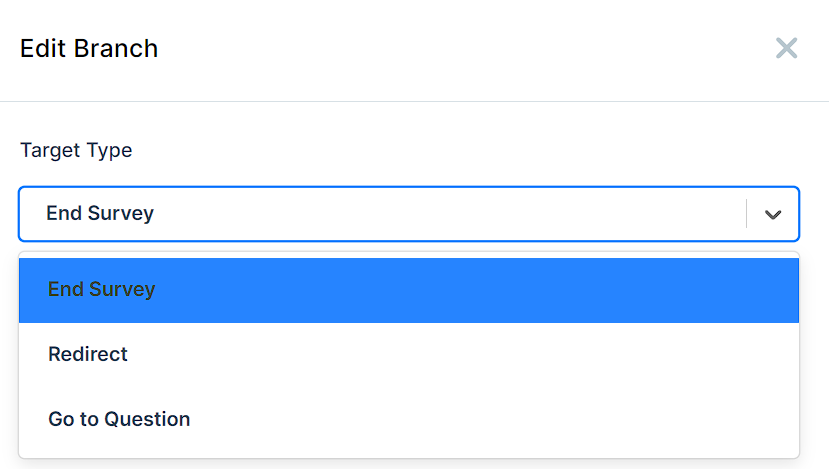
Click Submit to confirm your selection, a new branch will appear in your survey workflow, displaying the selected option.
Adding Survey Actions
Survey actions enable you to trigger specific workflow steps based on the answers respondents provide in your survey. For example, you can apply a tag when someone selects a specific option, send a follow-up email, or enroll them in a course. These actions help you engage with your audience in real-time and keep your workflows running smoothly. You can choose from various actions, including sending emails, applying tags, triggering workflows, and more, all directly from the Survey Workflow builder.
In the Survey Workflow builder, click the + icon next to a question to add an action.
From the dropdown, select Add Action.
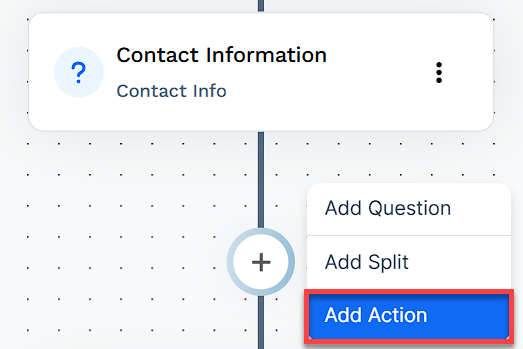
Configure the action details, then click Create action.
Set the rules for when the action should be triggered by clicking the branch icon and specifying the conditions (based on specific answers or scores).
NOTE
If you want an action to apply to all survey respondents, you don't need to set a rule.
Managing Survey Workflow Steps
Delete Survey Workflow Steps
In the Survey Workflow builder, locate the step you wish to delete.
Click the red X icon in the top-right corner of the step.
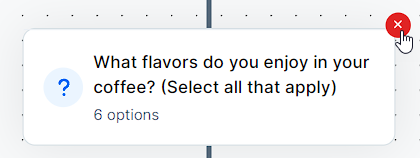
Confirm by selecting Delete when prompted.
Edit Survey Questions
In your survey workflow builder, click on the question you want to modify.
Choose the Question Type from Choice, Input, Image Choice, Contact Info, Email, or Phone Number.
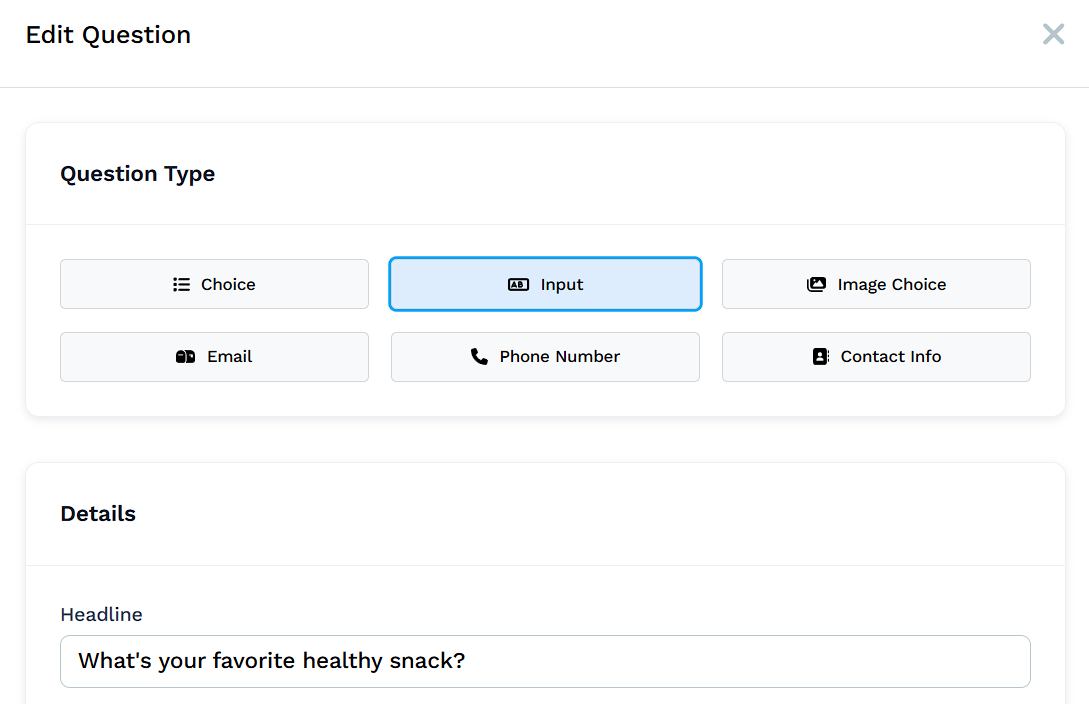
Modify the Question Headline as needed.
If applicable, select a Contact Attribute to associate with the response.
Click Save Changes to apply your modifications or “Discard” to cancel.
Clone Survey Questions
In your survey workflow builder, locate the question you want to duplicate.
Click the three dots ⋮ next to the question.
Select Clone Question from the dropdown menu.

A duplicate of the original question will appear in your survey with all options, scores, and settings copied over.
You can modify the cloned question as needed or use it as is to maintain consistency across different branches or sections of your survey.
Edit Survey Rules
In your survey workflow builder, locate the step with the added rule.
Click on the branch icon associated with that step then click Edit Rules.

In the Manage Rules panel, adjust the existing rules or add new ones.
Set conditions for each rule to control the survey flow.
Click Save to apply your changes.
Edit Redirect Steps
Find and click on the redirect step in your survey workflow builder.
Modify the redirect Type or destination.

Click Save Changes to update the redirect step.