Imagine a customer just purchased a product from your ClickFunnels store. They’re excited, ready to put it to good use. But what if, instead of a standard order confirmation page, you could present them with an offer perfectly tailored to their purchase? ClickFunnels Store Upsells make this a reality. This powerful feature lets you create targeted upsell opportunities that appear after checkout, maximizing your chance of increasing sales and average order value.
In this article, you will learn how to set up and customize ClickFunnels Store Upsells, customize the upsell page, and manage the upsell priorities to maximize your sales opportunities.
Requirements
An active ClickFunnels account
The Store app added to your workspace
A “Funnel” or a “Product Collection” created
What is a Store Upsell?
A Store Upsell is a strategic ClickFunnels feature designed to enhance your post-purchase conversion rate and boost overall sales. It works by redirecting customers to either a funnel or the store upsell page offering an upsell product after they complete a purchase in your store, rather than showing them the standard order confirmation page. This redirection provides an opportunity to present them with targeted offers that complement their initial purchase decision.
Here’s an example:
Imagine a customer buys a high-quality pair of athletic shoes from your store. With a Store Upsell in place, you could redirect them to a store upsell page showcasing a collection of athletic apparel (e.g., matching workout clothes, caps, performance socks). This strategic upsell leverages their existing purchase intent to increase the likelihood of adding more relevant items to their cart and boosting your average order value.
How to Create a Store Upsell
Create a New Store Upsell:
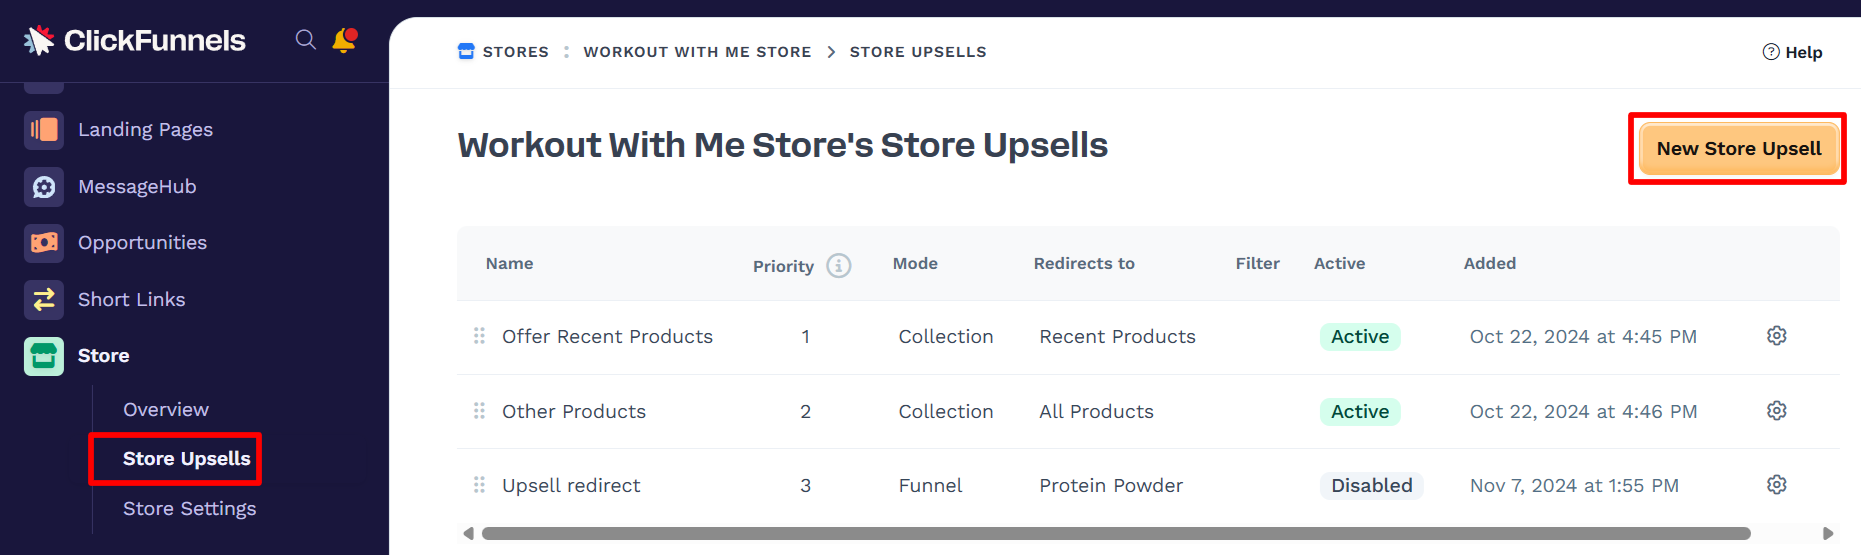
In your ClickFunnels dashboard, click on the Store menu in the left sidebar.
Select Store Upsells from the sub-menu.
Click on the New Store Upsell button.
Configure Upsell Settings:
Mode: Choose how you want the upsell to redirect customers after their purchase:
Funnel Mode: This option allows you to redirect them to the first page of a specific funnel you’ve created. This funnel can be designed to showcase additional products that complement their initial purchase.
NOTE
Choose a Funnel on the same domain as your store, that way your users’ information, including payment details, will be retained!
Collection Mode: This option allows you to offer users products from a selected collection after checkout. When a customer completes their purchase, they will be redirected to a store upsell page displaying the first product in the collection. If they have already purchased that product, the next product in the collection will be shown.
Configure Store Upsell Details:
Name: Enter the name for the store upsell.
Funnel: If you selected “Funnel Mode,” ClickFunnels likely prompts you to select a specific funnel from your existing funnels after you choose this mode. This funnel starts with the page the upsell redirects customers to.
NOTE
By strategically designing your upsell funnel, you can ensure the first page serves as the ideal landing page to present your targeted upsell offer.
Collection: If you selected “Collection Mode,”Click the dropdown menu and choose the specific product collection you want to present as an upsell after the trigger is met.
URL: Customize the web address (path) for your store upsell page. This is the URL users will see when offered a product from the collection. If left blank, ClickFunnels will generate a URL based on the name field.
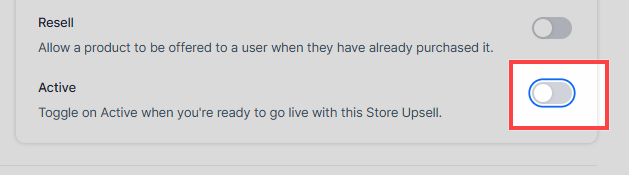
Resell (optional) This option controls how the upsell behaves if a customer already owns a product within the collection (applicable to Collection Mode only):
Enabled: The store upsell page will always showcase the first product in the collection, regardless of whether the customer already owns it. This can be useful for consumable products or products with variations (e.g., different sizes or colors).
Disabled: The upsell will only showcase products the customer does not already own within the collection.
Active: Toggle this option to activate the store upsell. An inactive upsell won’t trigger after an initial store purchase.
Set Up the Store Upsell Trigger:
The Store Upsell Trigger determines the specific event that activates the upsell after a customer completes a purchase in your ClickFunnels store. This allows you to precisely target upsell offers based on your customers’ behavior.
For example, you can set the trigger to only activate when a customer buys a specific product variant or when the customer has a specific tag on their profile. This ensures your upsell offers are targeted and relevant to the customer’s initial purchase.
Click on the Create Filter button and add the desired filter. Available filters include options such as:
Contact Tags: Trigger the upsell based on specific tags assigned to the customer’s profile.
Declined Product Purchase Attempt: Trigger the upsell when a customer attempts to purchase a product but the purchase is declined.
Declined Variant Purchase Attempt: Trigger the upsell when a customer attempts to purchase a specific variant of a product but the purchase is declined.
Purchased Product: Trigger the upsell based on specific products that the customer has purchased.
Purchased Product Variant: Trigger the upsell based on specific variants of products that the customer has purchased.
Recently Purchased Product: Trigger the upsell based on products that the customer has recently purchased within a 5-minute window.
Recently Purchased Product Variant: Trigger the upsell based on specific variants of products that the customer has recently purchased within a 5-minute window.
Save Store Upsell:
Click on Create Store Upsell to save your settings.
Managing the Existing Store Upsells
Viewing Existing Store Upsells
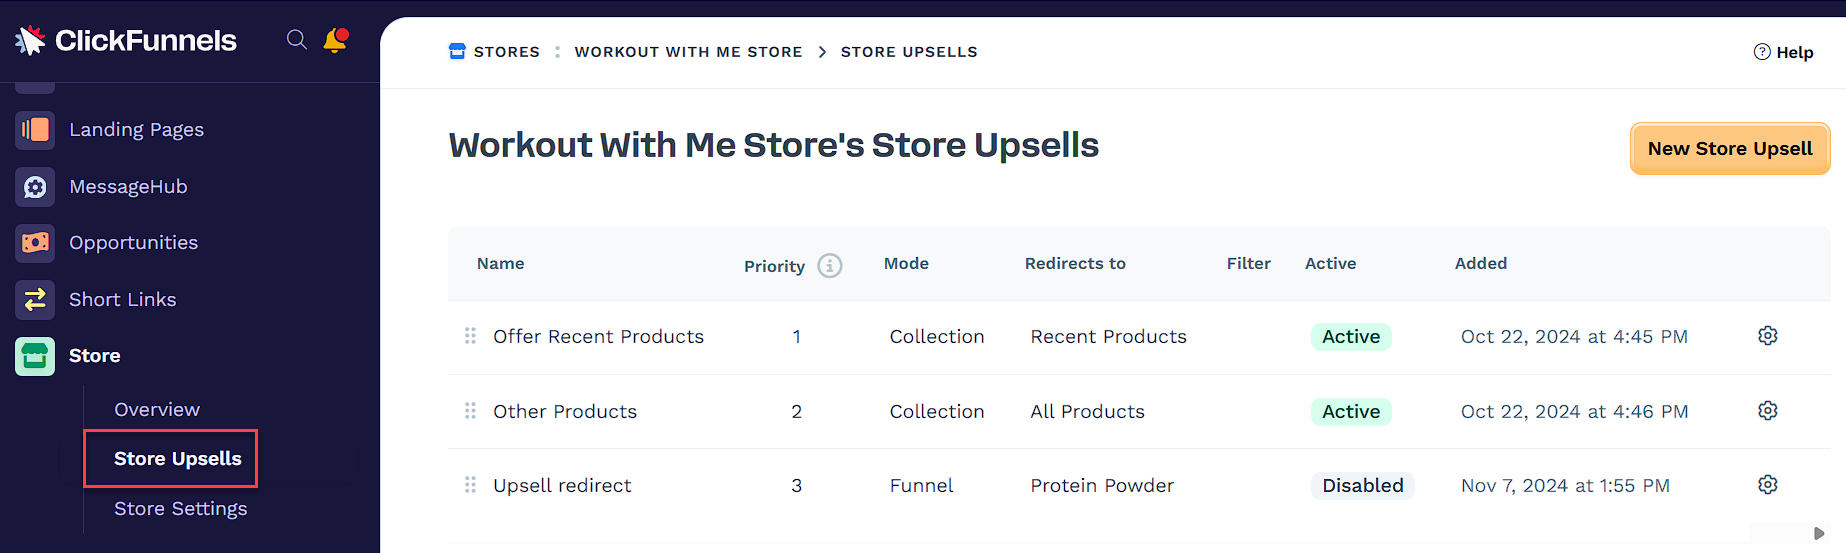
In the Store Upsells page, you will see a list of all the store upsells you have created. Each upsell will display details such as the name, priority, mode, redirect location, filter, status, and the date it was added.
Modifying an Existing Store Upsell
To modify an existing store upsell, click on the name of the store upsell or the gear icon (⚙️) next to the store upsell you wish to edit.

This will take you to the editing screen where you can update the store upsell details, change the trigger settings, and adjust the mode or filters as needed.
After making your changes, click on the Update Store Upsell button to save the modifications.
Deleting a Store Upsell
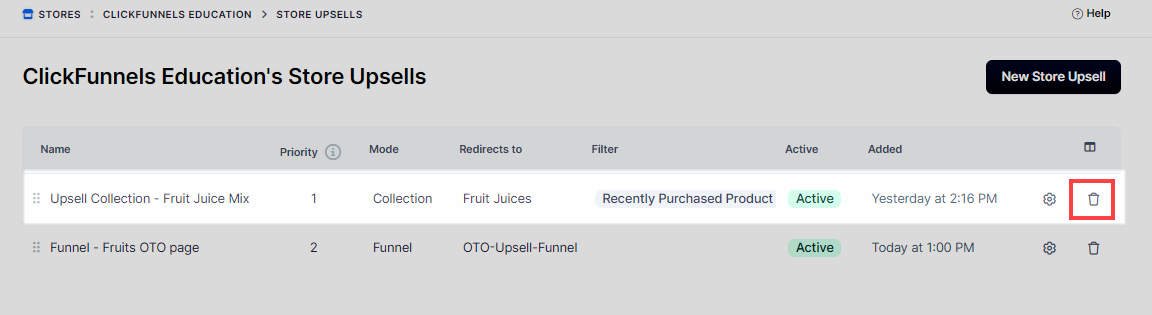
ClickFunnels allows you to delete unneeded store upsells. While viewing the list of upsells (as mentioned in step 2), locate the upsell you want to remove and click the trash can icon next to its name.
Confirm the action by clicking on the Proceed button.
WARNING
Deleting a store upsell is a permanent action and cannot be restored. Please ensure that you have carefully reviewed and confirmed your decision before proceeding with the deletion.
Prioritizing Store Upsells
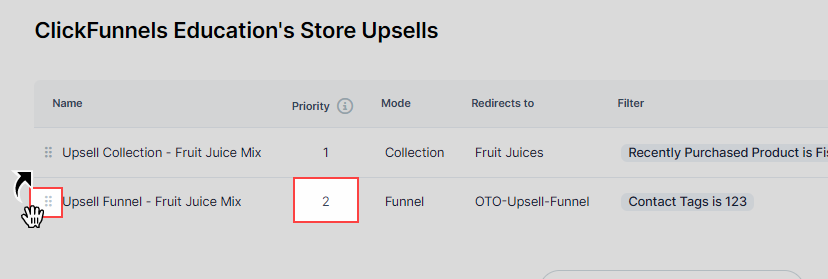
Prioritizing your store upsells is essential to ensure that the most relevant upsell is presented to your customers. The priority column in the Store Upsells section indicates the priority of each store upsell, with 1 representing the top priority. This means that if a customer fits the filter conditions of more than one store upsell, the upsell with the higher priority (closer to the top of the list) will be chosen.
To change the priority of a store upsell, use the hold and drag icon next to the upsell you wish to move.
Click and hold the icon, then drag the upsell up or down to the desired position.
Preparing The Store Upsell Page
ClickFunnels allows you to customize the appearance and content of your store upsell pages to effectively showcase your upsell offers. Here’s a breakdown of the key steps involved:
Edit the Store Theme:
In your ClickFunnels dashboard, navigate to the Store app and select Overview.
Click on the Design Store button.

Open the Theme Editor:
The editor will open, displaying various pages of your store theme.
Click on Upsell to view and edit the upsell page.
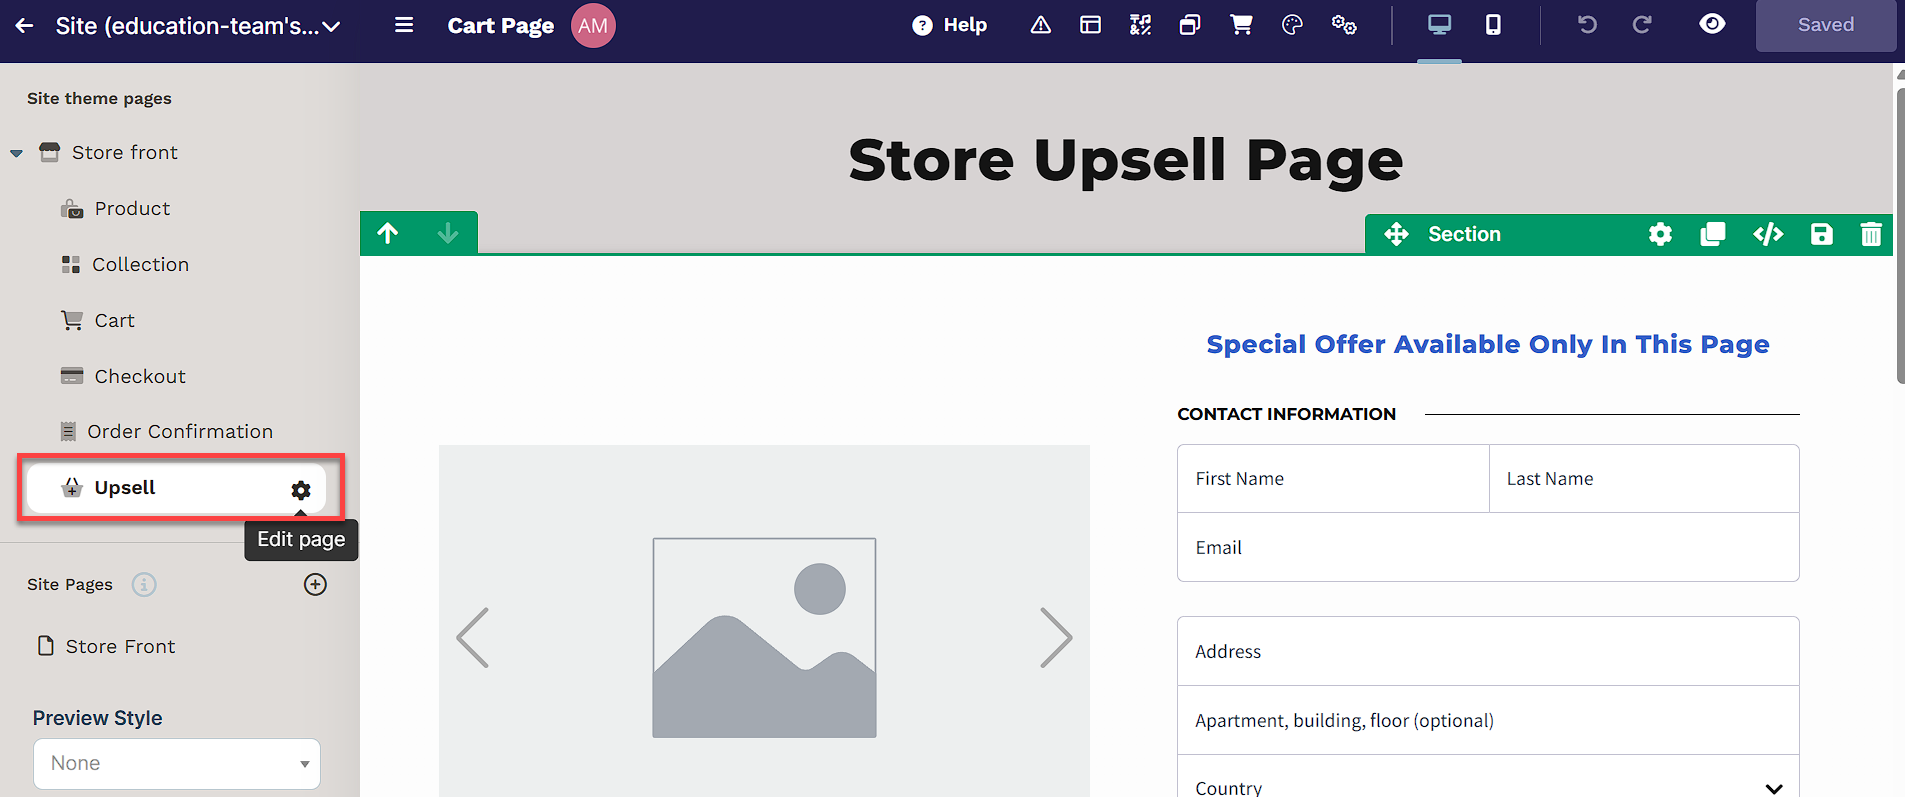
IMPORTANT
If the upsell page does not have a template applied, you need to pick a template before editing the upsell page.
Add Checkout Element:
An upsell page must contain a checkout element to facilitate the purchasing process. If your selected template does not have a checkout element, ensure that your store upsell page includes a checkout element.
To learn more about the checkout element, refer to the Checkout: Enable Users to Complete their Purchase.
Testing Store Upsell in Test Mode
To verify the functionality of your store upsell, you can perform a test in test mode by following these steps:
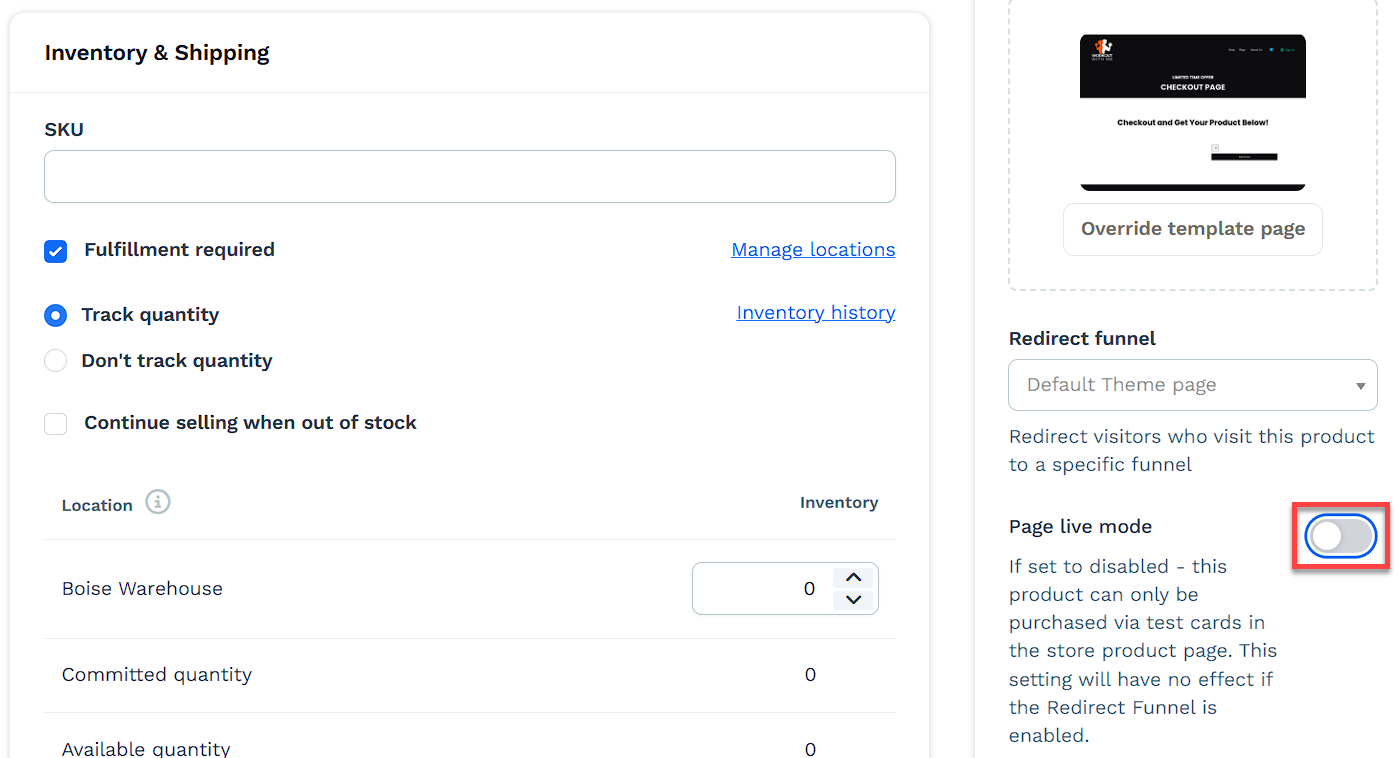
Disable Live Mode for the Product:
Navigate to the Products section in your ClickFunnels dashboard and select All Products.
Select the product you want to test.
Scroll down and click Advanced settings to expand the section.
In the Page live mode setting, toggle the switch off.
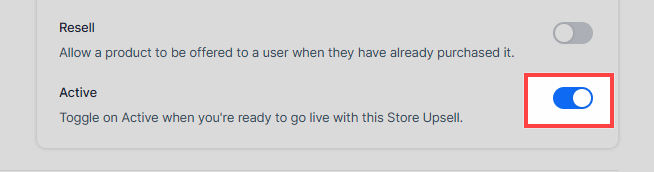
Activate the Store Upsell:
Ensure the store upsell is set to Active in the Store Upsell settings.
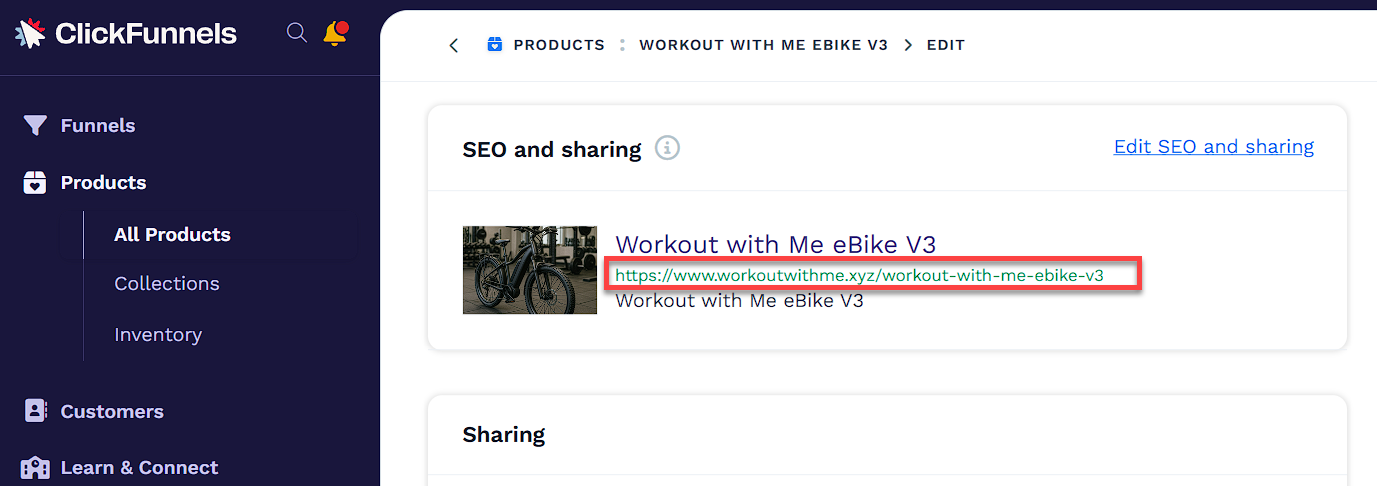
Obtain the Product Link:
Copy the link of the main product you intend to test and open it in your browser. We recommend you test it in the browser’s private or incognito mode.
Submit a Test Order:
Proceed to the store checkout page and complete a test order for the main product. Upon submission, the upsell page should appear. Learn How to Test Store Checkout in TEST Mode.
Deactivate the Store Upsell:
Return to the Store Upsell settings and set the Store Upsell to Inactive or Disabled.
Refresh the Upsell Page:
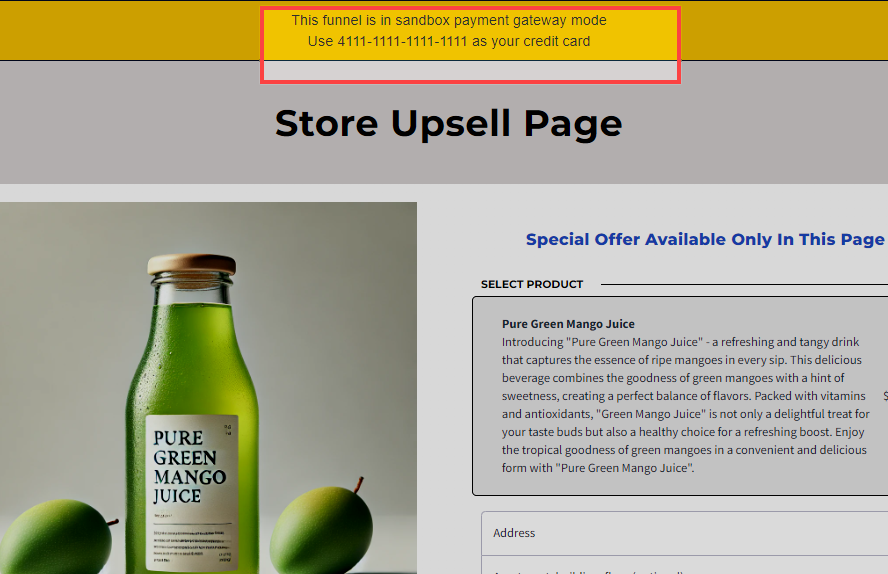
Navigate back to the upsell page that was opened and refresh it multiple times until you see the yellow banner indicating that test mode is active.
Complete the Test Upsell:
Finalize the order on the upsell page while in test mode.
Reactivate the Store Upsell and Product:
After testing, return to the Store Upsell settings and reactivate the upsell.
Navigate back to the product settings and re-enable the Page live mode to make the product visible in your store again.