Invoices are documents that record the details of a sale, including the services or products provided, their costs, and payment terms. They’re important because they help you keep track of your sales, ensure you get paid on time, and maintain good communication with your clients. Managing your invoices effectively helps you stay organized, avoid mistakes, and keep your business operations running smoothly.
.png)
Requirements
An active ClickFunnels account
An order
How to Access Invoices
Click on Customers from the left-side navigation menu in your account.
Select Invoices from the dropdown menu under Orders.
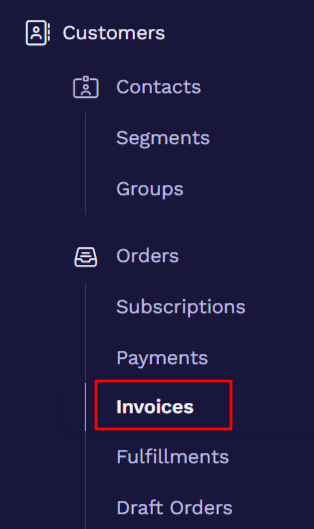
This will take you to the Invoices dashboard.
How to Manage Invoices
Click on the invoice number from the dashboard.
In the window that pops up on the right, click the Three Dot ⋮ icon.
A dropdown menu will appear, providing various options for handling the invoice.
IMPORTANT
Your view of the invoice management options may vary based on the type of product you have or the current status of your invoice.
Pay
The Pay option within the manage invoices feature allows users to process payments directly for outstanding invoices. When you select this option, you can enter payment details to settle any unpaid invoices associated with your account or a client’s account.
NOTE
This option will only appear for Past-Due invoices.
From the Pay Transaction menu, scroll down to the Payment method section and select your preferred payment method.
Update the Payment amount if needed.
Click Pay when ready.
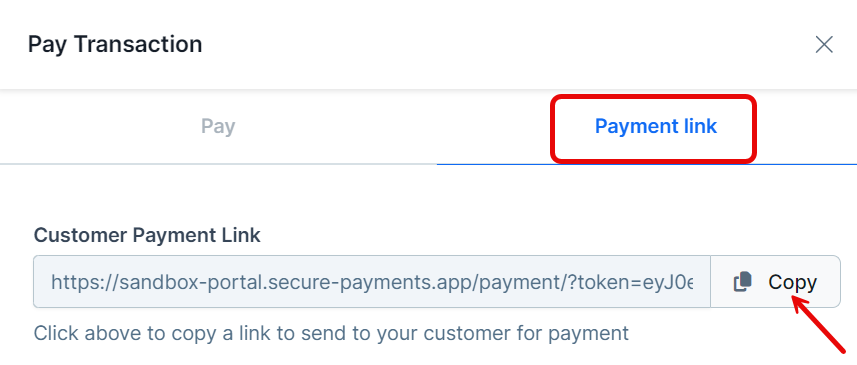
In the Pay Transaction menu, members have the option to select the Payment link tab. Here, you can easily copy a payment link to send directly to your customer, allowing them to complete the payment on their own.
Send
The Send option allows you to email invoices directly to clients, simplifying the billing process.
Select the Sender Email - the email address you wish to use for sending the invoice.
Enter the Recipient’s email - you can send the invoice to multiple recipients by separating each email address with a comma.
Fill in the Subject line - this will be the title of the email that recipients see when they receive the invoice.
Message - this is optional and you have 250 characters to add any additional information or note you want to include with the invoice.
Check the Checkbox to send a copy of the invoice to yourself for your records.
A Preview of your email will appear to the right of the window, allowing you to see how it will look to the recipients before sending.
Click Send Invoice.
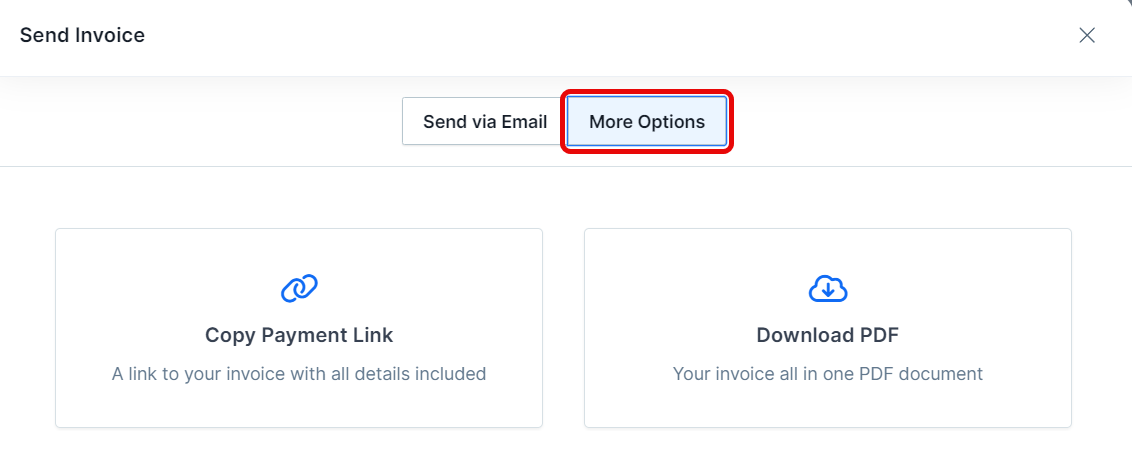
The More Options tab within the invoice management section, members are provided with further functionalities to enhance their invoice processing experience. By selecting this tab, members can:
Copy Payment Link: This option allows members to easily copy a direct link to the invoice’s payment page, which can then be shared with clients via email, message, or any other communication method. This link directs clients straight to the payment gateway, facilitating a smoother transaction process.
Download PDF: Members can download a detailed PDF version of the invoice, enabling them to have a physical or digital copy for record-keeping, to mail out manually, or to attach to emails separately if needed.
Download
By clicking on Download, you can save a PDF copy of the invoice directly to your computer. This feature ensures that customers can keep a local record of their transactions, which can be useful for accounting purposes, future reference, or to provide a physical copy to clients if needed.
Reissue
The Reissue option is designed for situations where the invoice due date needs to be updated or corrected. To reissue an invoice in ClickFunnels 2.0, follow these steps:
Click on Reissue in the manage invoice tab.
Select the Due date for the reissued invoice. You have the option to reissue it immediately or set a future date for the reissued invoice.
Click Reissue.
Abandon
The Abandon feature allows users to temporarily disregard an invoice without affecting the overall order. If an invoice due for a specific period is abandoned, your customers won’t have to pay for that period until the next invoice comes due. Later, if they decide to pay for the time skipped, they can do that, and it won’t mess up the regular payment schedule.
Click on Abandon in the manage invoice tab. The invoice will then be automatically set to abandoned status.
Click Proceed in the confirmation window that appears, if you’re sure you want to abandon the invoice.