 Dashboard
 Site & Funnels
 Products
 Orders
 Contacts
 Analytics
 Marketing
 Sales
Sales Settings
 Apps
Apps Payments
 MessageHub
This article will go over how to Add a New Broadcast. Broadcasts are a Marketing feature that allows you to send a one-off marketing email to a specific audience.
Sending Broadcast emails will enable you to send lead generation or nurturing emails to a particular audience, increasing your conversion rate.
Requirements:
An active ClickFunnels 2.0 account
A Broadcast campaign
Table of Contents:
Accessing your Broadcast Campaigns:
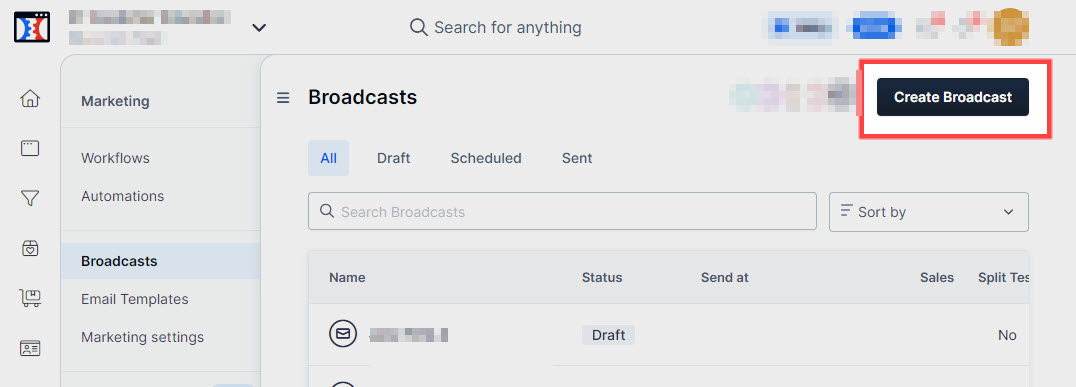
Click Marketing from the main menu, then select Broadcast.
.

From the Broadcasts page, you will see all your broadcast campaigns and can access each Broadcast campaign individually, among other features like adding a new broadcast campaign.
Add a New Broadcast:
Click under the Create Broadcast button.
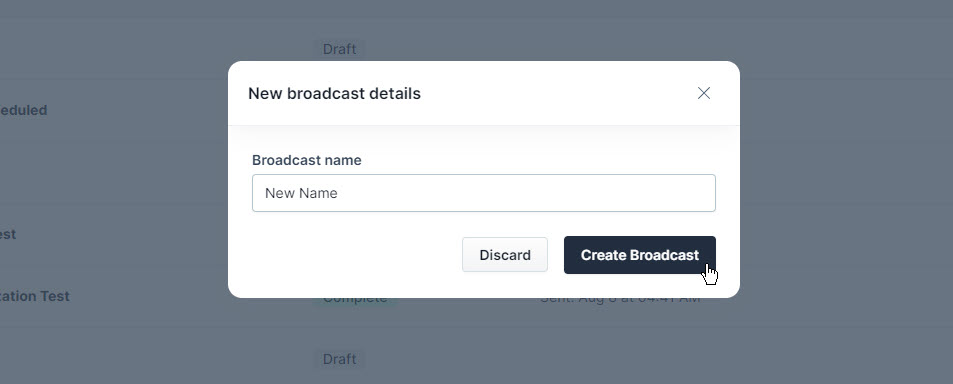
Set up a name for your Broadcast under the Broadcast Name input field and click under Create Broadcast.
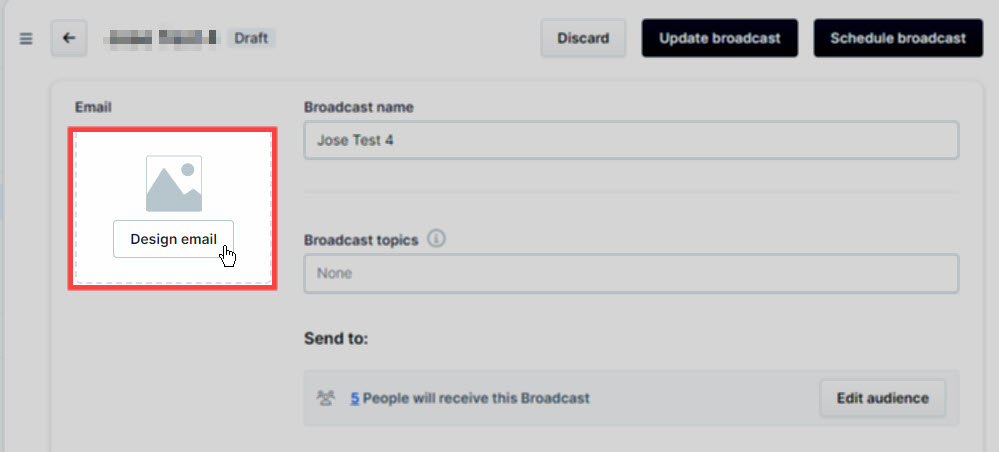
Click under Design email to select a template for your email.
Select one of the pre-existent templates by hovering over one of the existing templates and clicking under Select template, or hovering over the Blank Template and clicking under Start from blank to create a new email template from scratch.
This will open the Email Editor. You can design your whole email from here, changing the existing elements or adding new ones. Once you are done, click on Publish and exit. You can also skip editing and do it later by clicking under Discard draft and exit.
Back at the Create New Broadcast screen, the next step is adding Broadcast topics. Please select all the topics related to this email by typing them inside the input field; once options pop from the menu, select the desired one. Broadcast topics have to be previously set from Marketing Settings/Topics.
Define the email audience by clicking under Edit audience.
Select the rules that apply to your Broadcast audience from the drop-down menu. You can add a set of exclusive rules by using the +AND button or add several types of inclusive rules by using the OR button and include more rules.
These rules will become the frame or boundaries that will determine your Audience. Once you are done setting your Audience rules, click under Save.
Select the “From Email” value from the pre-defined options. This feature has to be previously set from Email addresses in the Marketing Settings section.
Set a Subject for your email from the Subject line input field.
You can also add dynamic tags by clicking under Merge tags and selecting an option from the drop-down menu.
Set a Preheader text for your email.
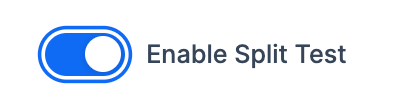
As an optional step, you can split test your Broadcast and test a new version of your email.
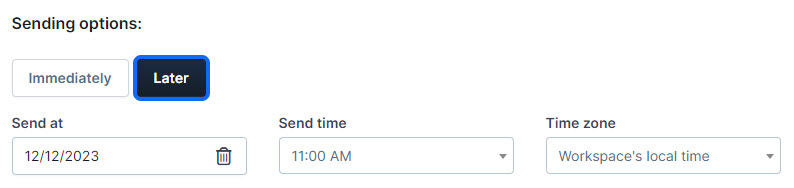
Important Note: Visit this link to learn more about Broadcast Split Testing.Select the email delivery time; you can choose between sending it immediately or any date and time in the future.
Smart Sending allows you to optimize email sending and works as an extra measure to avoid your emails being flagged as spam. To enable it, make sure the Smart Sending box is checked. You can also extend the period of email batches by clicking under Customize.
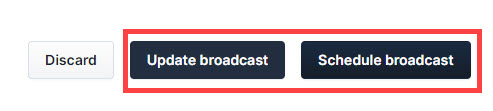
Click under Update Broadcast to save it as a Draft, or click under Schedule Broadcast to make it live with the current features and sending dates.


Related Articles and Links:
Here is a list of related articles and links to help you with your progress
Was this article helpful?
That’s Great!
Thank you for your feedback
Sorry! We couldn't be helpful
Thank you for your feedback
Feedback sent
We appreciate your effort and will try to fix the article