An “Automation Workflow” in ClickFunnels is a sequence of automated steps that can streamline your marketing efforts and enhance the customer journey. They eliminate repetitive tasks and allow you to send targeted messages and perform actions based on user behavior within your ClickFunnels workspace. In this article, you’ll learn how to create workflows in the ClickFunnels “Automations” app.
Requirements
An active ClickFunnels account
Adding the Automations App in the Workspace
From the main menu on the left, click on + Add an App to navigate to the Apps page.
.png)
Scroll down until you find the Automations app, then click on it.
Confirm your selection by clicking the Add App button.
Learn more about “Apps” and how to add an “App” to ClickFunnels in the Adding Apps to Your ClickFunnels Workspace article.
How to Create a New Workflow
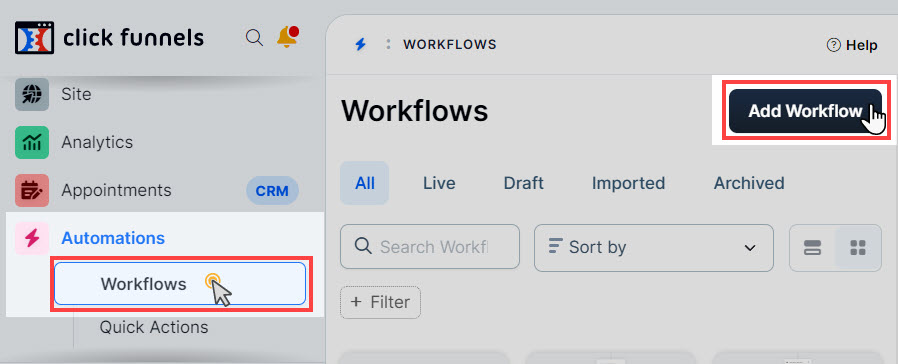
From your ClickFunnels dashboard, click on the Automations app in the left-hand menu.
Click Add Workflow to create a new workflow.
Give your workflow a clear and descriptive name.
Select Run Type: Here, you’ll choose how often a contact can trigger this workflow.
Multiple runs per contact (back to back): This allows a contact to re-enter the workflow if they meet the trigger condition again (e.g., someone abandons their cart multiple times).
Multiple runs per contact (simultaneous): This triggers multiple actions within the workflow at the same time for a single contact upon meeting the trigger condition (e.g., sending an SMS and email simultaneously when someone subscribes).
Only one run per contact: This ensures a contact only goes through the workflow once, even if they meet the trigger condition multiple times (e.g., a welcome email series).
Click the Create Workflow button.
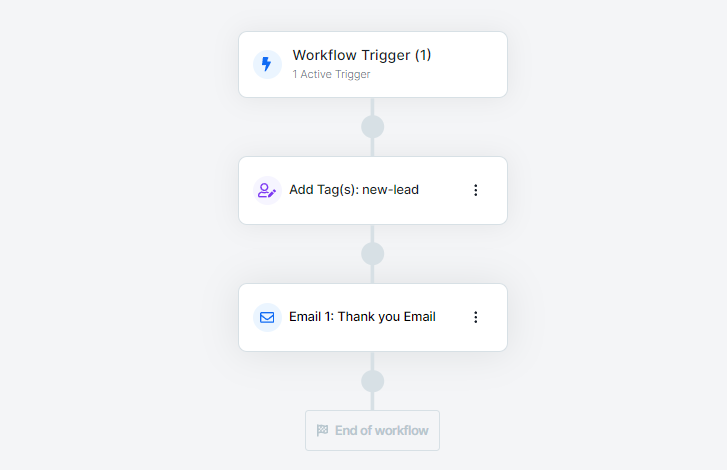
You’ll then be directed to the workflow builder interface, where you can start adding triggers and actions to create your automated sequence.
NOTE
An “Automation Workflow” will not trigger for existing contacts who met the event criteria before the workflow was created. To include these contacts, you can use the back-populate feature. Refer to the Exploring Workflow Options section in this article for more information on back populating a workflow.
Building Your Workflow Steps
Step 1 - Add Trigger
A trigger is the event that initiates your workflow. It defines when the workflow sequence will start for a contact. Imagine you want to send a warm “thank you” email to every customer who completes a purchase. In this scenario, the trigger would be “Successful Purchase”, ensuring the email automatically goes out after someone finalizes their order on your funnel’s checkout page. ClickFunnels offers various triggers based on user behavior or actions within your workspace. Here’s a step-by-step guide to setting up a trigger:
Click on the No Trigger set to add your first trigger.
Click on + Add a trigger.
Add Trigger Criteria:
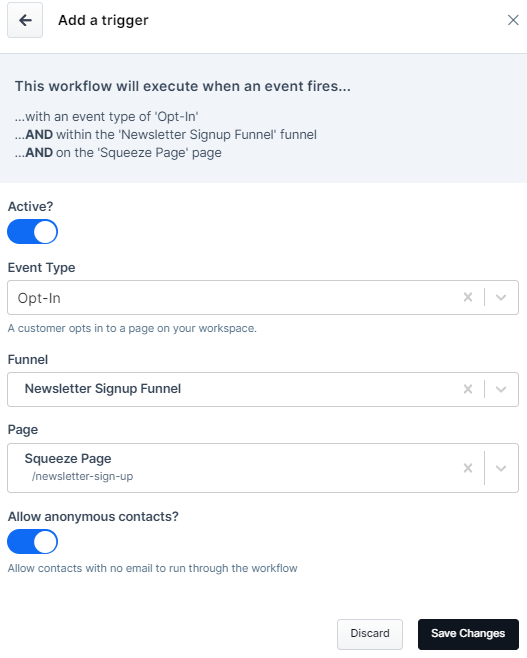
Activation: Toggle the Active switch to enable/disable the trigger.
Event Type: Select the specific event that will initiate the workflow. Examples include
Opt-In,Order - Successful Purchase,Applied Tagand more.Event Location: Select the source of the event such as funnel, course, or tag name depending on the event type you selected.
Allow Anonymous Contacts (Optional): Toggle this option if you want the workflow to run even for contacts without an email address. ClickFunnels requires that contacts have either an email address or a phone number. Contacts without an email address will be classified as anonymous.
Save Changes: Click the Save Changes button to add the trigger.
To add more triggers, click +Add a trigger and repeat the same process explained in step 3.
To learn more about Workflow Triggers and Event Types visit How to Manage Workflow Triggers.
Step 2 - Configure Actions
After defining the trigger that initiates your workflow, you’ll move on to configuring the actions your workflow will perform in response to the trigger. ClickFunnels offers a variety of pre-built actions you can incorporate into your workflow using a drag-and-drop interface.
To configure an action, follow these steps:
Add an Action: Click on the Plus Icon (+) below the trigger to add your first action.
Select Action Type: On the right-hand side panel, choose the appropriate action type from the available options. Here are some common ClickFunnels workflow actions:
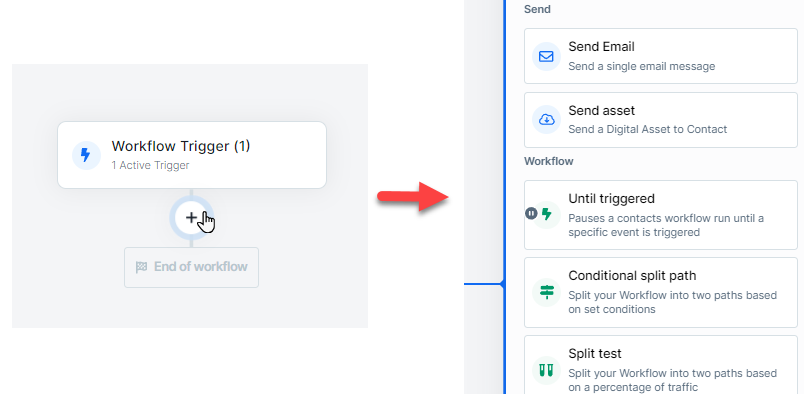
Send Email: Automate sending email messages to your contacts. This is commonly used for sending welcome emails, thank you messages, or promotional content.
Send MessageHub Message: Send a message to a contact from a MessageHub inbox, which can include SMS, email, or web notifications.
Send Asset: Distribute digital assets to your contacts, such as eBooks, whitepapers, or any downloadable content.
Delay: Introduce a wait time before the next action in the workflow. This is useful for drip campaigns where you want to space out emails over a period.
Conditional Split Path: Create branches in your workflow based on conditions. For instance, you can send contacts down different paths based on their responses or behaviors.
Trigger Another Workflow: Enroll a contact in another workflow, allowing for complex and multi-step automation processes.
Enroll/Unenroll in Courses: Automatically manage course enrollments by enrolling or unenrolling contacts based on their actions or triggers.
Grant/Revoke Community Access: Manage access to community features by granting or revoking access based on specific triggers.
Notify: Send notifications to your team when a contact meets certain conditions or goals, ensuring timely follow-ups.
Tag Contact: Add or remove tags to segment your contacts based on their actions, making it easier to target them in future campaigns.
Webhook: Pass information from ClickFunnels to an external application using webhooks, allowing for advanced integrations and automation.
Configure the Action: Depending on the action you select, fill in the necessary details. For example, if you choose “Send Email,” compose the email and set the recipient criteria.
To learn more about the “Workflow Action Steps” refer to the Exploring ClickFunnels Workflow Steps article.
Step 3 - Enable Workflow
After defining your trigger and configuring the desired actions, your workflow is almost ready. The final step is to activate the workflow so it can respond to contacts who meet the trigger criteria. Follow these steps to enable your workflow:
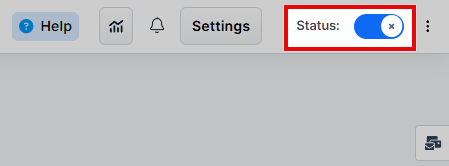
Locate the Workflow Status: In the top right corner of the workflow navigation, find the Status option.
Enable the Workflow: Toggle the status option. The workflow status will change from disabled to active.
How to Trigger a Workflow from the Funnel Step
Access the Funnel: From your workspace navigation, click the Funnels menu and access the funnel you wish to link the workflow with.
Select the Funnel Step: Choose the specific funnel step (e.g., an opt-in page) where you want the workflow to be triggered.
Integrate Workflow: Next to the funnel step, click on the Lightning Bolt icon to add a new or existing workflow. This will open a dialog where you can select the appropriate workflow from the list. The workflow editor will open and a new trigger will be automatically created in the workflow.
.png)
Learn more on how to create a new funnel in the How to Create a New Funnel article.
Exploring Workflow Options
ClickFunnels provides a range of options to help you manage and optimize your workflows.
Analytics
ClickFunnels offers comprehensive analytics to track the performance of your workflows. Analytics provide insights into various metrics, helping you evaluate the effectiveness of your workflow and make data-driven decisions to improve your campaigns.
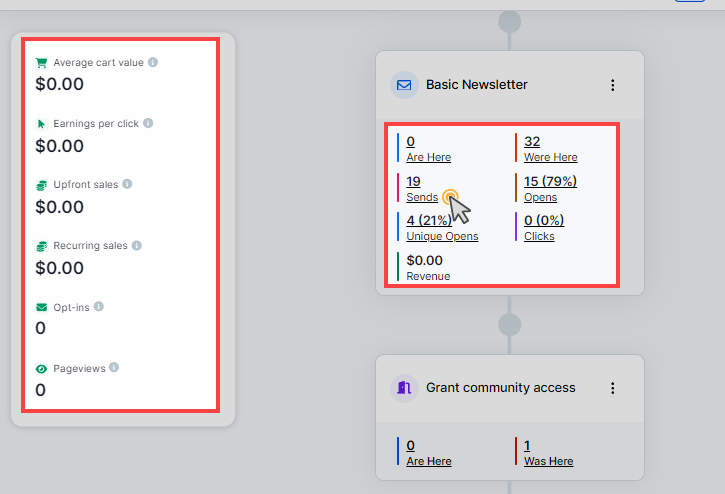
Average Cart Value: The average revenue generated per customer each time they checkout.
Earnings per Click: The revenue generated per click.
Upfront Sales: This shows the total amount of upfront sales, one time products, and only the first invoice of subscription products
Recurring Sales: This shows the total amount of sales of recurring products, not considering the upfront (1st invoice)
Opt-ins: The count of users who’ve subscribed or registered. This is key for measuring engagement and interest in your content or offers.
Page Views: The count of the total number of pages viewed in your funnel. Useful for understanding overall funnel traffic and visitor interest.
In addition to these general metrics, each step in your workflow can display specific analytics relevant to the action it performs. For example, an email step might show the number of emails sent, opened, and clicked.
Enhanced Step Analytics:
Each step in the workflow also features interactive metrics that provide deeper insights into performance. Some of the metrics you can click on include:
Are Here / Were Here / Was Here Counts: These metrics show the number of contacts currently at this step (“Are Here”) or those who have completed it (“Was Here” for a single contact and “Were Here” for multiple contacts).
Additional Clickable Metrics: Other metrics such as Sends, Opens, Unique Opens, and Clicks are also interactive. Clicking on these metrics allows you to view the contacts associated with each action, giving you a more detailed understanding of how contacts are interacting with each step of your workflow.
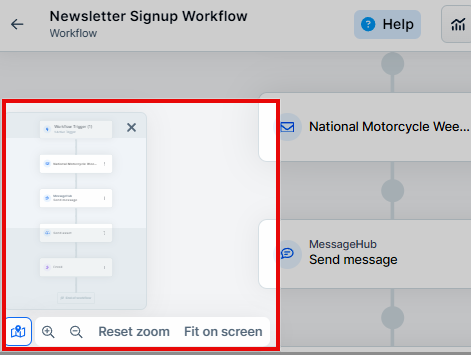
Mini Map
The Mini Map feature provides a simplified view of your workflow, allowing for easy navigation, especially when your workflow contains numerous steps. This feature is particularly useful for managing complex workflows. You can toggle the Mini Map on or off and adjust the zoom level to fit the workflow on your screen.
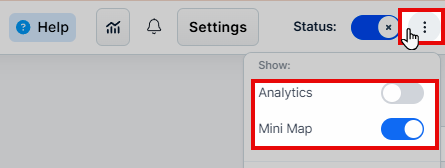
Show/Hide Analytics and Mini Map
Enable or disable the display of analytics and mini-map on your workflow editor when needed.
Back Populate
The “Back Populate” option allows you to retroactively trigger the workflow for contacts who previously met the workflow criteria but were not included when the workflow was first activated. Typically, a workflow will begin processing contacts from the moment it is activated, applying only to those who meet the criteria thereafter. However, by using the “Back Populate” feature, you can ensure that contacts who met the criteria before the workflow’s activation are also processed through the workflow steps.
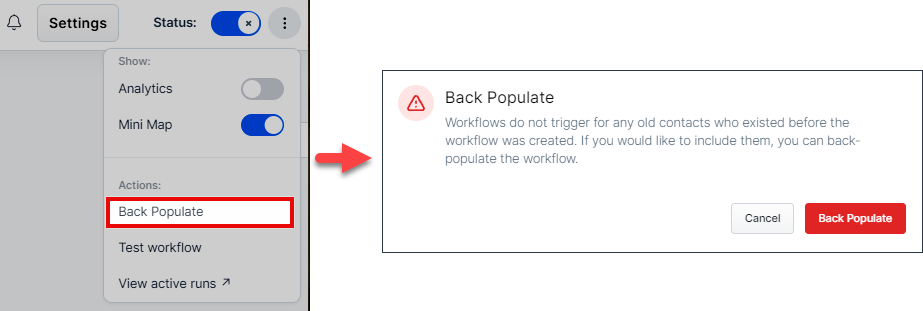
NOTE
Use Back Populate strategically. Consider the volume of contacts and the workflow complexity before activating this feature.
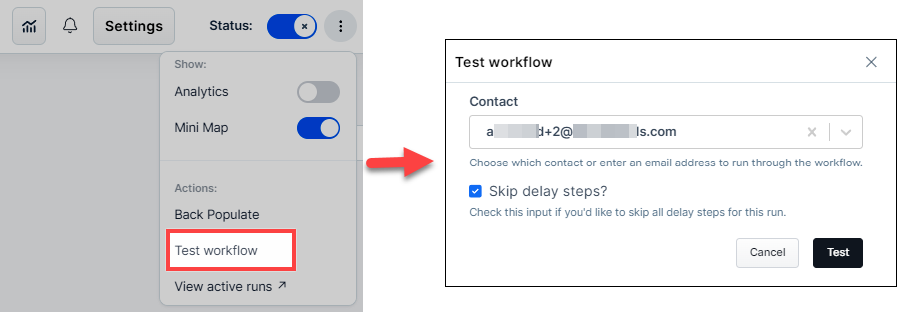
Test Workflow
The “Test Workflow” feature allows you to verify that all triggers and actions within your workflow are functioning correctly before going live. To perform a test, select a contact for the workflow to run the test on. Optionally, you can choose to bypass any delay steps in the workflow. This ensures that the system skips the delays and tests the action steps directly for the selected contact, providing a comprehensive check of the workflow’s functionality.
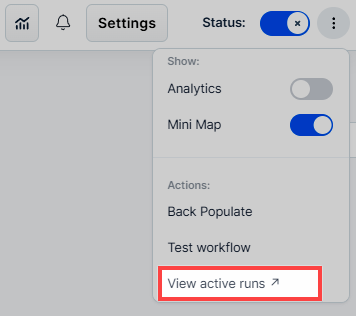
View Active Runs
The “View Active Runs” feature allows you to monitor the active instances of your workflow, giving you insights into the contacts currently being processed. This feature is crucial for tracking the real-time progress of your workflows and ensuring they are functioning correctly.
When you access the “View Active Runs” option, a detailed table is displayed, showing each contact’s progress within the workflow. The table includes information such as the contact’s email, the workflow they are in, their current step, and the date and time they were added to the workflow. This comprehensive view helps you manage and troubleshoot your workflows effectively.