This article will explore the Orders menu, which allows you to access all orders generated through the store, funnels, and manually created. The orders page displays both one-time and recurring orders, offering functionalities to search, filter, and sort orders based on specific criteria.
Additionally, the order table provides comprehensive details, including order number, customer email address, product name, order status, fulfillment status, billing status, and total order amount. This allows you to easily track and manage orders in one place.
.png "a3dpLTamvIM_rBklh70XW6IE9hmphgrqYw(3).png")
Requirements
An active ClickFunnels account
Accessing the Orders Dashboard
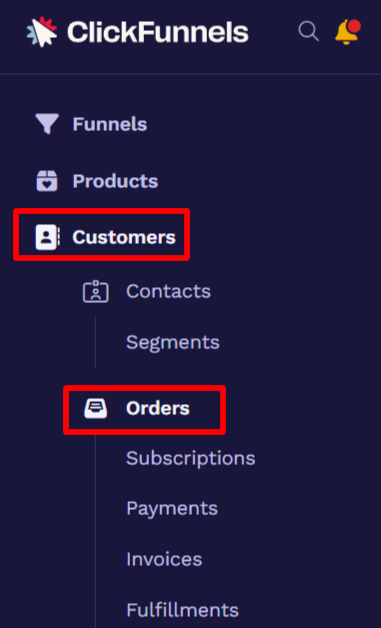
Navigate to the Customers section from the left-side menu.
Select Orders.
Orders Dashboard Overview
The Orders Dashboard includes several features and options for managing and analyzing order data.
Insights Panel: Use the Insights toggle in the top-right to enable or disable the orders analytics preview. The Insights panel includes:
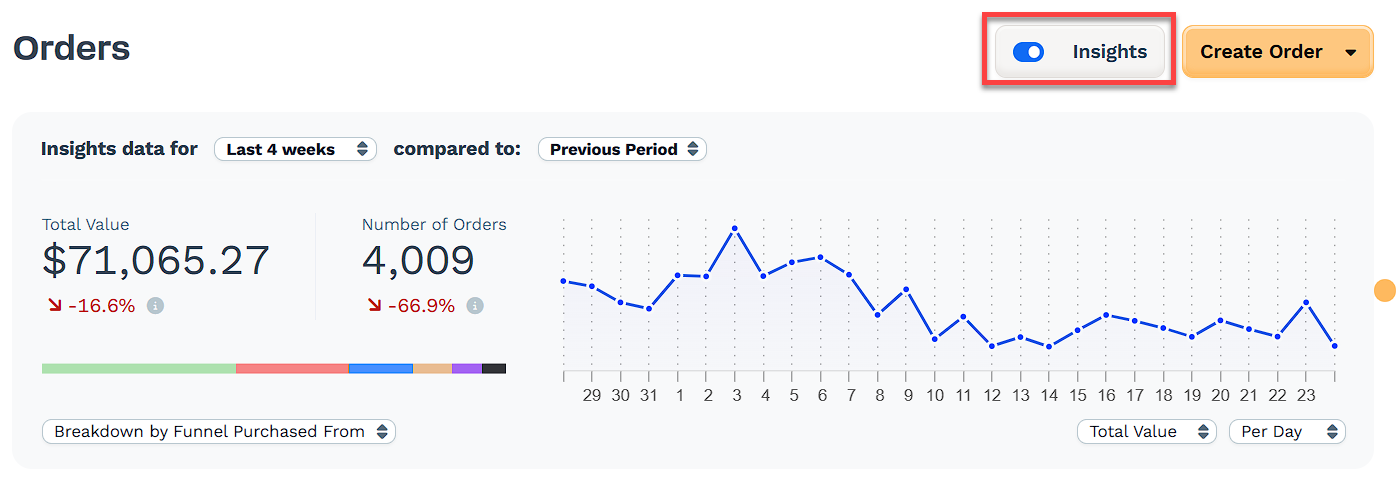
Insight data for: Modify the date range of the insight data.
Compared to: Modify the date range to compare the total value and number of orders.
Total Value: Shows the total order amount within the specified date range.
Number of Orders: Indicates the total count of orders within the designated date range.
Visual Chart: Provides a graphical representation of total order values or numbers across the specified date range.
Breakdown by Funnel Purchased From: The dropdown menu enables viewing Insight results categorized by “Funnel Purchased From” and “Products Ordered”.
Total: Displays a graph depicting either the total order value or the total order numbers within the specified date range.
Per: The graph timeline can be segmented into daily, weekly, and monthly breakdowns.
Order Creation: Click Create Order in the top-right to manually create an order. To learn more about creating orders, refer to the How to Create and Manage Orders article.
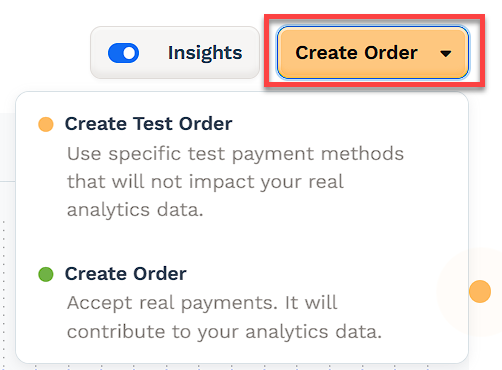
Create Test Order: Use this option to simulate an order using a test payment method. Test orders do not affect your analytics data.
Create Order: Use this option to create a real order that processes an actual payment. It will contribute to your store’s analytics.
Order View Options: The Orders dashboard provides different view tabs:
.png "og0X8oD2ufY8qB10xgok3zjMqgM10EnnhA(1).png")
All: Shows all existing orders.
One Time: Displays only one-time orders.
Recurring: Displays only recurring orders.
Search and Sort Options: Use these tools to quickly locate or organize orders in the dashboard.

Search Invoices: Use the search bar to find orders by customer name, product name, order number, or other keywords.
Sort By: Click Sort By to organize orders based on attributes like billing status, total amount, order date, or date updated.
Filter: Filters allow you to refine the list of orders based on specific criteria, making it easier to locate particular orders.
Click Filter + to open the filter options.
Select an attribute (e.g., Order Status, Order Tag) and set a condition (e.g., is, contains).
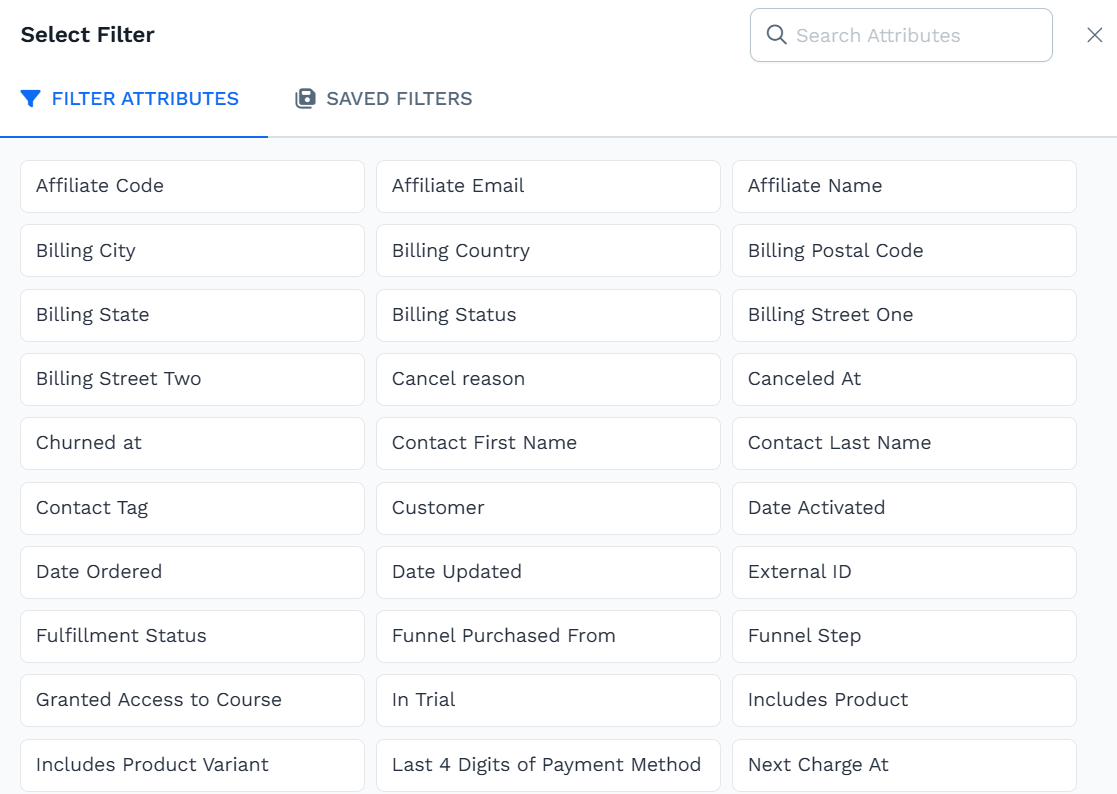
Enter or select the value by which you wish to filter.
Click Apply to see the filtered results.
To save the filter for future use, click Save after applying.
Combine multiple filters using and/or options to narrow down the results further.
Orders Table: The Orders Table provides key details for each order:
.png "HoIaShXOL7sy0xmoU53FlNGVwaCT7iN4Gw(1).png")
Order Number: Unique identifier for each order.
Customer: Name of the buyer. Click the arrow next to the customer’s name to view additional details, such as their email address, number of orders, and a link to view the full customer profile.
Items: Quantity and types of items purchased. Click the arrow next to the item count to see details of each item or subscription purchased.
Order Status: Current status of the order (e.g., Active, Churned).
Fulfillment Status: Indicates if the order has been fulfilled.
Billing Status: Shows if the order is paid or pending.
Total Collected: Total amount collected, including any shipping or discounts.