ClickFunnels webhooks offer a sophisticated method to integrate ClickFunnels with Zapier, surpassing the capabilities of standard Zapier integrations. This method provides a more robust and versatile way to connect ClickFunnels with the extensive range of apps and services available on Zapier. In this article, you will learn how to use the “Webhooks by Zapier” app to achieve advanced integrations with ClickFunnels.
Important:
While webhooks offer a powerful integration method, they require a working knowledge of both webhooks and Zapier. ClickFunnels also offers a direct Zapier integration for common events such as new contacts, purchases, course signups, etc. This built-in integration might be a simpler solution for many users.
💡 Learn more about Zapier app integration: Integrating Zapier with ClickFunnels.
Requirements
An active ClickFunnels account
A premium Zapier account
Add the “Webhooks by Zapier” App in the Zap
Log in to your Zapier account and create a new Zap.
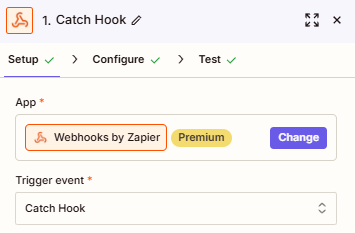
In the Zap editor, click on the Trigger step and search for Webhooks by Zapier.
Select Catch Hook as the event type and then click Continue.
Optionally, you can specify a Child Key if you want to pick off a specific part of the payload.
Click Continue to get your webhook URL.
Copy the provided webhook URL.
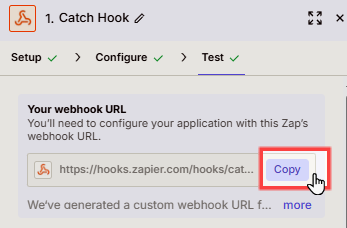
Leave this Zapier tab open in your browser and follow the next step.
For more detailed instructions on using the “Webhooks by Zapier” app, refer to the Zapier Help Center.
Create a Webhook in ClickFunnels
From your ClickFunnels dashboard, click Workspace Settings.
Select Webhooks.
Click on the Add New Endpoint button to create a new webhook or click on an existing webhook to access its settings.
Enter a Name for your webhook (e.g., Subscription Canceled To Zapier).
In the URL field, paste the Zapier webhook URL you copied earlier.
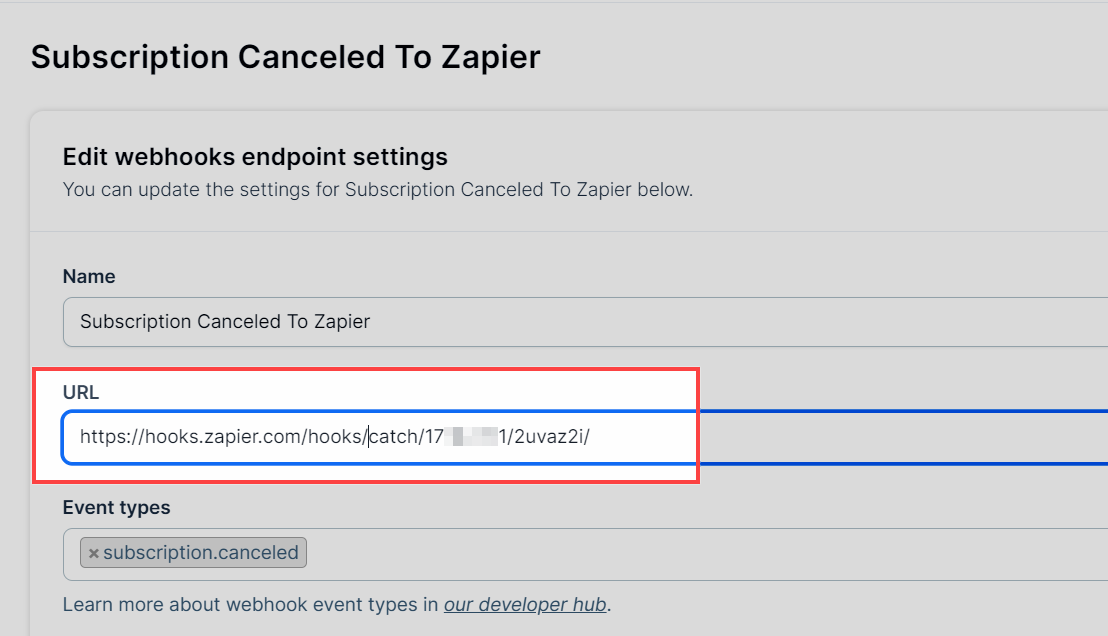
In the Event Types field, select the events you want to trigger the webhook.
In the API Version field, select an API version. New webhooks are typically V2-only, so it is recommended to choose V2 as API version.
Specify the Endpoint Scopes if needed.
Click Create endpoint or Update endpoint to save the settings.
Test the Webhook Integration with Zapier
Perform the corresponding action in ClickFunnels (e.g., create a new contact, complete a purchase). For instance, if your webhook triggers on
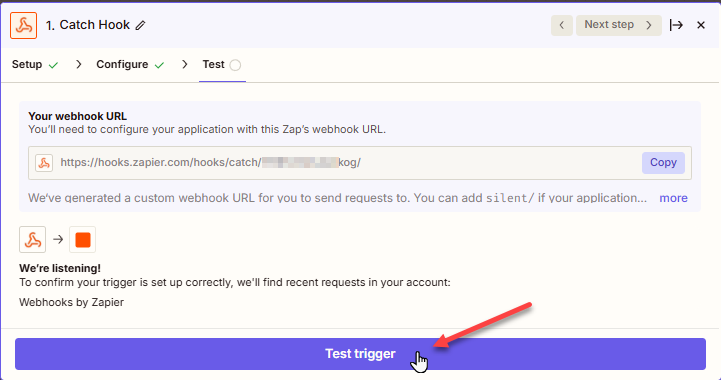
subscription.canceled, submit a test order and cancel the subscription to fire the webhook event.When the event action is completed, return to your Zap editor that was left open.
Click the Test trigger to check if the webhook is working correctly.
Zapier will display the payload it received. Confirm that it matches the expected data.
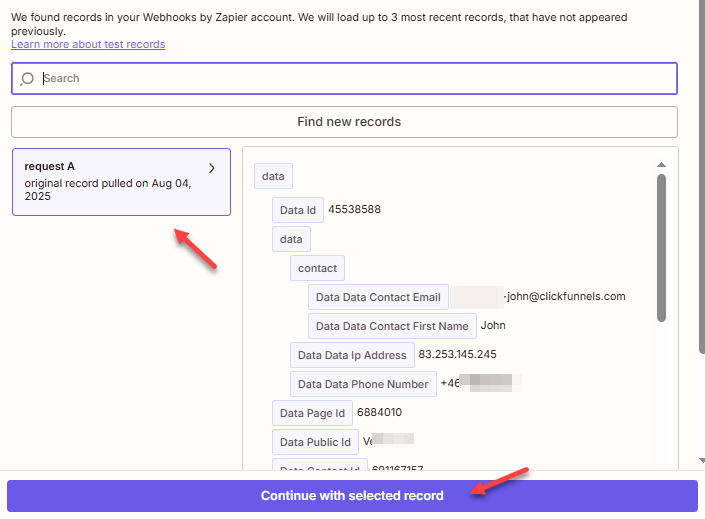
Click Continue with selected record to complete the setup and move to the next step.
For more details, refer to the Webhook Event Types in the API documentation.