Integrating third-party apps with ClickFunnels allows you expand your funnel’s functionality and automate tasks across your marketing ecosystem. You can connect your email marketing service to automate follow-ups, link a tool to handle invoicing, or sync with your CRM to keep your contact list up to date. In this article, you’ll learn how to link your favorite third-party apps to ClickFunnels, ensuring ClickFunnels works seamlessly with the tools you already use.

Requirements
An active ClickFunnels account
Accounts for the third-party applications to be integrated
What Are ClickFunnels Integrations?
ClickFunnels integrations enable data exchange between ClickFunnels and external applications, improving workflow automation and reducing the need for manual data entry.
Common Uses for Integrations:
Email Marketing: Automate follow-up emails and manage subscriber lists using services like MailChimp or ActiveCampaign.
Webinars and Meetings: Register attendees for Zoom or GoToWebinar sessions directly from your funnel.
Data Synchronization: Automatically update CRM platforms like HubSpot or Salesforce with new lead information.
Connecting Third-Party Apps to ClickFunnels
From your ClickFunnels dashboard, click Workspace Settings in the left sidebar.
In the Workspace Settings menu, select Integrations.
Choose the app you want to connect from the list of supported third-party applications.
Log in to the selected third-party service and follow the prompts to authorize ClickFunnels access.
After authorizing, confirm that the integration appears as Active in your Connected Integrations list.
Using Third-Party Integrations in Workflows
Open the Automations app from the left menu and select Workflows.
Click Add Workflow to create a new workflow or select an existing one to edit.
Add a trigger to initiate the workflow, such as a form submission or a survey completion.
Click the + icon below the trigger to add a new step to the workflow.
In the sidebar, scroll down to Other and select 3rd Party Integration.

Use the search bar to find the app you want to integrate and select it.
Click Next to save the integration and run a test to ensure it works as expected.
To learn more about 3rd party Workflow integrations, check our Workflows “3rd Party Integration” Step - Sync Data with External Apps article.
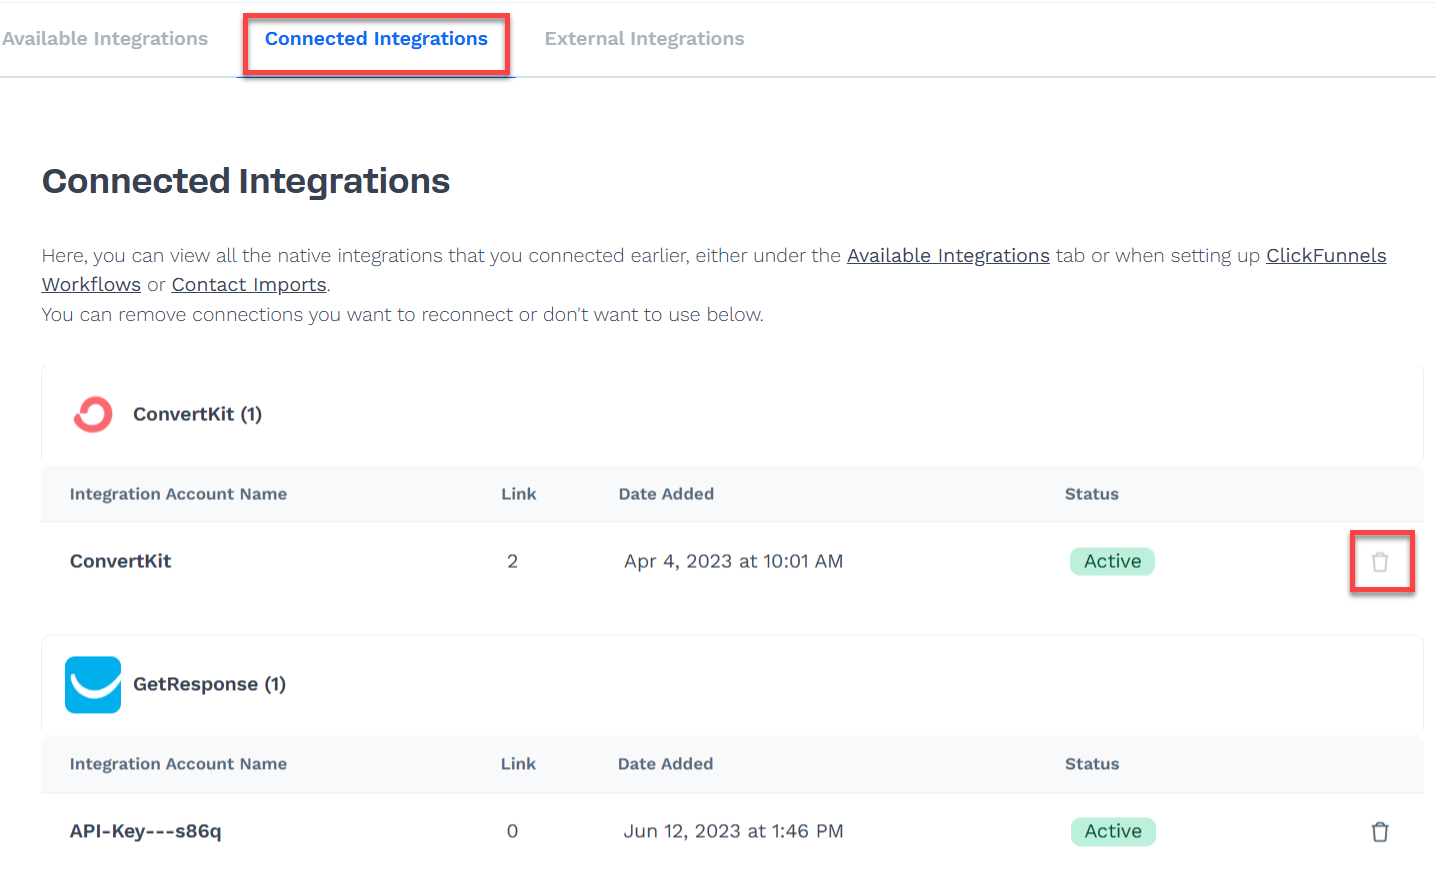
Removing an Integration
Navigate to Workspace Settings and select Integrations.
Click on the Connected Integrations tab.
Locate the app you want to disconnect.
Click the Delete icon next to the integration and confirm the removal.
Troubleshooting and FAQs
Why doesn’t my app showing in the integrations menu?
Ensure the app is supported and that you’ve logged in and authorized access.How do I test if my integration is working?
Set up a test workflow, trigger it, and confirm that data flows correctly to the third-party app.Can I use the same integration in multiple workflows?
Yes, you can use an integration across different workflows as needed.Do I need a paid plan for third-party apps?
Some services may require a paid plan for full functionality, like advanced email marketing or webinar features.What should I do if my integration stops working?
Check if the app is still connected under Workspace Settings > Integrations. Reauthorize if needed and ensure field mapping is correct.
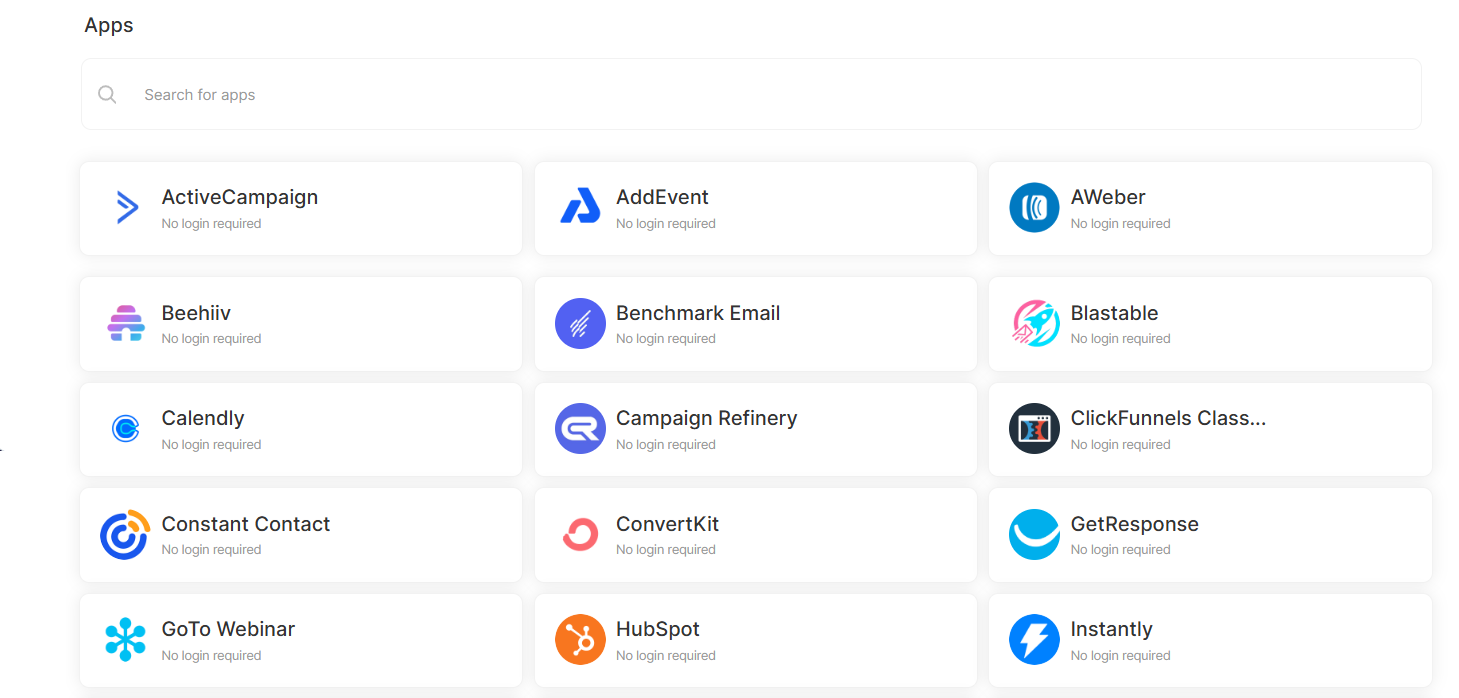
List of Current Integrations
Here is a list of all the third-party apps you can connect with ClickFunnels:
Email Marketing Services:
ActiveCampaign
AWeber
Beehiv
Benchmark Email
Blastable
Brevo
Campaign Refinery
Constant Contact
ConvertKit
E-goi
Elastic Email
GetResponse
Klaviyo
Mailjet
Moosend
CRMs and Sales Tools:
Agile CRM
Close.io
Freshworks CRM
HubSpot
JobNimbus
Keap
Teamgate
FreshSales
Less Annoying CRM
Nimble
Event and Scheduling Platforms:
AddEvent
GoTo Webinar
E-commerce and Invoicing:
Invoice Ninja
Automation and Communication:
JustCall
Instantly
Re:amaze
Help Scout
Respond.io
Other Integrations:
Airtable
Avalara
ClickFunnels Classic
Freedcamp
GetProspect
Zendesk Support
Knack