The Page Editor is essential for creating an effective online course. By learning to use it, you can structure your content logically, add engaging elements, and ensure your course is easy to navigate. This helps students find and absorb information more easily, leading to better learning outcomes. This article explores the key steps of using the Page Editor to design a well-organized course that enhances the learning experience for your members.
Requirements
An active ClickFunnels account
Enabling Advanced Customization for Course Pages
To customize your course home and module pages, you need to turn on the Advanced Customization feature.
Navigate to the Courses app from the left-side menu.
Select the course from which you want to customize.
Click on the Customize tab on the course overview page.
Locate the Advanced Customization toggle switch.
Click the toggle to turn it on. The switch will turn blue when active.
You can now select a custom theme using the Change theme option.
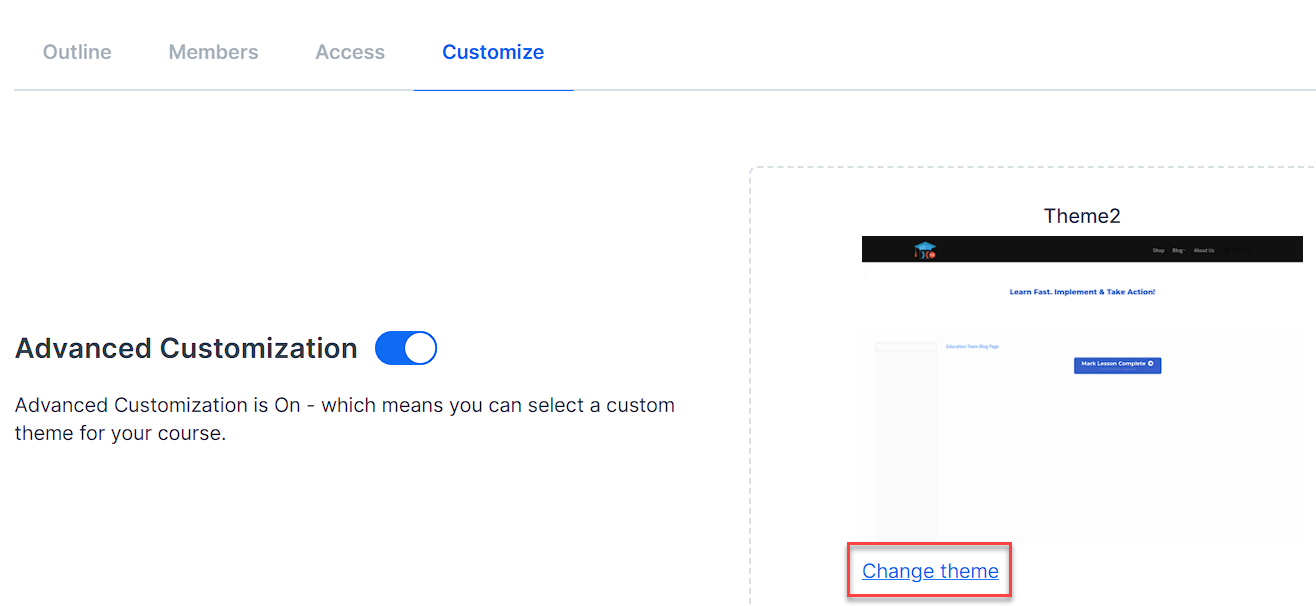
Click Customize to open the page editor.
IMPORTANT
The theme you select for your course may already include some essential elements. These pre-configured elements provide a starting point for your course design. You can:
Reposition existing elements to suit your preferred layout.
Edit the settings of these elements to match your course style.
Add new elements to further customize your course pages.
As you follow the customization steps in this article, keep in mind that you may not need to add every element from scratch. Instead, you might be adapting or enhancing the existing theme structure.
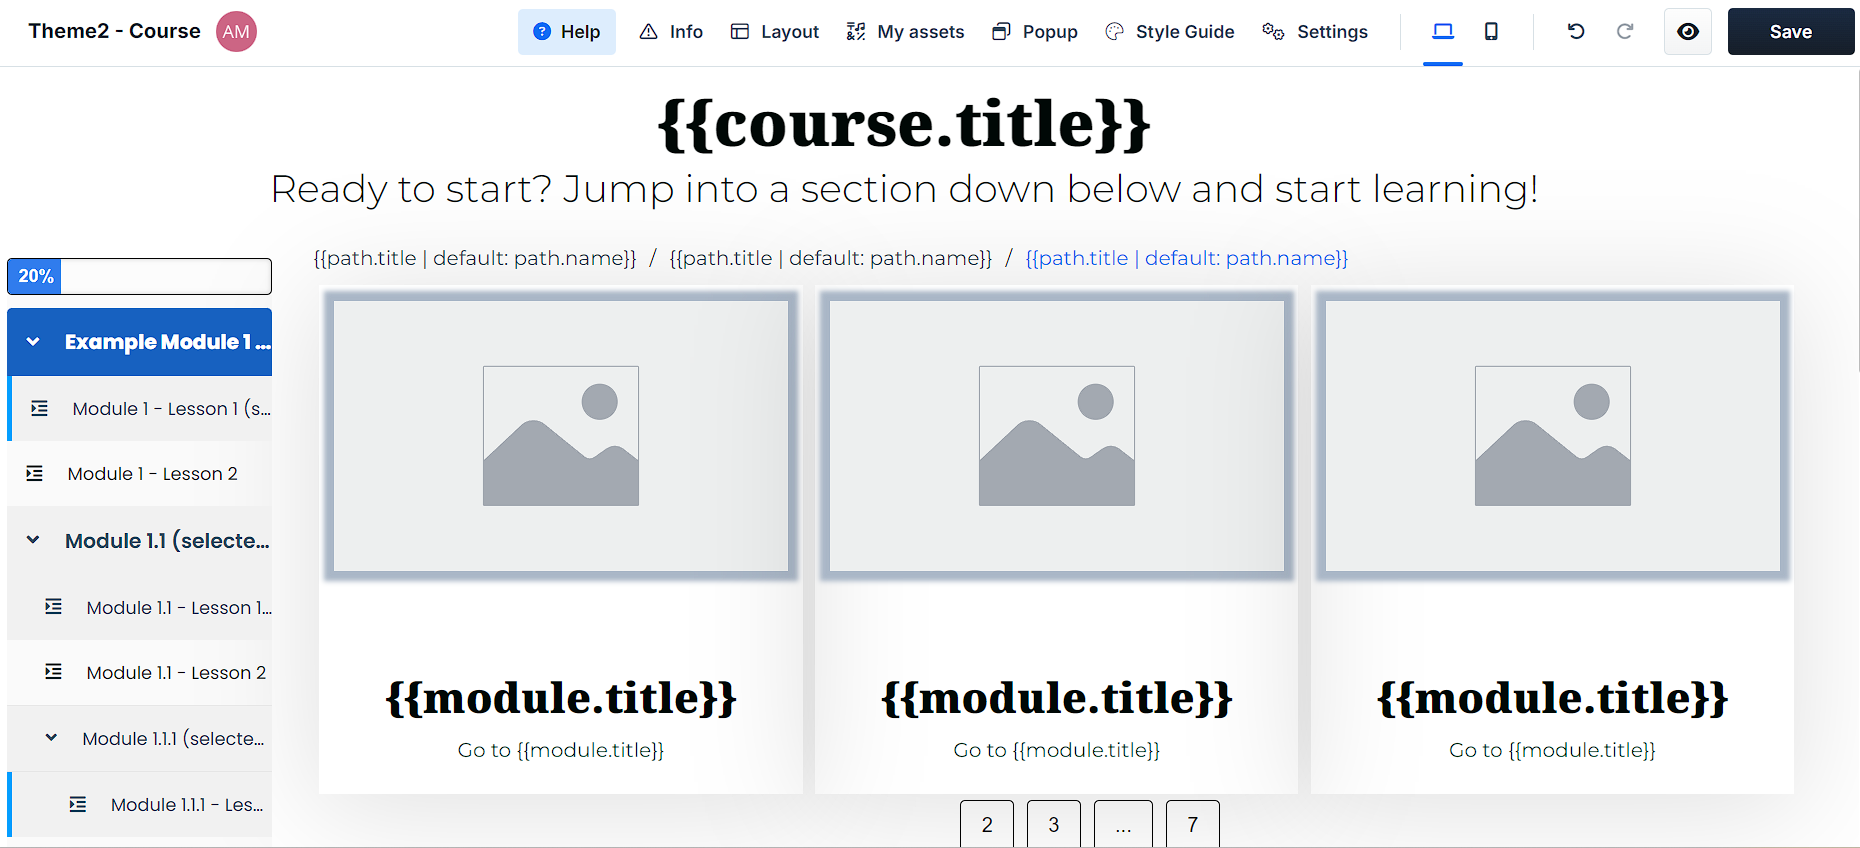
Customizing the Course Home Page
The course home page is the starting point for your students. The Course Home page displays your course structure. The elements you add here will automatically populate with the course details you’ve already set up. For information on creating courses and their content, see the article Getting Started with Courses. Here’s how to customize it:
In the editor, locate Course Home.
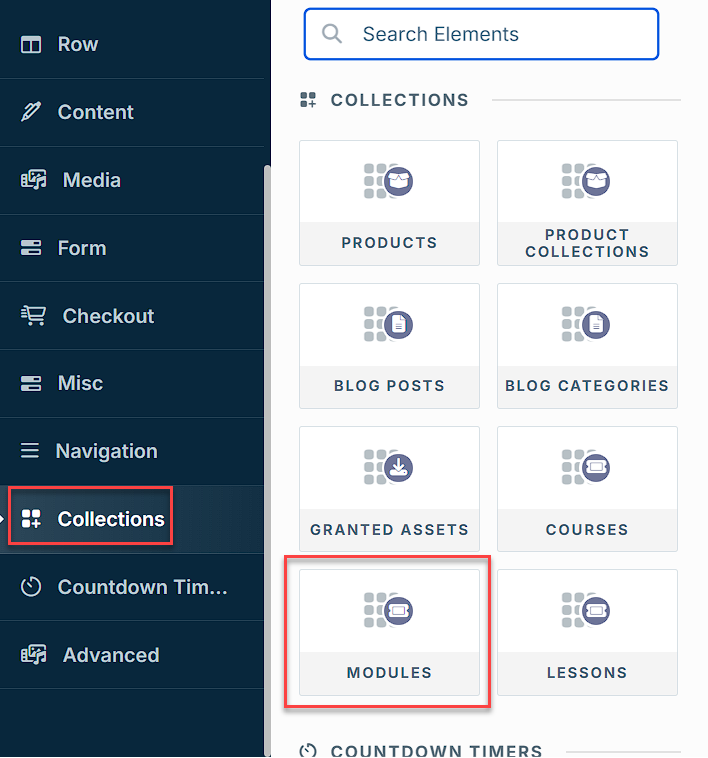
Add a Module Collection element to display your primary modules:
Click Add New Element.
Select Collection from the right-hand menu.
Choose Modules.
Configure the Module Collection:
Add columns as needed
Include essential module elements:
Module Name
Module Image
Module Link
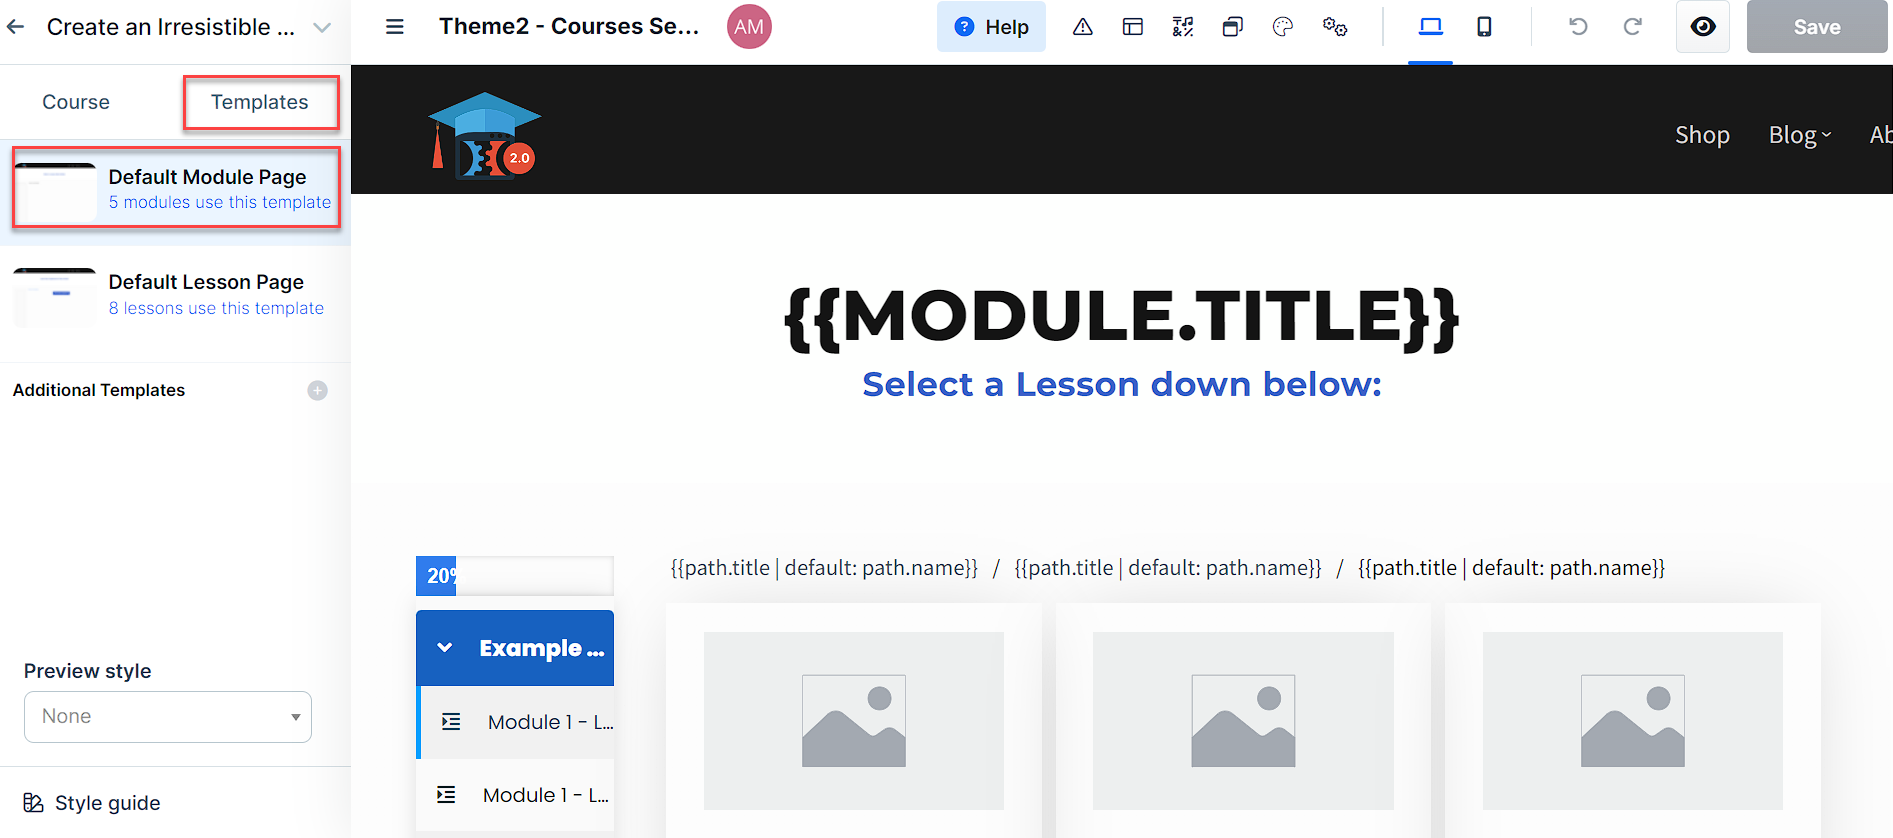
Customizing Module Pages
Module pages show your lessons and submodules. The content here updates automatically based on the module structure you’ve created. For details on setting up modules and submodules, refer to the article How to Manage Course Modules. Here’s how to set them up:
Adding Lessons to Module Pages
In the page editor, find Default Module Page under Templates.
Add a Lesson Collection element:
Click Add New Element
Select Collection > Lesson
Configure the Lesson Collection:
Add columns as needed
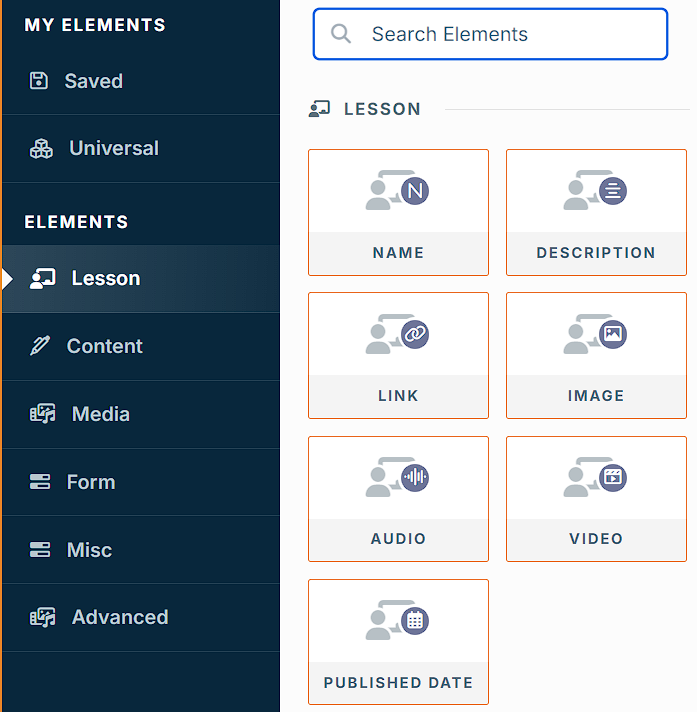
Include essential lesson elements:
Lesson Name
Lesson Image
Lesson Link
Click Save to apply your changes.
Adding Submodules to Module Pages
On the same Default Module Page area, add a Module Collection element to display your submodules:
Click Add New Element.
Select Collection from the right-hand menu.
Choose Modules.
Configure the Module Collection:
Add columns as needed
Include essential module elements:
Module Name
Module Image
Module Link
Customizing Lesson Pages
Lesson pages display individual lesson content. The elements here will populate with the individual lesson information you’ve created. For guidance on creating and managing lessons, see the article How to Manage Course Lessons. You have two options for customizing lesson pages:
Edit the Default Lesson Template:
In the page editor, click on the Templates tab.
Select Default Lesson Page.
Changes made here will apply to all lessons using this template
Customize Individual Lesson Pages:
In the Course tab in the page editor, Navigate to the specific lesson you want to customize.
Click the lesson name to edit its individual page.
For either option, follow these steps to customize the page:
Add essential lesson elements:
Lesson Title
Image
Include media elements if applicable:
For video lessons: Add Lesson Video element
For audio lessons: Add Lesson Audio element
Add the Content Body:
Click Add New Element
Select Advanced > Content Body
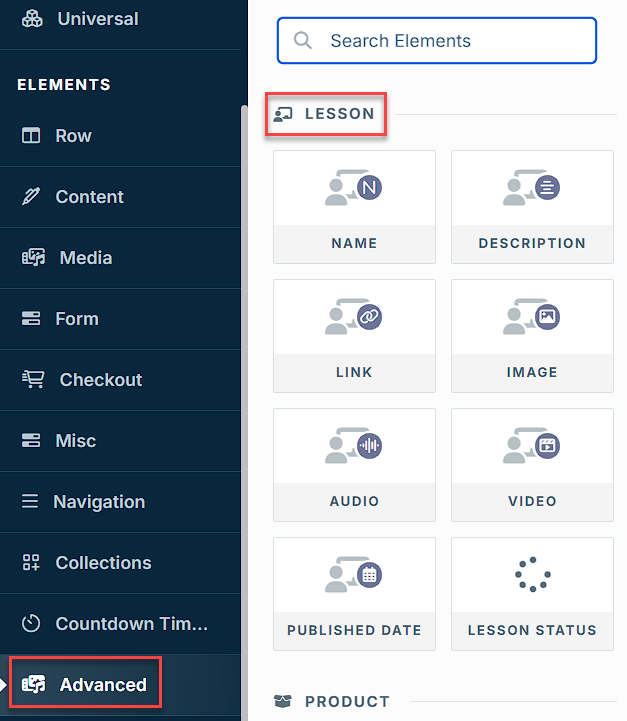
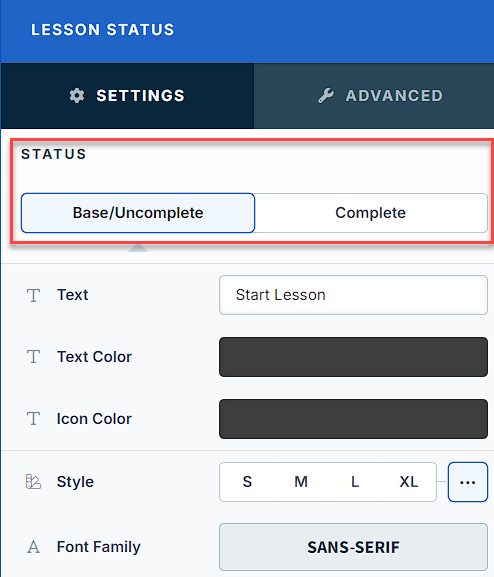
Set up the Lesson Status element: The Lesson Status element shows students their progress within each lesson. To add it:
click Add New Element and select Lesson Status.
Customize its appearance for both Base/Uncomplete and Completed states:
Edit the text (e.g., “Start Lesson” or “Completed”)
Adjust text and icon colors
Modify styles to match your course design
(Optional) Add a Mark as Complete button:
Add a Button element
Set the button action to Mark Complete
NOTE
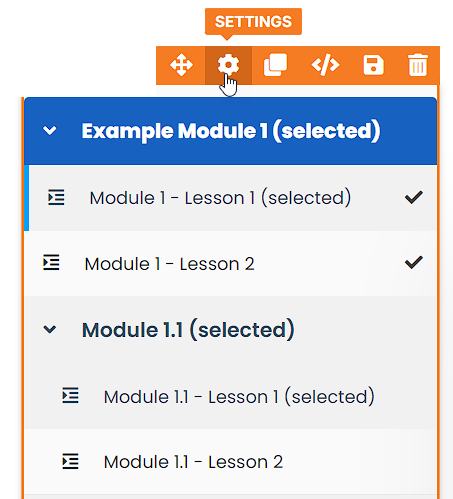
Note: When a student marks a lesson as complete, the Lesson Status element automatically updates. For example, it might change from “Start Lesson” to “Completed”. The system then automatically advances to the next lesson. If you return to a completed lesson, you’ll see the updated status, and a checkmark will appear next to the lesson in the course sidebar.
Click Save to apply your changes.
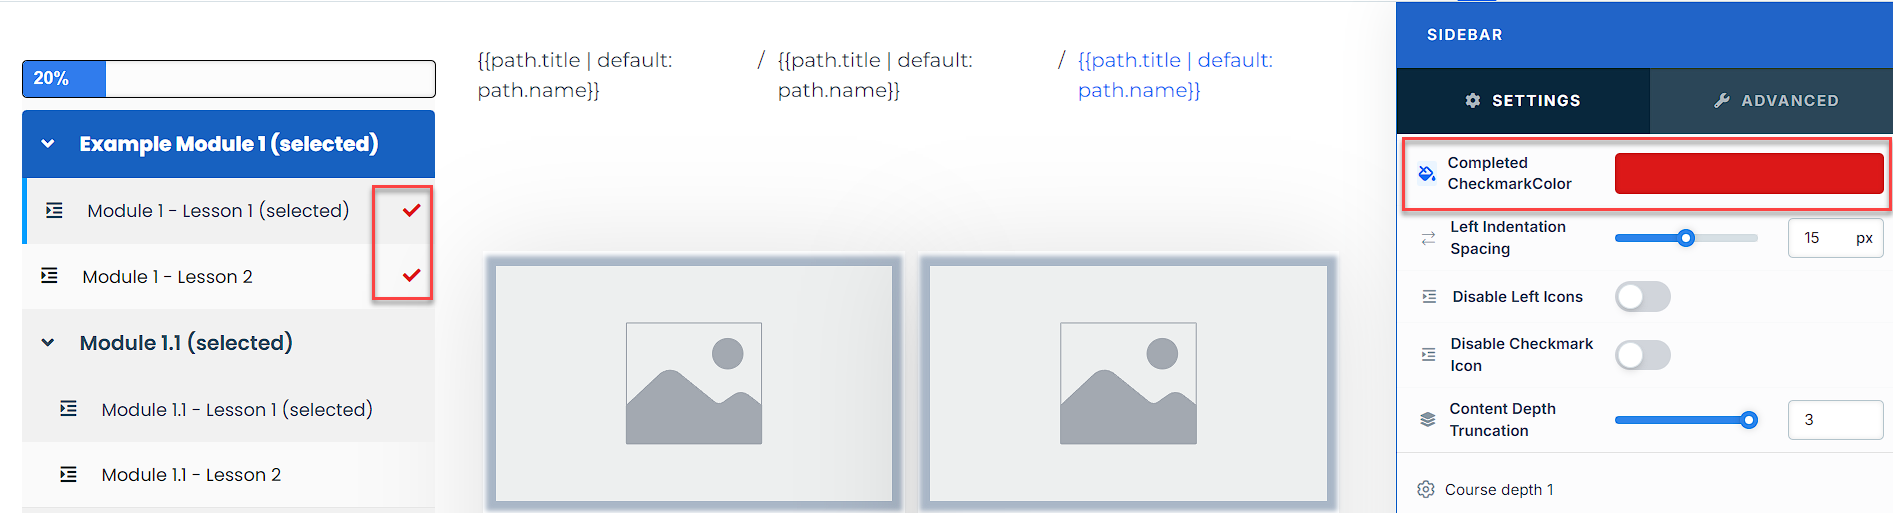
Customizing the Course Sidebar
The course sidebar helps students navigate through your course content. It displays the course structure, including modules and lessons, allowing for easy movement between different sections. You can customize various aspects of the sidebar to match your course design and improve the learning experience for your students.
In the page editor, locate or add the Sidebar element.
Click on the Settings ⚙ icon to display its settings.
Adjust the following settings as needed:
Top Margin: Use the slider to set the space above the sidebar.
Render Mode: Choose between “classic” or “ascension” styles in the dropdown menu.
Show drip modules: Toggle between “Yes” to display all modules or “No” to hide inaccessible dripped modules in the course sidebar.
Width: Adjust the sidebar width using the slider.
Padding Top and Padding Bottom: Fine-tune the internal spacing.
Vertical Spacing: Control the gap between sidebar items.
Background Color: Select a color that complements your course design.
Mobile Hamburger Color: Choose a color for the mobile menu icon.
Gap Between Modules: (Only available in classic render mode) Adjust the spacing between module sections in the sidebar.
Completed Checkmark Color: Select a color for the progress tracking checkmarks. This feature displays small checkmark icons next to completed lessons in the sidebar, helping students visualize their course progress at a glance.
Left Indentation Spacing: Set the indent level for sub-items.
Disable Left Icons: Toggle to show or hide icons next to items.
Disable Checkmark Icon: Toggle to turn off the completion checkmark icons if desired.
Content Depth Truncation: Control how many levels of content are visible.
Customize Sidebar Modules settings to adjust the appearance of module sections within the sidebar.
Configure Course Depth settings: Course Depth refers to the different levels of content hierarchy in your sidebar. For example:
Depth 1 might be main modules
Depth 2 could be sections within modules
Depth 3 might represent individual lessons
Each depth level can have its own styling, allowing you to visually distinguish between different levels of your course structure. To customize:
Scroll down to “Course Depth 1”, “Course Depth 2”, etc., in the settings menu.
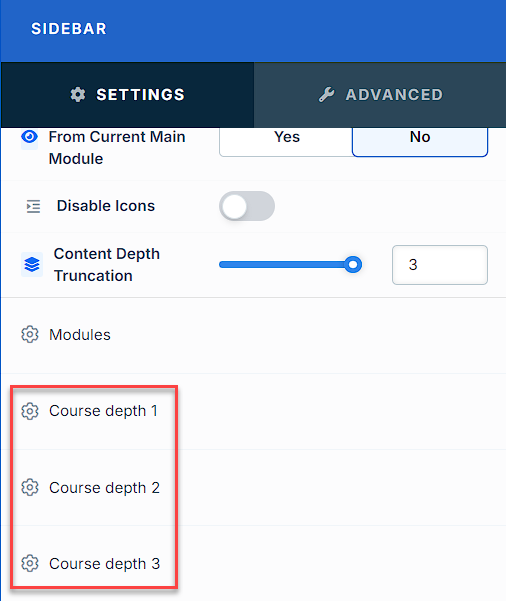
For each course depth, you can adjust typography, colors, and other visual elements to create a clear hierarchy in your sidebar navigation.
Enable Border to add an outline to the sidebar.
Toggle the Shadow setting to add a shadow effect for visual depth.
After adjusting the settings, click Save on the top right to apply your changes.
Saving and Previewing Your Course Pages
Saving Your Work
In the Page Editor, locate the Save button in the top-right corner.
Click Save after making changes to your course page.

Wait for the save confirmation to ensure your updates are stored.
Previewing Your Course Page
In the Page Editor, click the Preview icon next to the Save button.

A new tab will open, displaying a live preview of your course page.
Check for any formatting issues, broken links, or design inconsistencies.
Close the preview tab when you're ready to continue editing.
Important
To see dynamic content like modules and lessons in the preview, you must first publish the course. If the course is still in draft mode, these elements will not appear. Additionally, if a dynamic section has no content attached, it will remain hidden even after publishing. For detailed instructions, refer to the Getting Started with Courses article.
Important
Some course pages use dynamic content such as modules, lessons, or elements that are automatically pulled into the page:
If your course page includes dynamic content but nothing has been added yet (such as a module without any lessons), the section will not appear in the preview.
This is expected behavior since dynamic elements only display when content is attached.
To see how dynamic content looks, ensure you’ve added at least one module, lesson, or item before previewing.
For more details, see Page Editor: Saving and Previewing Your Work.