A forwarding rule is a redirect from one page to another. One of the most common uses of the forwarding rule is to make your domain work with and without “www”. This Article will show the needed setup to add a Forwarding rule inside your Domain’s registrar. The required setup to add a Forwarding Rule into any domain’s registrar is using a Permanent 301 redirect.
Important:
DNS servers can take up to 48 hours to update the information.
If your Domain registrar is not listed here, you can use these examples as a reference.
If you are having further issues with adding your forwarding rule, please get in touch with your domain registrar’s support.
Requirements
An external domain and access to the DNS settings
GoDaddy
From the Go Daddy DNS records area, scroll down to the Forwarding settings
Click the paper and pencil icon**.
Under Forwarding, select https://.

Enter in the field to the right (**replacing the yourdomain.com part with your actual domain**).
Under Forward Type, select Permanent (301).
Click Save.
Note:
For more details, see GoDaddy’s official documentation.
Namecheap
From Namecheap DNS records, click + Add New Record.
From the dropdown, select URL Redirect Record.

In Host Input, type the @ symbol.
Enter https://www.yourdomain.com in the target value input. (In place of ‘yourdomain’, using https:// and www before it)
Select Permanent (301).
Click Save all Changes.
Note:
For more details, see Namecheap’s official documentation
Google Domains
Click Website from the left-hand menu from your Google Domains account.
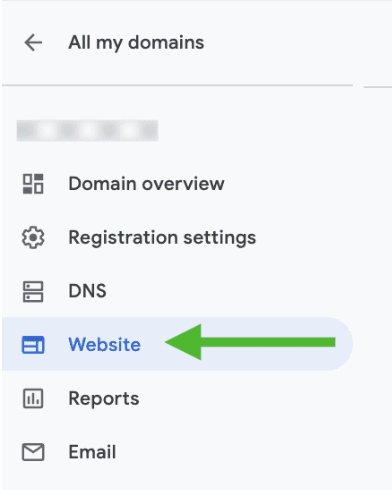
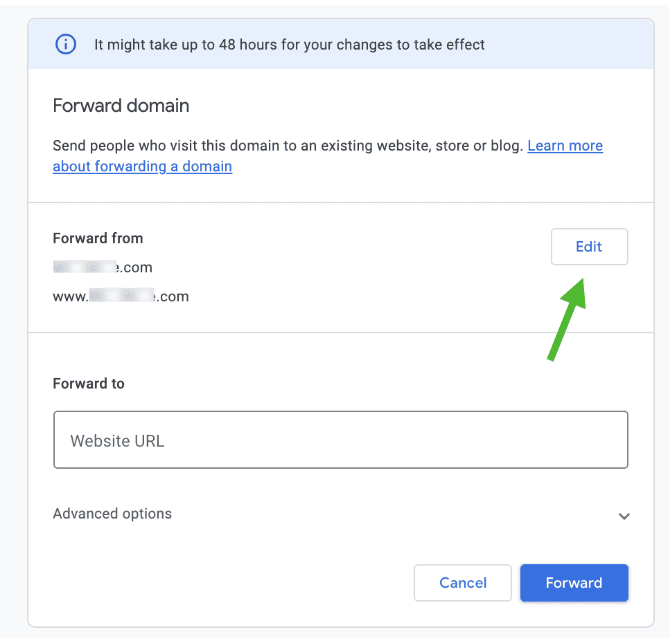
Click Set up Forwarding.
Click on Edit.
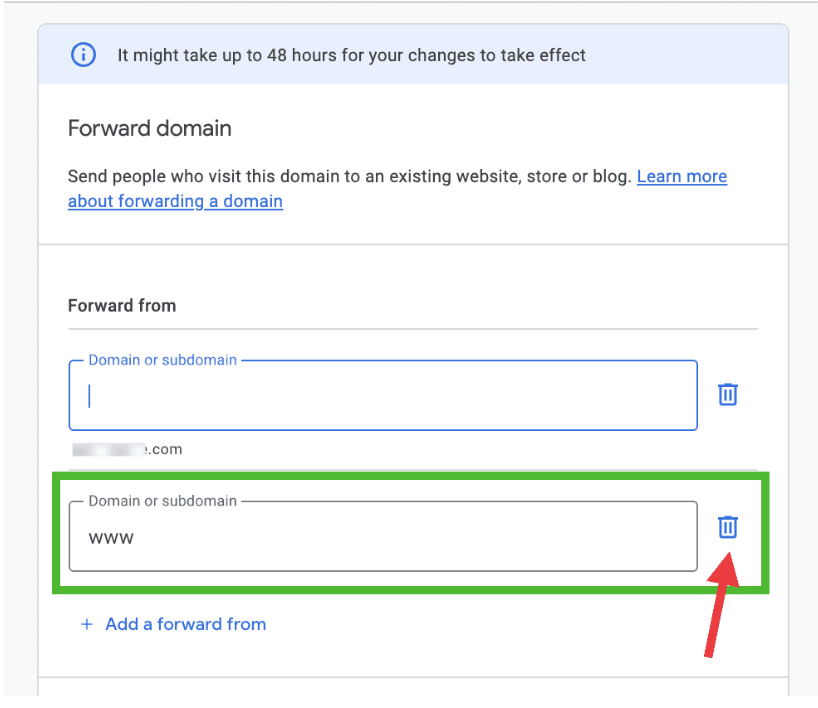
Click the trashcan icon next to the field that contains “www”.
In the Forward To area, enter https://www.yourdomain.com (replace “yourdomain.com” with your domain name, no quotations). Do Not Select the blue Forward Button yet.
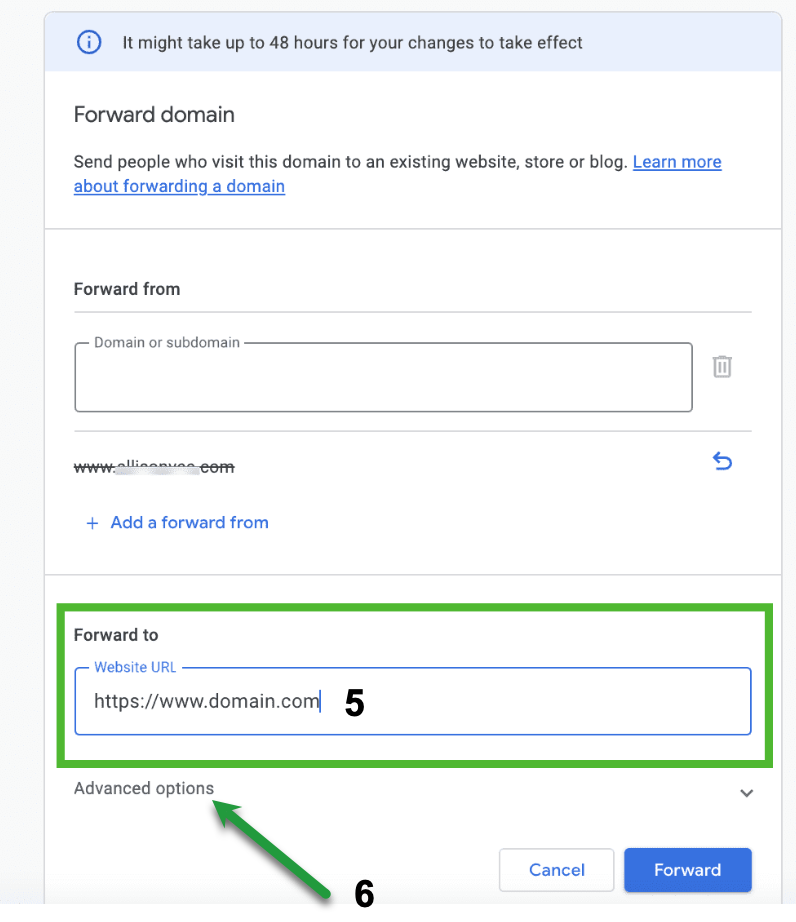
Click on Advanced Options
Select the following options:
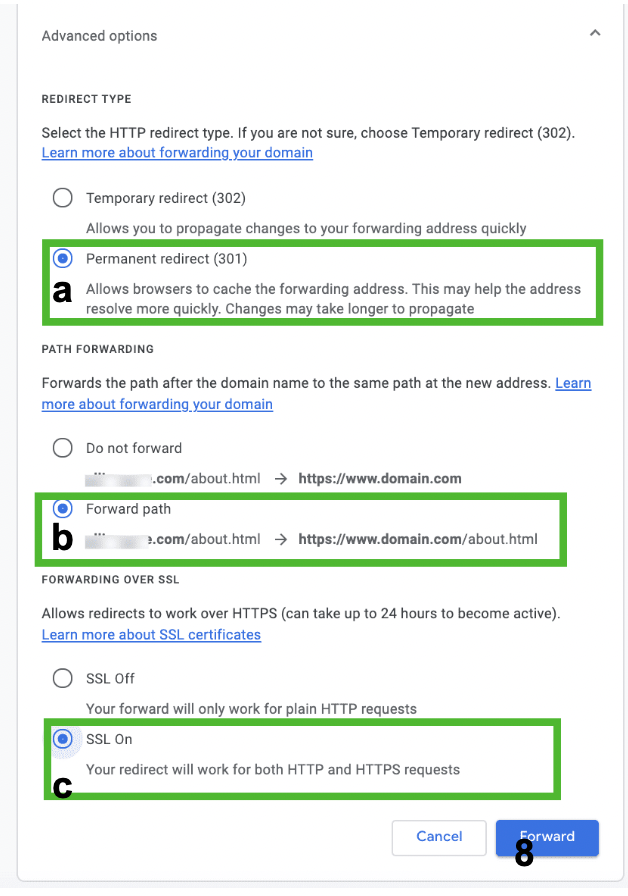
Redirect Type: Permanent Redirect (301)
Path Forwarding: Forward Path
Forwarding Over SSL: SSL On
Click on Forward.
Note:
For more details, see Google’s official documentation
Bluehost
From your Bluehost account, click on Domains, then Redirect.
Select Permanent 301.
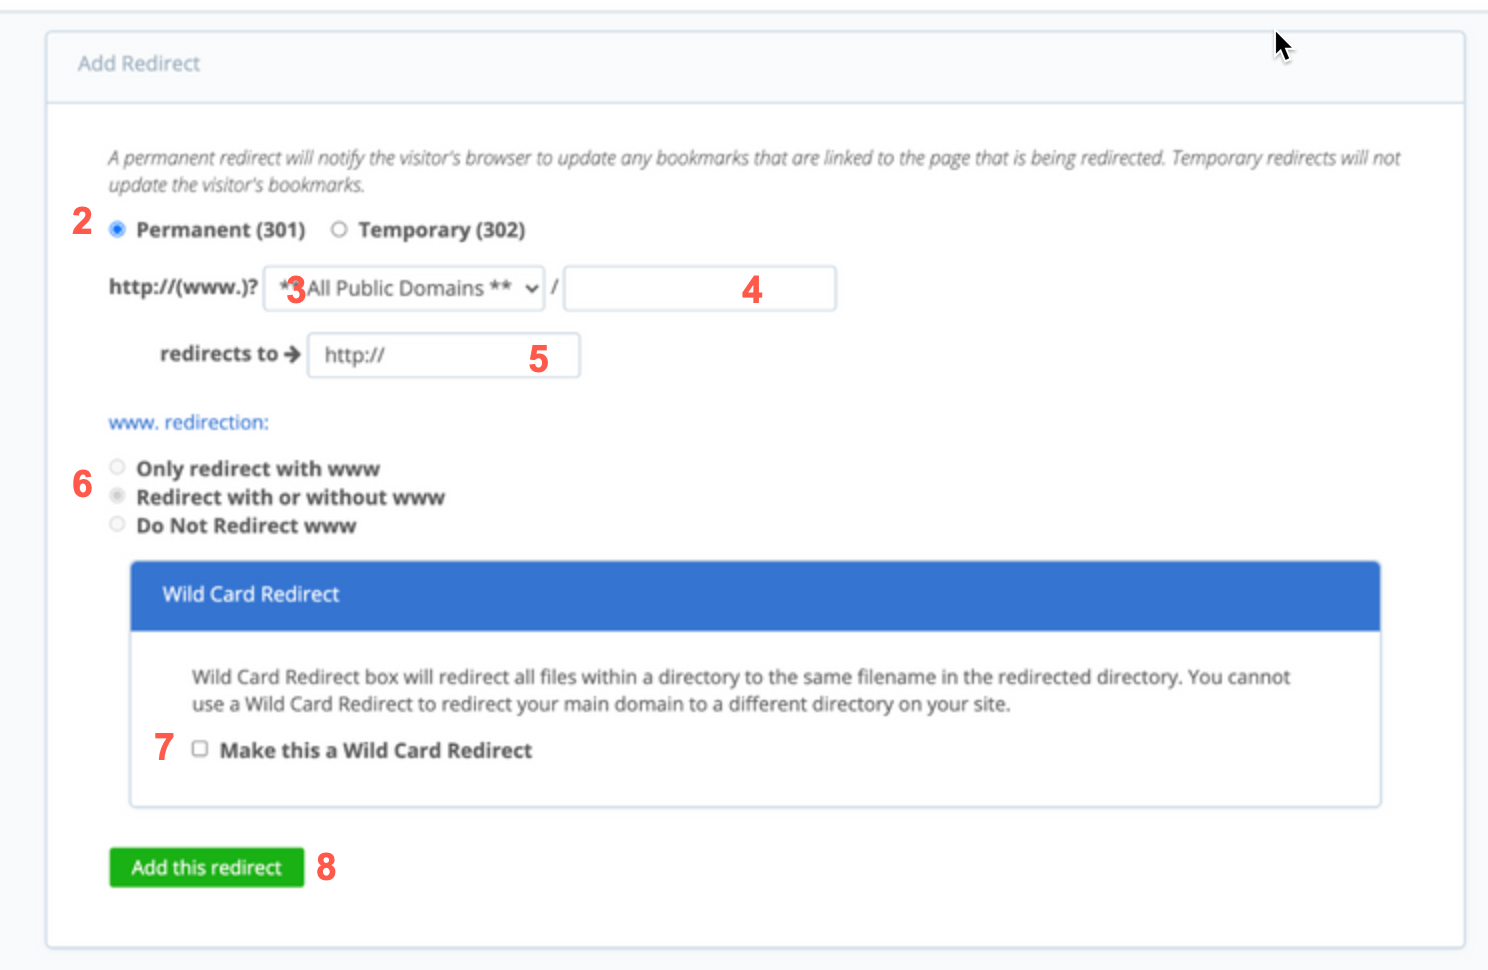
Select your domain from the drop-down menu.
If you want to redirect a single page or directory, you can use this text field.
Enter the address that you are redirecting to. Example: yourdomain.com
Select Redirect with or without www.
Click the “Wild Card Redirect” if you want to redirect to the same file on the new destination.
Click on Add this Redirect.
Note:
For more details, see Bluehost’s official documentation
Cloudflare
To set up a manual redirect for your root domain in Cloudflare, follow these two steps:
Step 1 - Add a CNAME Record in the DNS:
In your ClickFunnels account, navigate to Workspace Settings > Domains, and access the domain’s DNS table.
Copy the value of the DNS record associate with the host name
www. You will use this data to add a new CNAME record in Cloudflare. You will only need the data from this record.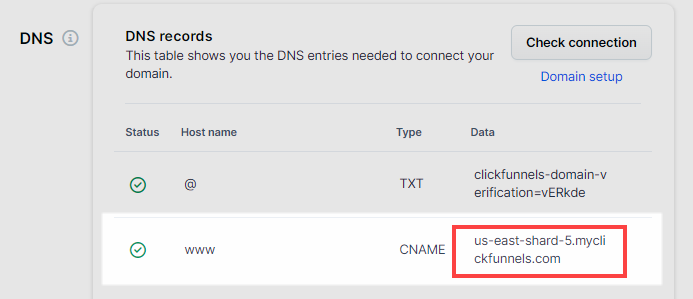
Log in to your Cloudflare account and navigate to the DNS settings for your domain.
Add a new DNS record with the following settings:
Type:
CNAMEName:
@Target: Paste the data you copied from the ClickFunnels DNS zone table.
Ensure that Proxy status is enabled.

Click Save to add this CNAME record to the DNS table in Cloudflare.
Step 2 - Create a Redirect Rule in Cloudflare:
To ensure your root domain properly redirects to the HTTPS version, create a redirect rule:
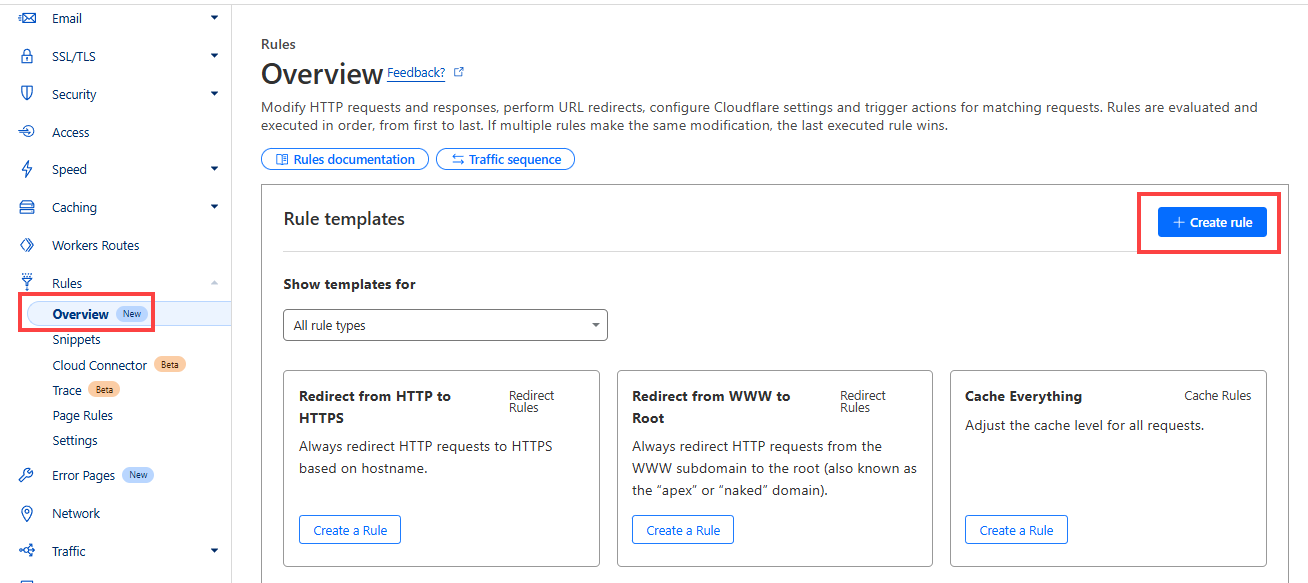
In your Cloudflare account, navigate to your domain, then click Rules > Overview.
Click + Create rule and select Redirect Rule to add a new rule.
Provide a name for the rule, such as
“Root Domain Redirect”.In the If incoming requests match… section, select All incoming requests.
In the Then… section:
Set the action type to Dynamic.
In the Expression field, enter the following:
concat("https://www.yourdomainname.com", http.request.uri.path). Replace yourdomainname.com with your actual domain name.Set the status code to 301 (Permanent Redirect).
Enable the option Preserve query string.
If multiple rules are present, in the Place at section, select the order as First.
Click Deploy to save and apply the redirect rule.
Note:
Cloudflare may take some time to propagate the redirect rule globally. Allow a few moments for changes to take effect before testing.
The network (Wifi) you are using may still have cached data. If, after waiting, the redirect is still behaving unexpectedly, try using a different network, such as testing the domain on your phone using mobile data.
For more information, refer to Cloudflare’s official documentation.