A domain is a unique web address like www.example.com, which helps people find your website or funnel online. It is essential for a professional online presence, making it easy for customers to find, remember, and trust your site. ClickFunnels lets you connect custom domains to personalize your website and funnels, ensuring they reflect your brand and build customer trust. In this article, you will learn how to connect an existing domain to your ClickFunnels account using the automated setup process.
Also read: Connecting a Domain (Manual Setup).
Requirements
An active ClickFunnels account
An existing domain using a supported DNS host for automated setup
Warning:
If you already have a website with your domain, connecting the root domain in ClickFunnels may cause it to stop working. Instead, try using a subdomain (such as,
funnels.example.com) or connect another domain in ClickFunnels.We currently do not support Internationalized Domain Names (IDNs). Special characters are letters that are not in the English alphabet. Some examples of special characters are æ, ø, å, ö, ä, ü and é.
Domain names with trademarked phrases cannot be added or used in ClickFunnels. Click here to view restricted phrase list.
Step 1: Adding a Domain
Note: Claiming a Free Domain
ClickFunnels offers one free domain for each account/team. You can claim a free domain for one of your ClickFunnels workspace in the Domains menu. For more information on claiming a free domain, refer to the article How to Get a Free Domain in ClickFunnels.
Follow the steps below to add an external domain to your ClickFunnels workspace:
Log in to your ClickFunnels workspace.
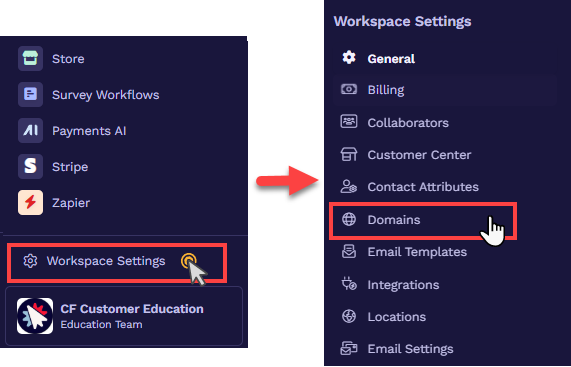
From the left sidebar menu, click Workspace Settings and then select Domains.
Click Add Domain.
In the open prompt, click + Add an Existing Domain.
Enter your domain name (e.g., example.com) and click Continue.
Select Primary Domain.
Important:
ClickFunnels requires using ‘WWW’ in your domain, such as ‘
www.example.com’. The automated setup process will configure your domain DNS to redirect ‘example.com’ to ‘www.example.com’. Learn more: Domains - How to Add Forwarding Rules.ClickFunnels does not provide an
Arecord for root domain integration.To connect a subdomain, you don’t need ‘WWW’ — for example, ‘blog.example.com’. Learn more: How to Connect a Subdomain in ClickFunnels.
Click “Continue with …” to proceed to the DNS setup.
Step 2: DNS Setup
After adding a domain, you need to pick a DNS setup method. Now, you must link your domain registrar or DNS provider account (e.g., GoDaddy, Cloudflare, NameCheap, Bluehost, etc.) with ClickFunnels to complete the integration. Follow the steps below:
Select Automatic Setup as the DNS setup method.
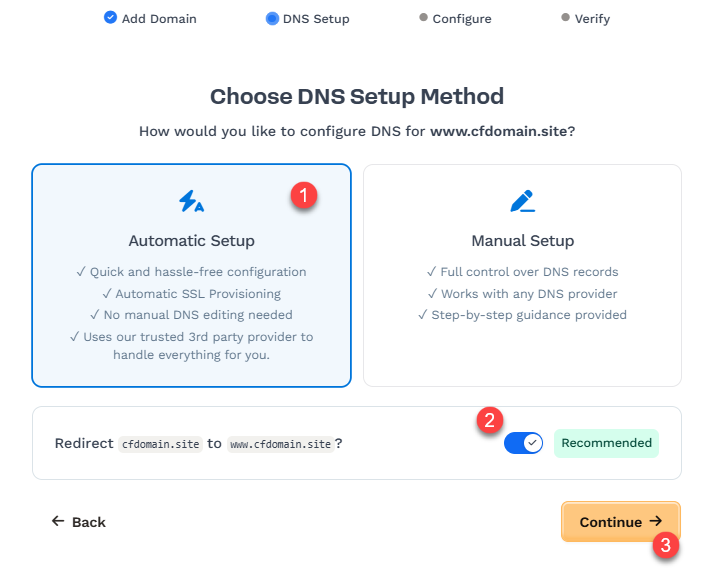
Decide if you want to redirect your root domain
example.comtowww.example.com. Doing so means visitors can also type in your root domain (e.g.,example.com) to access your ClickFunnels site, Funnels, Courses, etc., without typing in theWWW.Redirect ON (default): Leave the toggle “ON” to redirect the root domain (e.g.,
example.com) to the chosen subdomain (e.g.,www.example.com).Redirect OFF: Turn the toggle “OFF” to leave the root domain (e.g.,
example.com) alone and not redirect it to the chosen subdomain (e.g.,www.example.com).
Click Continue.
A window will open, confirming that ClickFunnels will configure the domain. Click the “Continue” button to agree.

The system needs a moment to analyze the domain and determine the DNS location. Depending on your domain's DNS provider, you might be required to authorize access to your DNS provider account or sign in to that account.
At this stage, the system will add the necessary records to your domain DNS. If your domain DNS has any conflicting records, it will display existing records in the prompt and ask for your permission to update them.
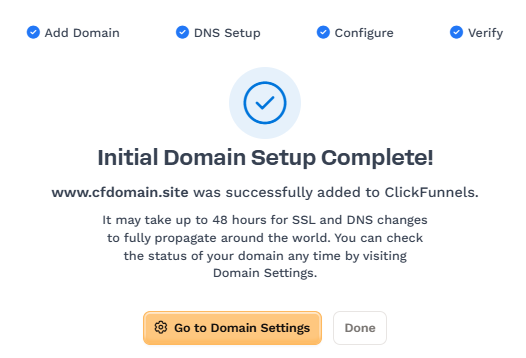
Click the Done button once the domain configuration has been confirmed.

ClickFunnels now checks your domain's DNS configuration to ensure the DNS settings are set up correctly. At this point, the initial setup is finished; however, ClickFunnels will verify that the records are live in the DNS and begin the SSL deployment for the domain. In most cases, the records are validated quickly. However, depending on the DNS provider, it might take 24 to 48 hours for DNS changes to propagate completely worldwide.
Step 3: SSL and Domain Verification
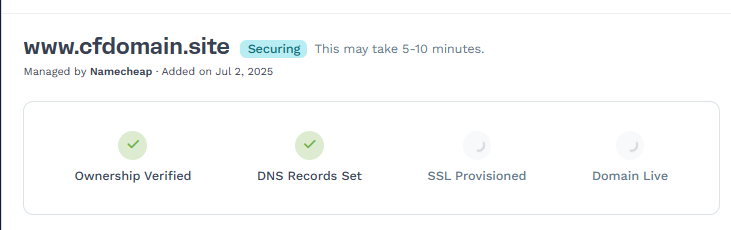
During this stage, the domain status will display as Securing. At this stage, no further action is required on your part; please allow a few moments for the SSL propagation to complete.
Note:
Allow 5-10 mins for SSL propagation. Occasionally, the securing process may take up to 48 hours to finish.
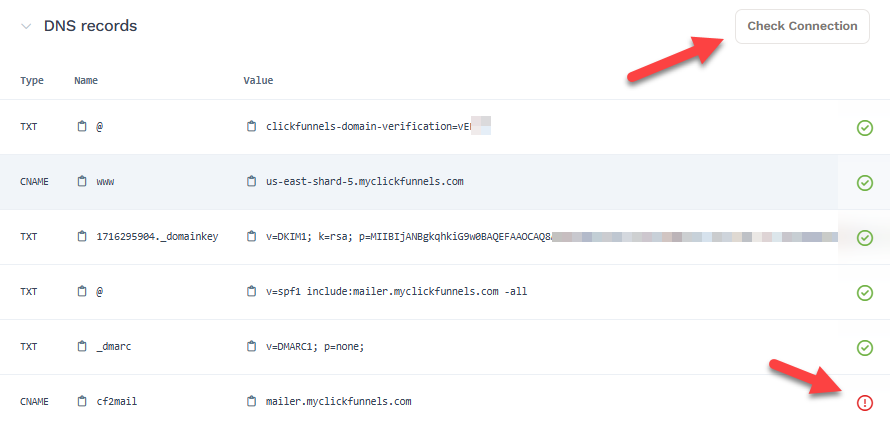
If any record cannot be verified, a red warning icon will appear next to it in the DNS records table. The SSL deployment will only proceed if the required DNS records (TXT for domain verification and CNAME for
www) are valid.You can click the Check Connection button to refresh the status of your records and confirm verification manually.
Note:
If the records do not verify after clicking Check Connection, please allow 5 - 10 minutes before clicking Check Connection again to verify the records. Once verified, the records status will display with a green checkmark. Occasionally, the verification of DNS records may take 24-48 hours.
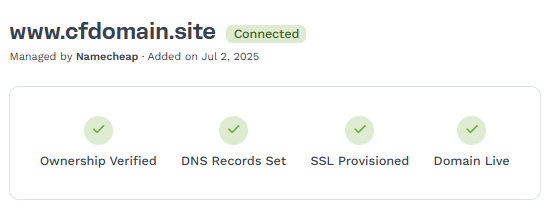
Once all required records are verified and the SSL certificate is issued, the domain status will change to Connected. You may now utilize this domain for the Site and Blog app or Funnels.
Congratulations! You now know how to connect an existing domain in ClickFunnels.
Domain Usage
Once your domain is connected, you can assign it to your ClickFunnels site or one or more funnels. This allows you to publish pages using your custom domain.
The Domain Usage section shows where your domain is currently being used. You’ll be able to view: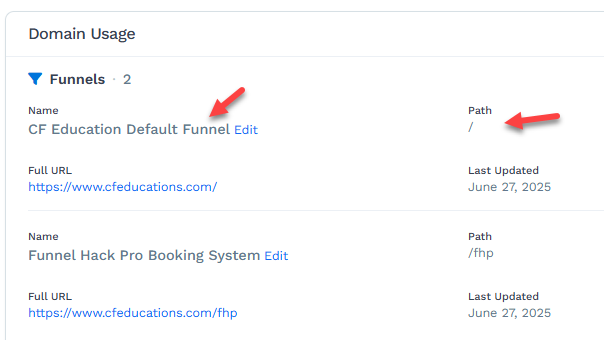
Funnels that are using the domain, along with their assigned paths (e.g.,
/or/fhp)Whether the domain is connected to a site
Quick links to edit or manage those funnel paths
If your domain has not yet been assigned, you’ll see options to:
Assign to Site
Go to Funnels
Clicking either button will direct you to the appropriate settings page where you can attach the domain to your desired destination.
Helpful Resources:
Setting Up the Forwarding Rule
Upon completing the integration of your domain with ClickFunnels, it may be necessary to create a forwarding rule within your domain's DNS provider. This will ensure that any visitors accessing the domain without the "www" prefix (e.g., https://yourdomain.com) are redirected to https://www.yourdomain.com.
Below is an example of a forwarding rule that can be added to Namecheap.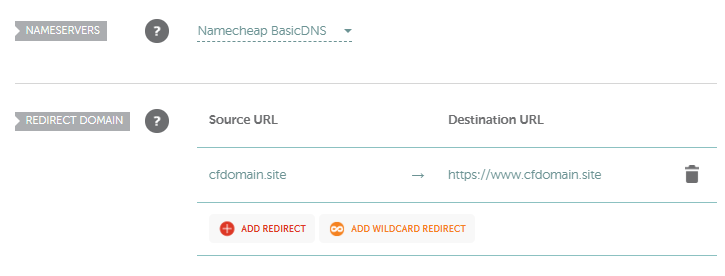
Learn more about forwarding rules in the article, Adding Domain Forwarding Rules.
Connecting the Domain to the Workspace Site
After successfully integrating your domain with your workspace, follow these steps to connect it to your site:
From your workspace, click on the Site & Blog app in the left-hand menu.
Select Site Settings.
Scroll to the Site Domain section and choose the domain you wish to use for your site in the Domain field.
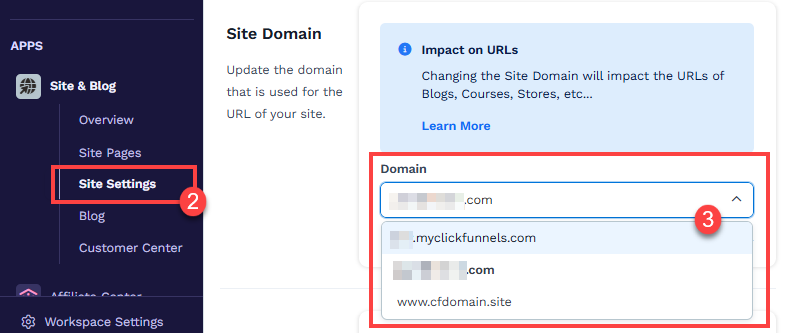
Click the Update site button to save your changes.
Important:
The domain connected to the Site & Blog app is used for Courses, Store, Blog, Customer Center, Landing Pages, and Community. These features must share the same domain connected to the site settings.
Connecting the Domain to a Funnel
Click on Funnels from the left navigation menu.
Identify a funnel you wish to associate with your domain and click the Gear
⚙️ icon to access the funnel’s settings.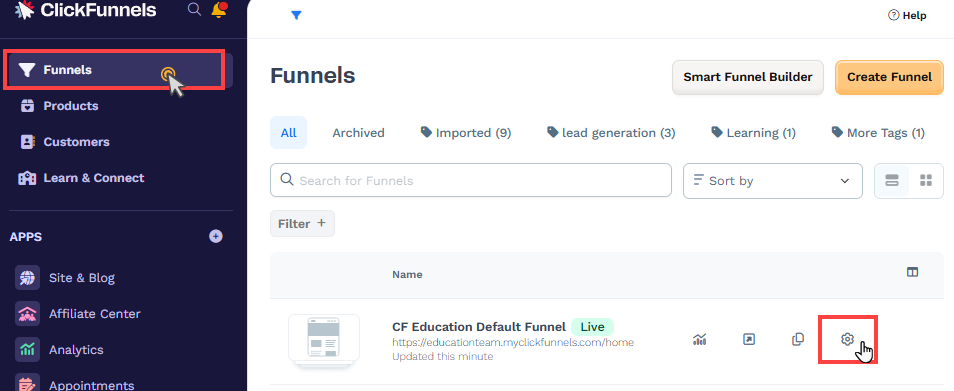
In the Domain field, select the desired domain from the dropdown menu.
Enter the desired path in the Funnel Path URL field, such as
/webinar,/blog, or/about. To set this funnel as the domain’s default page, enter a single/character.
Learn more about setting a funnel as a domain default page in the article, Setting a Funnel as the Domain Default Page.
Click Update Funnel to save changes.
Congratulations! Your domain is now connected to the funnel. When the domain is visited, the first page of your funnel will be displayed.
Domain FAQs
I already have a website. Can I connect the same domain with ClickFunnels?
No. A domain or subdomain can only be used with one platform at a time. For example, if your domain is connected to Shopify, it cannot be used with ClickFunnels or vice versa.
Can I purchase a domain from ClickFunnels?
Yes. You can purchase a domain through ClickFunnels via IONOS. ClickFunnels has a partnership with IONOS that allows you to initiate the purchase process directly within ClickFunnels. Once the purchase is completed, ClickFunnels will automatically set up and secure your domain. To learn more about purchasing a domain in ClickFunnels, refer to the article: Buying a New Domain Through ClickFunnels.
Do I have to purchase SSL?
No. ClickFunnels will generate and verify SSL during the domain setup process, so you do not need to purchase SSL separately.
How many funnels can I connect with one Domain?
There is no limit to the number of funnels you can connect to a single domain.
Can I create custom emails associated with the domain in ClickFunnels?
Yes. During the domain setup process, ClickFunnels will prompt you to add email DNS records, allowing you to create custom emails within your workspace. Learn more about creating a custom email associated with a domain in the article How to Add a Custom Email Address in ClickFunnels.
Can I assign different domains to individual courses in my ClickFunnels workspace?
No. All courses in your ClickFunnels workspace use the domain connected to the Site & Blog app. It is not possible to assign different domains to individual courses.