Funnels are a simple way to guide visitors toward specific actions, like signing up for an email list, registering for a webinar, or making a purchase. Instead of overwhelming users with too much information, funnels focus on creating a clear and logical path that leads to results.
With ClickFunnels, you can choose from a variety of funnel types to match your business goals, all without needing technical or design skills. This article will help you understand the different funnel types available and show you how to start using them in your ClickFunnels account.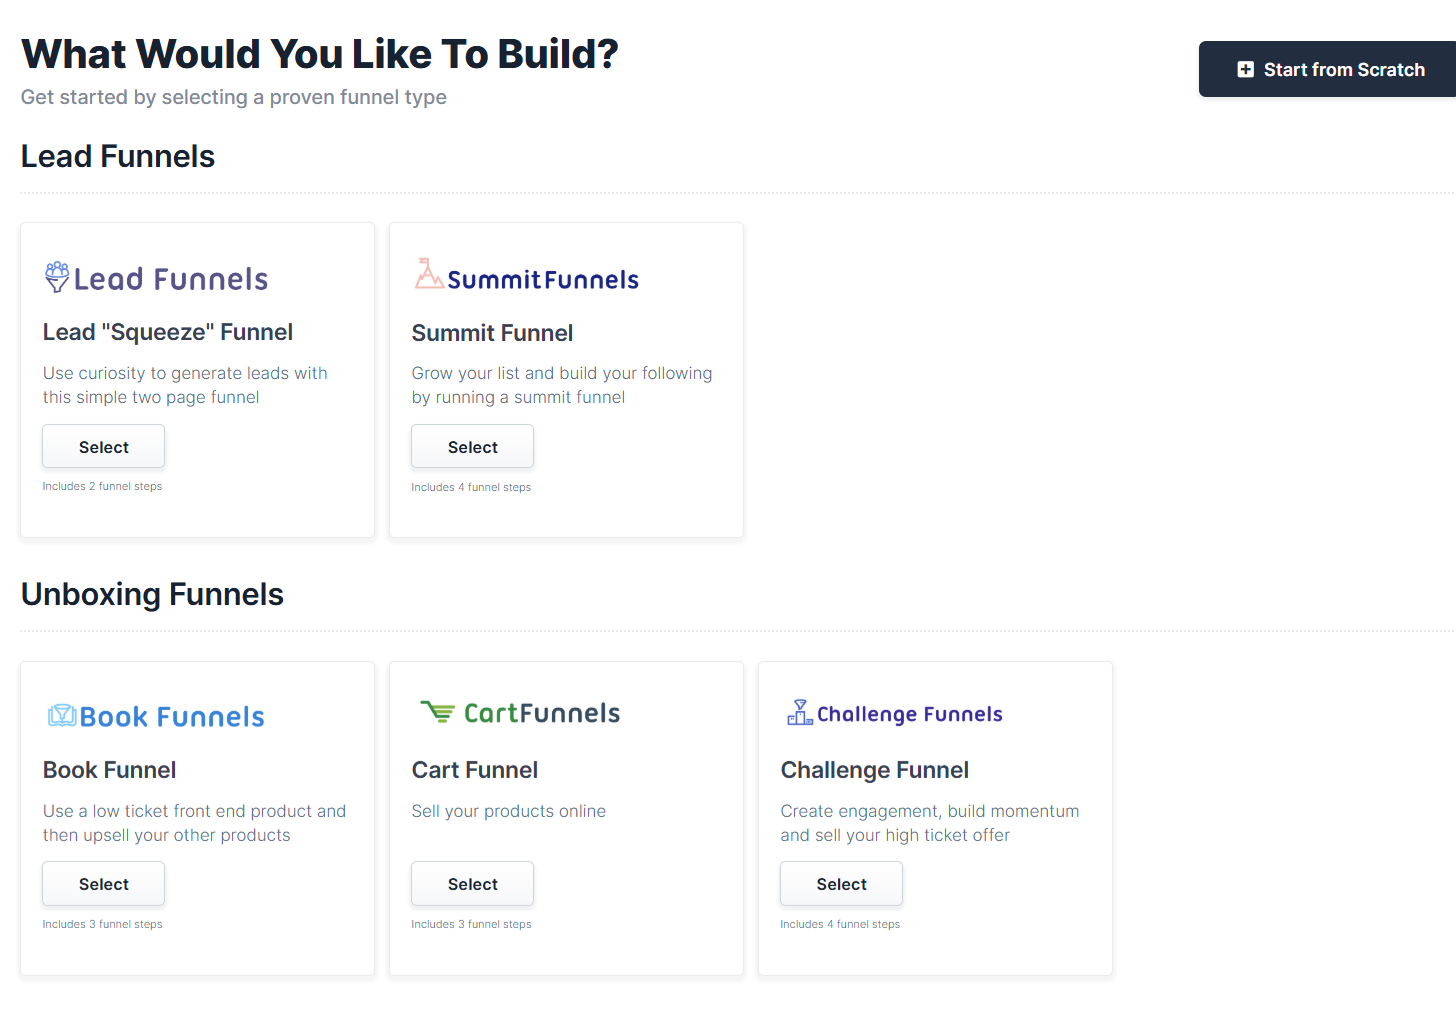
Requirements
An active ClickFunnels account
Overview of Funnel Types
ClickFunnels offers a variety of funnel types to help you achieve specific goals, whether you're generating leads, selling products, or engaging with your audience. Each funnel is designed with a clear purpose and comes with ready-to-use templates to get you started quickly. Below is a quick overview of the different funnel categories and how they can support your business.
Lead Funnels
Lead "Squeeze" Funnel
A two-step funnel designed to collect contact information, like email addresses, from potential leads. It’s ideal for building your email list and starting relationships with your audience.Summit Funnel
Use this funnel to host virtual summits and grow your email list while building authority in your niche. It’s perfect for connecting with your audience on a larger scale.
Unboxing Funnels
Book Funnel
Sell a low-cost product, such as a book, as a way to introduce customers to your offers. This funnel is great for increasing trust and leading your audience to higher-value products.Cart Funnel
A streamlined process for selling products online, including checkout and upsell options. It helps boost sales by guiding customers through the buying journey efficiently.Challenge Funnel
Encourage engagement and sell high-ticket offers through a multi-day challenge. This funnel is great for motivating your audience to take action and experience quick wins.
Presentation Funnels
Video Sales Letter (VSL) Funnel
Use a video to present your offer and guide prospects toward making a purchase. This funnel is ideal for selling through storytelling or detailed product explanations.Webinar Funnel
Drive registrations and attendance for your webinars while setting up a sequence for follow-ups. It’s perfect for showcasing expertise and converting attendees into customers.Product Launch Funnel
Build excitement for a new product with a series of pre-launch steps and offers. This funnel helps create anticipation and maximizes sales during your launch.
Phone Funnels
Application Funnel
Collect applications from leads interested in your high-ticket offers or services. This funnel is excellent for pre-qualifying potential clients.
Other Funnels
Bridge Funnel
This funnel is commonly used to connect your audience with affiliate offers. It helps bridge the gap between what your audience knows and why they should take action on the offer you’re promoting.Ask Campaign Funnel
Gather feedback or insights from your audience with surveys. This funnel helps you tailor your offers to meet customer needs effectively.Daily Deal Funnel
Promote a time-sensitive or irresistible offer to attract new customers quickly. It’s great for generating sales through urgency.Hero Funnel
Introduce yourself or your brand to build trust and connection with your audience. Use this funnel to establish your presence and share your story.Storefront Funnel
Create an ecommerce-style "website" that guides visitors to explore and purchase your products. It’s a great way to combine product discovery with sales.
How to Add a Funnel to Your Workspace
Click on Funnels from the left navigation menu.
Click on the Create Funnel button.
Browse the funnel types organized into categories like Lead Funnels, Unboxing Funnels, and Presentation Funnels. Select a funnel type that fits your needs. To learn more about the funnel, watch the detailed training sections:
Overview: Understand the purpose of the funnel.
Strategy: Explore how to effectively use the funnel.
Implementation: Get a step-by-step guide for setup.

If you'd prefer to start fresh, click Start from Scratch (see the How to Create a New Funnel article for details).
Scroll down to select a template by clicking Select Funnel under the template of your choice.

Wait for your funnel to install, then:
Click Close to exit the installation window.
Or click Customize Now to start editing the funnel in the workflow builder (see the How to Add and Manage Funnel Steps article for detailed instructions).
Checklist for Setting Up Your Funnel
Customize your funnel steps by adding, removing, or rearranging pages. Learn how to manage funnel steps.
Add your products to the funnel if applicable. Learn how to add products.
Design your pages using the ClickFunnels Page Editor to match your brand and message. Get started with the Page Editor.
Connect your custom domain to make your funnel live. Learn how to connect a domain.
Set up payment integrations if your funnel involves transactions. Learn how to start accepting payment.
Test your funnel to ensure that every step functions correctly.
Publish your funnel and start sharing it with your audience.