Sending messages too quickly or without proper spacing can lead to lower engagement or unsubscribes. ClickFunnels Workflows solve this by letting you insert the “Delay” step to space out your automation with precision. In this article, you’ll learn how to add and customize the “Delay” step to better control the timing of your emails, tags, and other actions.
Requirements
What is a Delay Step?
Imagine you’re setting up an automated message system for your customers. You want to send a welcome message immediately, but then wait a few days before sending a follow-up with more information. That’s where a Delay step comes in!
In a workflow, you can create a series of actions that happen automatically, like sending emails. A delay step tells the workflow to hit the pause button for a specific amount of time before doing the next action in the sequence.
The “Delay” step is helpful for several reasons. Let’s explore some common scenarios:
Sending a series of emails: Imagine you’re sending a welcome email series to new subscribers. You wouldn’t want to overwhelm them by sending everything at once, right? A delay step lets you space out the emails over a few days or weeks for a smoother experience.
Scheduling follow-up actions: Maybe you need to send a follow-up email after a customer interaction, like a purchase or a support request. A delay step lets you schedule the follow-up at the perfect time, ensuring they don’t feel forgotten.
Managing marketing campaigns: Perhaps you’re running a timed promotion or sale. A delay step allows you to control the timing of your marketing messages, ensuring they reach your audience at the most effective moment.
Note:
Steps in your workflow happen one after another (from top to bottom), like people in line. If you add a delay step, it’s like pausing the line for a set amount of time. For example, if two delays are set for 5 minutes each, the total delay will be 10 minutes.
Adding the “Delay” Step in a Workflow
Navigate to the Automations app and select Workflows.
Open an existing workflow or create a new one.
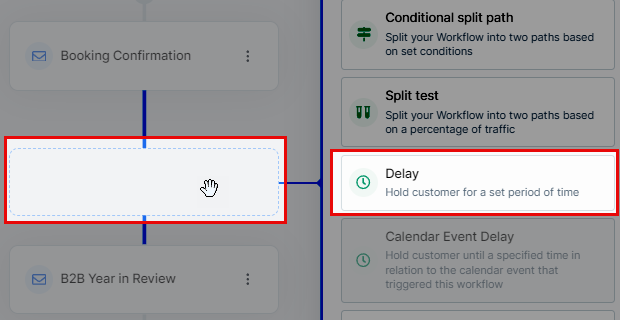
Click on the Plus Icon (+) in your workflow editor.
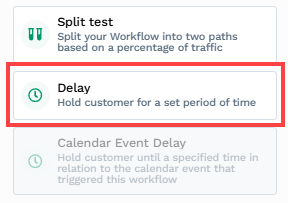
Select the Delay step under the Workflow category.
Configure the delay step according to your requirements.
Click the Create button to add the delay step to your workflow.
Configuring the “Delay” Step Settings and Options
In ClickFunnels, the delay step provides three configuration options: Relative, Day of Week, and Day of Month. Each option allows you to set specific delay parameters suited to your automation needs.
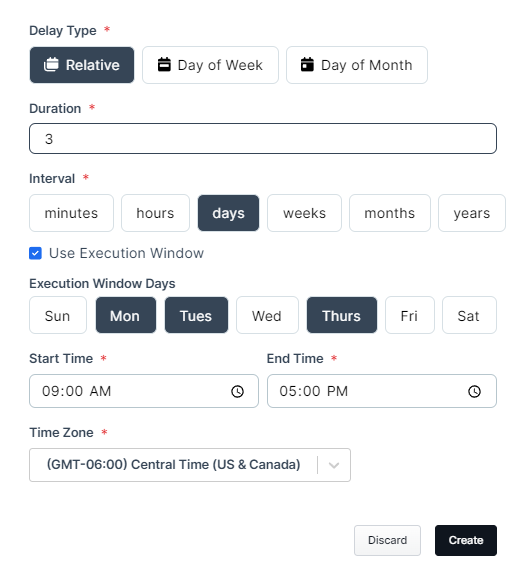
Relative Delay
The Relative Delay option allows you to set a delay relative to the previous step. This means you can define how many minutes, hours, days, weeks, months, or years to wait before moving to the next step in the workflow.
Duration: Set the number of units for the delay.
Interval: Choose the unit of time (minutes, hours, days, weeks, months, years).
Execution Window (Optional): Define specific days, times, and time zones when the delay can execute. If enabled, you can specify the execution window days, times, and time zones.
Example:
Consider a health coach who wants to follow up with new clients after their initial consultation. The business prefers not to send marketing emails on Wednesday and Friday and is closed on Saturday and Sunday. They set a delay of 3 days with an execution window for Monday, Tuesday, and Thursday from 9 AM to 5 PM.
If a client completes the initial consultation on Wednesday, the delay will be for 3 days (Thursday, Friday, and Saturday). Since the business does not operate on Sunday and the execution window excludes Wednesday and Friday, the delay will hold on those days. The next step, such as sending a follow-up email, will be executed on Monday at 9 AM because it falls within the specified execution window, and the start time is set to 9 AM.
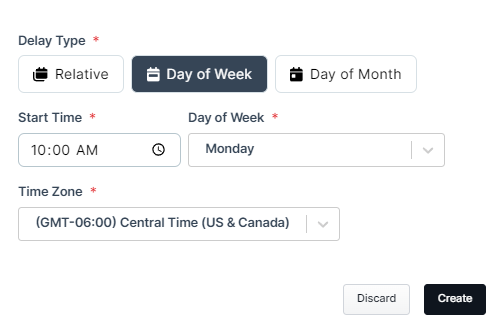
Day of Week Delay
The Day of Week Delay option allows you to trigger the next step on a specific day of the week at a set time. This is useful for scheduling actions that need to occur on a particular day of the week.
Day of Week: Choose the day of the week.
Start Time: Set the specific time of day for the step to execute.
Time Zone: Use the contact’s time zone, or you can set a specific time zone.
Example:
Consider a football coach who sends weekly training tips to their team. The coach wants these emails to go out every Monday at 10:00 AM to ensure the team starts the week with new training material. By setting a Day of the Week Delay, the coach can ensure the email is sent every Monday at the specified time. It is important to note that all preceding steps in the workflow must be completed before this delay step is reached.
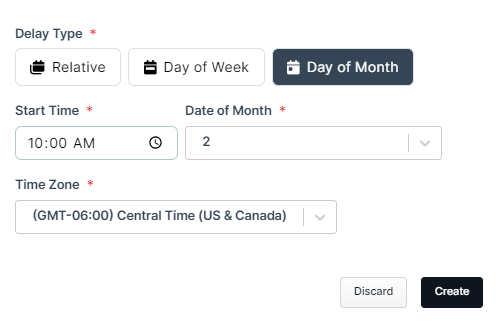
Day of Month Delay
This option allows you to trigger the next step in your workflow on a specific day within the month, combined with a chosen start time. It’s ideal for situations where you want an action to happen on a consistent day of the month.
Date of Month: Select the date (1-31).
Start Time: Set the time of day for the step to execute.
Time Zone: Use the contact’s time zone, or you can set a specific time zone.
Example:
A financial advisor offers a six-month investment course and wants to send training materials, bonuses, and monthly market updates at the beginning of each month. The advisor can create six emails in the workflow, each with a Day of the Month Delay set to the 2nd day of the month at 10:00 AM Central time.
This setup ensures that each email is sent on the 2nd day of each month, providing timely information to clients throughout the course.