The “Notify” step in ClickFunnels Workflows allows you to automatically notify team members about important actions or events that occur within a workflow. This step is particularly useful for keeping your team informed and ensuring timely follow-up on customer actions. In this article, you will learn how to configure the “Notify” step and use it to improve team communication and workflow efficiency.
Requirements
An active ClickFunnels account.
The member you want to notify needs to be added as team member in the “Team Settings”.
Adding the “Notify” Step to Your Workflow
Open Your Workflow:
From your ClickFunnels dashboard, navigate to the Automations » Workflows menu.
Open an existing workflow or create a new one.
Add the “Notify” Step:
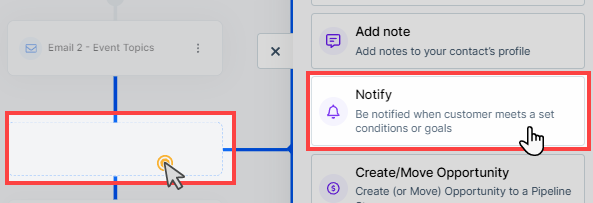
Click on the Plus Icon (+) in your workflow editor.
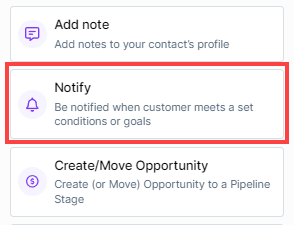
In the right-hand panel, select the “Notify” option under the “Internal” category.
Configuring the “Notify” Step
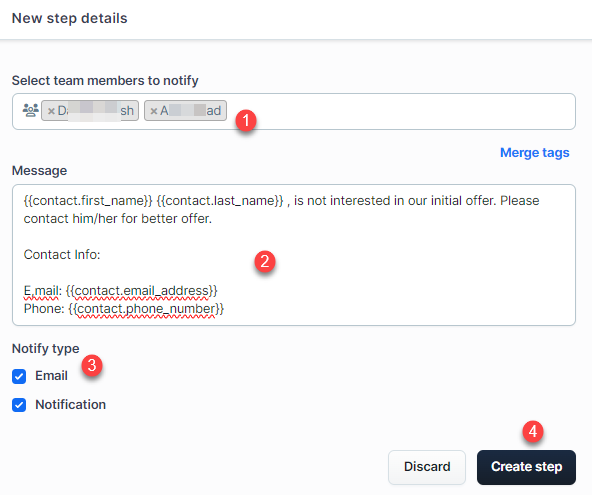
Select Team Members to Notify:
In the dialog box that appears, select the team members you want to notify by choosing from the dropdown menu. You can select multiple team members to keep everyone informed.
Compose the Notification Message:
Enter the message you want to send to the selected team members. You can include important details about the contact or any specific instructions.
Utilize Merge Tags to dynamically insert contact information, such as the contact’s name, email, or phone number. This helps personalize the notification and provides team members with quick access to relevant details. Merge tags will not render if the field data is missing for the contact.
Choose Notification Type:
Select whether you want the notification to be sent as an Email or an In-App Notification (or both). Checking both options will send an email and an in-app notification to the selected team members.
Save the Step:
After configuring the notification settings, click Create Step to add the “Notify” step to your workflow.
Viewing Notifications in ClickFunnels
After the workflow runs and the “Notify” step is executed, the selected team members will receive the notifications based on the type specified: Email Notification or In-App Notification. Here’s how you can view these notifications:
Email Notifications
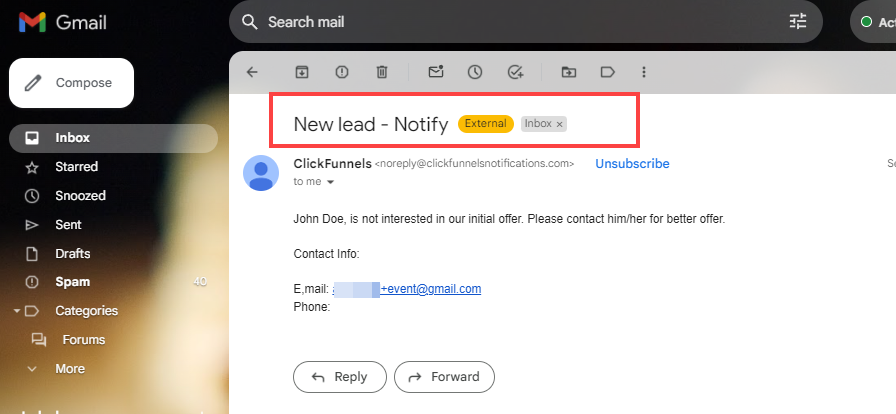
If you chose Email as the notification type, team members will receive an email in their inbox. The email will contain the message defined in the “Notify” step along with any merge tags that were included to auto-populate the contact’s information.
In-App Notifications
If you selected In-App Notification as the type, team members can view the notifications directly within the ClickFunnels account:
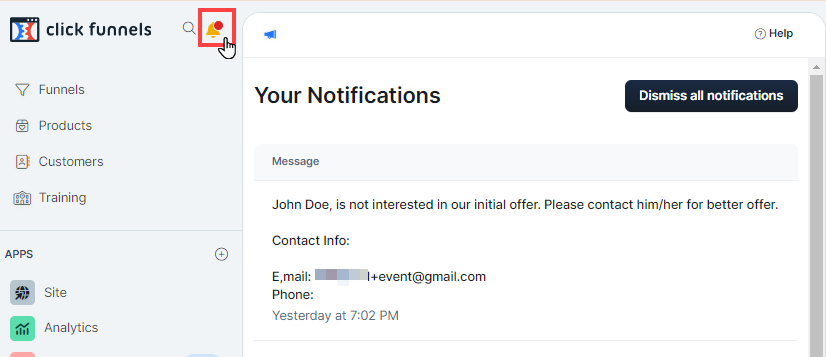
Click on the Notification Bell Icon at the top of the ClickFunnels dashboard.
The Notifications Panel will open, displaying all the recent notifications, including those triggered by the “Notify” step.
