The Countdown Funnels app in ClickFunnels allows you to create real urgency on your funnel pages by setting up countdown events. These events can be tied to countdown timers in the funnel, helping drive action and conversions. This article will walk you through creating and managing countdown events, including setting them up, using them in funnels, editing, deleting, and viewing registrants.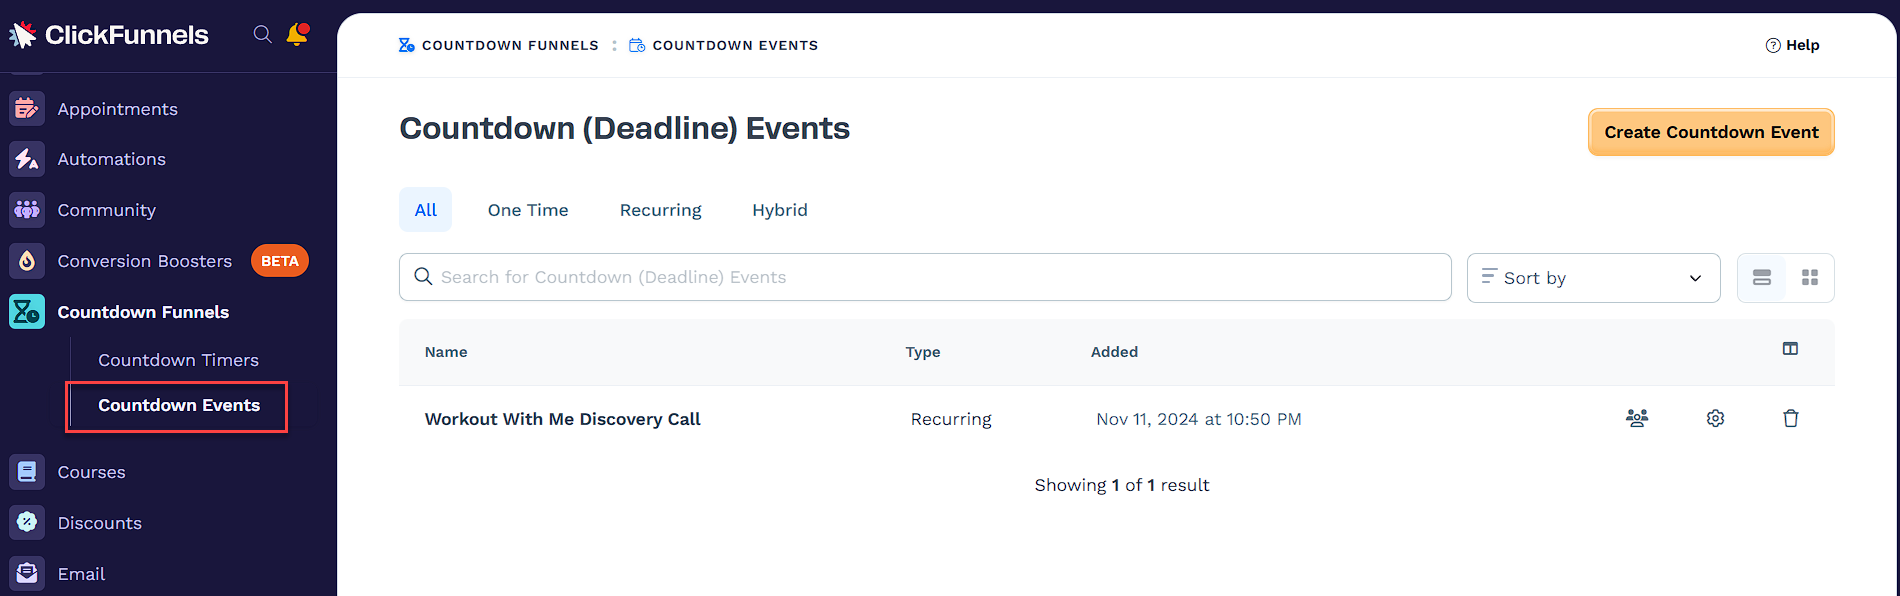
Requirements
What is a Countdown Event
A countdown event is a timed event designed to create urgency and encourage action from visitors on your funnel pages. These events can be tied to specific deadlines, recurring schedules, or hybrid configurations, helping you drive conversions by leveraging psychological triggers like urgency and scarcity.
Example Use Case:
Imagine you are hosting a live webinar scheduled for January 25 at 10:00 AM EST. To highlight the registration deadline, you can create a countdown event and insert a countdown timer on your funnel page to show how much time is left for users to register. This will motivate potential attendees to act promptly. You can also trigger a workflow based on event registration and send an automated email sequence to the registrants before and after the event.
Adding the Countdown Funnels App in the Workspace
From the main menu on the left, click on + Add Apps to navigate to the Apps page.
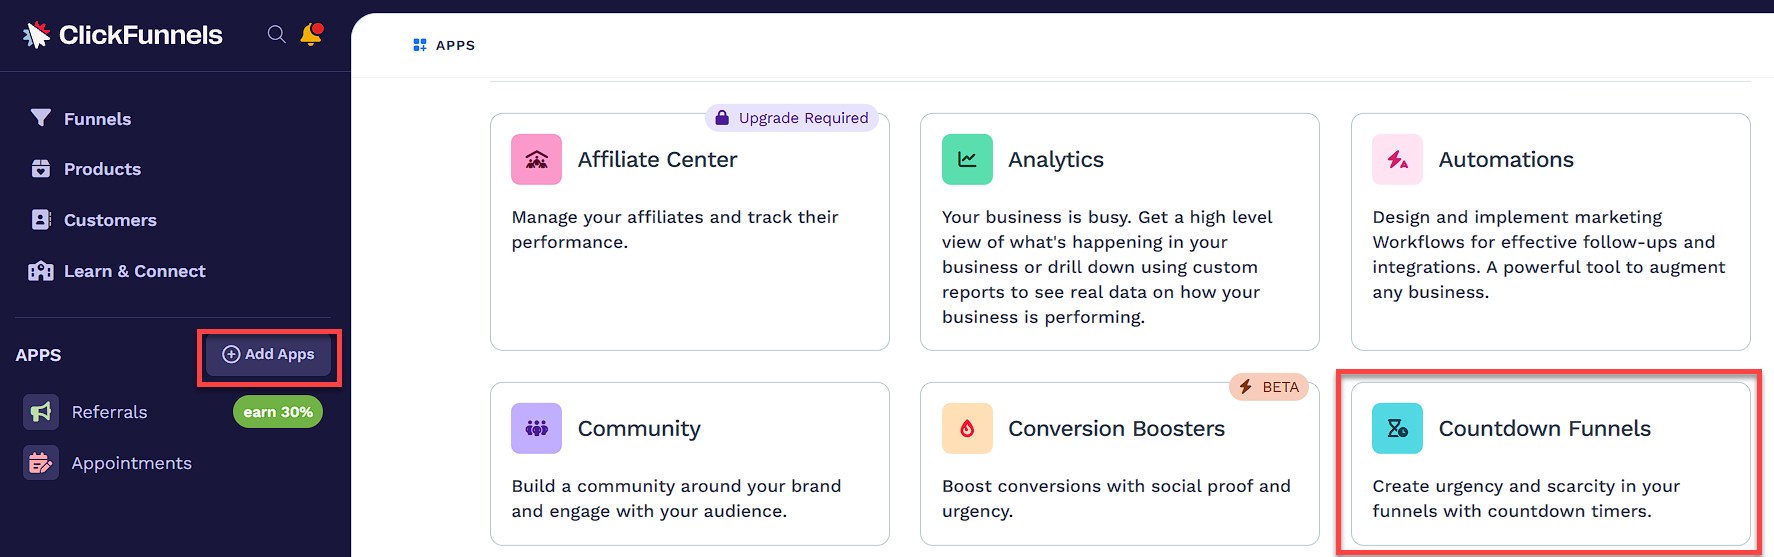
Scroll down until you find the Countdown Funnels app, then click on it.
Confirm your selection by clicking the Add App button.
Creating a New Countdown Event
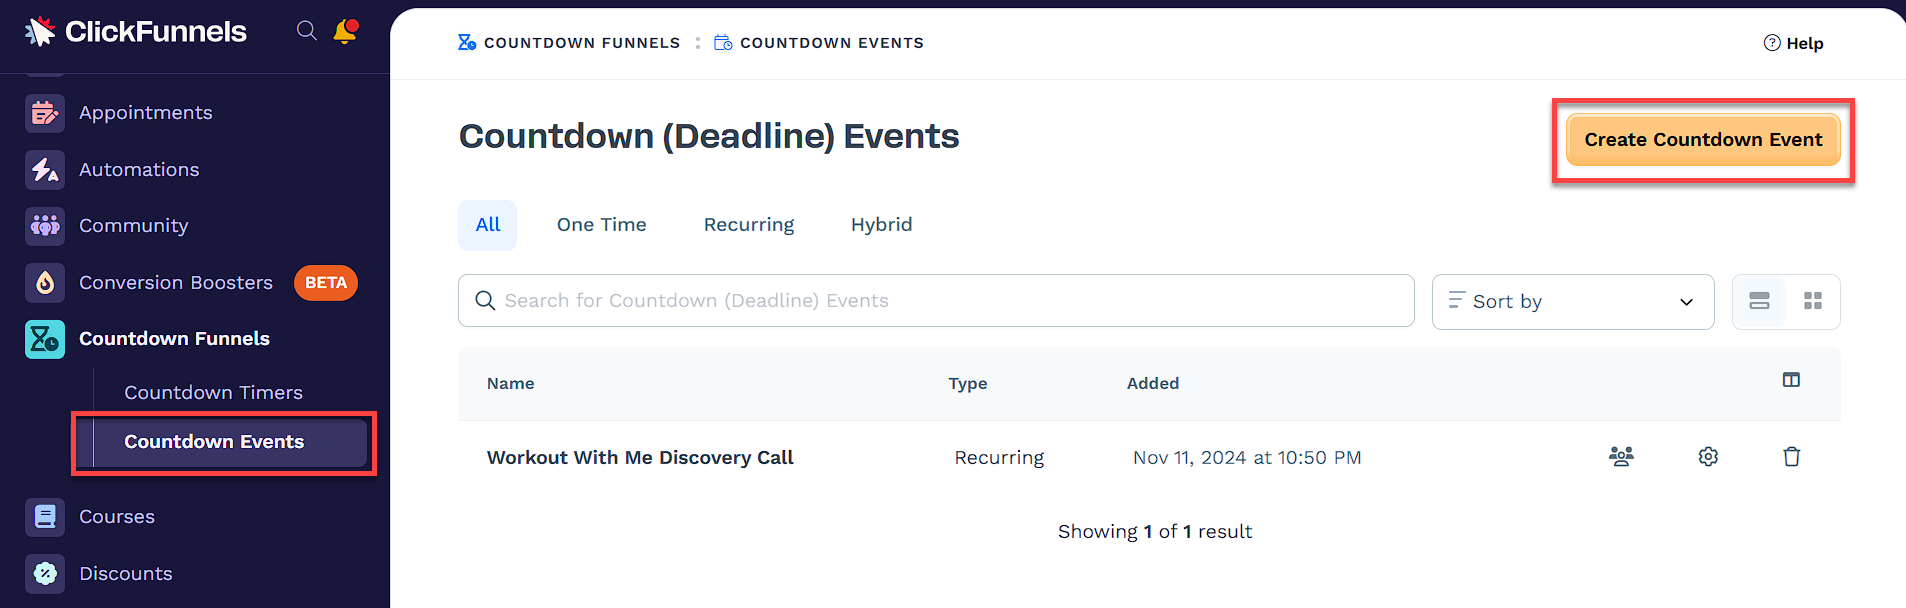
Navigate to Apps on the left-hand menu and select Countdown Funnels.
Under the Countdown Funnels menu, click Countdown Events.
Click the Create Countdown Event button in the top-right corner.
After creating the event, adjust its settings, such as event type and details. For a detailed explanation, refer to the Setting Up the Countdown Event section.
Setting Up the Countdown Event
New Countdown Event Details
Name: Start by naming your event. For example, “Black Friday Sale Deadline” or “Webinar Registration Close.”
Event Type
Type: The event type in the settings determines how your countdown event behaves. To best suit your needs, you can choose between one-time, recurring, or hybrid configurations.
.png "image(565).png")
One Time Event
One-time events are ideal for events with a specific, fixed date and time. These are commonly used for events where the deadline is clear and doesn’t repeat. For example:
Examples:
A Black Friday Sale ends at midnight, allowing customers to make last-minute purchases before the deal ends.
A webinar registration closes on January 25th at 10:00 AM, ensuring participants register before the event begins.
A limited-time free trial offer that expires on a fixed date.
To configure:
Select One Time as the event type.
Set the Start Time and Start Date.
Choose the appropriate Time Zone.
Recurring Events
Recurring events repeat at defined intervals based on the contact’s registration or a specific schedule. These are useful for ongoing promotions or regularly scheduled updates. For example:
Examples:
A 48-hour sale triggered every time a user signs up for a lead magnet, ensuring each user gets a fair chance to act within their own timeframe.
Weekly access to a new training module after registration, keeping participants engaged with a consistent schedule.
To configure:
Select Recurring as the event type.
Define the Recurrence Interval (e.g., 2).
Choose the Recurrence Unit (e.g., days, weeks).
Hybrid Events
Hybrid events combine aspects of One Time and Recurring events. They work well for events that occur on a repeating schedule but align with specific start dates or days. For example:
Examples:
A live coaching session happening every Monday at 10:00 AM starting from January 1st, helping participants prepare for the week ahead.
Monthly product launches scheduled on the 15th of every month, ensuring customers are informed about new arrivals.
A seasonal promotion that occurs every quarter on the first Friday of the month, driving sales during specific periods.
To configure:
Select Hybrid as the event type.
Set the Start Time and Time Zone.
Choose the Hybrid Type (e.g., Day of Week or Day of Month).
Specify additional details, such as the exact Day of Week or Date of Month.
Email Embedding
The Email Embed Code allows you to include a live countdown timer in your emails. This feature ensures that registrants see a real-time countdown to the event start time, helping them stay informed and prepared for the event. When contacts are triggered through a workflow based on event registration, the countdown timer dynamically adjusts to display the remaining time for the event..png)
To set up the email embedding:
Create a Funnel: Ensure your funnel includes a page with a Calendar Event attached to it. Learn more about how to attach a countdown calendar event in a funnel step in our article How to Add a Countdown Calendar Event in a Funnel Step.
Set Up a Workflow: Create a workflow that triggers with the event "Calendar Event - Contact Registered." Learn more about workflow triggers in the article How to Manage Workflow Triggers.
.png)
Select the Funnel: Choose the funnel where the contact registers for the event.
Edit the Email: Open the email editor within the workflow.
Insert the HTML Element: Drag and drop an HTML block into the email editor.
Paste the Embed Code: Copy the embed code from the Countdown Event settings and paste it into the HTML editor.
.png)
Save and Publish: Save the email and publish the workflow.
When the email is sent, the countdown timer will automatically display the remaining time until the event. This approach ensures a personalized and accurate countdown for each recipient, increasing the likelihood of action.
Note:
The Email Embed Code will only work when emails are sent via a workflow using the "Send Email" step and triggered by the event "Calendar Event - Contact Registered." It will not work with Broadcast emails or emails sent outside of ClickFunnels.
Advanced Settings
Allow Reregister After Days: Specify a value to allow users to restart the registration process after a set number of days. When this setting is enabled, any connected workflow in the funnel step where this event is attached will trigger again for the contact as if they are a new registrant.
Example:
Specify a value to allow workflows to re-trigger for a contact after a set number of days. When this setting is enabled, any connected workflow in the funnel step where this event is attached will automatically run again for the contact once the specified days have passed, treating them as a new registrant.
Using a Countdown Event in Funnels
Create a new funnel or access an existing one from the Funnels menu.
Add a new Page to the funnel where the countdown event will be used.
Attach a Countdown Calendar Event in the page settings.
.png)
In the page editor, drag and drop the Countdown element.
In the element settings, select Calendar Event as the timer type to connect it to the attached event.
.png)
Save the page to ensure all changes are applied.
For more detailed steps, refer to our articles How to Add a Countdown Calendar Event in a Funnel Step and Countdown: Display a Countdown Timer on Your Page.
Editing an Existing Countdown Event
Navigate to the Countdown Events menu in the Countdown Funnels app.
Locate the event you want to edit and click the Gear
⚙️ icon.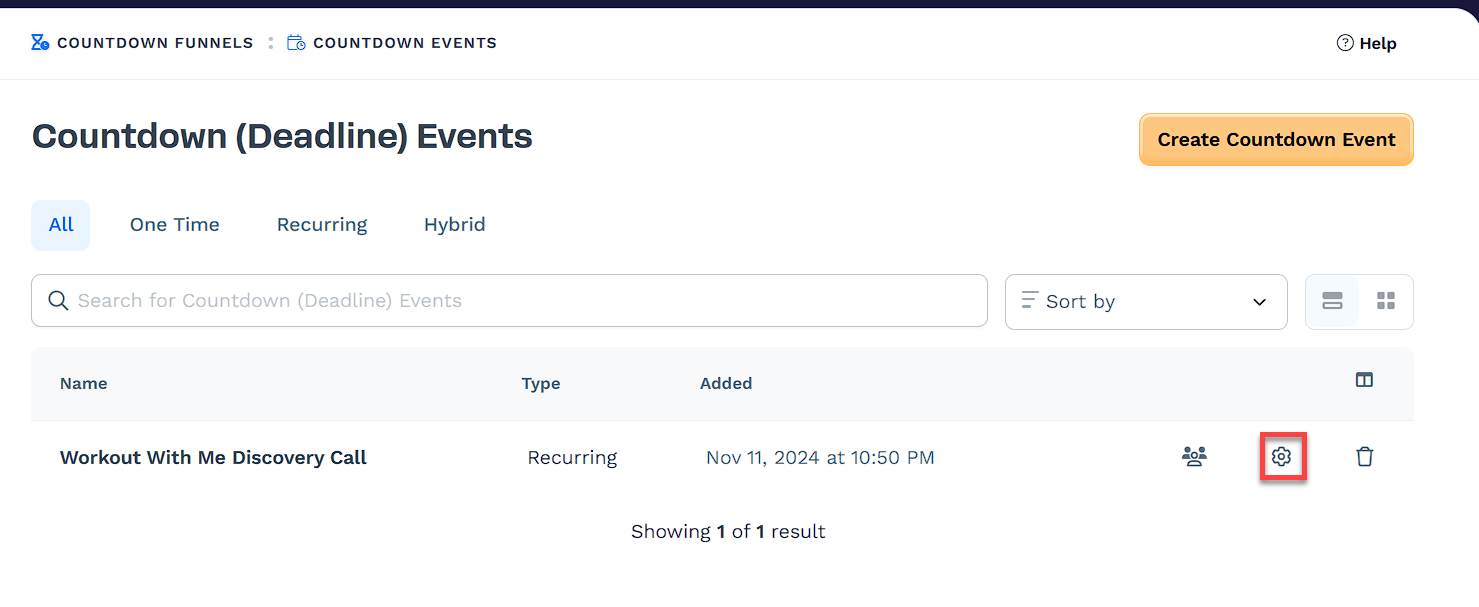
Make the necessary changes to the event details.
Click Update Countdown Event to save your changes.
Important:
Contacts already subscribed to the event and are waiting in the workflow steps, will be rescheduled based on your changes in the event.
Deleting a Countdown Event
Navigate to the Countdown Events menu in the Countdown Funnels app.
Locate the event you want to delete and click the Trash
🗑️ icon.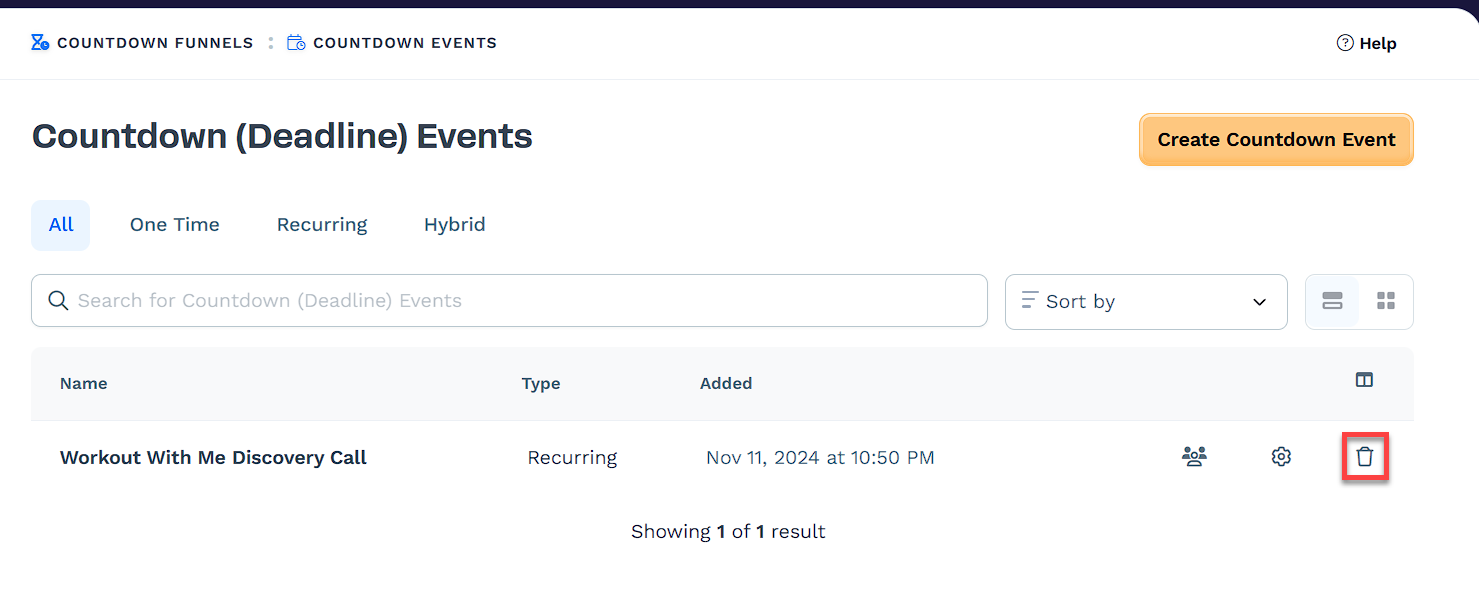
Confirm the deletion in the pop-up dialog.
Warning:
Deleting a Countdown Event is an permanent action and cannot be undone. Please ensure that you are removing the correct event that is no longer required.
Viewing Registrants of the Countdown Event
Navigate to the Countdown Events menu in the Countdown Funnels app.
Locate the event and click the Contacts icon.
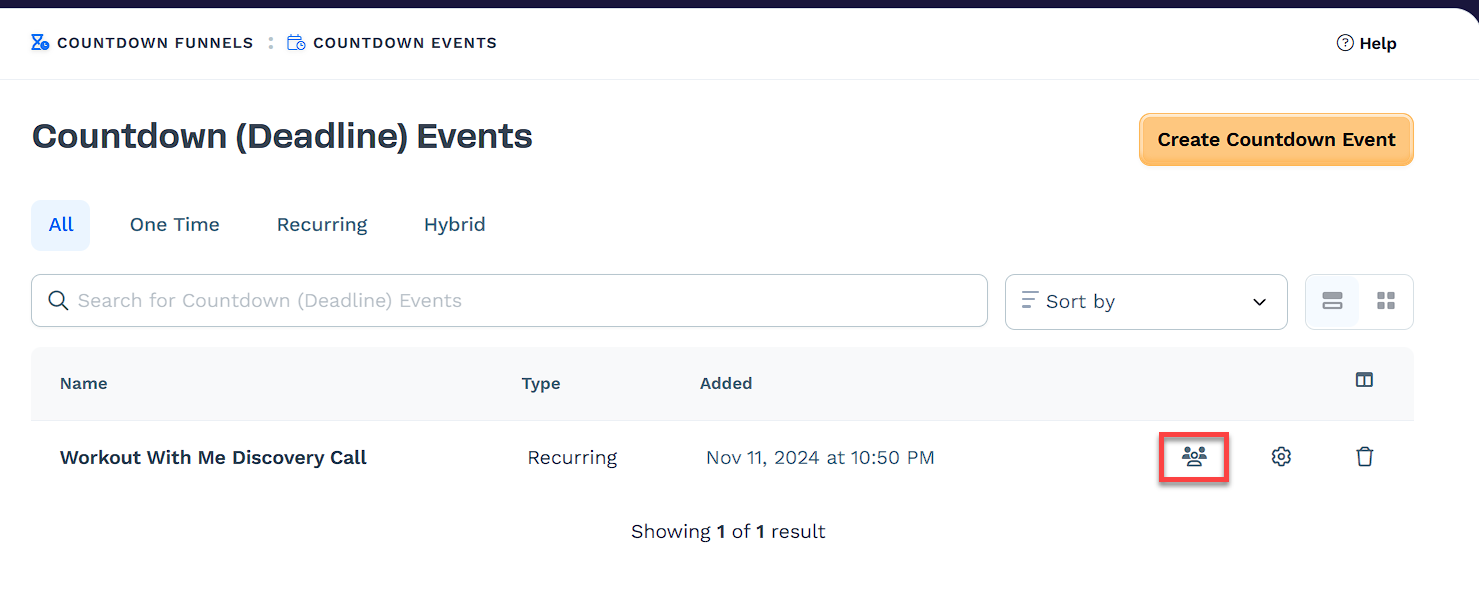
View a list of registrants associated with the event.