The Content Body element allows you to dynamically display content on the blog posts and course lesson pages. It ensures that when users visit a blog post or course lesson page, the element pulls the specific content associated with it. In this article, we’ll explain how to add the Content Body element to your blog post and course lesson pages and ensure it functions correctly.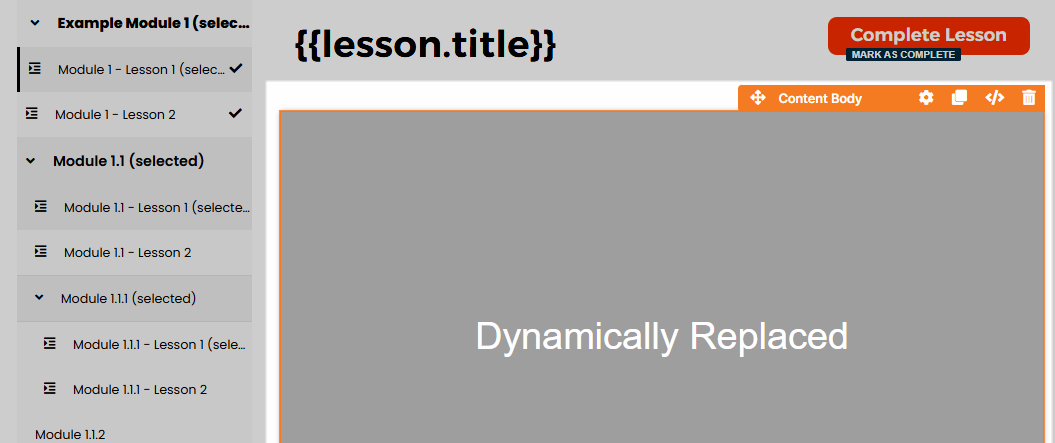
Requirements
An active ClickFunnels account
A blog post or course lesson created in your workspace
Note:
The Content Body is a dynamic element that is capable of rendering dynamic content exclusively within the Blog Post theme page and the Course Lesson theme page.
How the Content Body Element Works
The Content Body is a dynamic element designed specifically to display the contents of individual blog posts and course lessons in an engaging manner. When your viewers access blogs or course lessons and click on any specific blog post or course lesson, the Content Body element has the capability to pull the relevant content associated with the item they clicked on. This process occurs seamlessly, allowing the Content Body container to replace the existing content dynamically with the new information. This functionality enhances user experience by providing immediate access to the desired content without page reloads or additional navigation steps.
Step 1: Adding Blog Post or Course Lesson Content
Adding Blog Post Content
Navigate to the Site & Blog app and select Blog.
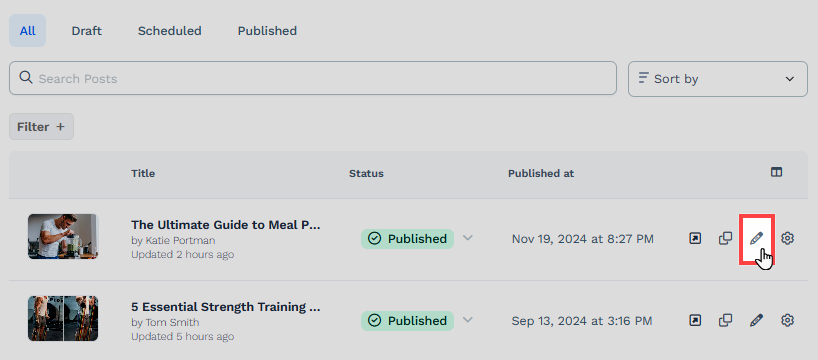
Create a new post or select an existing one.
On the Blog Posts page, click the Pencil ✏️ icon next to your created post.
You can add and customize blog content (e.g., text, images, videos, buttons, etc) in the Page Editor using Sections, Rows, and Elements.
Once done, click Save Changes to save your edits.
Learn more: How to Create and Manage Blog Posts
Adding Course Lesson Content
Navigate to the Courses app and select a course to edit.
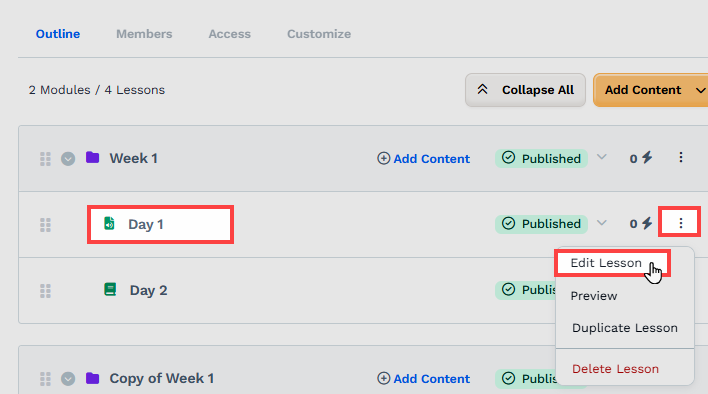
Add a new Module and a new Lesson inside the module.
Click the Lesson Name or Edit Lesson option to open the lesson editor.
You can add and customize lesson content (e.g., text, images, videos, buttons, etc) in the Lesson Editor using Sections, Rows, and Elements.
Once done, click Save Changes to save your edits.
Learn more: How to Manage Course Lessons
Step 2: Adding the Content Body Element
Navigate to the Site & Blog app.
Click Overview.
Click Edit Site to open the site theme pages editor.
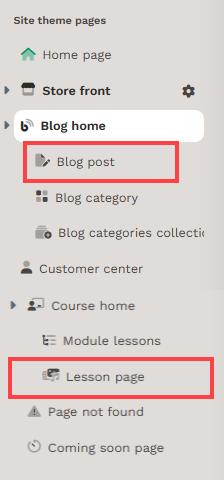
In the left panel, choose Blog Post from the Blog category or Lesson Page from the Course category to modify the theme pages.
Inside the page editor, add a Section where you want to place the element.
Add a Row within that section.
Click the orange + Plus or Add New Element button inside the row to insert a new element.
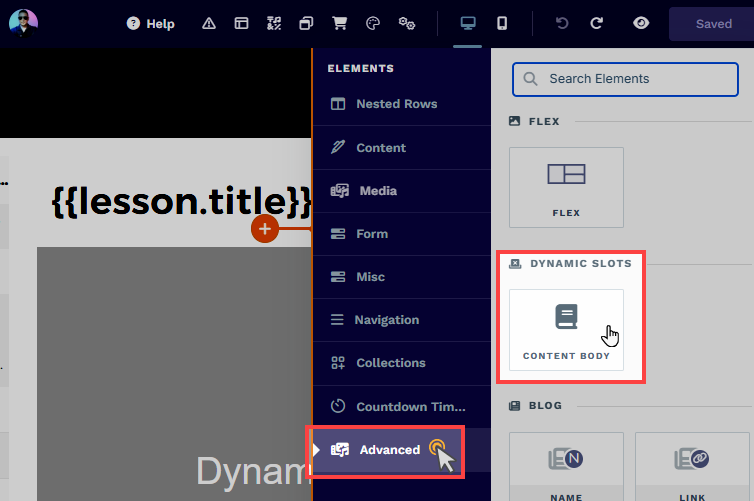
From the Advanced category, scroll to the Dynamic Slots section and select the Content Body element.
Customizing the Content Body Element
When you hover over an element, its border will be highlighted in orange. To access an element's settings, click on the gear ⚙️ icon or click directly on the element.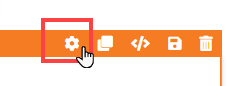
Top Margin
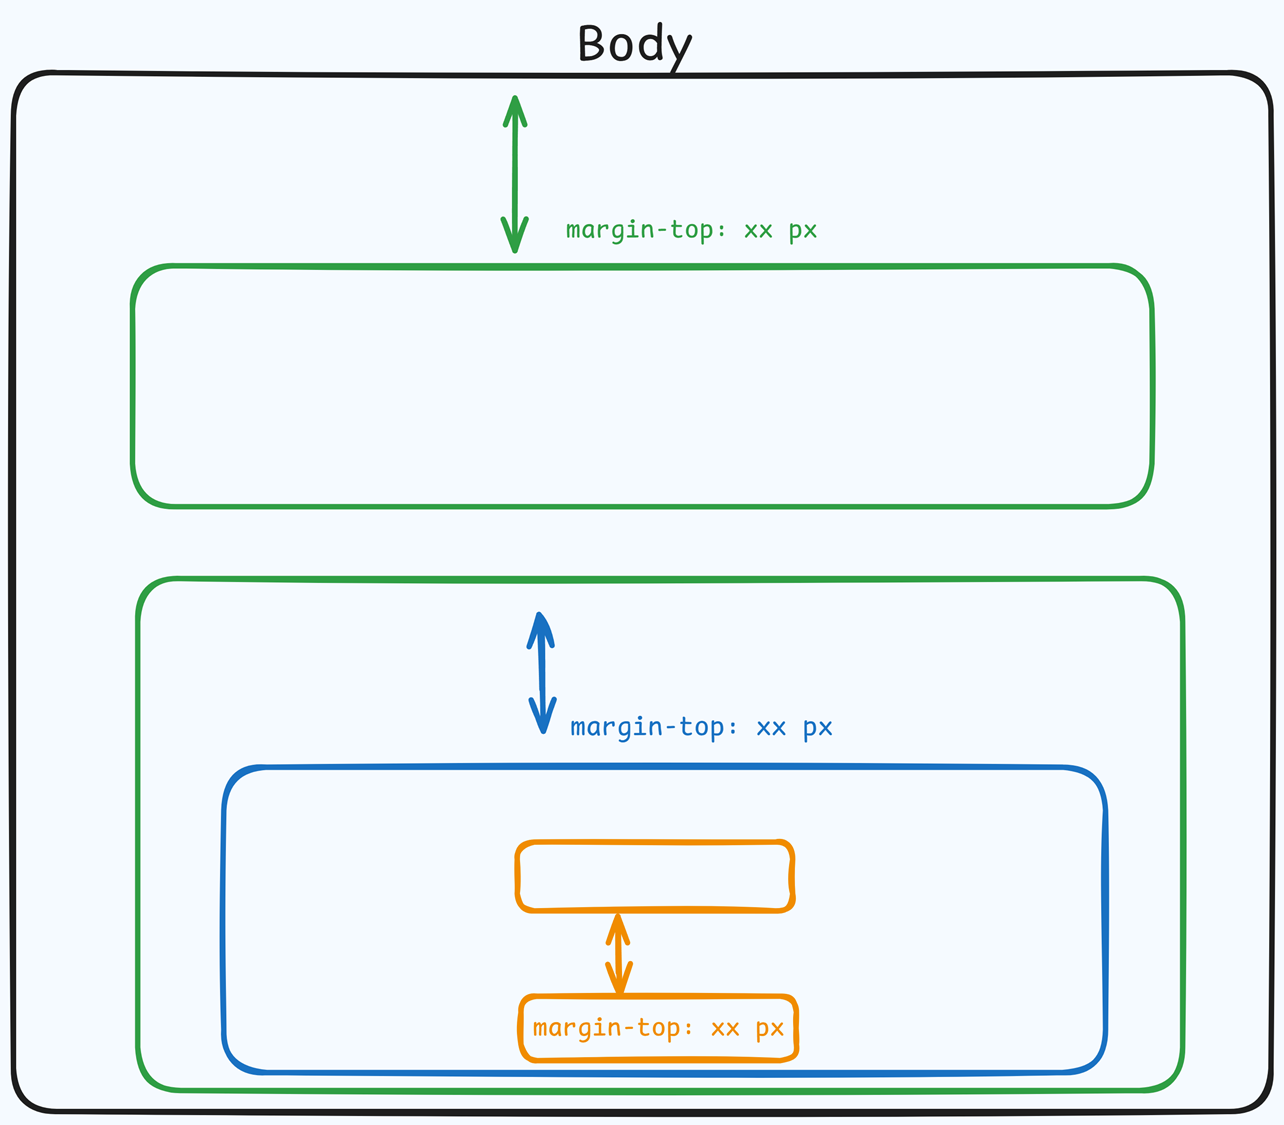
 The Top Margin setting lets you control the space between the current container (section, row, flex, and element) and the container directly above it. If no previous container exists, the margin will be applied relative to the parent container. If no preceding container is added, the Body will be the parent.
You can set top margin values independently for desktop and mobile by using the device icons (px) or percentage (%) to create consistent spacing across screen sizes.
Control Panel
The Control Panel appears at the bottom of every container(Section, Row, Flex, and Element) in the page editor, offering quick access to essential settings and actions for that container. Here’s what each icon represents:.png "image(47).png")
ALL: The container will be visible on all devices (desktop, tablet, and mobile).
Desktop (
🖥️ ) Icon: The container will only be visible in desktop view.Mobile (
📱 ) Icon: The container will only be visible in mobile view.Eye (
👁️ ) Icon: Use this to hide the container from the page. Once clicked, the container will be hidden in the editor but not deleted. You can click the Layout menu in the top navigation bar to find the hidden containers. Select All, Desktop, or Mobile icon to unhide in the editor.Code (</>) Icon: This icon opens the code editor, where you can insert custom CSS or JavaScript code to modify the container's behavior or styling.
Trash (
🗑️ ) Icon: Removes the container from the page editor entirely.
Advanced Settings

To further customize your container (section, row, column, and element), ClickFunnels provides Advanced settings that allow you to control style, advanced CSS, animation, and rendering logic. We’ve separated these advanced features into dedicated articles to avoid overwhelming you with too much content in one place and to keep our documentation concise. Explore the following resources for more details:
Advanced Settings - Customize Styles: Learn how to populate contents dynamically, position containers, and apply z-index.
Advanced Settings - Customize Animation: Learn how to add animations, control entry and exit effects, and adjust animation delay.
Advanced Settings - Customize Logic: Learn how to apply conditional logic to elements and add custom attributes.