In ClickFunnels, you can easily manage your community settings to create a tailored experience for your members. Customizing these settings is essential for businesses looking to engage their audience and control their user experience. This article will help you manage key aspects like privacy, post approvals, and notifications, ensuring your community runs smoothly and efficiently.
Requirements
An active ClickFunnels account
Community Settings
Community settings allow you to control the overall structure and functionality of your community. These settings let you manage the community’s visibility, member permissions, post approvals, and automated emails, ensuring that your community runs smoothly and delivers a customized experience for your members.
Accessing Community Settings:
Click Community app in the left-side navigation.
From the community dashboard, click the Settings ⚙️ icon next to your community name.
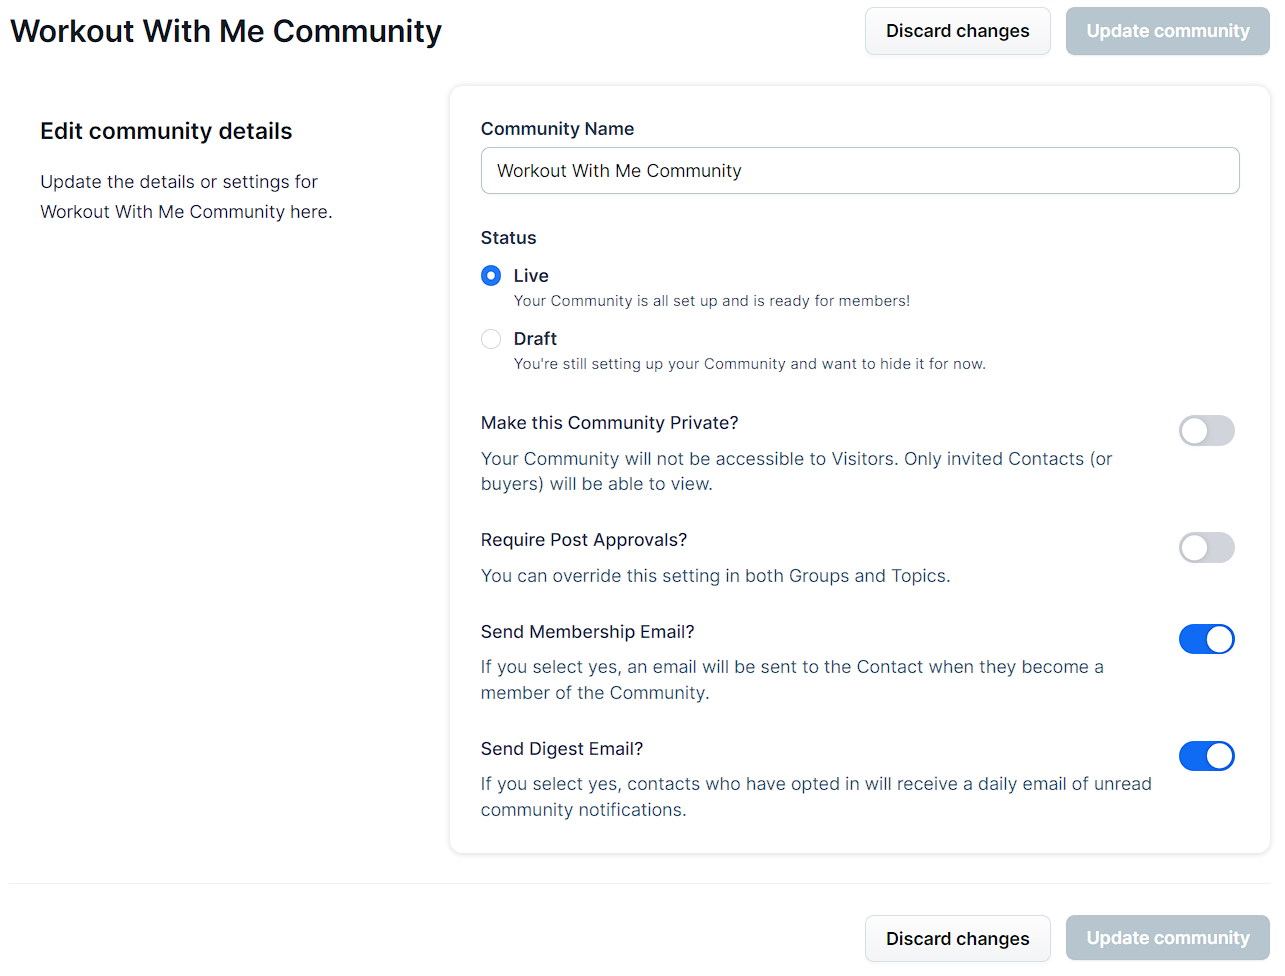
Community Settings:
Enter a Community Name to rename your community.
Select Live to make your community visible to members or choose Draft to hide it while setting it up.
Toggle Make this Community Private? to restrict access only to invited contacts or buyers.
Toggle Require Post Approvals? to review and approve posts before they appear in the community. You can override this setting at the group or topic level.
Toggle Send Membership Email? to automatically send a welcome email when a contact becomes a member. To customize this email, navigate to Workspace Settings > System Emails > Community. To learn more, refer to our How to Customize and Manage System Emails article.
Toggle Send Digest Email? to send daily summaries of unread activity to members. Members can opt out of these emails in their user settings.
Click Update Community to save your changes.
Allow Public Sign-Ups:
If your community is set to public, you can allow guests to sign up and become members directly from the community page. This is useful if you want visitors to interact with your community — liking posts, leaving comments, and creating their own posts — without needing to be manually added.
When this setting is enabled, guests who visit your public community will see a Get Access prompt when they try to interact with a post. From there, they can either create a free account or be directed to a page of your choice (such as an order form or funnel) to gain access.
Important:
This setting only applies to public communities. If your community is set to private, guests will be redirected to the sign-in page and will not see the sign-up prompt.
Enabling Public Sign-Ups:
Click Community in the left-side navigation.
From the community dashboard, click the Settings ⚙️ icon next to your community name.
Make sure Make this Community Private? is toggled off.
Toggle Allow Public Sign-Up? to enable it.
Click Update Community to save your changes.
When enabled, guests who try to interact with a post will see a prompt to Get Access. Clicking it will take them to a sign-up page where they can create an account. Once they sign up, they automatically become a community member and can start participating right away.
Adding an Upgrade URL (Optional):
If you want guests to purchase access rather than sign up for free, you can add an Upgrade URL. This directs guests to a page where they can take action — such as an order form or a funnel — before gaining community access.
Toggle Allow Public Sign-Up? to enable it.
In the Upgrade URL field that appears, enter the URL you want guests to be directed to (e.g., subdomain.myclickfunnels.com/buynow).
Click Update Community to save your changes.
When an Upgrade URL is set, the Get Access button in the guest prompt will direct visitors to that URL instead of the free sign-up page. Once the guest completes the purchase and the product grants community access, they will automatically become a community member.
Tip:
To use this with a paid product, make sure the product associated with your order form or funnel is configured to grant access to the community. This ensures that completing the purchase automatically creates the community membership.
If you leave the Upgrade URL blank, guests will be able to sign up for free.
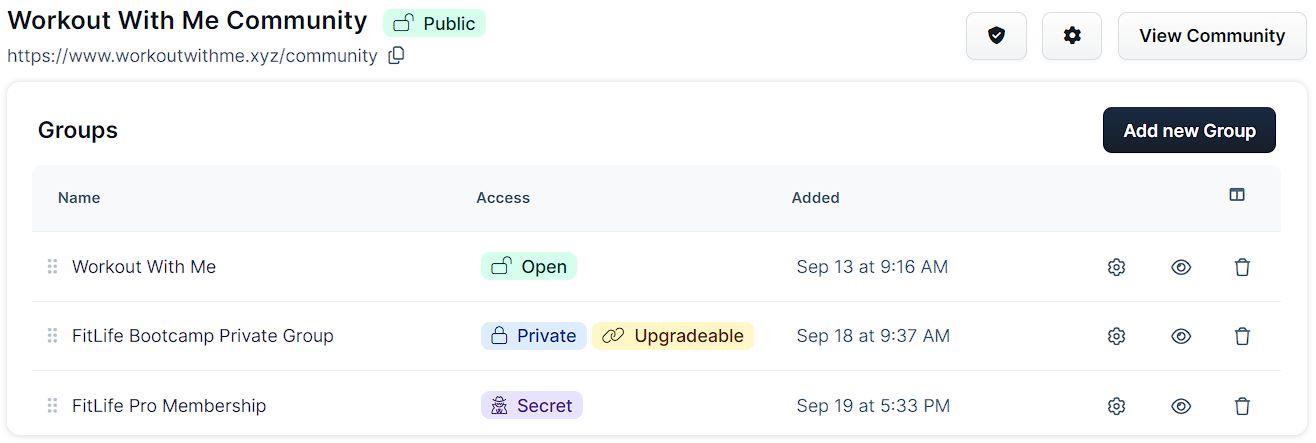
Group Settings
Groups are the subsections within your community, and each group can contain multiple topics for discussion. While Community Settings control the overall structure of your community, Group Settings allow you to customize the behavior, access, and permissions specific to each group.
Accessing Group Settings:
From the Community dashboard, locate the group you want to edit.
Click the Settings ⚙️ icon next to the group name to open the Group Settings page.
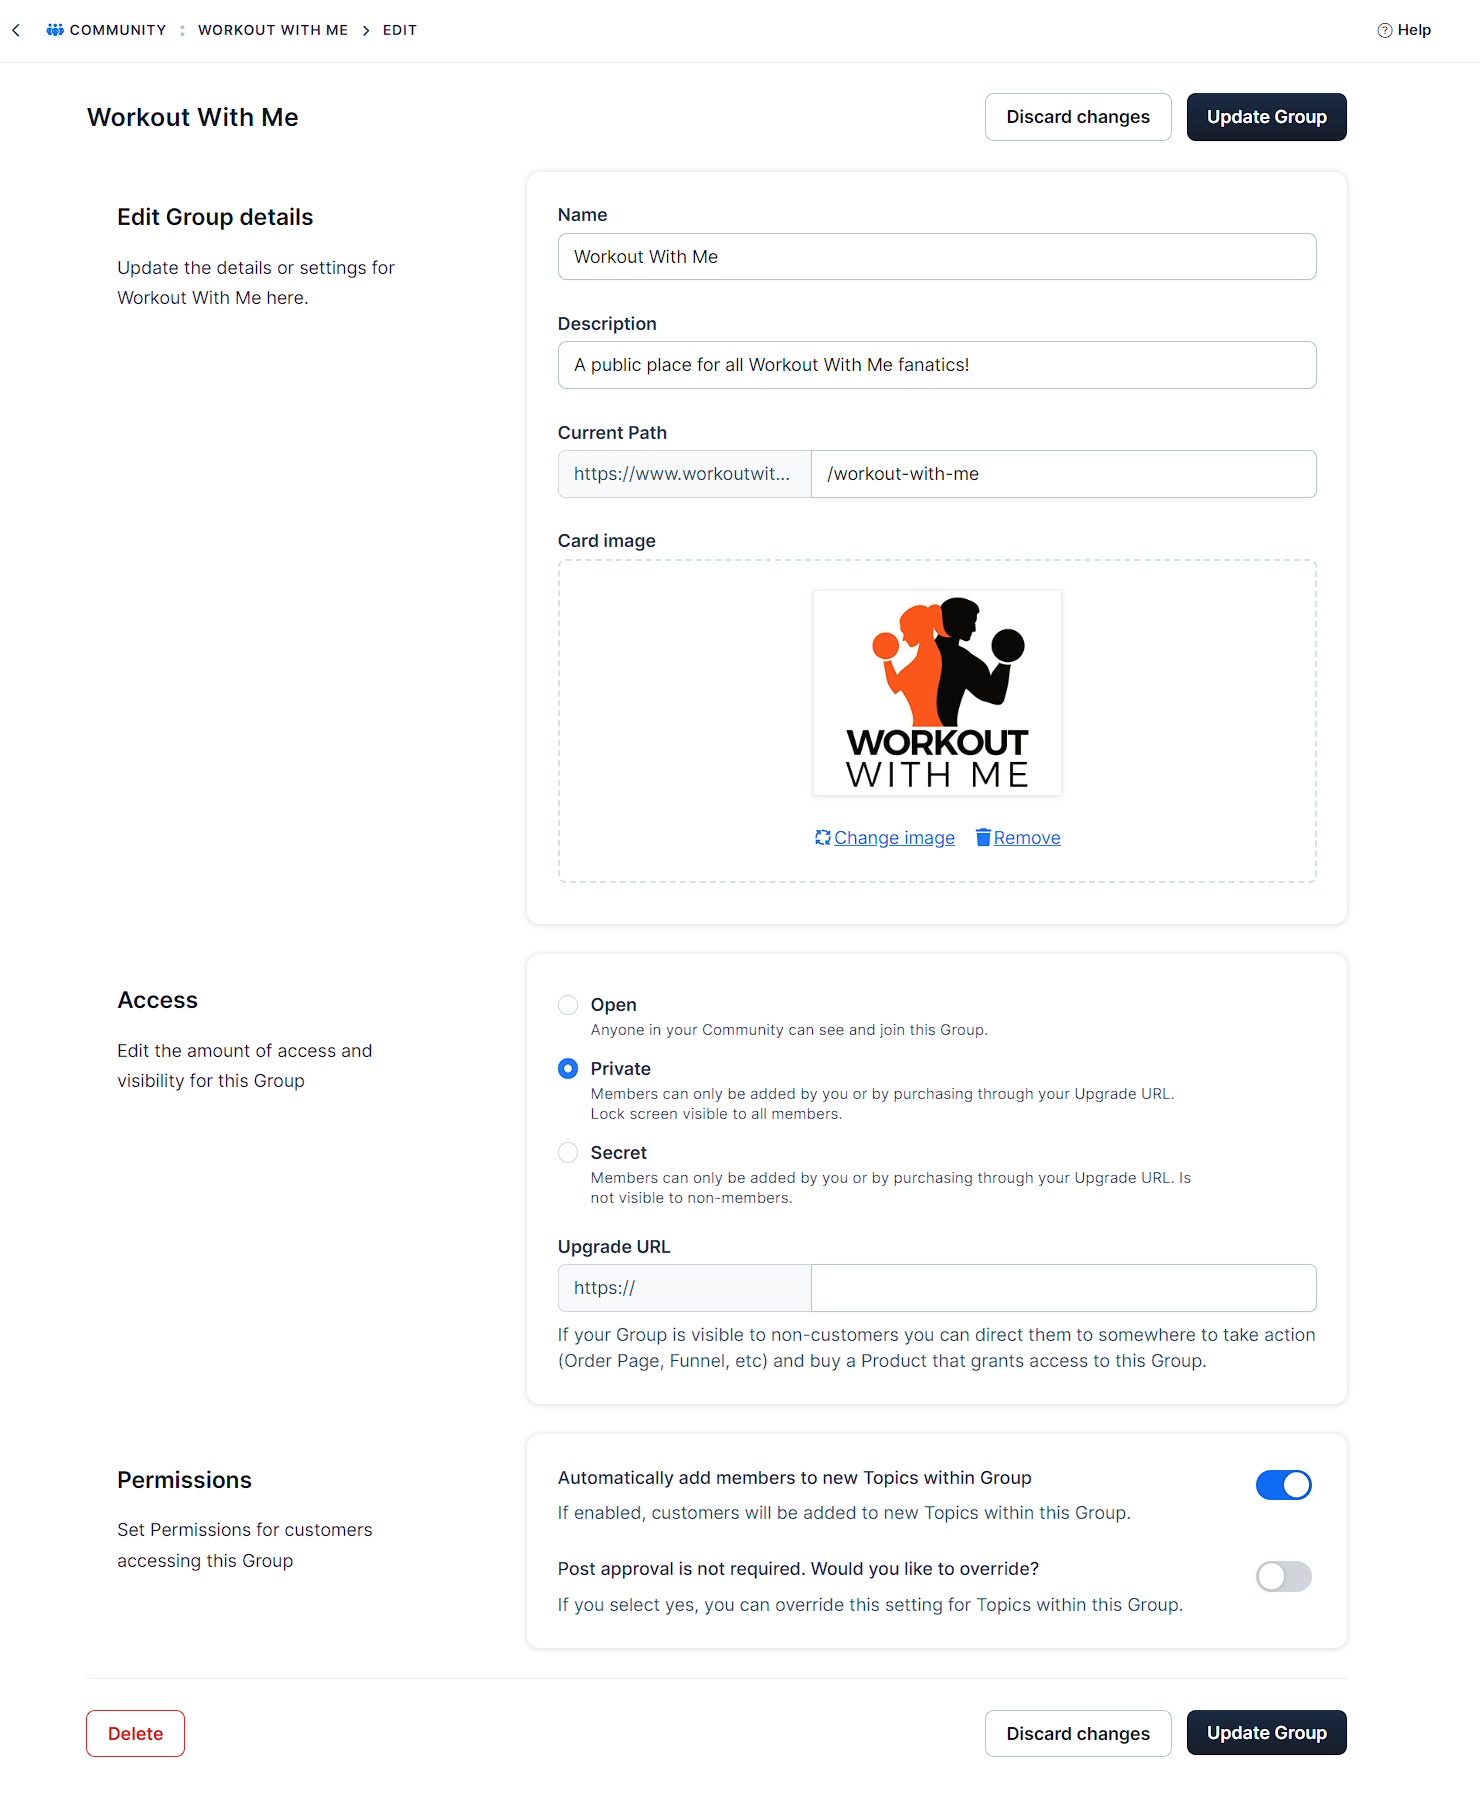
Editing Group Details:
Name: Enter a name for your group.
Description: Provide a brief description to explain the purpose of the group.
Current Path: Customize the URL path for the group (e.g., yourdomain.com/community/s/groupname).
Card Image: Upload or update an image to represent the group. This image will display in the community interface.
Access Settings:
Open: Allows anyone in your community to see and join this group. This is ideal for public discussions.
Private: Members can view the group, but they can only join if given specific access or through a purchase. You can add an Upgrade URL to direct members to an order form if they attempt to join but don’t have access.
Secret: Only members added by you can join, and the group is not visible to the rest of the community. If a non-member finds the group URL, they can be redirected to an Upgrade URL to purchase access.
Permissions:
Automatically add members to new topics: Automatically add group members to any new topics created within this group.
Override Post Approvals: If post approvals are required at the community level, toggle this setting to override that requirement for this group.
Click Update Group to save your changes.
Topic Settings
Topics are where discussions happen within each group in your community. Each topic has its own settings for access and permissions, allowing you to manage who can view, join, and participate in specific conversations.
Accessing Topic Settings:
Navigate to your group from the Community dashboard.
Find the topic you want to edit, then click the Settings ⚙️ icon next to the topic name.
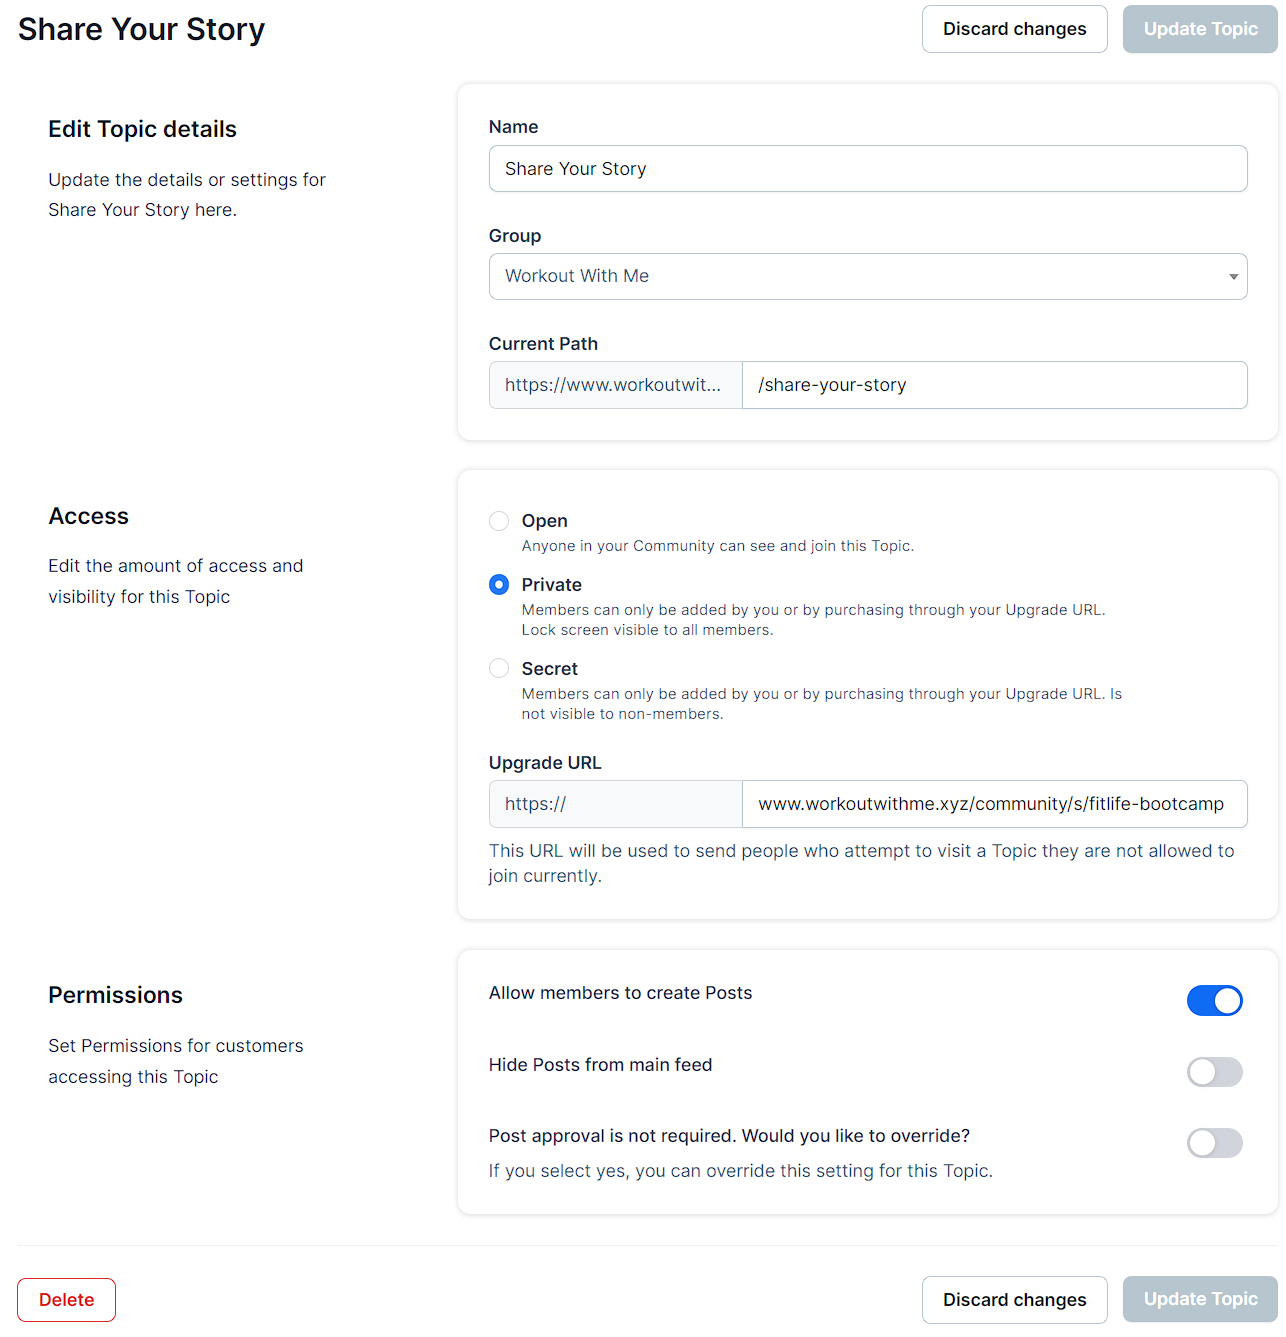
Topic Details:
Name: Enter a name for the topic.
Group: Select the group where this topic belongs. You can move the topic to a different group if needed.
Current Path: Customize the URL path for the topic.
Access:
Open: Anyone in your community can see and join this topic.
Private: Only members who purchase access through an Upgrade URL can join the topic. You can add the Upgrade URL when this option is selected.
Secret: The topic is hidden and only accessible to members who have been manually added.
Permissions:
Allow Members to Create Posts: Enable this option to let members create posts within the topic.
Hide Posts from Main Feed: If you want posts in this topic to be excluded from the main feed, toggle this setting on. This is useful for more sensitive or private topics.
Override Post Approval: If post approval is not required for the entire group but you’d like to require it for this specific topic, toggle this setting. If post approval is already required, you can override it here to allow posts without approval for this topic.
Click Update Topic to save your changes.