The “Awaiting Response” step in ClickFunnels workflows allows you to pause the workflow until a contact responds to a MessageHub message. This step is specifically designed to work with the Send MessageHub Message step and provides a way to wait for a specific duration and decide whether to continue or complete the workflow run based on contact response. In this article, we will explain how to use the “Awaiting Response” step in a workflow
Requirements
An active ClickFunnels account
A Use Case for “Awaiting Response” Step
The “Awaiting Response” step is ideal for pausing a workflow until a contact provides a response to a message sent from the preceding “Send MessageHub Message” step in the workflow. Let’s look at an example involving an online course:
Scenario - Follow-up on Student Feedback in an Online Course:
Imagine you are running a course in ClickFunnels and have set up a Web Widget using MessageHub on your course pages. This widget allows students to easily communicate with you by sending messages, asking questions, or providing feedback directly from the course interface.
Start by Sending an Automated Message: Suppose you want to engage students after they complete a module or lesson. You set up a workflow to automatically send a message via the Web Widget, asking for their feedback or if they have any questions. This is done using the “Send MessageHub Message” step.
Pause the Workflow Until a Response is Received: After sending the initial message, you add the “Awaiting Response” step to your workflow. This step pauses the workflow until the student replies via the Web Widget.
Handle Non Responses After a Set Duration: If no response is received within a predefined time (e.g., 3 days), you can configure the workflow to either Complete Run (end the workflow for that student) or Continue Run (proceed with an alternative action, such as sending a reminder or offering additional resources). This ensures that no student is left unattended and that your communication remains proactive.
Adding the “Awaiting Response” Step to Your Workflow
Open Your Workflow:
From your ClickFunnels dashboard, navigate to the Automations » Workflows menu.
Open an existing workflow or create a new one.
Ensure “Send MessageHub Message” Step is Added:
The Awaiting Response step can only be added if a Send MessageHub Message step is already present in the workflow.
Add the “Awaiting Response” Step:
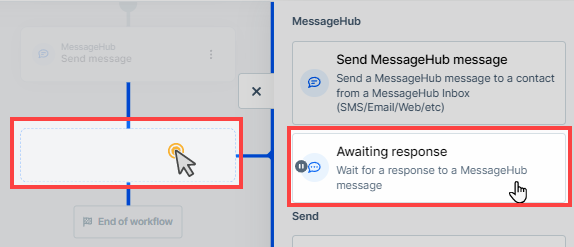
Click on the Plus Icon (+) in your workflow editor.
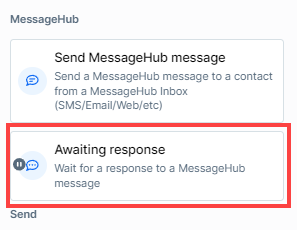
In the right-hand panel, select the “Awaiting Response” option under the MessageHub category.
Configuring the “Awaiting Response” Step
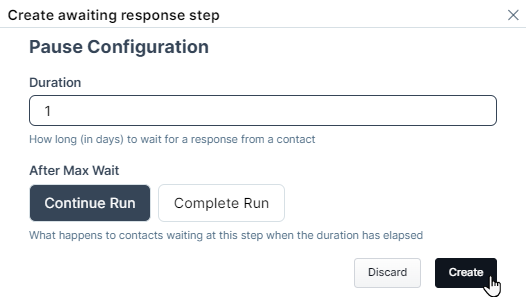
Set the Duration:
In the configuration dialog, enter the number of days to wait for a response from the contact in the Duration field. This determines how long the workflow will pause at this step, waiting for a response to the MessageHub message.
Choose Action After Max Wait Time:
After the maximum wait time has elapsed, you can choose one of the following options:
Continue Run: This option will continue the workflow after the max wait time has passed, regardless of whether the contact has responded. Contacts will move to the next step in the workflow. This is useful if you want to keep the workflow moving forward without waiting indefinitely for a response.
Complete Run: This option will mark the workflow as completed for contacts if no response is received after the max wait time has passed. The remaining steps after the “Awaiting Response” step will not be triggered for the contact. The workflow will terminate immediately.
Save the Step:
Click on Create to save the step and apply the configuration to the workflow.