The “Contact Custom Attribute” step in ClickFunnels allows you to automatically update or set custom attributes, also known as “custom fields”, for your contacts. This step is particularly useful when you want to manage data related to your contacts’ status, preferences, or other custom-defined fields. In this article, we’ll explore how to configure the “Contact Custom Attribute” step and provide examples of how you might use it to enhance your automation.
Requirements
An active ClickFunnels account
Adding the “Contact Custom Attribute” Step to Your Workflow
Open Your Workflow:
From your ClickFunnels dashboard, navigate to the Automations » Workflows menu.
Open an existing workflow or create a new one.
Add the “Contact Custom Attribute” Step:
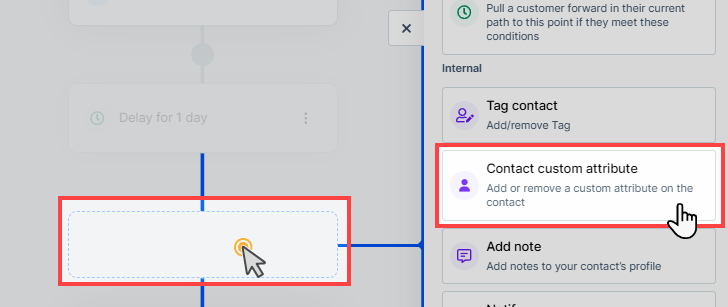
Click on the Plus Icon (+) in your workflow editor.
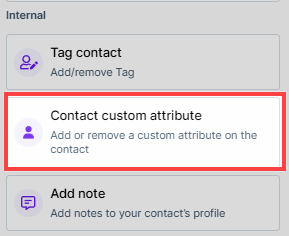
In the right-hand panel, select the “Contact Custom Attribute” option under the “Internal” category.
Configuring the “Contact Custom Attribute” Step
Once you’ve added the “Contact Custom Attribute” step, follow these steps to configure it:
Choose the Action:
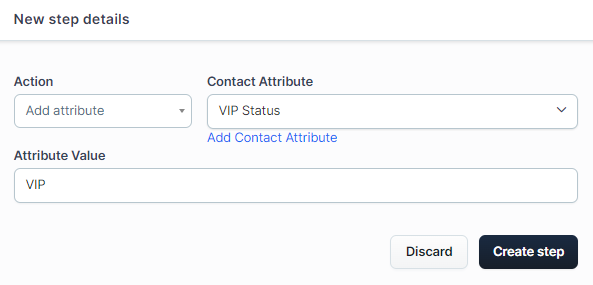
In the configuration window, select whether you want to “Add attribute” or “Remove attribute” from the contact’s profile.
Select Contact Attribute:
Choose the “custom attribute” you want to set or update. This could be any custom field that has been previously created for your contacts. If desired attribute is not the list, you can click “Add Contact Attribute” to create a new custom attribute for the contact. You can add “Text” type and “Select” type field for the contact.
Define the Value:
Enter the value in the “Attribute Value” field, for the attribute based on your campaign or workflow requirements. For example, you might use this step to update a contact’s VIP status after they register for an exclusive webinar or purchased a high value product. When a contact takes an action that indicates strong interest or engagement—such as signing up for a premium event, their custom attribute could be updated to “VIP.”
Save Your Settings:
Once you’ve configured the attribute and value, click the Create Step button to save your settings and return to the workflow editor.
Viewing Custom Attributes for a Contact
Once the workflow has successfully run the “Contact Custom Attribute” step for a contact, you can easily view the new or updated custom attributes in the contact’s profile. Follow these steps:
From your ClickFunnels dashboard, go to the Customers tab and select Contacts.
Click on the specific contact whose custom attributes you want to view.
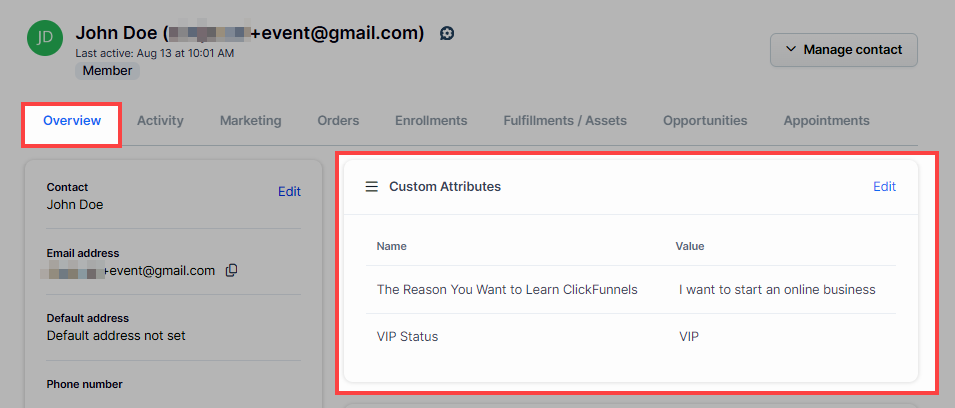
In the contact’s profile, go to the Overview tab.
Locate the Custom Attributes section, where you’ll see the updated custom fields, such as the “VIP Status” in this example.
Practical Use Cases
The “Contact Custom Attribute” step can be applied in various scenarios to enhance your marketing and customer management efforts:
VIP Status Management: Update a contact’s “VIP Status” when they register for an exclusive event, granting them access to premium content or offers.
Engagement Tracking: Adjust a contact’s “Engagement Level” based on their interactions with your campaigns, enabling more targeted follow-up actions.
Survey Response Follow-Up: If a contact has previously submitted a survey with custom questions, their profile would have been initially updated with the relevant custom attributes based on their responses. However, as time progresses, their interactions might require these attributes to be updated. For instance, if a contact mentioned interest in a specific product category in a survey but later purchased a different product or completed a course module, you can use the “Contact Custom Attribute” step to update their profile.
Appointment Management: After a contact schedules or completes an appointment, you can update a custom attribute like “Last Appointment Date” or “Appointment Type” to keep your records current and trigger relevant follow-up workflows.
Purchase-Based Updates: When a contact makes a purchase, update a custom attribute such as “Preferred Product Category” or “Purchase Frequency” to better segment and target them in future campaigns.