Digital downloads are essential resources that can be delivered to your audience as part of your funnels, memberships, or product offerings. ClickFunnels makes it easy to upload, manage, and deliver these files directly through your account, eliminating the need for external hosting services. In this article, you’ll learn how to upload digital downloads to your ClickFunnels account, manage them effectively, and deliver them to your customers.
Requirements
An active ClickFunnels account
Files stored on your local device
Supported categories: image, audio, video, and documents(.pdf, .docx, .txt, etc)
Maximum file size: 3,000 MB (3 GB)
Upload Downloadable Files in Assets
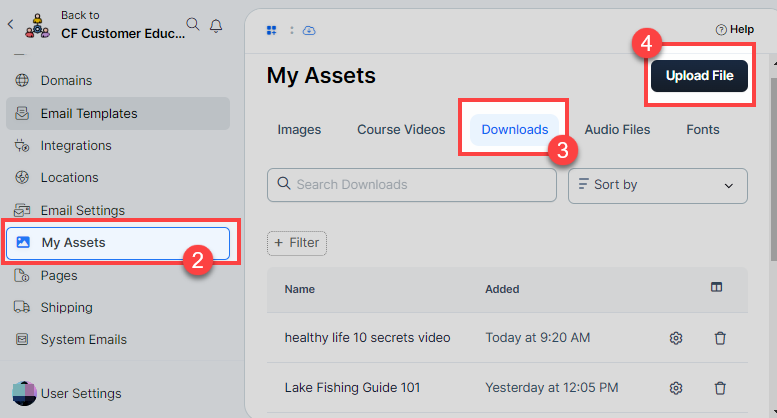
From the ClickFunnels Dashboard, navigate to the Workspace Settings on the left-hand menu.
.png)
Select My Assets under the Workspace Settings menu.
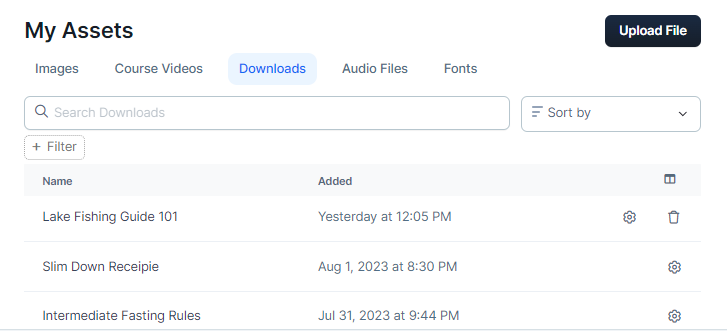
Click on the Downloads tab.
Click the Upload File button to add a new video.
In the Name field, enter the name of the file.
Note:
A clear and consistent naming convention is crucial for managing and retrieving your digital downloads efficiently, especially as your library of downloadable content grows. Use a format that reflects the nature and purpose of the file, such as “
Project Name - File Type/Content - Version/Date” (e.g., “Healthy Living Guide - Ebook - v2”). This approach makes it easier to identify and organize your files, ensuring you can quickly deliver the right content to your audience.In the File section, click the Upload file button to upload a file from your local storage. You can upload one file at a time. Remember, this category can include
images,audio files,videos, anddocuments(.pdf, .docx, .txt, etc). The maximum file size limit is 3,000 MB (3 GB).In the Preview Image section, you have the option to upload an image that will serve as a visual representation of the file. This preview image enhances the user experience by providing a clear visual cue for the downloadable content, making it easier for users to identify the file. When the download elements are added inside the Granted Assets Collection element in a course, this image is automatically fetched and displayed. If no preview image is uploaded, the Download Image element will not render, and users won’t see any image associated with the file.
Click Create File to finalize and upload the file to your assets.
How to Showcase Digital Downloads in a Course
The Granted Assets collection element in ClickFunnels allows you to dynamically display all digital downloads granted to a specific user. This feature is particularly useful in Course Home, Module, and Lesson template pages where you want to give students easy access to their downloadable resources.
Access the Courses app and select a course to edit.
Click Customize to access the course editor.
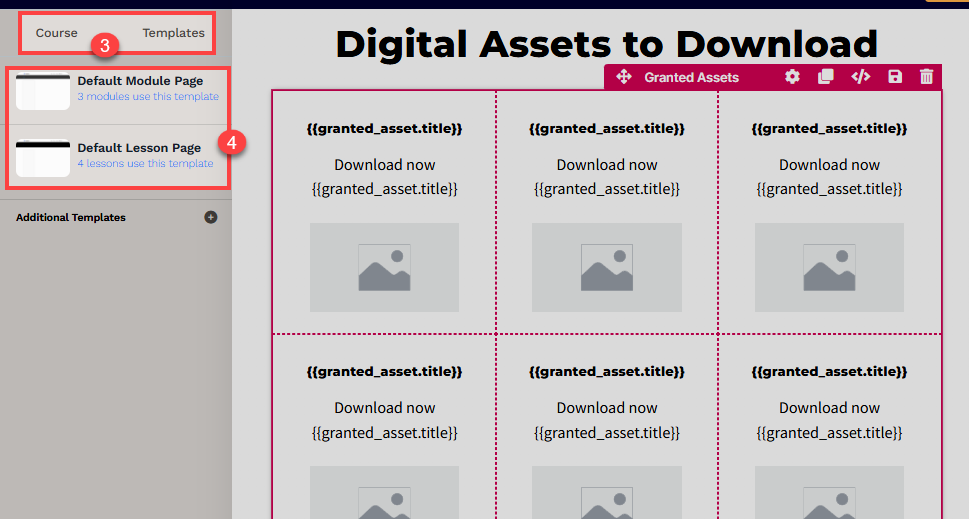
Switch to the Course or Templates tab to access the course home, module, and lesson template pages.
You can display granted assets on Course Home, Default Module Page, and the Default Lesson Page. Select one of them to edit the page.
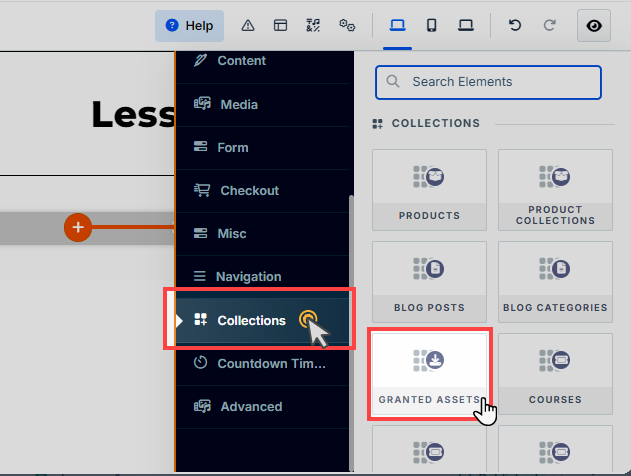
In the page editor, click the orange Add Element or Plus Icon (+) to add a new element.
Search for and add the Granted Assets collection element to your lesson page. This collection will serve as the container for the downloadable files.
Inside the Granted Assets collection, add a row with a single column or multiple columns, depending on how you want to structure your download display.
Within the Granted Assets container, insert the Download elements that are designed to work within this collection:
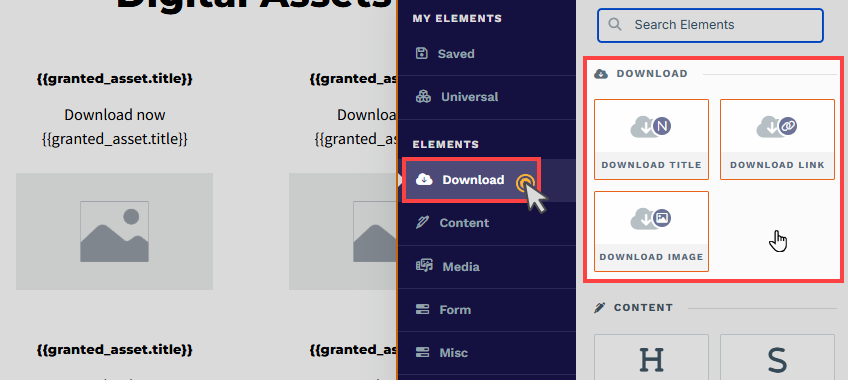
Download Title: Automatically generates and displays the title of the digital download file.
Download Link: Creates a clickable hyperlink that allows the user to download the file directly.
Download Image: Auto-populates with the preview image associated with the digital download file.
Once the student accesses the course and visits the home, module, or lesson page, a collection of digital downloads will be displayed, allowing them to easily download their granted assets.
Note:
Ensure that digital download files are granted to the contact’s profile for them to dynamically populate in the course template pages. For detailed steps on granting access, refer to the sections How to Deliver Digital Downloads and How to Manually Grant Digital Assets to Contacts.
How to Deliver Digital Downloads
1. Using Workflows
Digital downloads can be automatically sent to your contacts as part of a workflow in ClickFunnels. This is especially useful when you want to deliver downloadable assets after a user completes specific actions (getting tag, course completed, etc) in your workspace. Here’s how you can set up this process:
From your ClickFunnels dashboard, go to Automations and select Workflows.
You can create a new workflow or edit an existing one.
In the workflow editor, add a new action step and select Send Asset from the list of available actions.
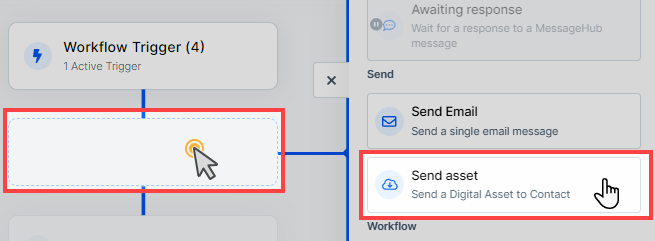
In the Send Asset step, choose the digital download file you’ve uploaded to your My Assets section. If you have not done it already, you can upload the file by clicking the + New Asset button in the open prompt.
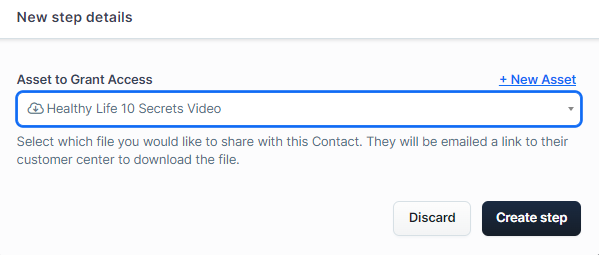
Click Create Step to proceed.
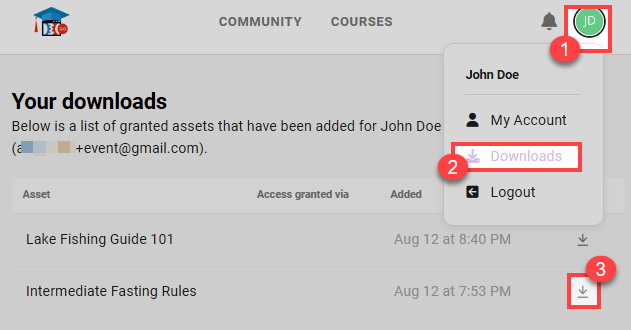
When the workflow is activated, the contact will receive an email notification informing them that new assets are available in their Customer Center. They can log in to the customer center, navigate to Profile Icon > Downloads tab, and find their downloads under the Your Downloads section.
2. With Products
You can associate digital downloads with products in your ClickFunnels workspace. When a customer purchases the product, they will receive a notification email informing them that the download is available in their Customer Center. To set this up, follow these steps:
From your ClickFunnels dashboard, click Products and select All Products.
Create a new product or edit an existing product from the list.
Scroll down to the Purchase Actions section.
Click the Plus (+) icon next to the Digital Asset Access option.
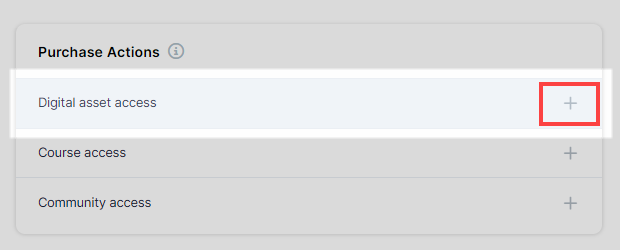
A new window will appear on the right side where you can select the downloadable assets you want to associate with this product. You can also upload a new asset by clicking on New digital asset.
After selecting the assets, click Save to apply the settings.
When a customer purchases the product, they will receive an email notification letting them know that the download is available in their Customer Center. They can log in to the customer center, navigate to Profile Icon > Downloads tab, and find their downloads under the Your Downloads section.
3. Linking Digital Downloads in Pages or Emails
After uploading a file in the Downloads section within My Assets, ClickFunnels automatically generates a unique URL for that file. This URL can be used to link the file directly within your funnel pages or emails, making it easily accessible to your audience. Additionally, the file URL can be shared externally outside of ClickFunnels for broader distribution. Here’s how you can link a digital download:
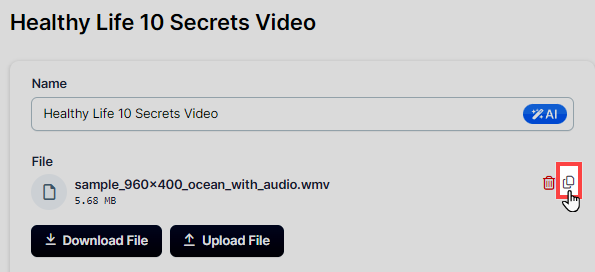
In the My Assets » Downloads section, locate the file you want to link.
Click the Copy icon next to the file to copy the file’s URL.
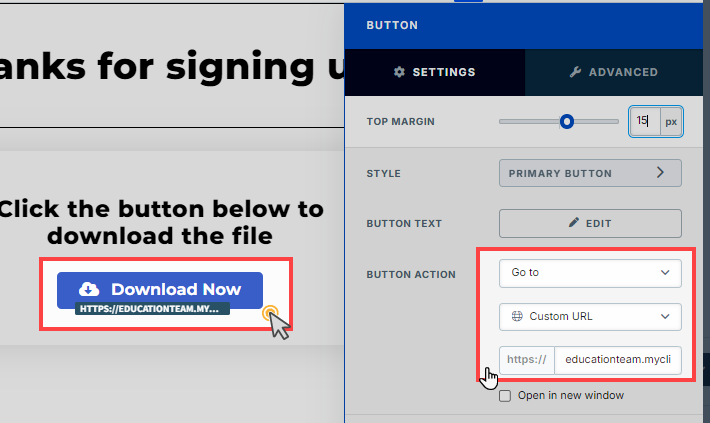
Go to the funnel page or email where you want to place the download link and click Edit Page or Edit Email to open the editor.
In the page editor, insert a Button element where you want the download link to appear. Set the button action by selecting Go To from the action menu, then choose Custom URL. Paste the copied URL into the provided field.
In the email editor, insert a Button element where you want the download link to appear. Set the button link type action as Open web page. Paste the copied URL into the URL field.
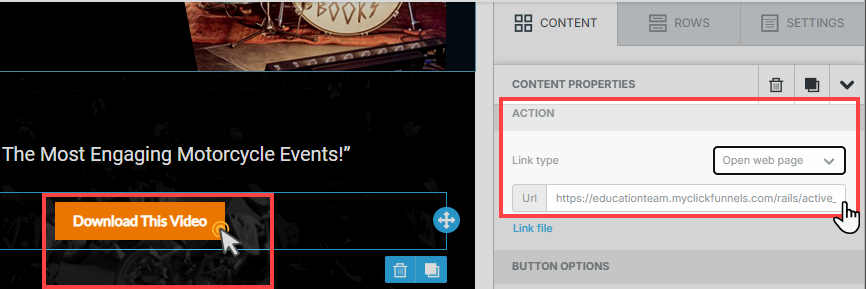
Save the changes to apply the download link to your page or email. When users click the button, the file will automatically download to their device.
How to Manually Grant Digital Assets to Contacts
Manually granting digital assets to contacts in ClickFunnels allows you to provide specific content directly through their profiles. This is particularly useful when you want to share resources outside of the standard automated processes. Once the asset is granted, it becomes available in the contact’s Customer Center for download. Here’s how to do it:
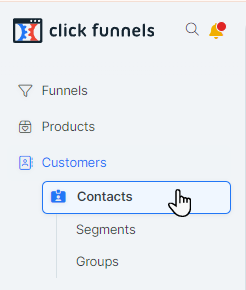
From your ClickFunnels dashboard, go to the Customers menu and select Contacts to access the list of your contacts.
Choose the contact you want to grant a digital asset by clicking on their name, which will open their contact profile.
In the contact’s profile, navigate to the Fulfillments / Assets tab to view any assets already granted to the contact.
Scroll down to the Granted Digital Assets section to manage or view existing assets.
Click the Grant Digital Asset option to add a new asset, opening a selection window.
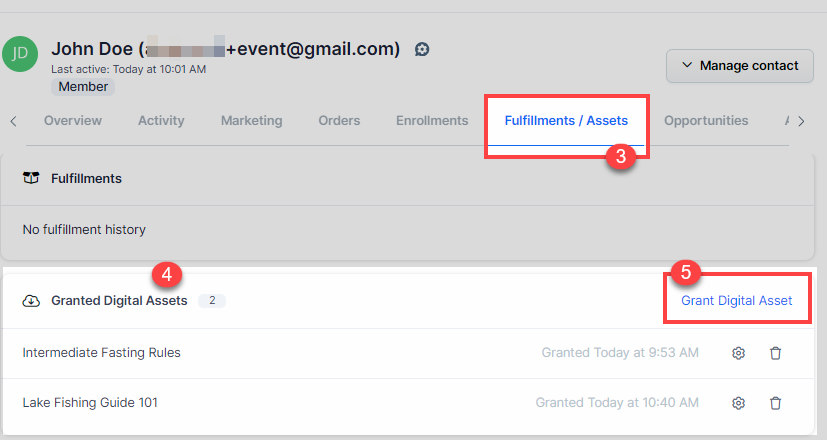
From the dropdown menu in the window, select the asset you want to grant, then click Create Granted Asset to save the changes.
The contact will receive an email notification informing them that the download is available in their Customer Center. They can log in to the customer center, navigate to Profile Icon > Downloads tab, and find their downloads under the Your Downloads section.