This article explains how to create and update a product in ClickFunnels. To sell an item on the ClickFunnels store and funnels, you need to create a product and set it up in the Products menu. From the products page, you can add, or update product information such as its price, shipping method, variants, and availability.
Requirements
An active ClickFunnels account
How to Create a New Product
Navigate to Products in the side navigation menu, then select All Products.
.png)
Click the Create Product button in the All Products dashboard.
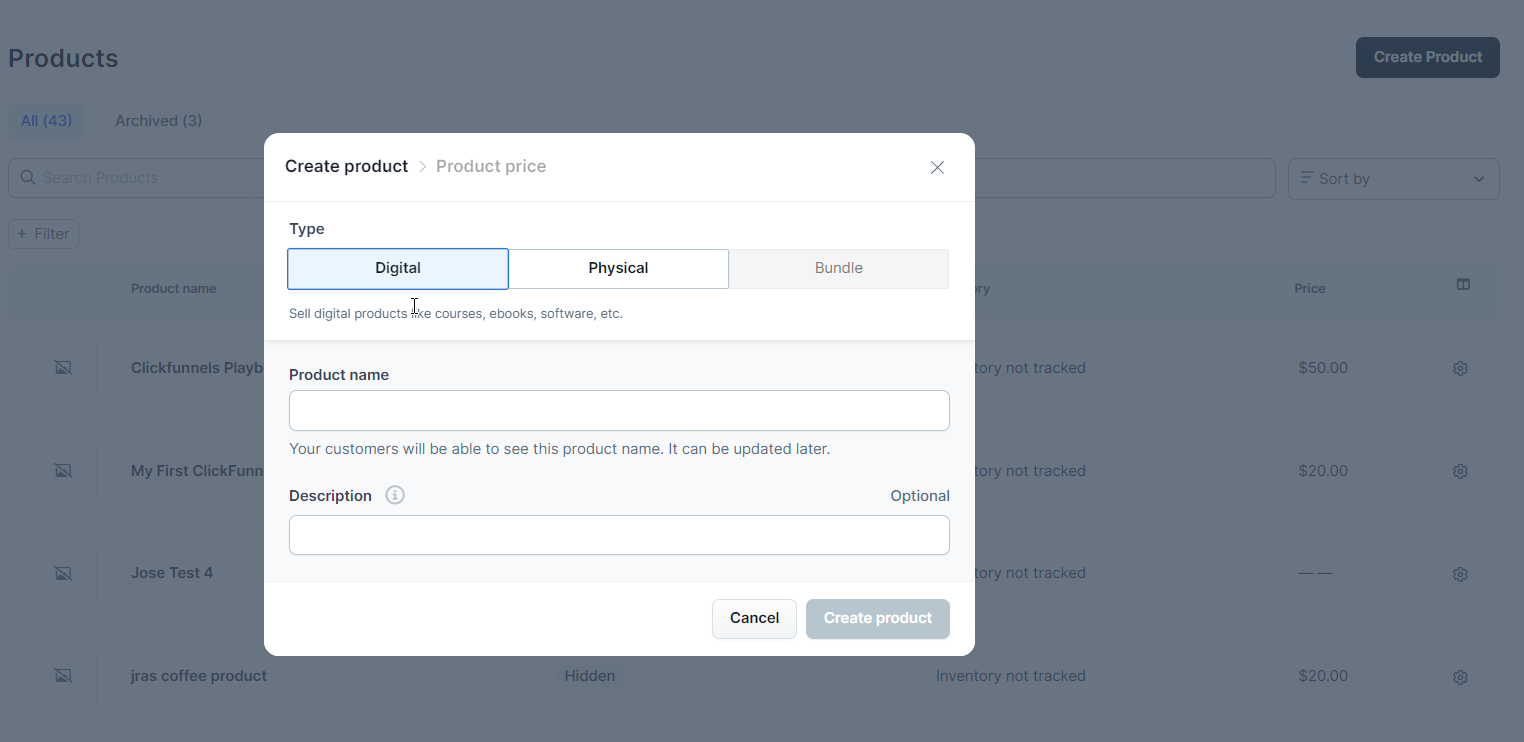
In the prompt that appears, choose the type of product you wish to sell: either Physical or Digital. Note that the “Bundle” feature is not yet available.

Enter the product information, including the Product name and Description.
Click the Create Product button to confirm the action.
Select the Price type from the following options: One time, Subscription and Payment plan.
Provide the necessary price details.
Click Set Price to confirm your pricing details or choose the Set Later option if you prefer to add the price later.
For more information on additional product features, visit the Products - Product Settings Overview article.
How to Edit an Existing Product
Navigate to Products in the side navigation menu.
On the Products page, locate the product you want to edit. You can either click on the product itself, its image, or the settings ⚙ icon to edit the product.
Make the necessary changes to the product details.
Click Update Product to save your changes.
For more information on additional product features, visit the Products - Product Settings Overview article.
How to Bulk Edit Products
Bulk editing products allows you to make changes to multiple products simultaneously, saving time and ensuring consistency across your product catalog. This feature is particularly useful for applying uniform tags, adjusting visibility settings, and making other modifications to multiple products at once, streamlining your workflow and enhancing overall productivity.
To streamline product management tasks, you can bulk edit products by following these steps:

Navigate to Products in the side navigation menu.
On the products page, locate the products you want to modify. Use the Checkboxes to select the products that you want to modify or update.
Click Bulk actions and select one of the following actions:
Tag Selected: Add or remove tags from the selected products.
Set Visibility of Selected: Make the selected products visible or invisible in the workspace store and customer center.
Archive Selected: Archive or remove the selected products.
IMPORTANT
In certain circumstances, the system may prevent archiving, and a warning message will provide an explanation. Ensure to address these situations before attempting to archive again. Common reasons include:
The product is already in use within funnel steps.
The product is set to be visible in the customer center and store.
The product is associated with active ongoing subscriptions.
The product has pending invoices awaiting fulfillment.
Export: Export product details into a CSV file. Exporting product information to a CSV file can facilitate data analysis, inventory management, and record-keeping. Before exporting, you can select the product fields to include in the CSV file. Additionally, you can access previous exports and download them. To view previous exports, click Actions > Exports in the top right corner of the product page.
How to Remove or Archive Products
Navigate to Products in the side navigation menu.
Archiving a Single Product:
On the products page, locate the specific product you wish to remove.
You can click directly on the product, its image, or the settings ⚙ icon to access its settings.
In the bottom left corner of the product settings, click the Archive button.
Confirm the removal by clicking Confirm Archive.
Archiving Products in Bulk:
Identify the products you want to archive on the products page.
Use the Checkboxes to select the desired products.
Click the Bulk Actions menu.
Choose the Archive Selected option.
Confirm the archiving by clicking Confirm Archive in the prompt.
Upon archiving, the product will be removed from the products page. You may need to refresh the browser to see the updated products page.
IMPORTANT
In certain circumstances, the system may prevent archiving, and a warning message will provide an explanation. Ensure to address these situations before attempting to archive again. Common reasons include:
The product is already in use within funnel steps.
The product is set to be visible in the customer center and store.
The product is associated with active ongoing subscriptions.
The product has pending invoices awaiting fulfillment.
How to Restore Archived Products
Navigate to Products in the side navigation menu.
Click on the Archived tab.

Locate the products you want to restore. Use the Checkboxes to select the products that you want to restore. You can select one or multiple products for restoration.
Click the Actions menu.
Choose the Restore Selected option.

In the prompt that appears, click Confirm Restore to finalize the restoration.
Upon restoration, the selected products will be visible again on the products page.
How to Add Quick Actions to Products
Navigate to the Products section in your ClickFunnels dashboard.
Find the product you want to add a Quick Action to.
Click the lightning bolt icon (⚡) next to the product name.

Select Add Quick Action.
Choose a trigger for your Quick Action. For products, triggers include:
Makes a purchase
Cancels subscription
Updates credit card
Payment fails
Select an effect that will occur when the trigger is activated.
Activate your Quick Action using the toggle switch.
For more detailed instructions, please refer to the How to Add Quick Actions to Products