Payment plans allow your customers to buy products by paying in installments over time, instead of the full price upfront. This feature can make your higher-priced items more accessible to a wider range of customers, potentially boosting your sales and customer satisfaction. In this article, we’ll walk you through the process of setting up payment plans for your products.

Requirements
An active ClickFunnels account
Setting Up a Payment Plan for New Products
Navigate to the Products section from the left menu.
Create a new product. For detailed instructions on creating a product, refer to our article How to Create and Manage Products.
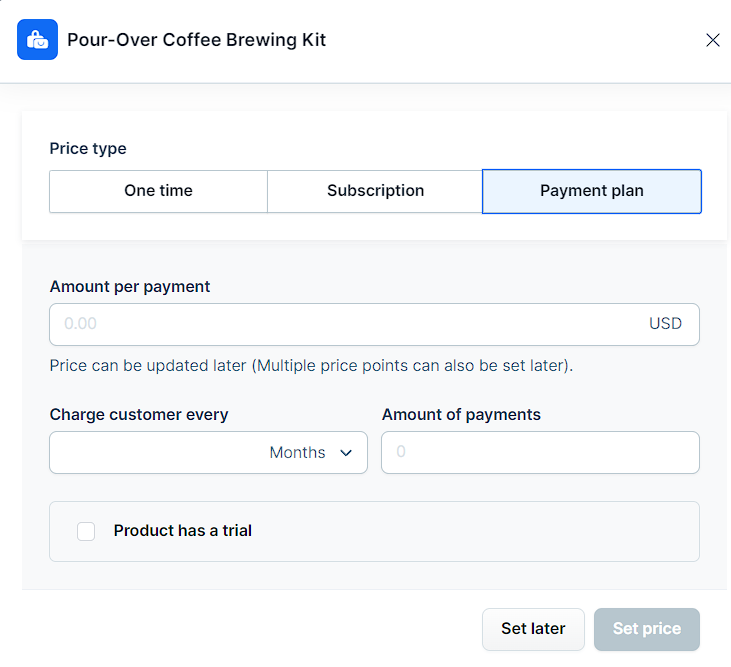
Select Payment plan from the pricing options.
Enter the Amount per payment in the workspace currency.
Choose how often to charge the customer.
Specify the total Amount of payments.
If you want to offer a trial period, check the Product has a trial box.
Choose between Free trial or Paid trial.
Set the Trial length using the dropdown menu.
Click Set price to confirm or Set later to decide later.
NOTE
You can update prices and add multiple price points later. To learn more, refer to the article How to Manage Pricing.
Setting Up a Payment Plan for Existing Products
Navigate to the Products section from the left menu.
Locate the product you want to set up a payment plan for.
Scroll down to the Pricing section and click Add price.

Select Payment plan from the pricing options.
Enter the Amount per payment in the workspace currency.
Set the Compare at amount if applicable. When your product is on sale, enter the original price here. The Compare at amount should be higher than the Amount per payment.
Add a Name for the plan (optional).
Enter the Product cost if different from the amount per payment.
Choose how often to Charge customer (e.g., monthly).
Specify the total Amount of payments.
If you want to offer a trial period, check Product has a trial.
Select Free trial or Paid trial.
Set the Trial length in days.
To add a setup fee, check Setup fee and enter the amount.
Select customer options as desired: cancel, upgrade, or downgrade.
Toggle Visible to make the plan available.
Click Save to confirm your payment plan settings.