The “Add Note” step in ClickFunnels workflows allows you to automatically add notes to a contact’s profile. This is particularly useful for tracking customer interactions, preferences, or important events that you want to log for future reference. In this article, you will learn how to configure the “Add Note” step and use it to enhance your customer management process.
Requirements
An active ClickFunnels account
Adding the “Add Note” Step to Your Workflow
Open Your Workflow:
From your ClickFunnels dashboard, navigate to the Automations » Workflows menu.
Open an existing workflow or create a new one.
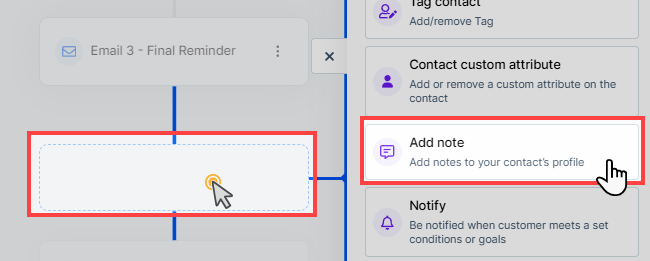
Add the “Add Note” Step:
Click on the Plus Icon (+) in your workflow editor.
In the right-hand panel, select the “Add Note” option under the “Internal” category.
Configuring the “Add Note” Step
Define the Note Content:
When adding the “Add Note” step, a dialog box will appear prompting you to enter the note content.
Write the note in the Note input field that you want to be added to the contact’s profile.
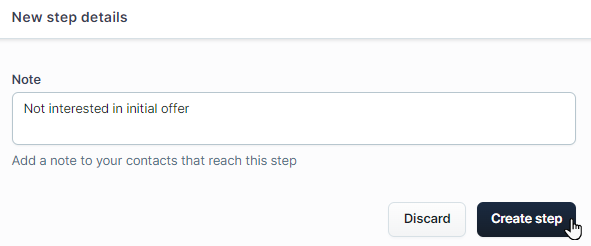
Save the Step:
After entering the note, click Create Step to save the note in the workflow.
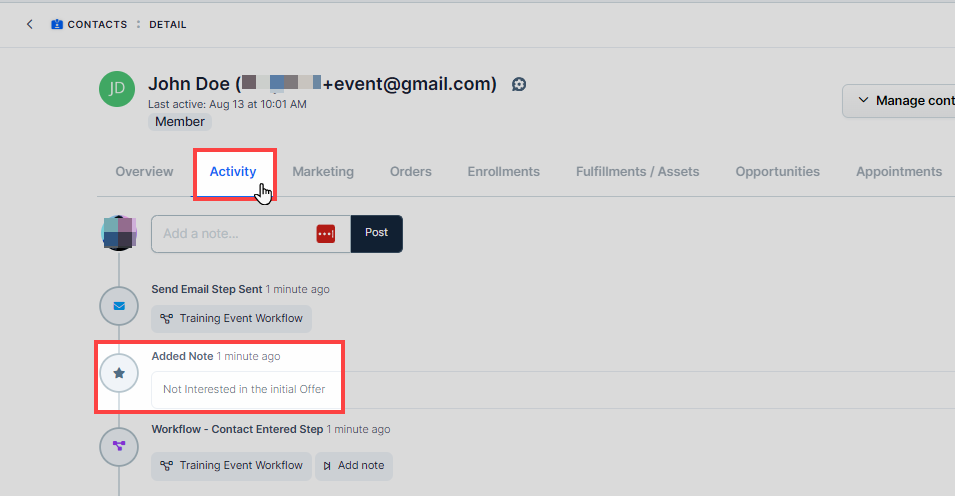
Viewing Notes on a Contact’s Profile
Once the workflow runs and the “Add Note” step is executed for a contact, the note will be visible in the contact’s profile within the Activity tab. Here’s how to find it:
From your ClickFunnels dashboard, navigate to Customers » Contacts.
Click on the specific contact whose profile you want to view.
Once inside the contact profile, click on the Activity tab.
Scroll down the activity timeline to see the note added by the workflow. The note will be displayed with a timestamp indicating when it was added. For example, “Not interested in initial offer” will be visible under the workflow activity log.