Shipping packages allow you to add the dimensions and weight of the packages you frequently use to ship your products. This helps calculate live rates accurately during checkout, ensuring your customers see the correct shipping cost based on the package being used. Setting up packages is especially useful if you have standard boxes or envelopes that you regularly use.
This article will guide you through the steps to create and manage your shipping packages in ClickFunnels.

Requirements
An active ClickFunnels account
A connected shipping integration
Understanding Shipping Packages
Shipping packages in ClickFunnels help you define the size and weight of the boxes or envelopes you use to ship your products. By setting up packages, you can ensure that accurate shipping rates are calculated during checkout. This means the system will take into account the dimensions and weight of the package when it generates live shipping rates from your carrier.
For example, if you often use a standard box or padded envelope, you can add it as a package in ClickFunnels. Once this is set up, live rates will be based on the specific package, helping your customers see the correct shipping costs before they place their order.
Creating a New Shipping Package
When creating a shipping package in ClickFunnels, you have two options:
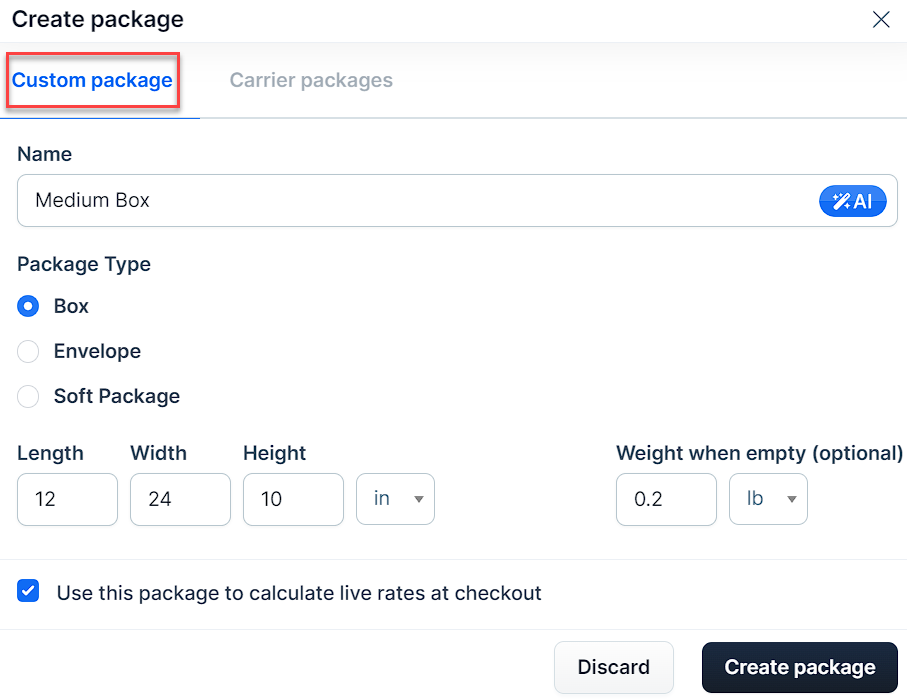
Custom Packages: Use this option to define your own packaging by entering specific dimensions and weight. This is ideal if you use your own boxes or envelopes that aren’t standard carrier packaging.
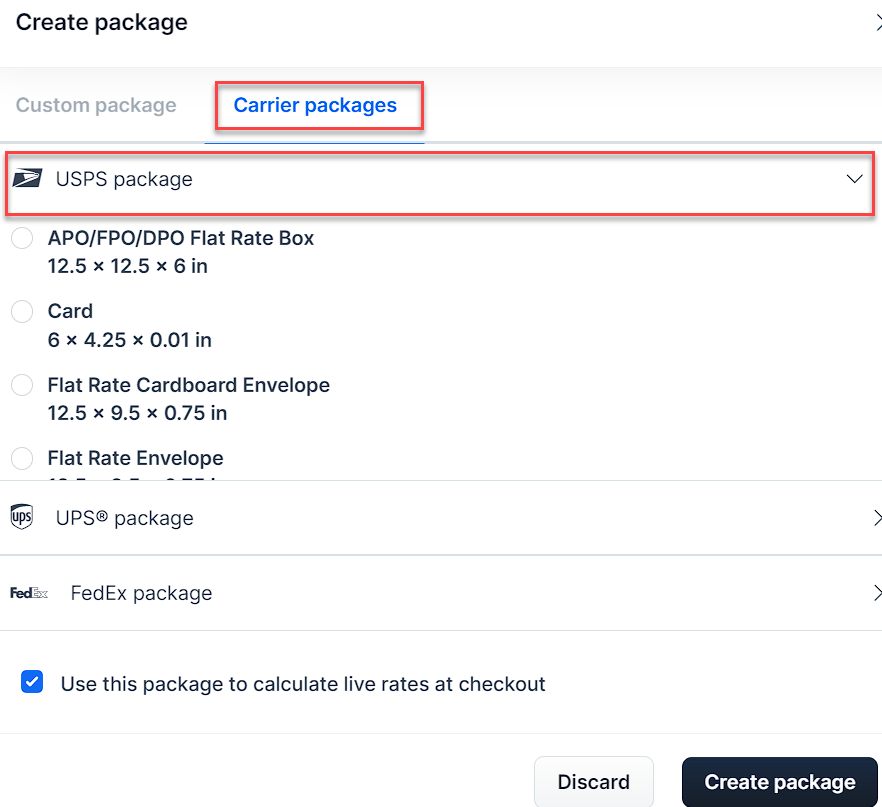
Carrier Packages: Select this option if you’re using standard packaging from carriers like USPS, UPS, or FedEx. These predefined package sizes are provided by the carriers and can be used to calculate live shipping rates based on their specifications.
How to Create a New Shipping Package:
Navigate to Workspace Settings from the left-hand menu.
Select Shipping from the list of options.
On the Shipping Configuration page, click the Packages tab.
Click Create package on the right side of the page.
Creating a Custom Package
Enter a Name for your package (e.g., “Medium Box”).
Choose a Package Type (Box, Envelope, or Soft Package).
Enter the Length, Width, and Height of your package.
(Optional) enter the Weight when empty to improve the accuracy of shipping live rates.
Check the box for Use this package to calculate live rates at checkout if you plan to use this package for live rate calculations.
Click Create package to save.

Creating a Carrier Package
Select the Carrier Packages tab in the Create Package window.
Choose a carrier (e.g., USPS, UPS, or FedEx) from the list.
Select the package size that fits your needs.
Check the box for Use this package to calculate live rates at checkout, if applicable.
Click Create package to save.

Managing Shipping Packages
Navigate to the Packages tab on the Shipping Configuration page.
Locate the package you want to manage.
Click the Settings ⚙ icon next to the package to edit it.
You can update the details as needed.
After making changes, click Update package to save.
To delete a package, click the Trash 🗑 icon and confirm by selecting Proceed.
