Managing your scheduled events is crucial for maintaining an organized and efficient appointment system. With ClickFunnels Appointments, you can easily keep track of all confirmed appointments, view details, reschedule if needed, or even cancel appointments when necessary. This article will guide you through the process of managing your scheduled events, ensuring you can handle any situation with ease.

Requirements
An active ClickFunnels account
A confirmed appointment for an event
Managing Scheduled Events
Managing your scheduled events means keeping track of all confirmed appointments, including the ability to view details, reschedule if needed, or even cancel appointments under certain circumstances.
Example:
Imagine you are a busy life coach and have used ClickFunnels Appointments to offer one-on-one coaching sessions. Clients have booked appointments throughout the week in 30-minute slots. What if something unexpected comes up on your end? ClickFunnels Appointments empowers you to manage your schedule with flexibility. Perhaps an urgent client matter arises, or you need to run a quick errand. No problem! Through the Scheduled Events menu, you can easily reschedule the appointment for a more convenient time or even cancel it entirely if needed. The feature allows you to communicate these changes directly to your client through automated emails, keeping them informed and ensuring a smooth experience.
Steps to Manage Scheduled Events
You can easily view, reschedule, cancel, and edit your scheduled events from the Scheduled Events sub-menu in the “Appointments” app. To manage your scheduled events, follow these steps:
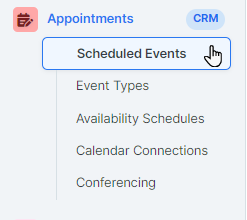
Navigate to the Appointments App: Go to the ClickFunnels dashboard, click on Appointments in the left-hand menu, and select Scheduled Events from the submenu.
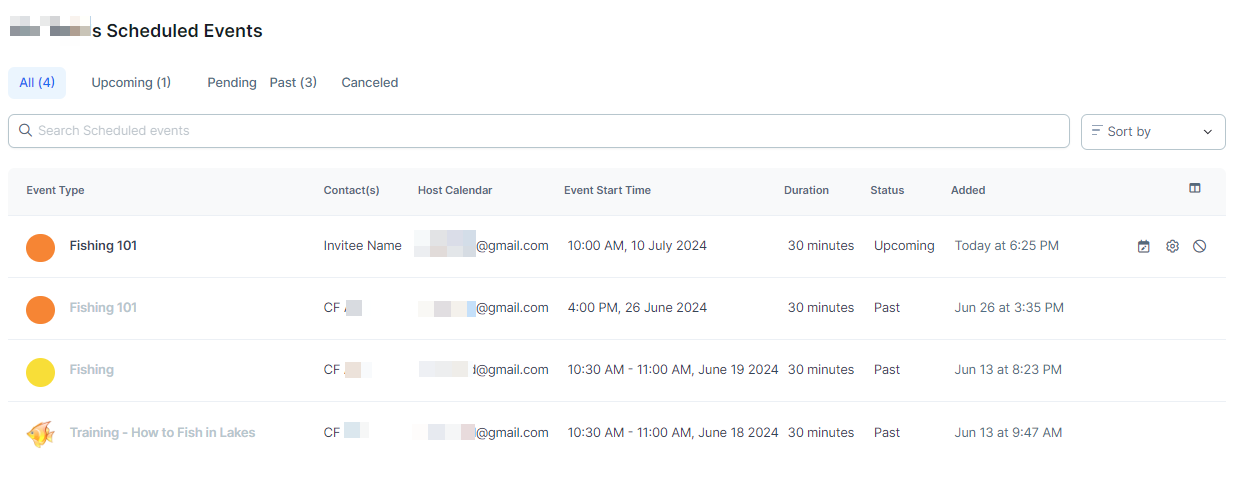
View and Manage Events: Here, you will see a list of all your booked appointments. You can reschedule, cancel, or edit events directly from this list.
Rescheduling a Scheduled Event
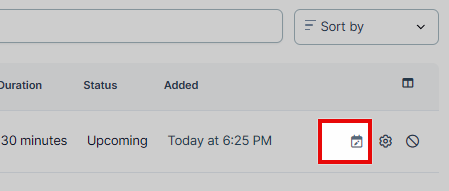
Click on the Reschedule Link icon next to the event you wish to reschedule.
Update the event date, start time and any other necessary details.
Click the Confirm button to confirm the rescheduling.
Canceling a Scheduled Event
Click on the Cancel Event icon next to the event you wish to cancel.
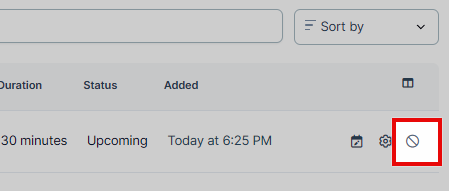
Click Proceed to confirm the cancelation.
WARNING
Canceling an event will notify the invitee and remove the event from your calendar. This action is final and cannot be undone.
Editing a Scheduled Event Details
To edit the details of a scheduled event, follow these steps:
From the Scheduled Event page, click the Name of the event or the Gear icon on the right-hand side to open the event settings.

In the event details popup, you will see various fields and options to update. Here’s a detailed explanation of each feature:
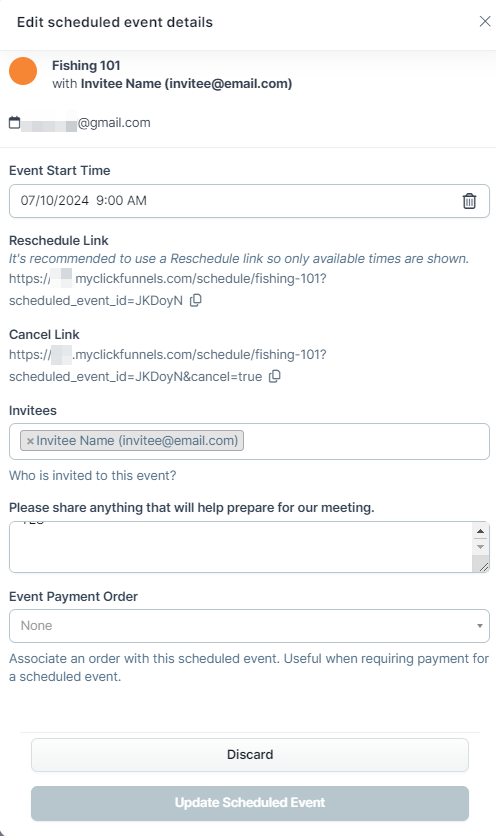
Event Start Time: Use this field to update the start time of the event. Click on the date and time picker to choose a new start time.
Reschedule Link: This link allows rescheduling the appointment. It is recommended to use this link so that only available times are shown.
Cancel Link: This link allows canceling the appointment.
Invitees: This field lists the invitees for the event. You can add or remove invitees by entering their email addresses. This ensures that all necessary participants are included in the event.
Please share anything that will help prepare for our meeting: Here, you can add any comments or notes that might help prepare for the meeting. This is a useful space to provide context or additional information for the event.
Event Payment Order: This dropdown allows you to associate an order with the scheduled event. It is useful when requiring payment for a scheduled event. Select the appropriate order from the list.
After making the necessary updates, click the Update Scheduled Event button to save the changes. If you decide not to proceed with the changes, click the Discard button to exit without saving.